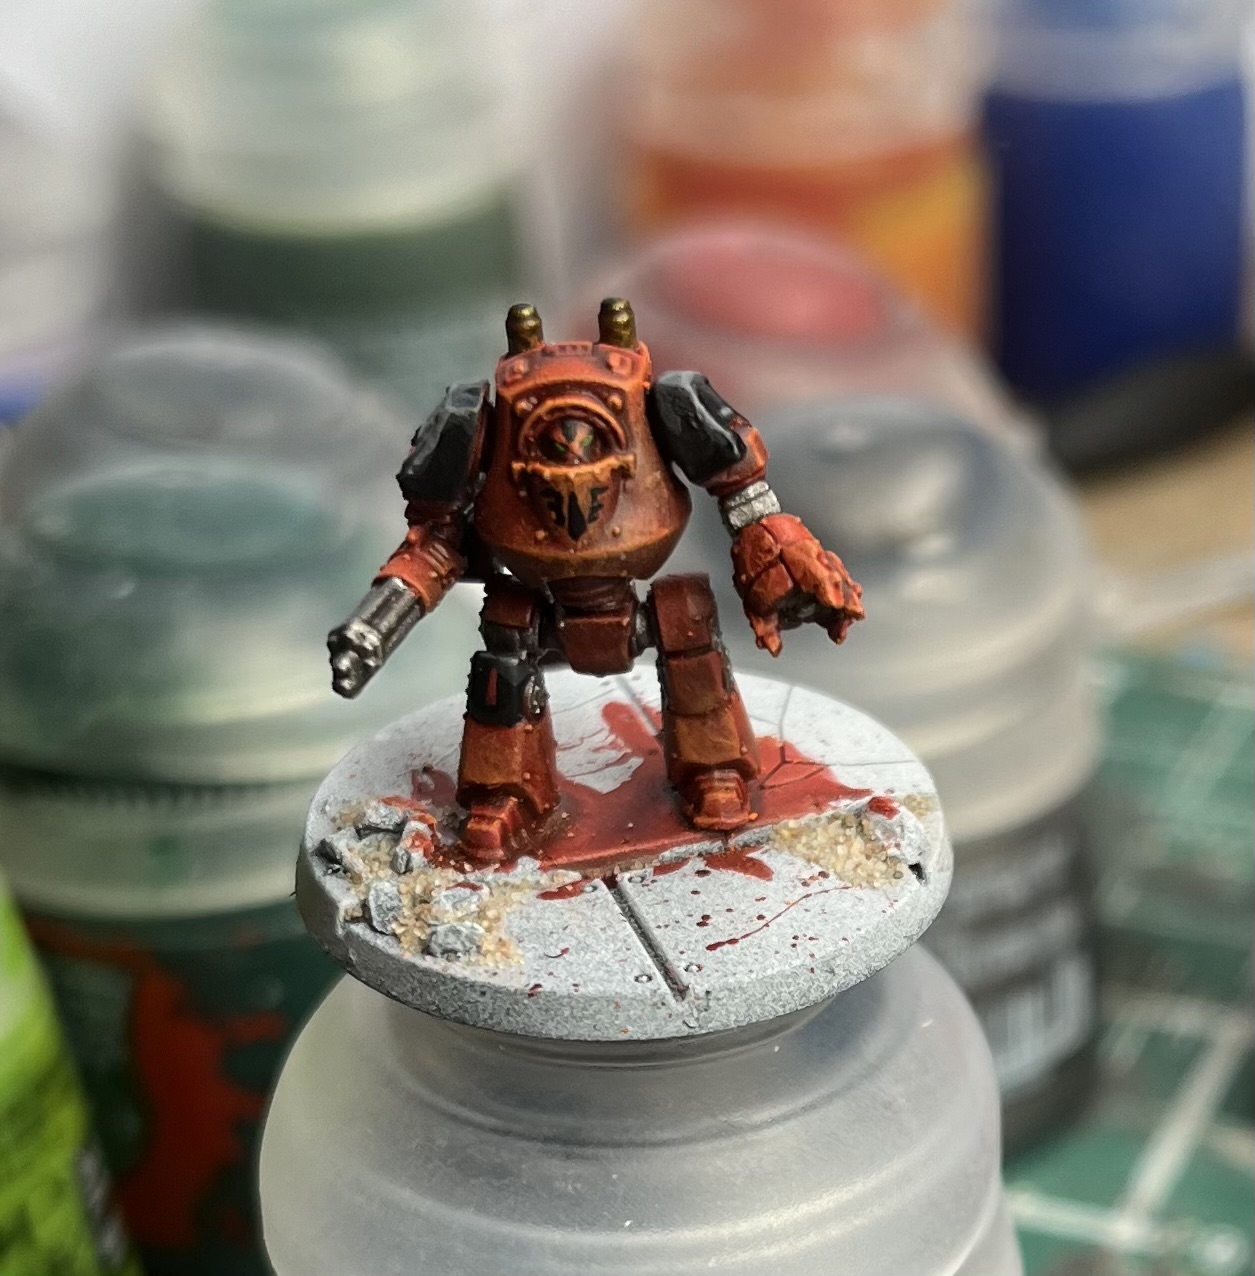
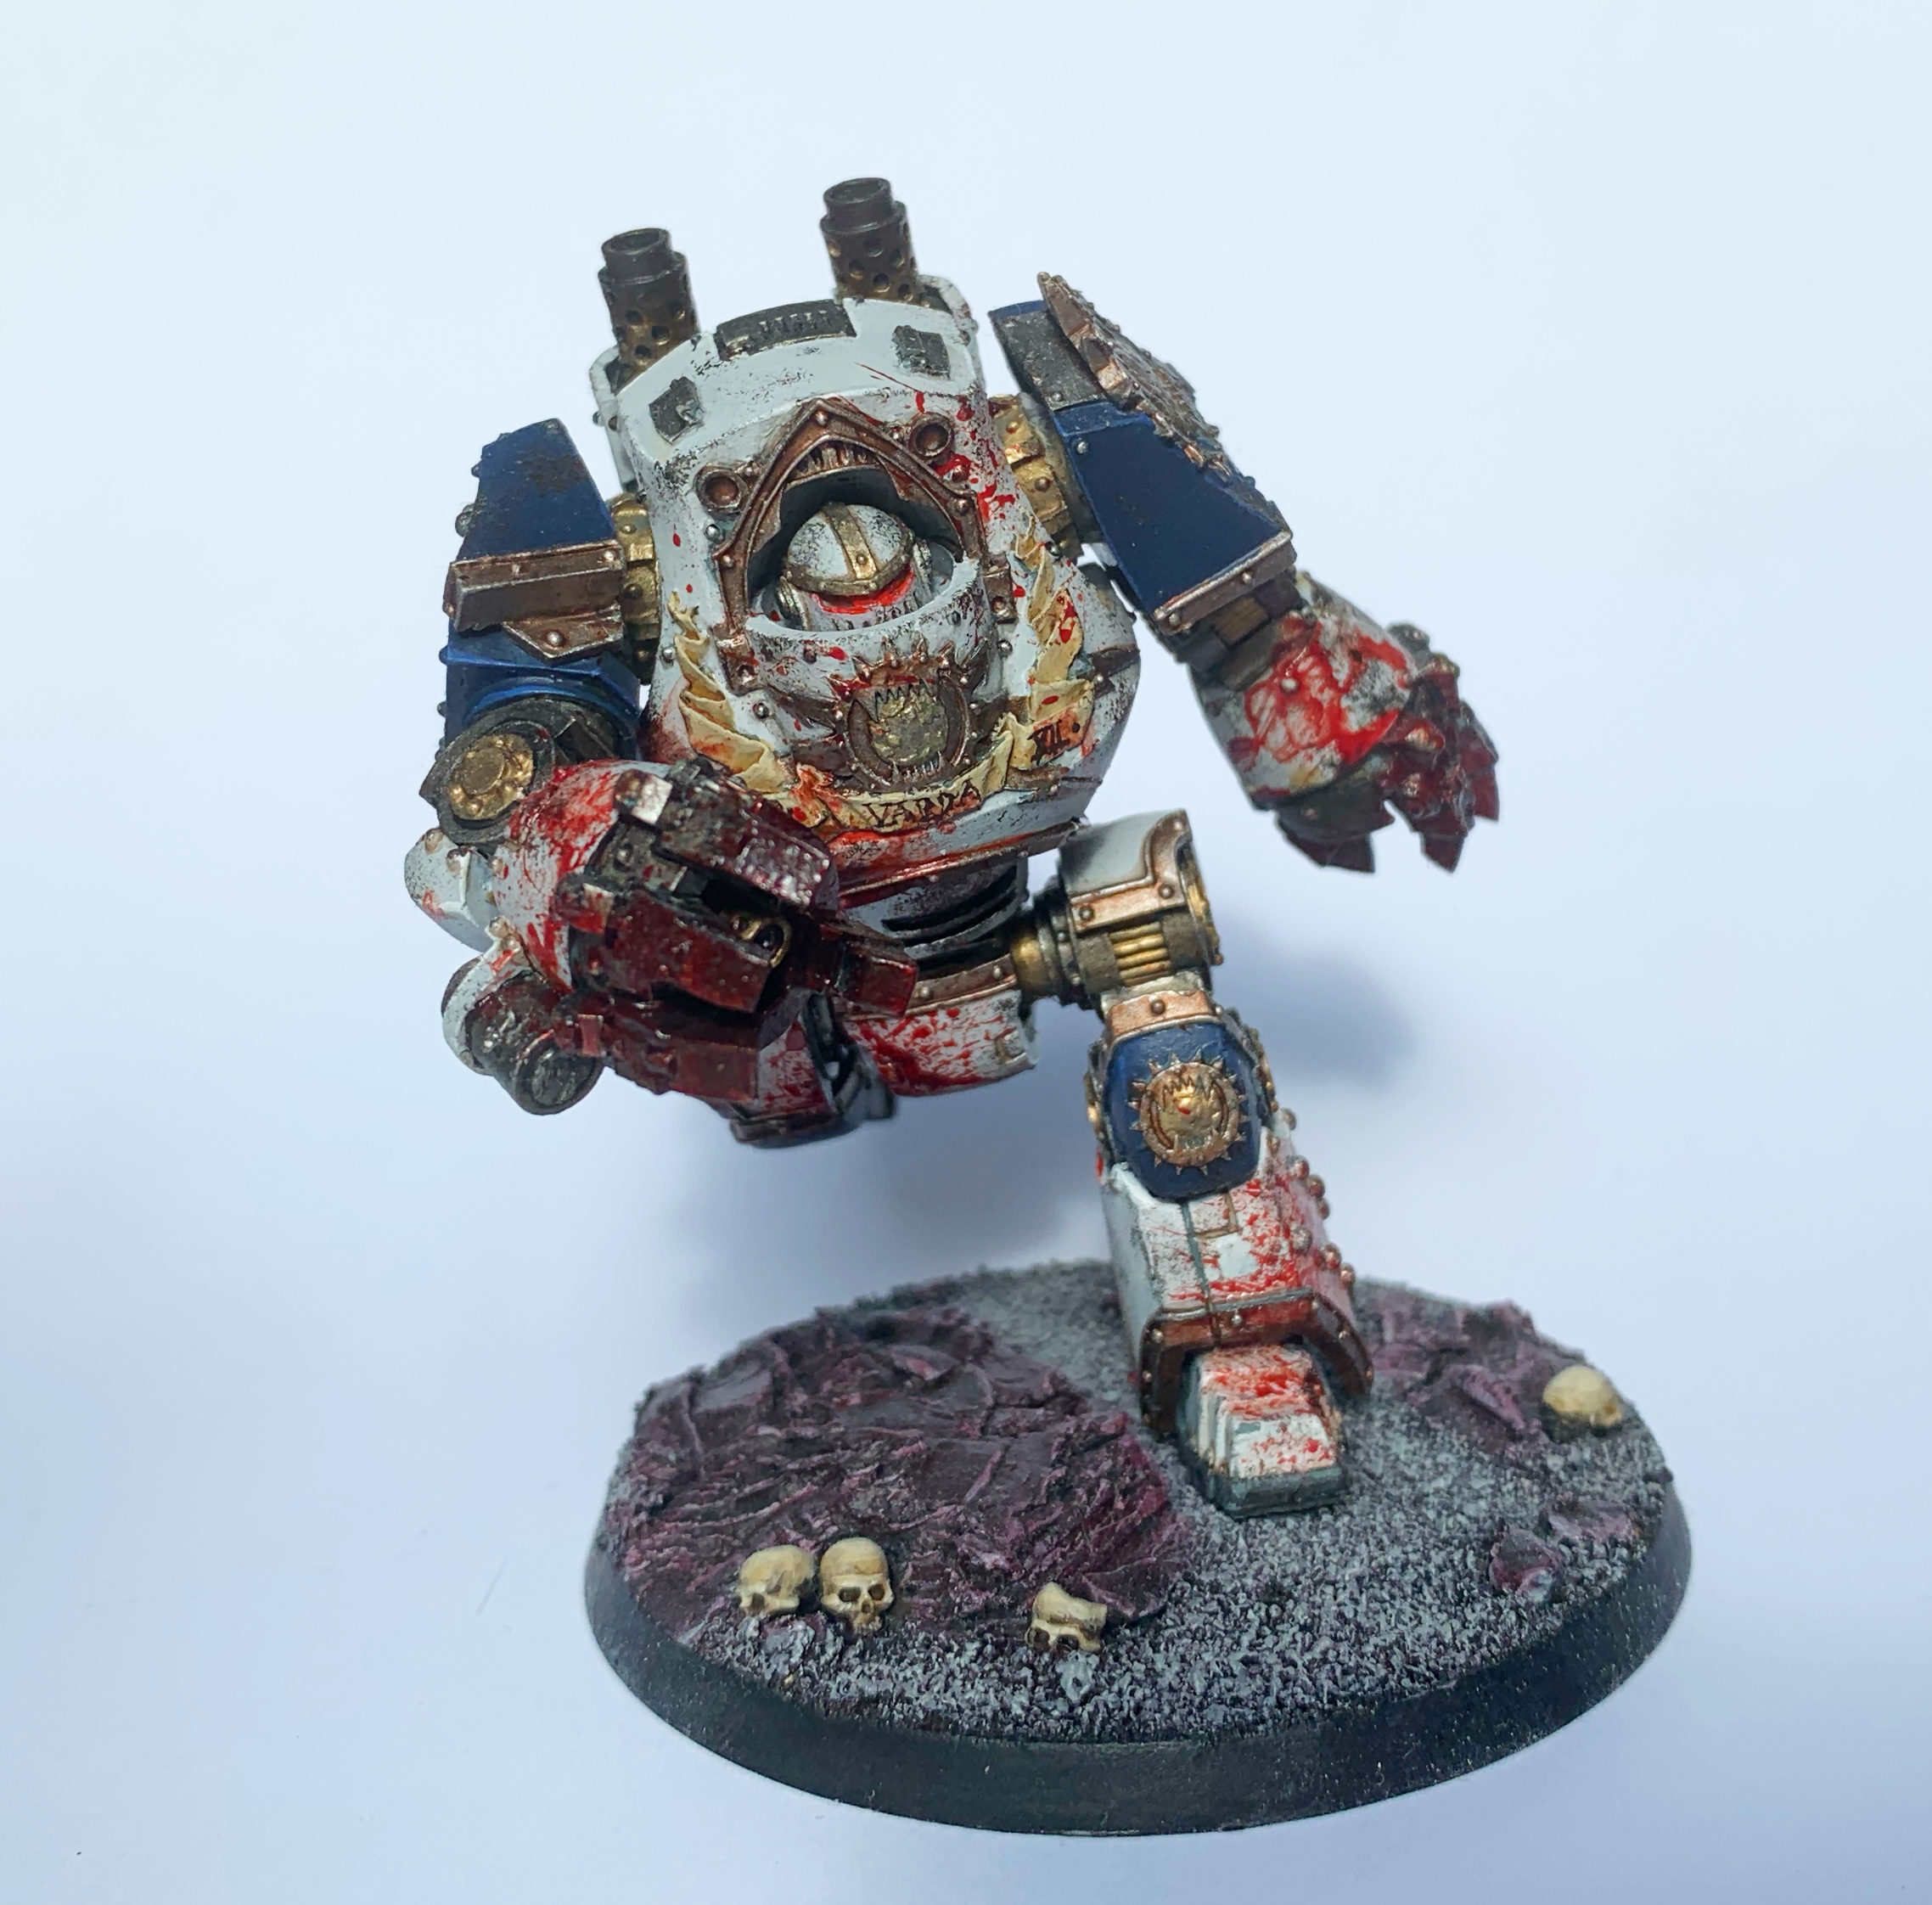
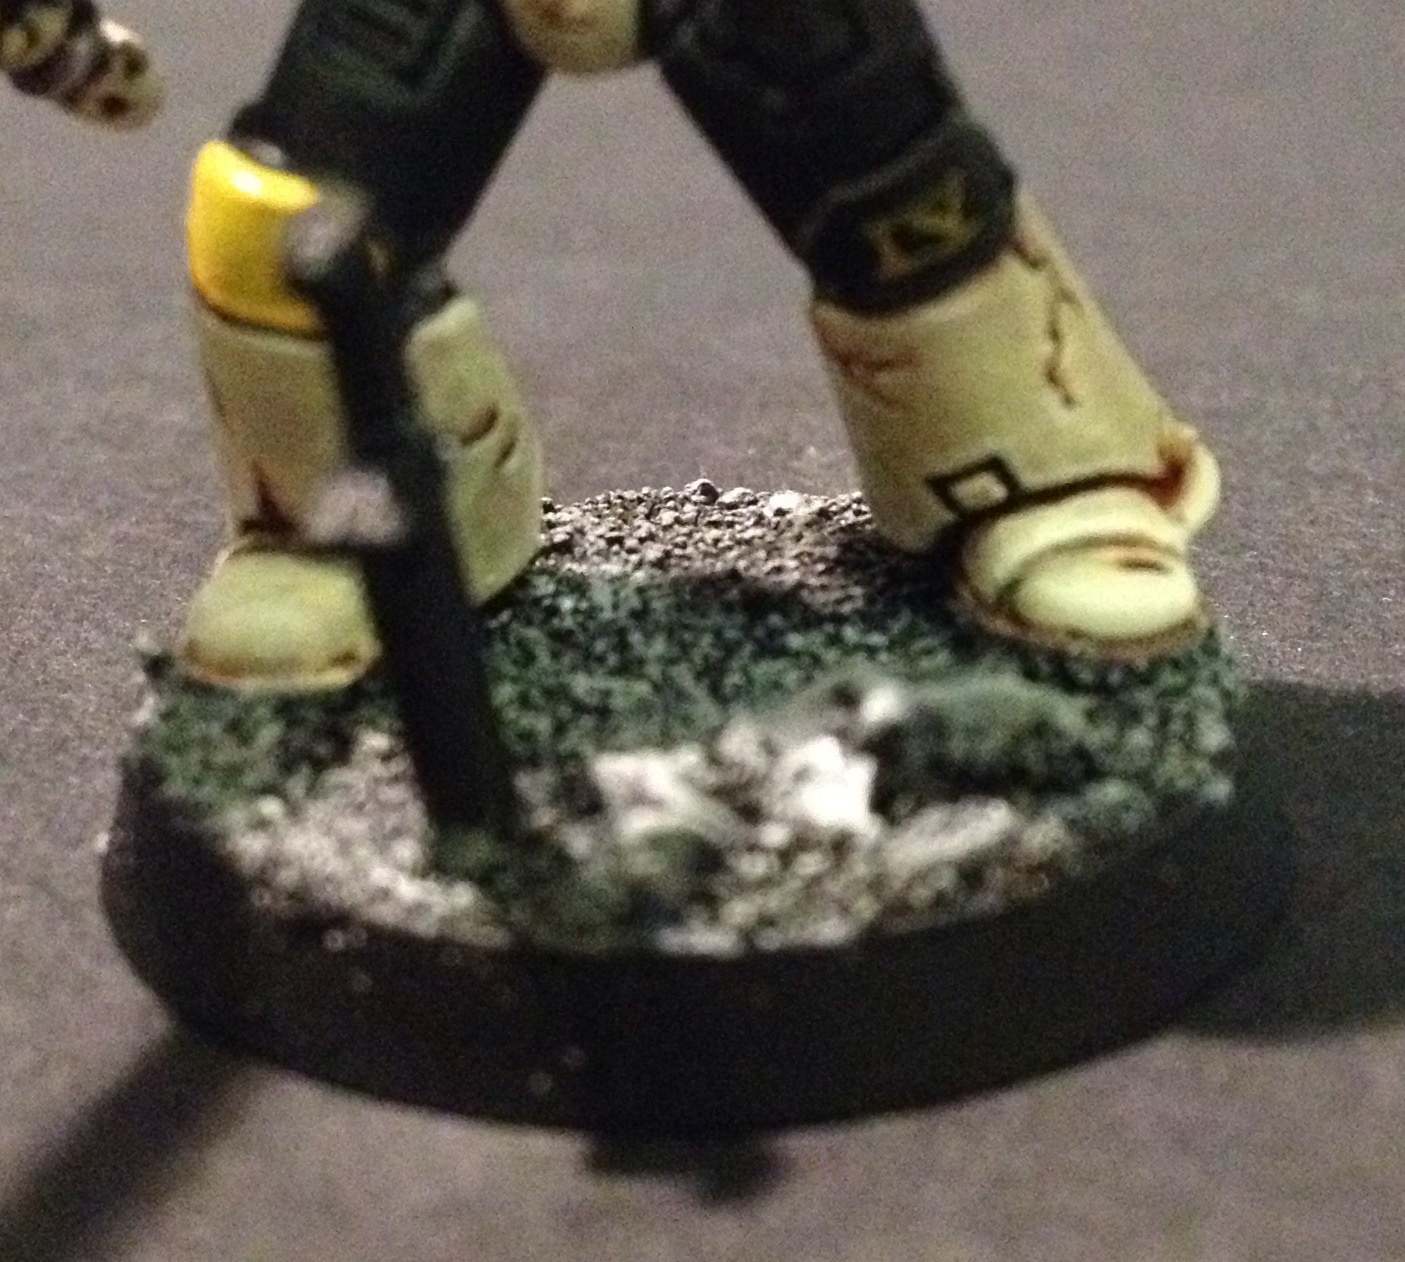
Hey folks! Continuing in my series of new Legiones Imperialis posts as I try and revive the output of this blog, I’m going to show you how to create a marbled base with a little bit of rubble on the side. To do this, I’m going to be basing one of my itty-bitty, teeny-weeny Contemptors (they’re so cute!) and I’ll be taking you through all the steps.
And as ever, thank you to Games Workshop for sending me this miniatures, and thank you to those of you reading this article – I hope it proves useful. Now with that admin out of the way, let’s get cracking!
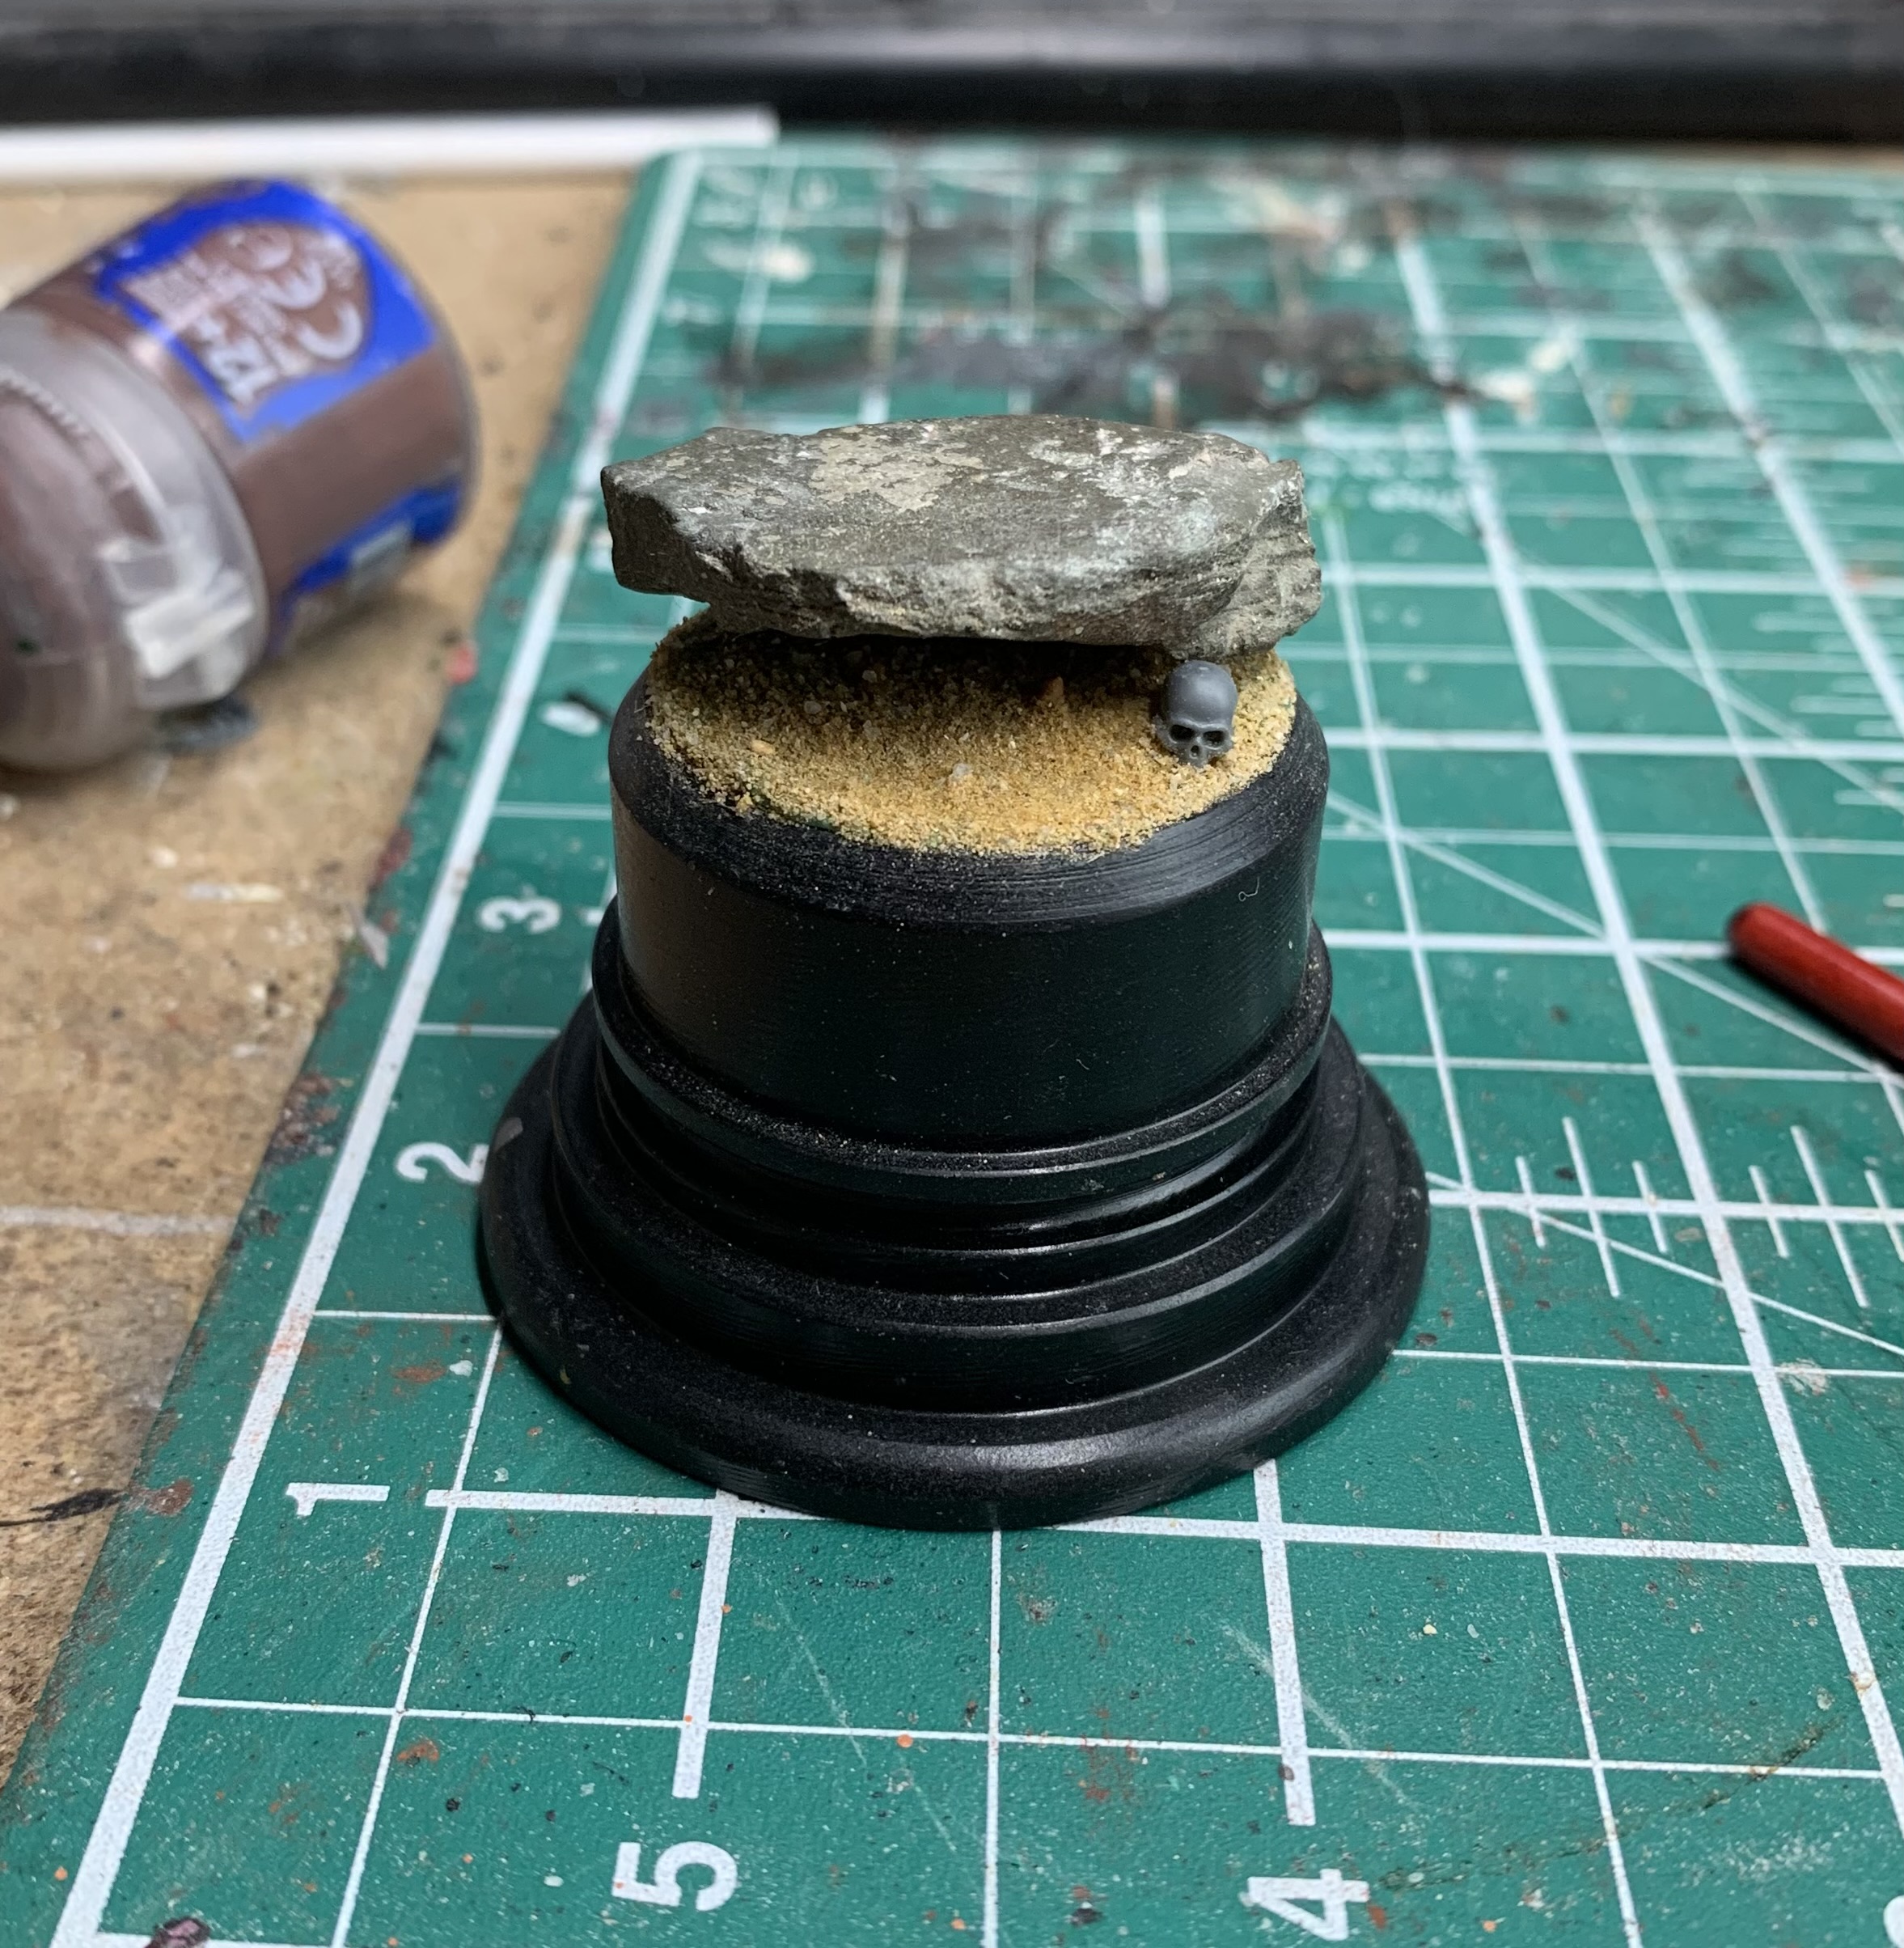
So here’s our base. The Contemptor is done to a standard I’m happy with for gaming and a little has been done to the base already. I’ve put down some fine sand and some tiny gravel pieces to help represent our rubble. The tiny stones were put in place first with some thin super glue, and then sand was drizzled over the same areas before the glue dried. It’s the perfect way to give a little bit of something to your epic-scale bases.
Next up, I painted the base up with a couple of thinned coats of Grey Seer. I left the model on the base, but you could take it off if you wanted to spray it. Honesty though, as long as you’re careful, it dries so quickly, I just did like this because I had a pot to hand and it was no bother.
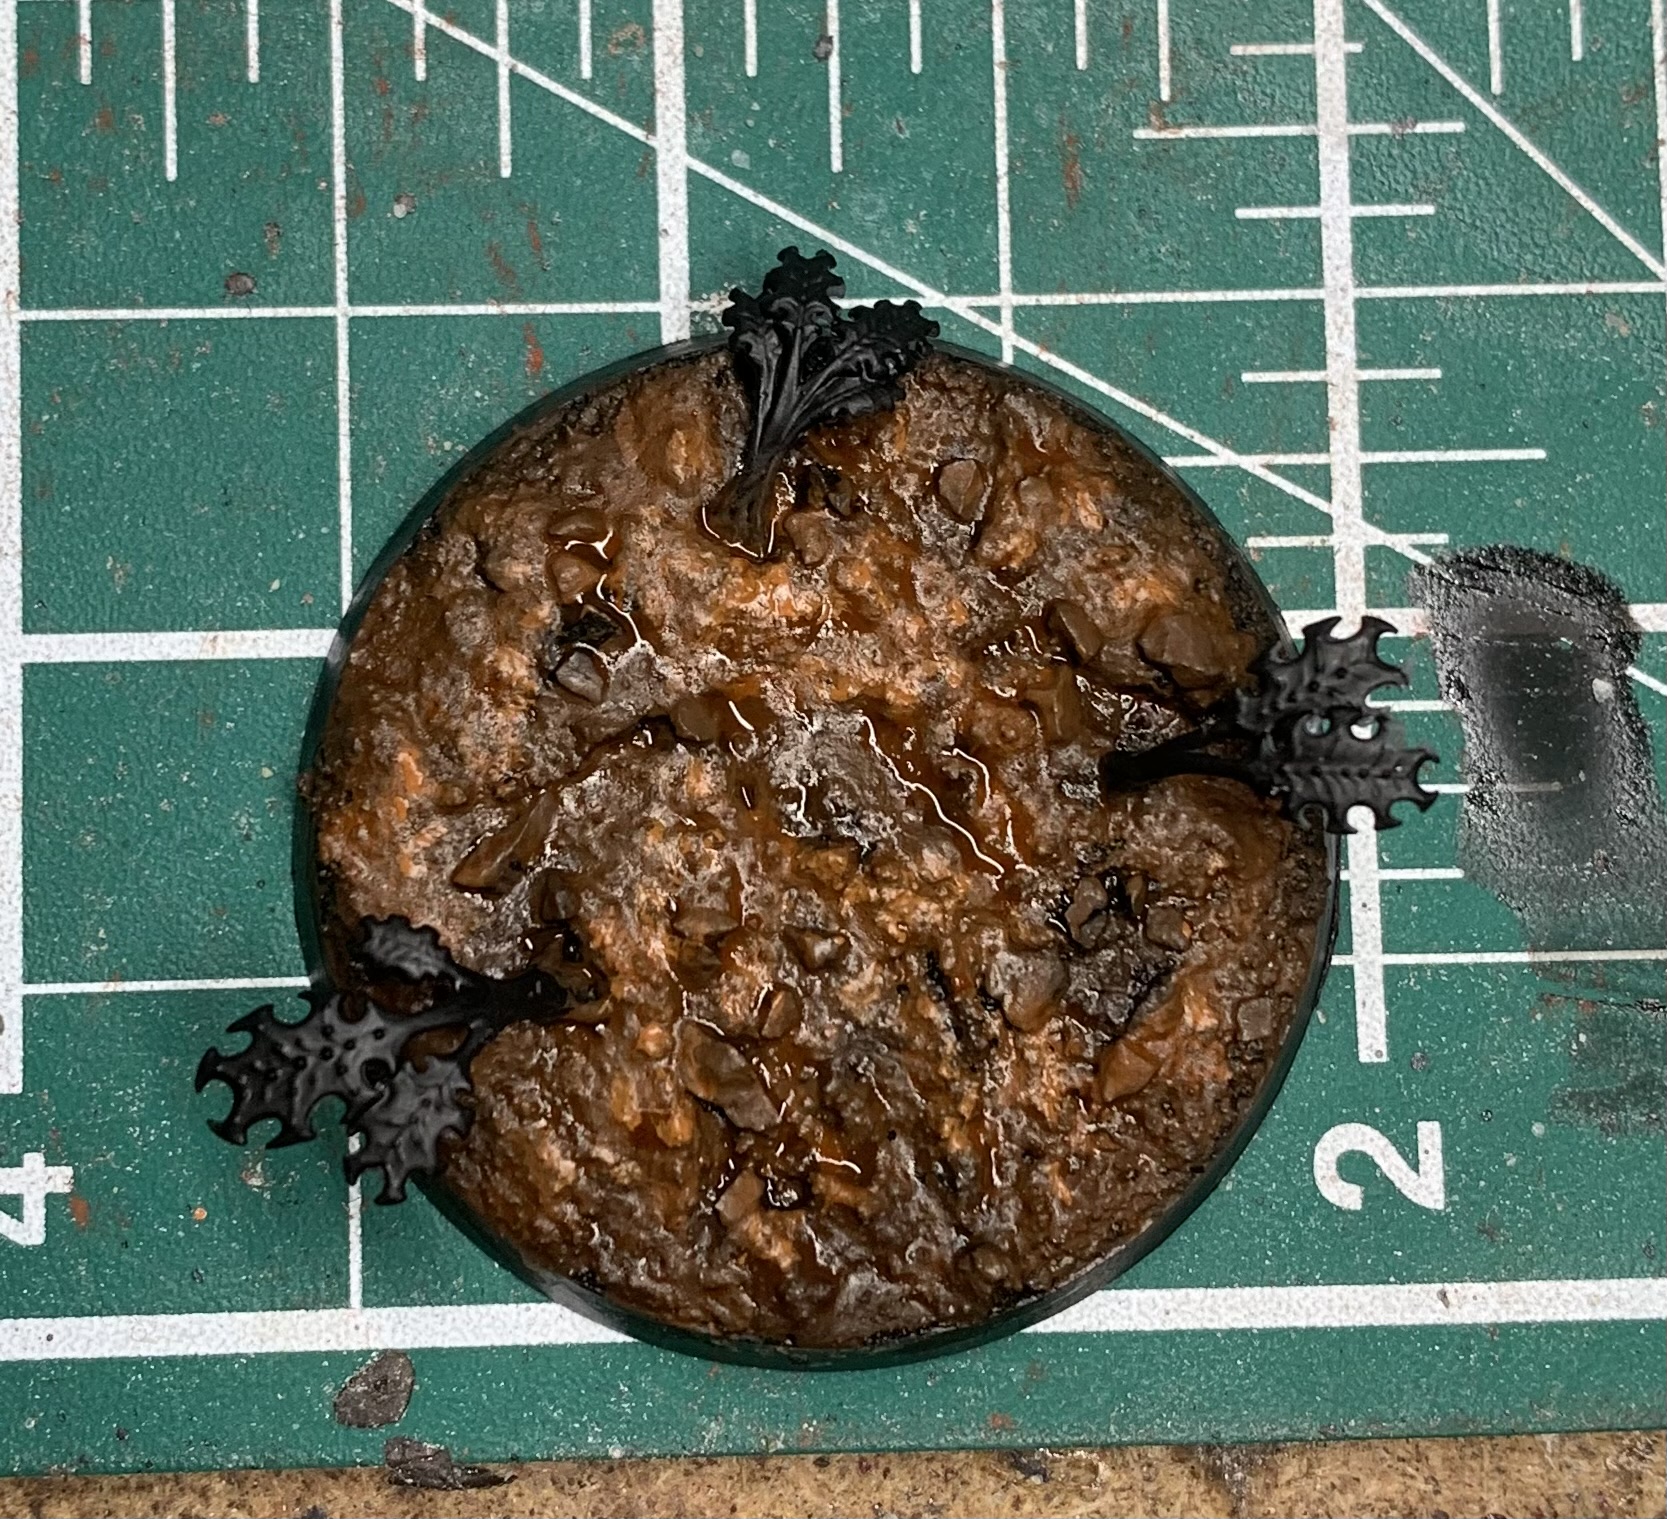
Apologies for the out of focus Contemptor (if you thought my photography was bad before, Epic scale has given me some real trouble!), but you should be able to see that I’ve added a coat of Aggrax Earthshade to the rubble areas. Allow this to dry completely before moving on to the next step – seriously, it can go very bad if you don’t!
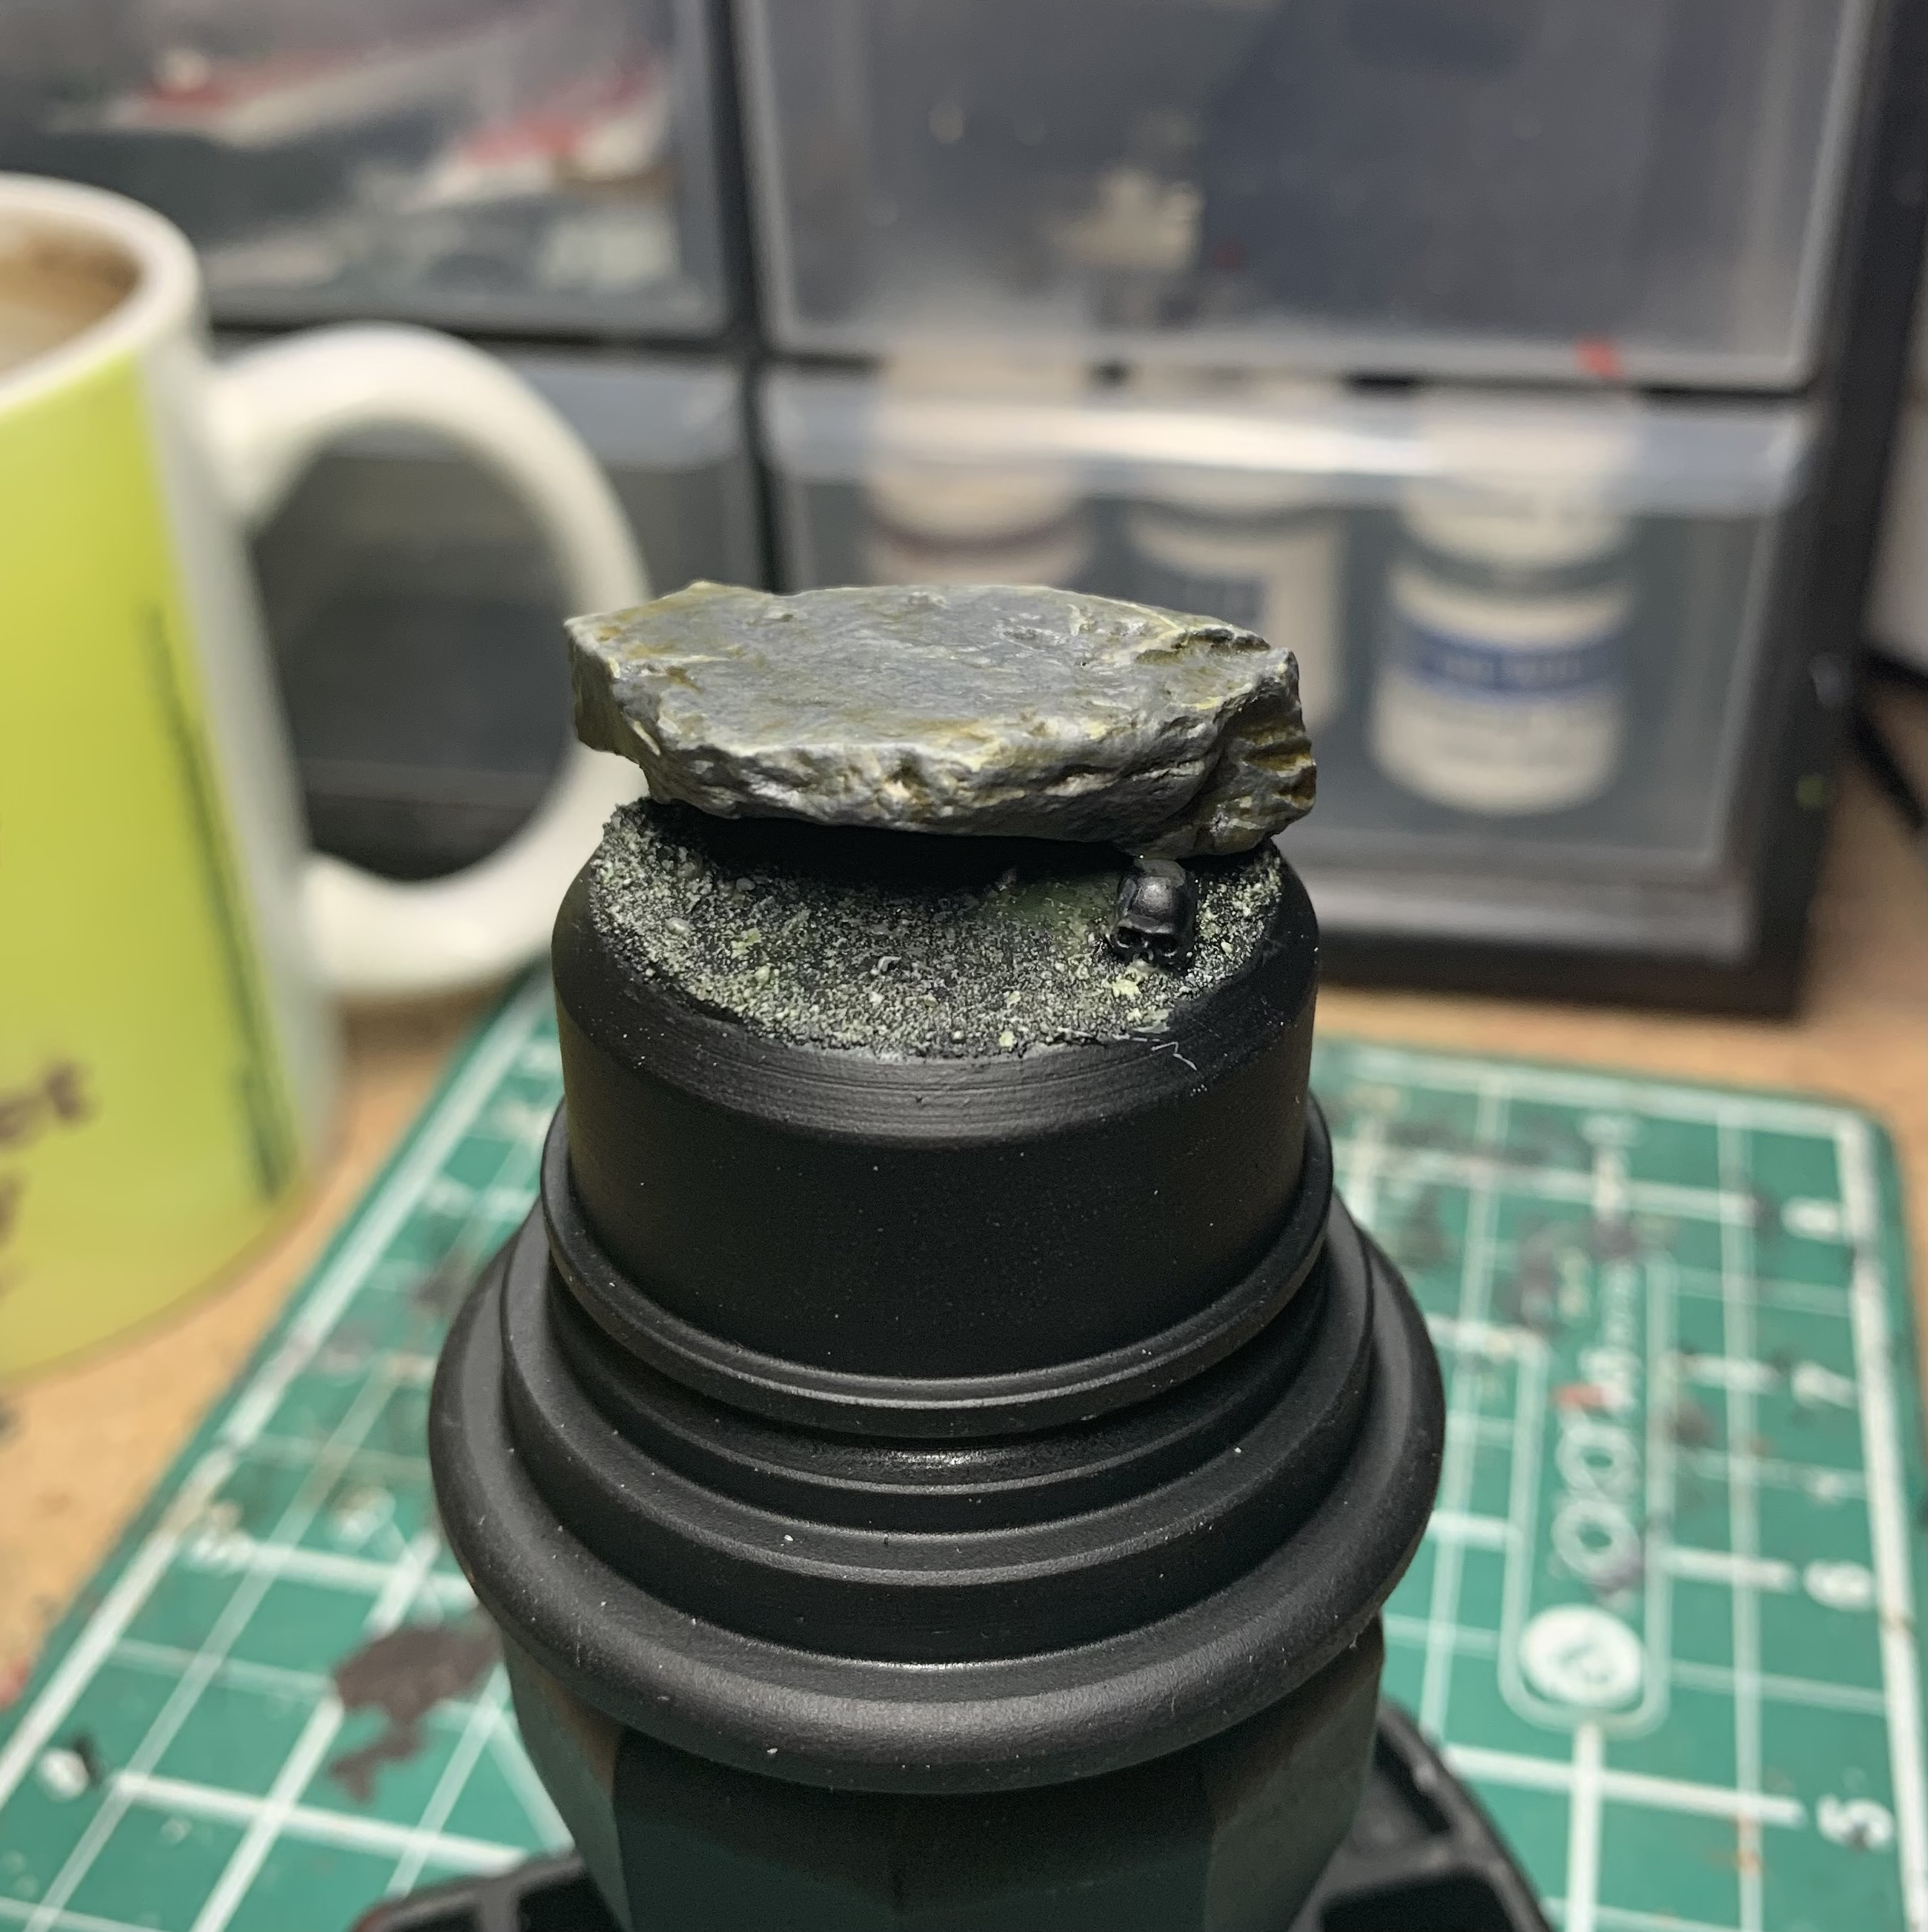
Next up, we have a heavy coat of Space Wolves Grey all over our base, and the rubble. My tip for this would be to dab it on rather than brush it on – more chaos (not that sort of Chaos), means a more organic look, so don’t try to apply it too neatly, except in terms of keeping the paint off the dreadnought.
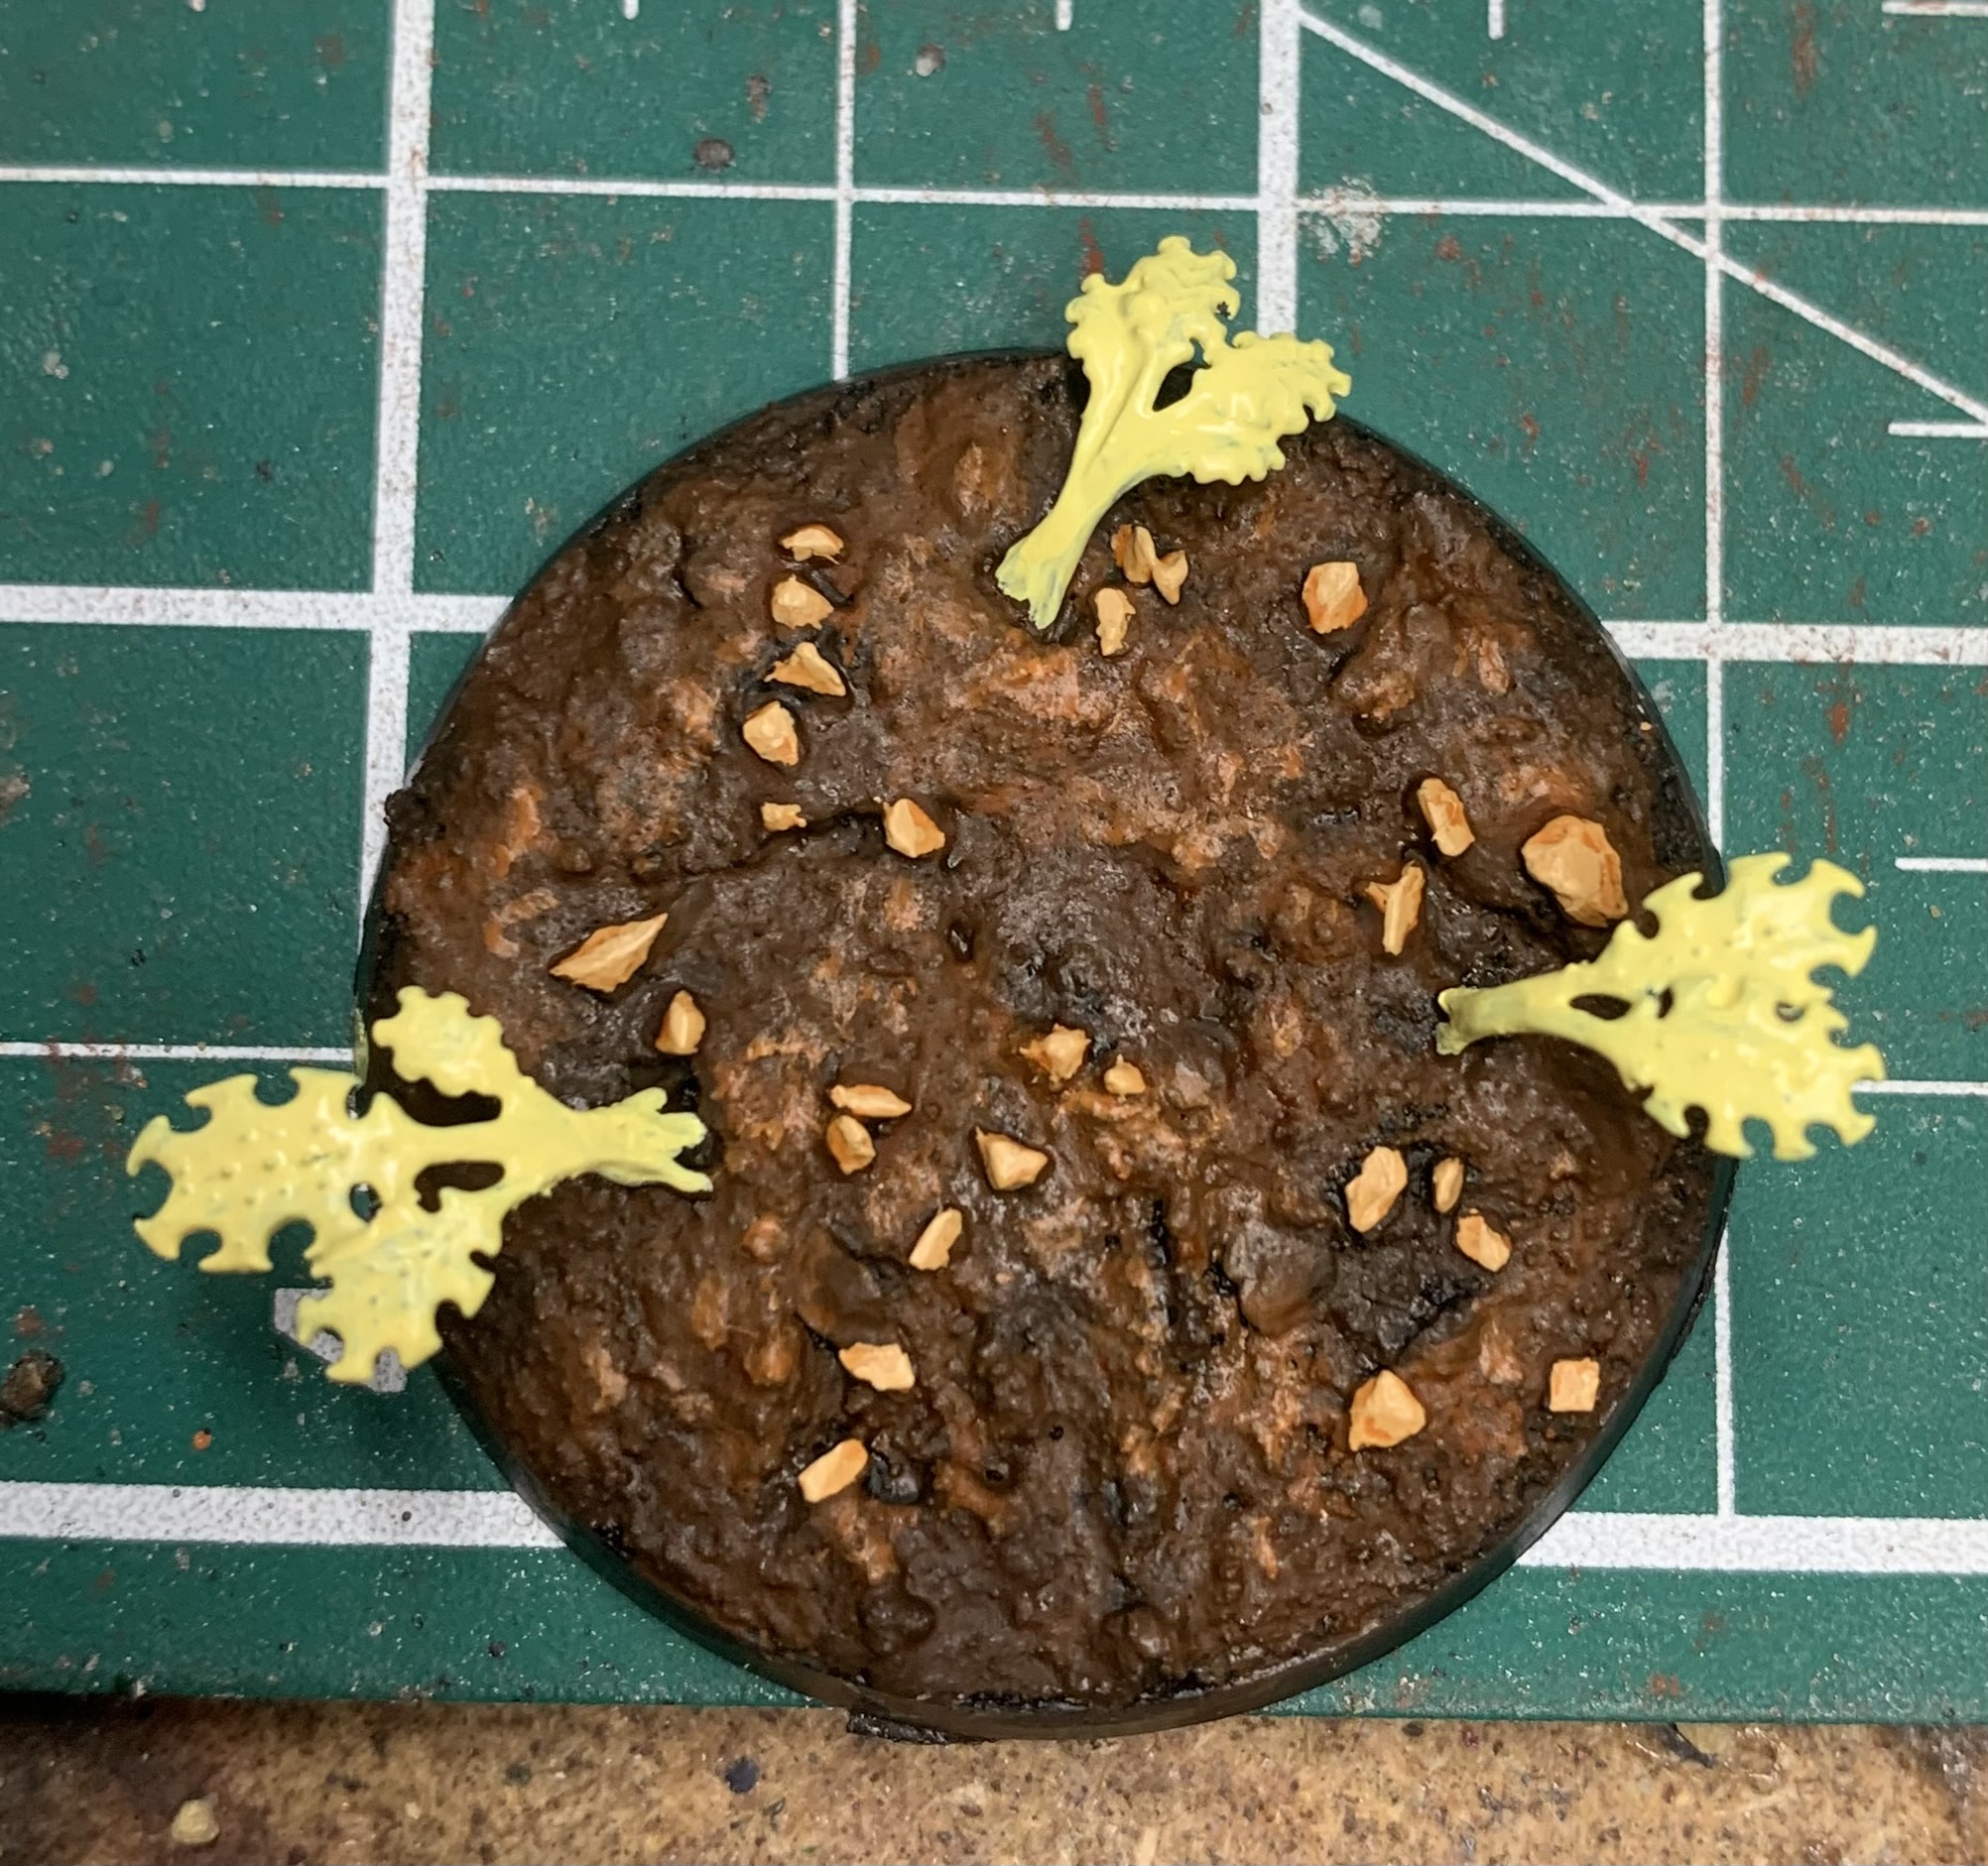
Allow this to dry and then we move on to drybrushing. Using very small amounts of Grey Sear/White Scar (1:1 mix), I focussed my drybrushing efforts on the areas of the base with some detail, but don’t go overboardyou really want almost no paint on the brush. And for the rubble, I just used Grey Seer for the drybrushing.
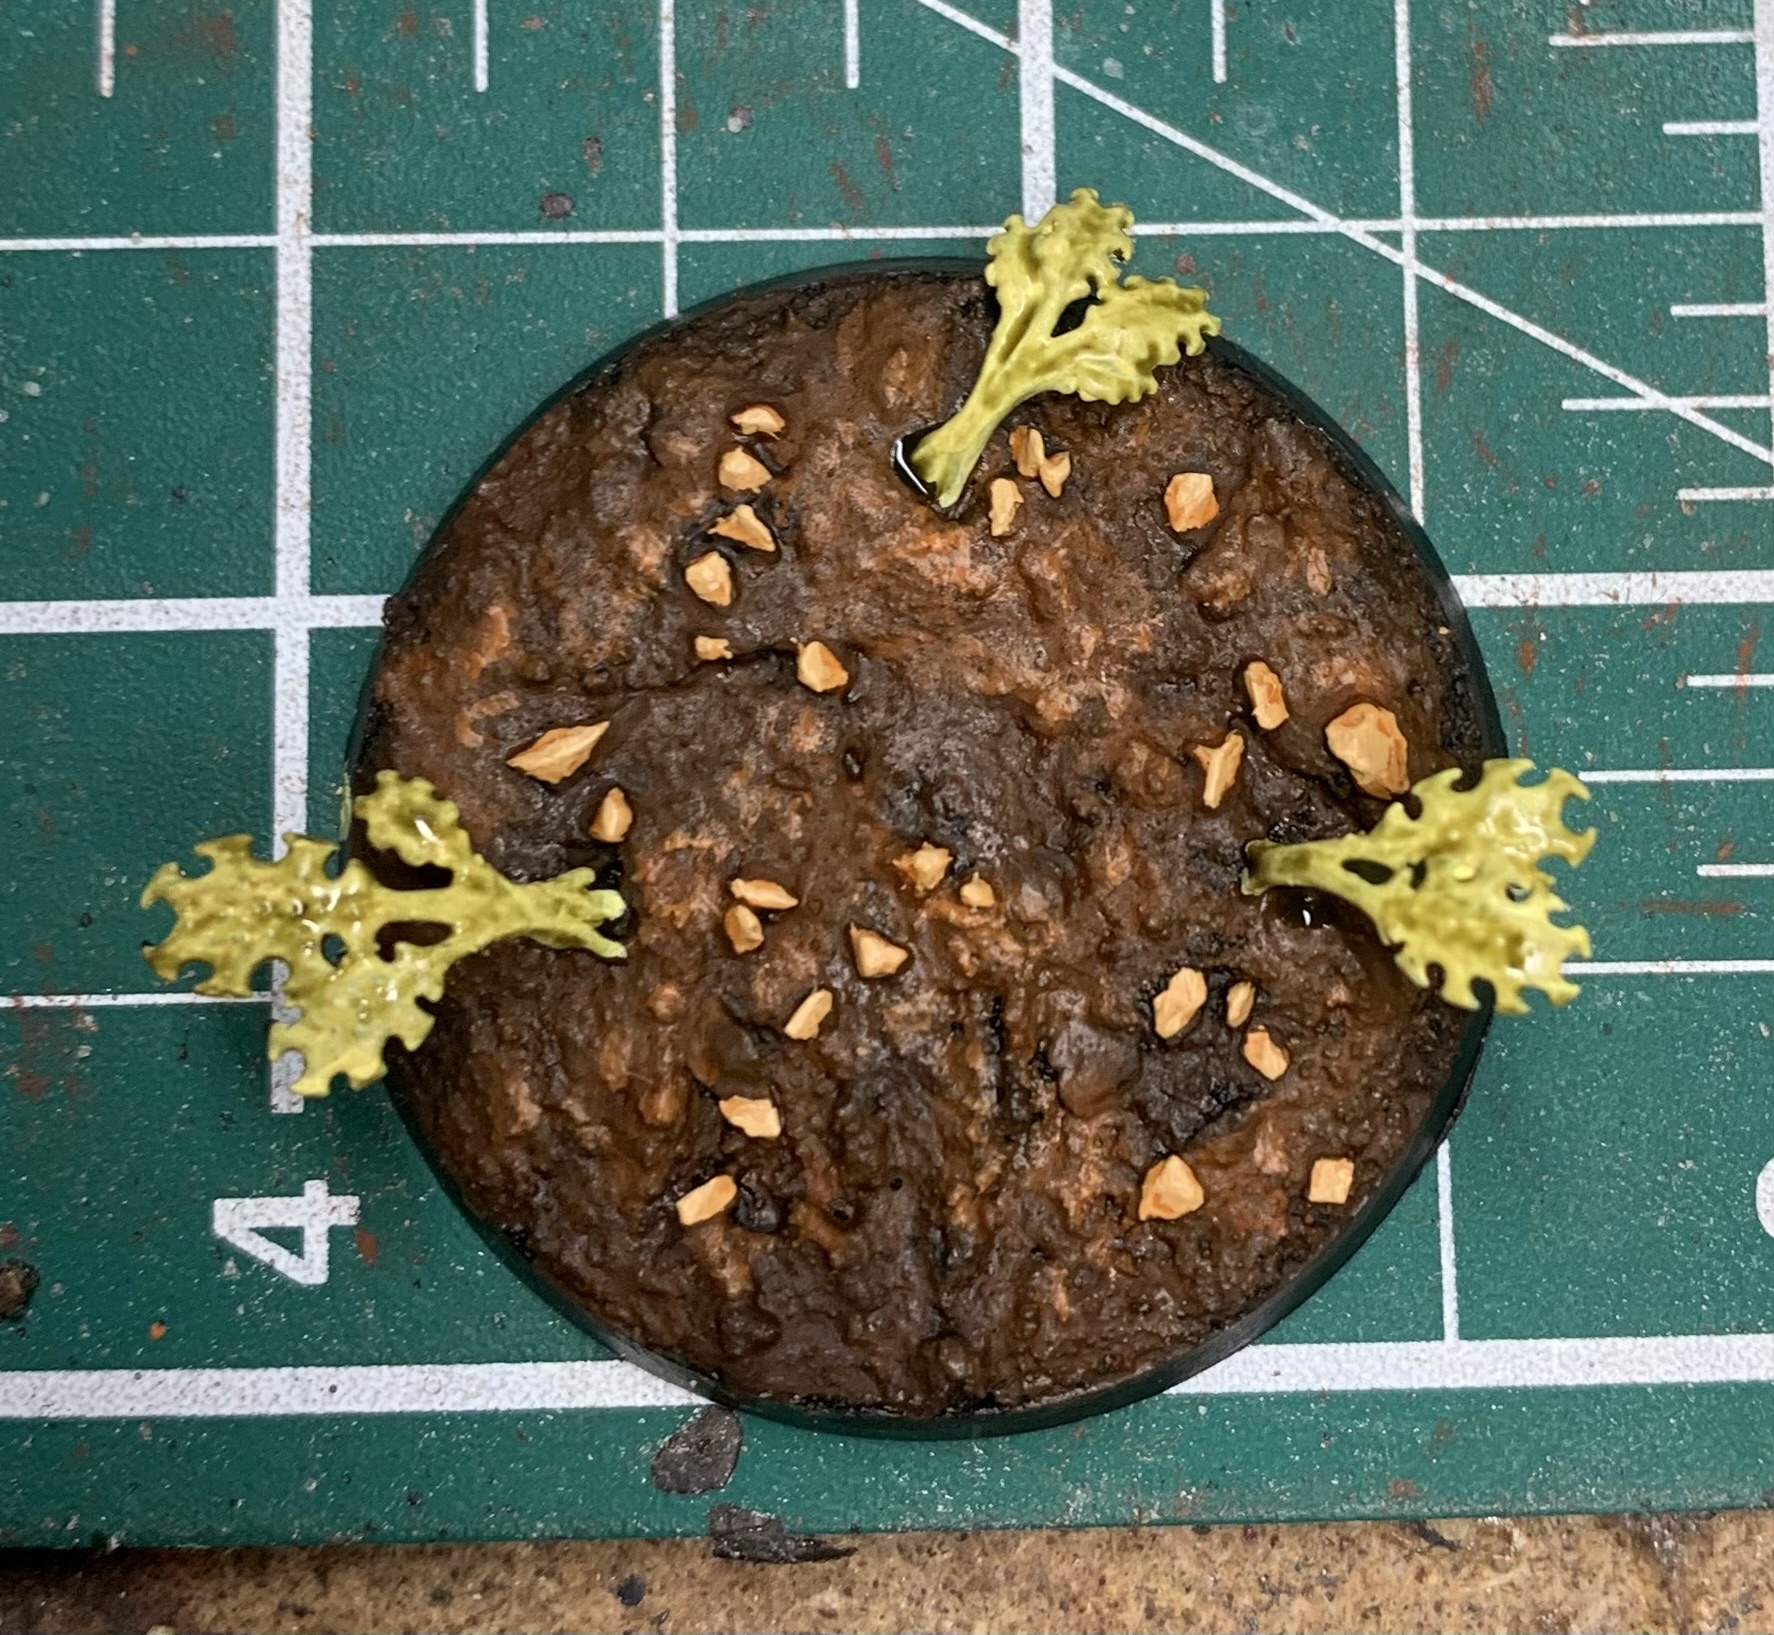
Now, you want to make a mix of Skeleton Horde and Contrast Medium, in a 1:3 mix (so 3x as much medium) and you’re going to put a thin coat all over that base to help make this scene look more like a dirty warzone.
Finally, using a steady hand and a straight brush, paint the rim of the base black. You’re done!
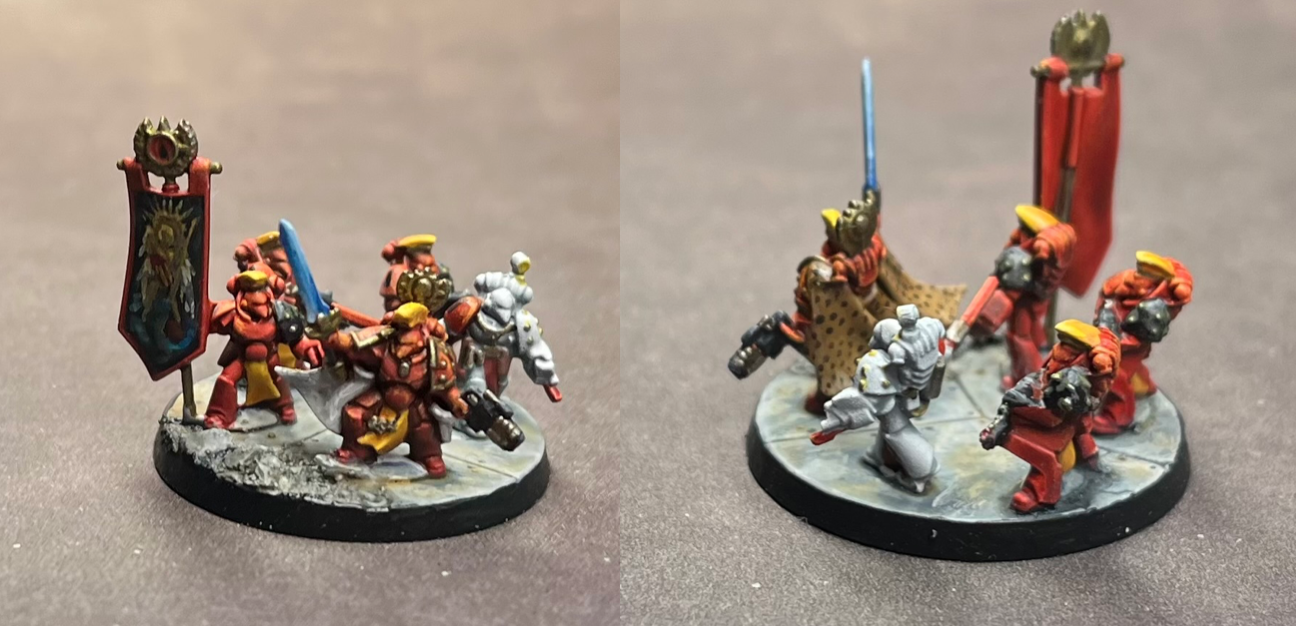
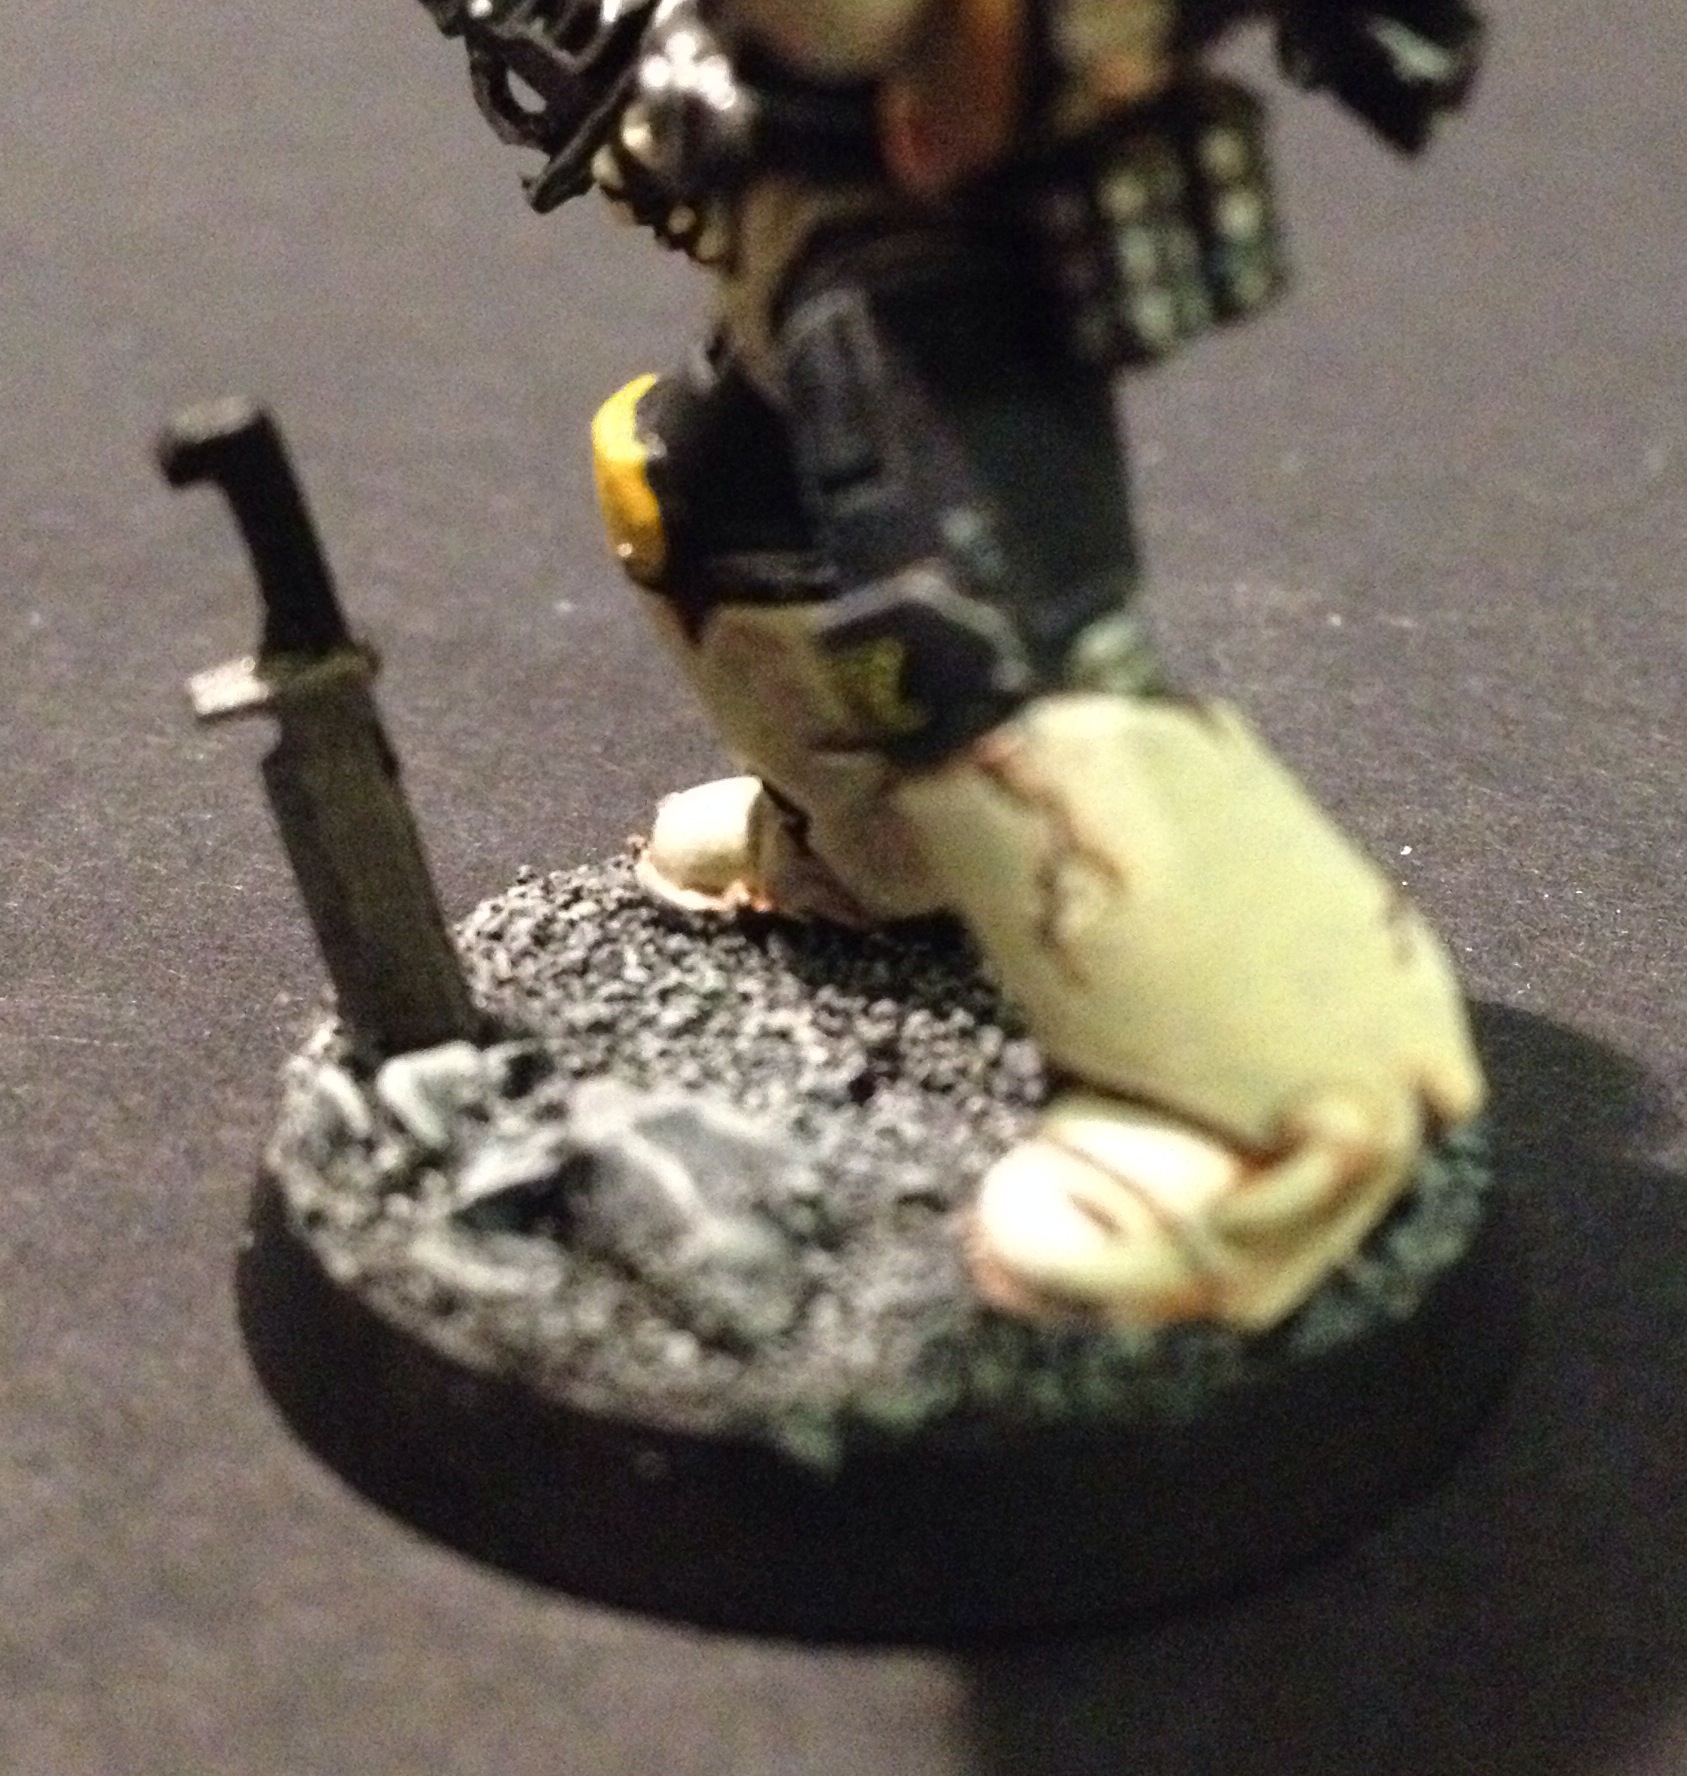
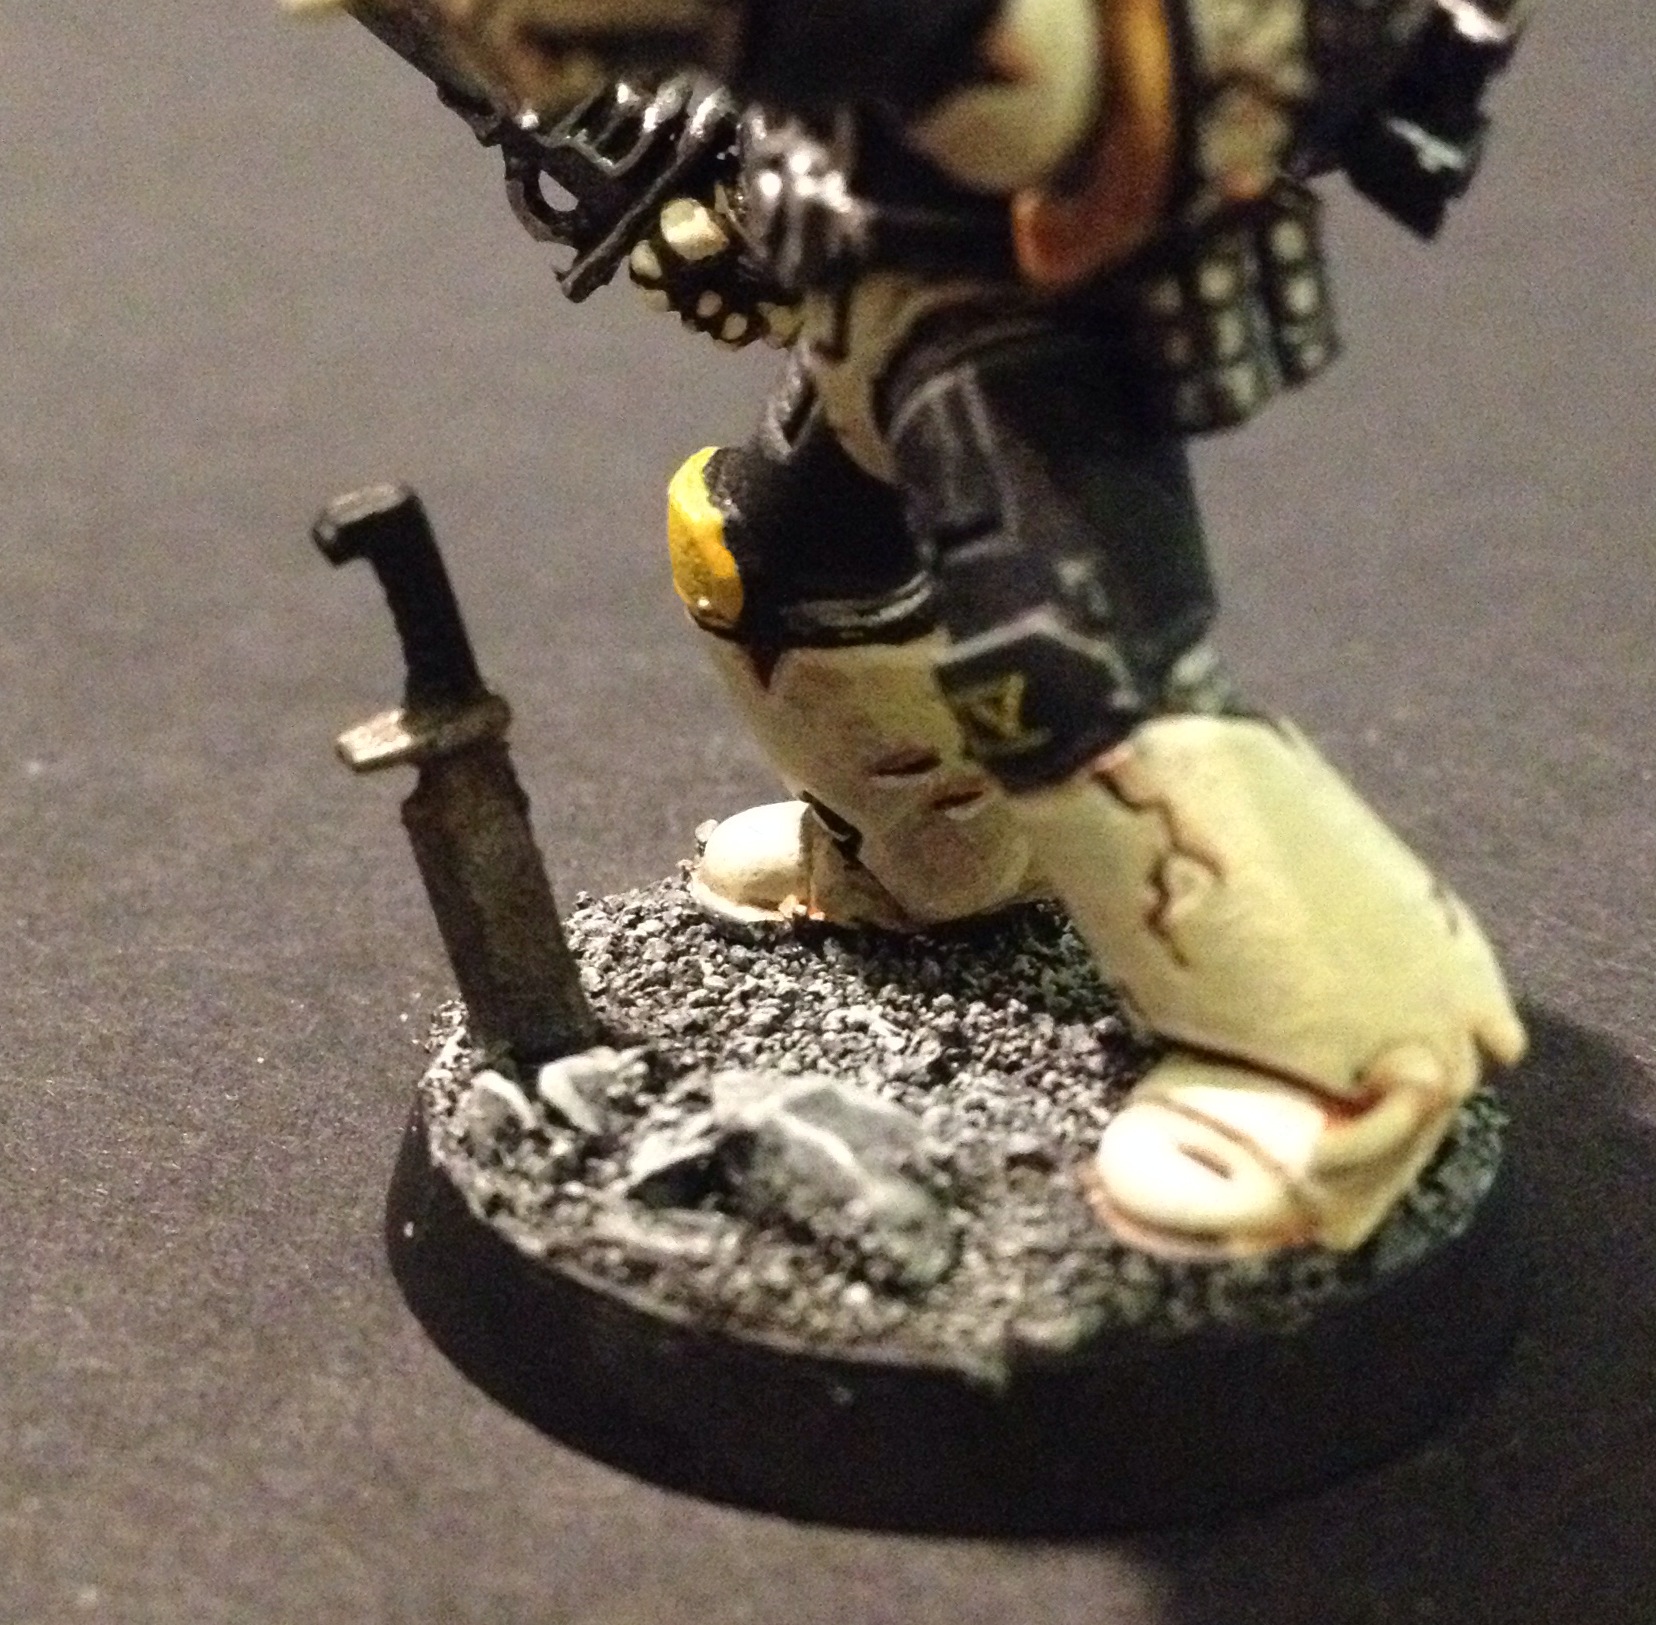
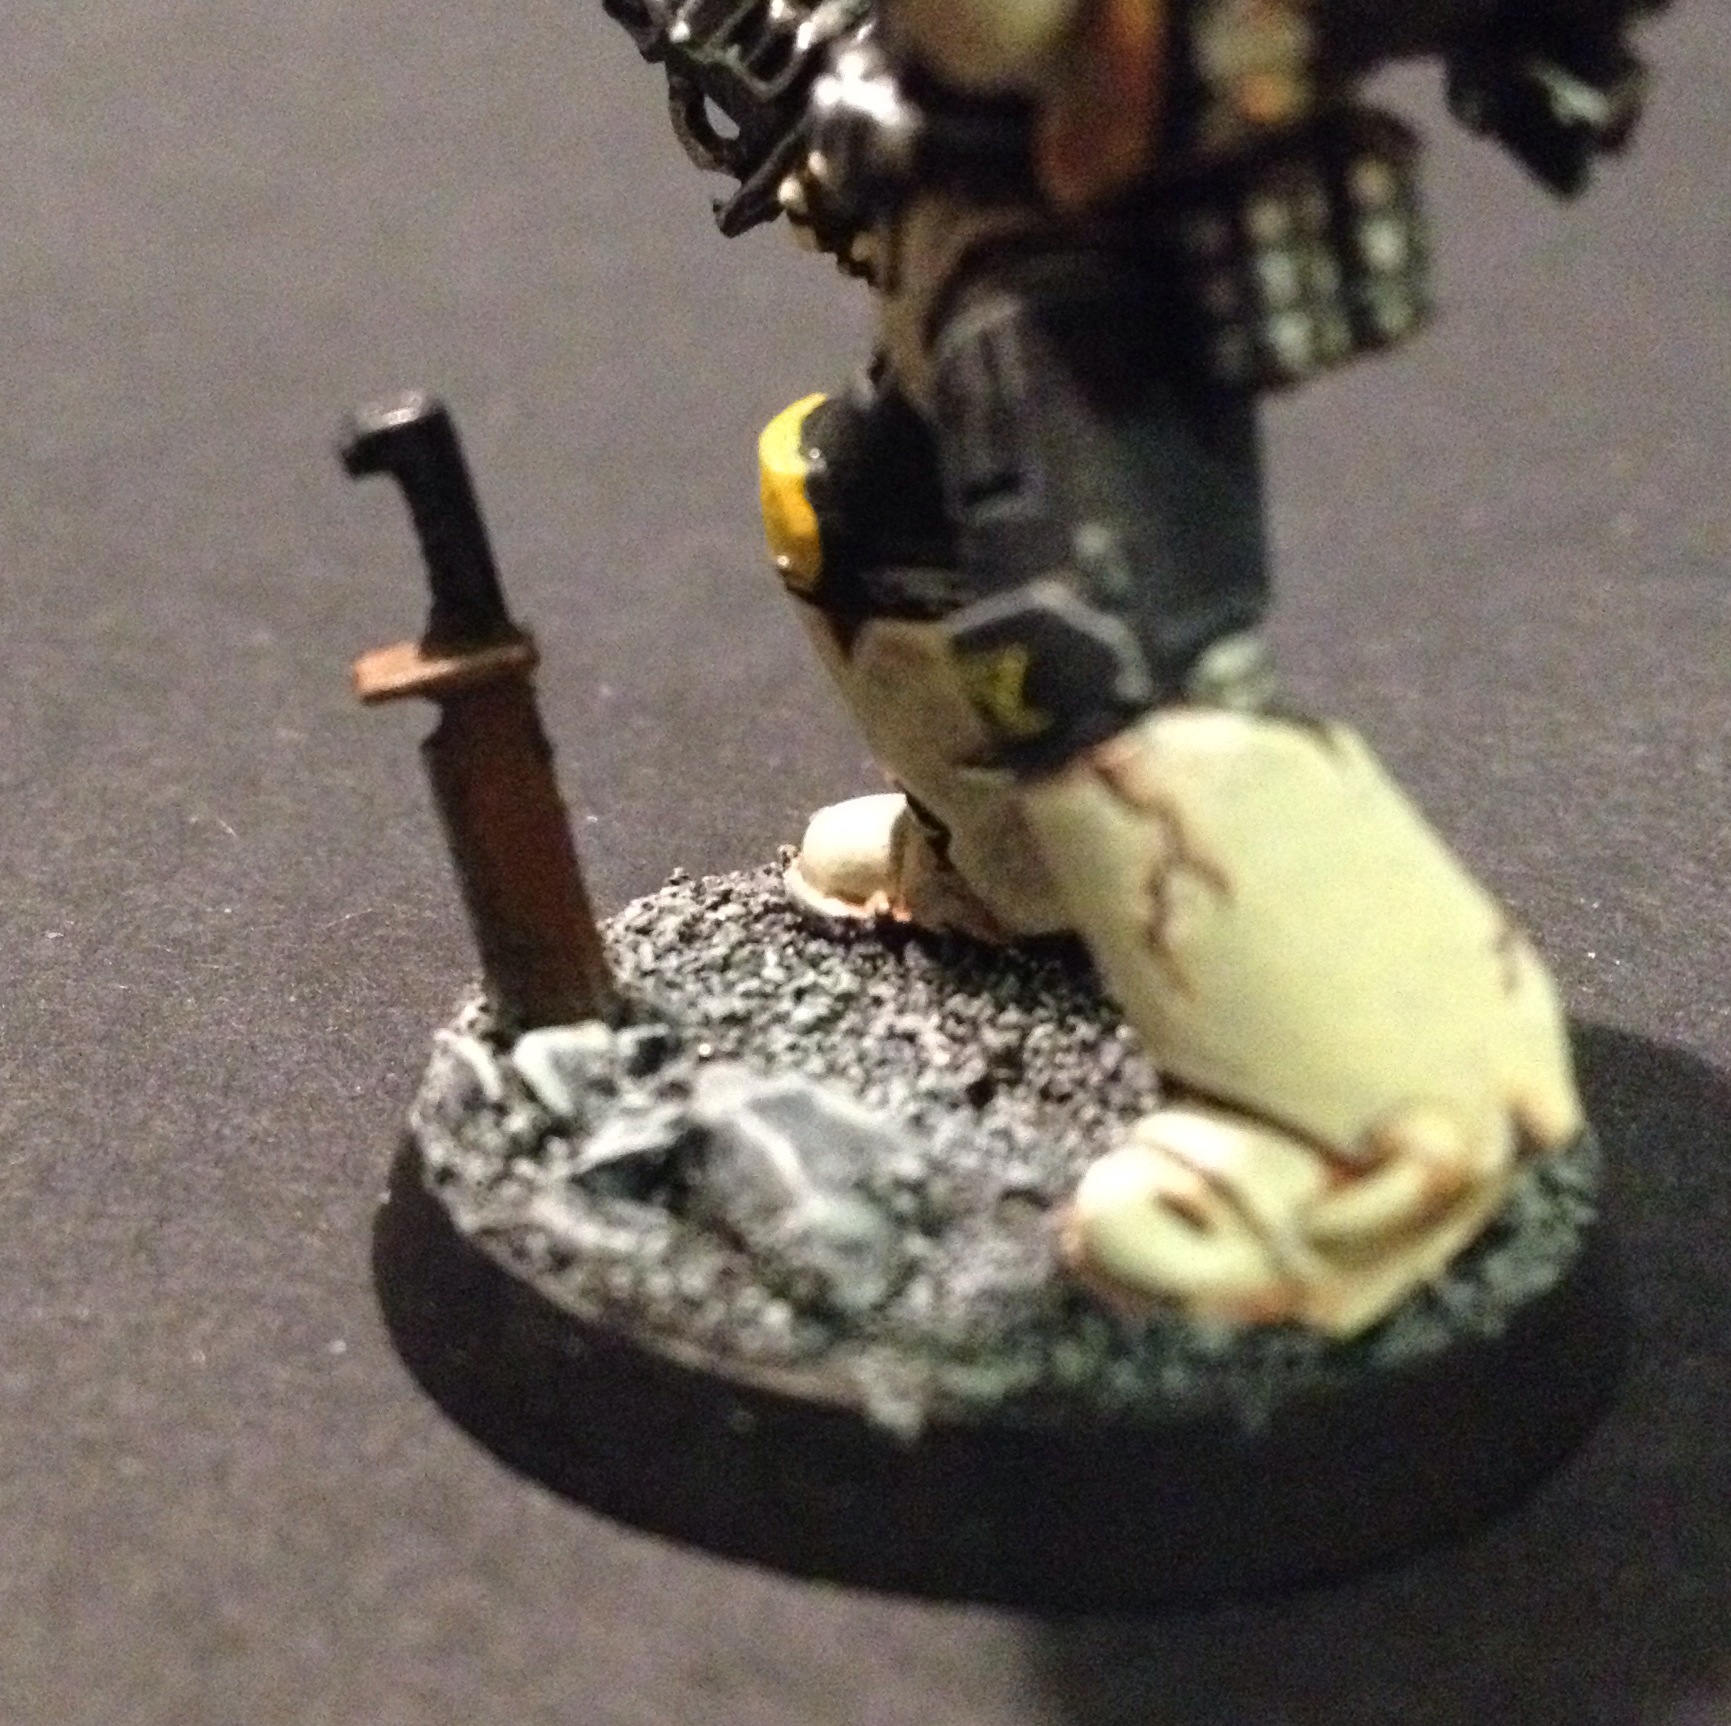
And here’s the same basing technique done with some tiny dudes – just for something different and vaguely in focus. 😉
I’ve painted all of my Blood Angels’ bases like this and I really enjoy the effect it gives me. Sure, I was tempted by doing some Goblin Green rims and simple sand/flock green bases, but I think this looks better. If you have any good recipes for bases like this, let me know in the comments below, and until next time, Onwards!
Those familiar with this blog will know that I certainly enjoy basing my miniatures, and I’ve had a couple of people over the last few of months ask me about display bases. Now, I am by no means an expert in making very pretty bases, but I can give you some basic ideas as to how you might want to do it simply, and with materials you may well already have in your hobby supplies stash. If you do want to go more with expert-level, check out the work my Matt Cexwish who always inspires me to be better at basing – he even has a Patreon called The Joy Of Basing that I heartily recommend if you want to up your game. Or look at the work of many Golden Demon winners to get ideas – there’s some amazing things out there.
But I can show you how to do something simple, that looks good. Though mentioning Golden Demon, if you do want to do this because of that prestigious competition, it’s worth remembering that the bases aren’t what’s judged – they’re just a nice way to present your mini. I’ve seen miniatures win with almost entirely unbased bases. Display bases are more something nice to have that you, the creator, likes to look at. It’s an enjoyable finishing touch to help frame a mini you’re proud of painting. So with all that being said, let’s take a look at how to create a simple, yet pleasing display base.
I love a nice, plinth, me. I’m actually reusing this plinth as it’s a nice small one (in terms of base area – it’s 32mm actually which is handy), and it’s quite fancy, so why not? Where does one get plinths? Well, you can use websites like Model Display Products to find pieces that have been specifically created for the job, but really, you can use anything you think will work. Offcuts of wood are a popular choice – as long as it gives a bit of elevation, you’re golden.
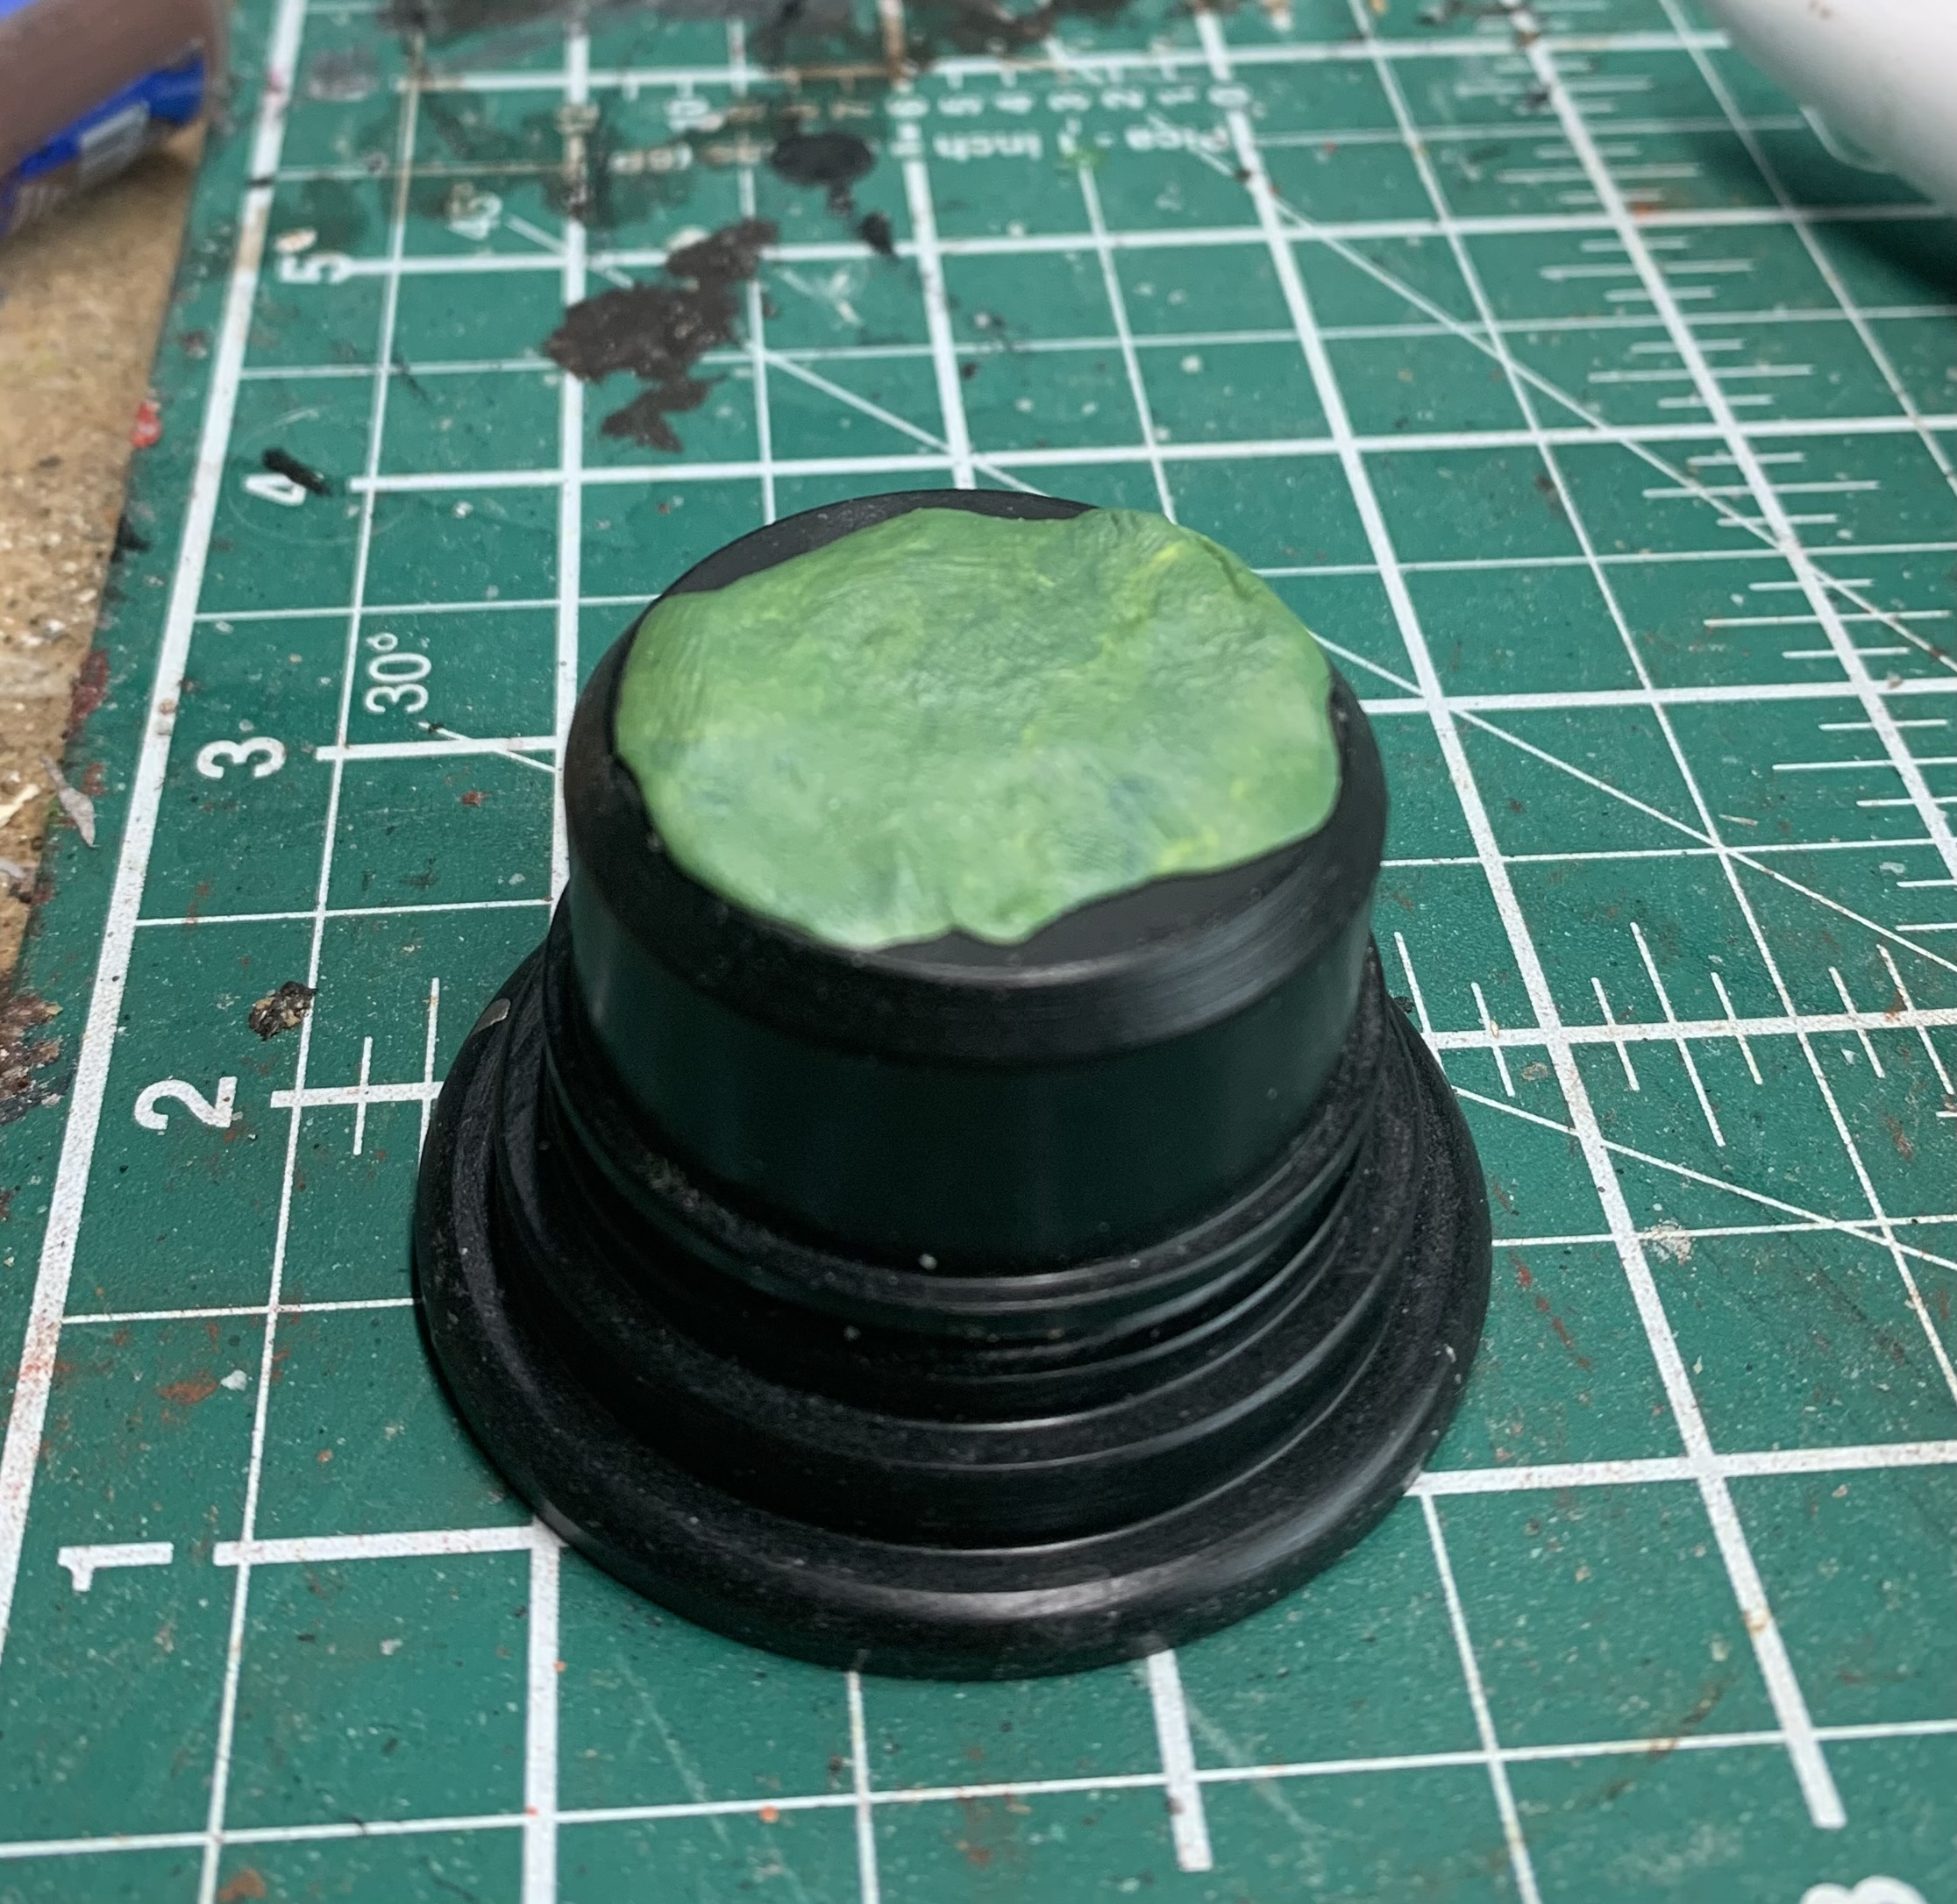
Once you’ve found your plinth, you need to consider the setting you want to create. I’m going with quite a natural setting – I want my mini to be standing on top of a big rock out in the wilds somewhere, so I don’t want a flat floor. To that end, I took some leftover Green Stuff and just pressed it down to give me some variation. Subtle dips and peaks are your friend here – if you go too mad with lumps and bumps, it will be harder to work on, but it all depends on the look you’re trying to create. And you can also use plastic putty, miliput or even clay to do this. Whatever works for you. I also pressed the rock I want to use into this so that it will be easier to glue that down once the Green Stuff has cured.
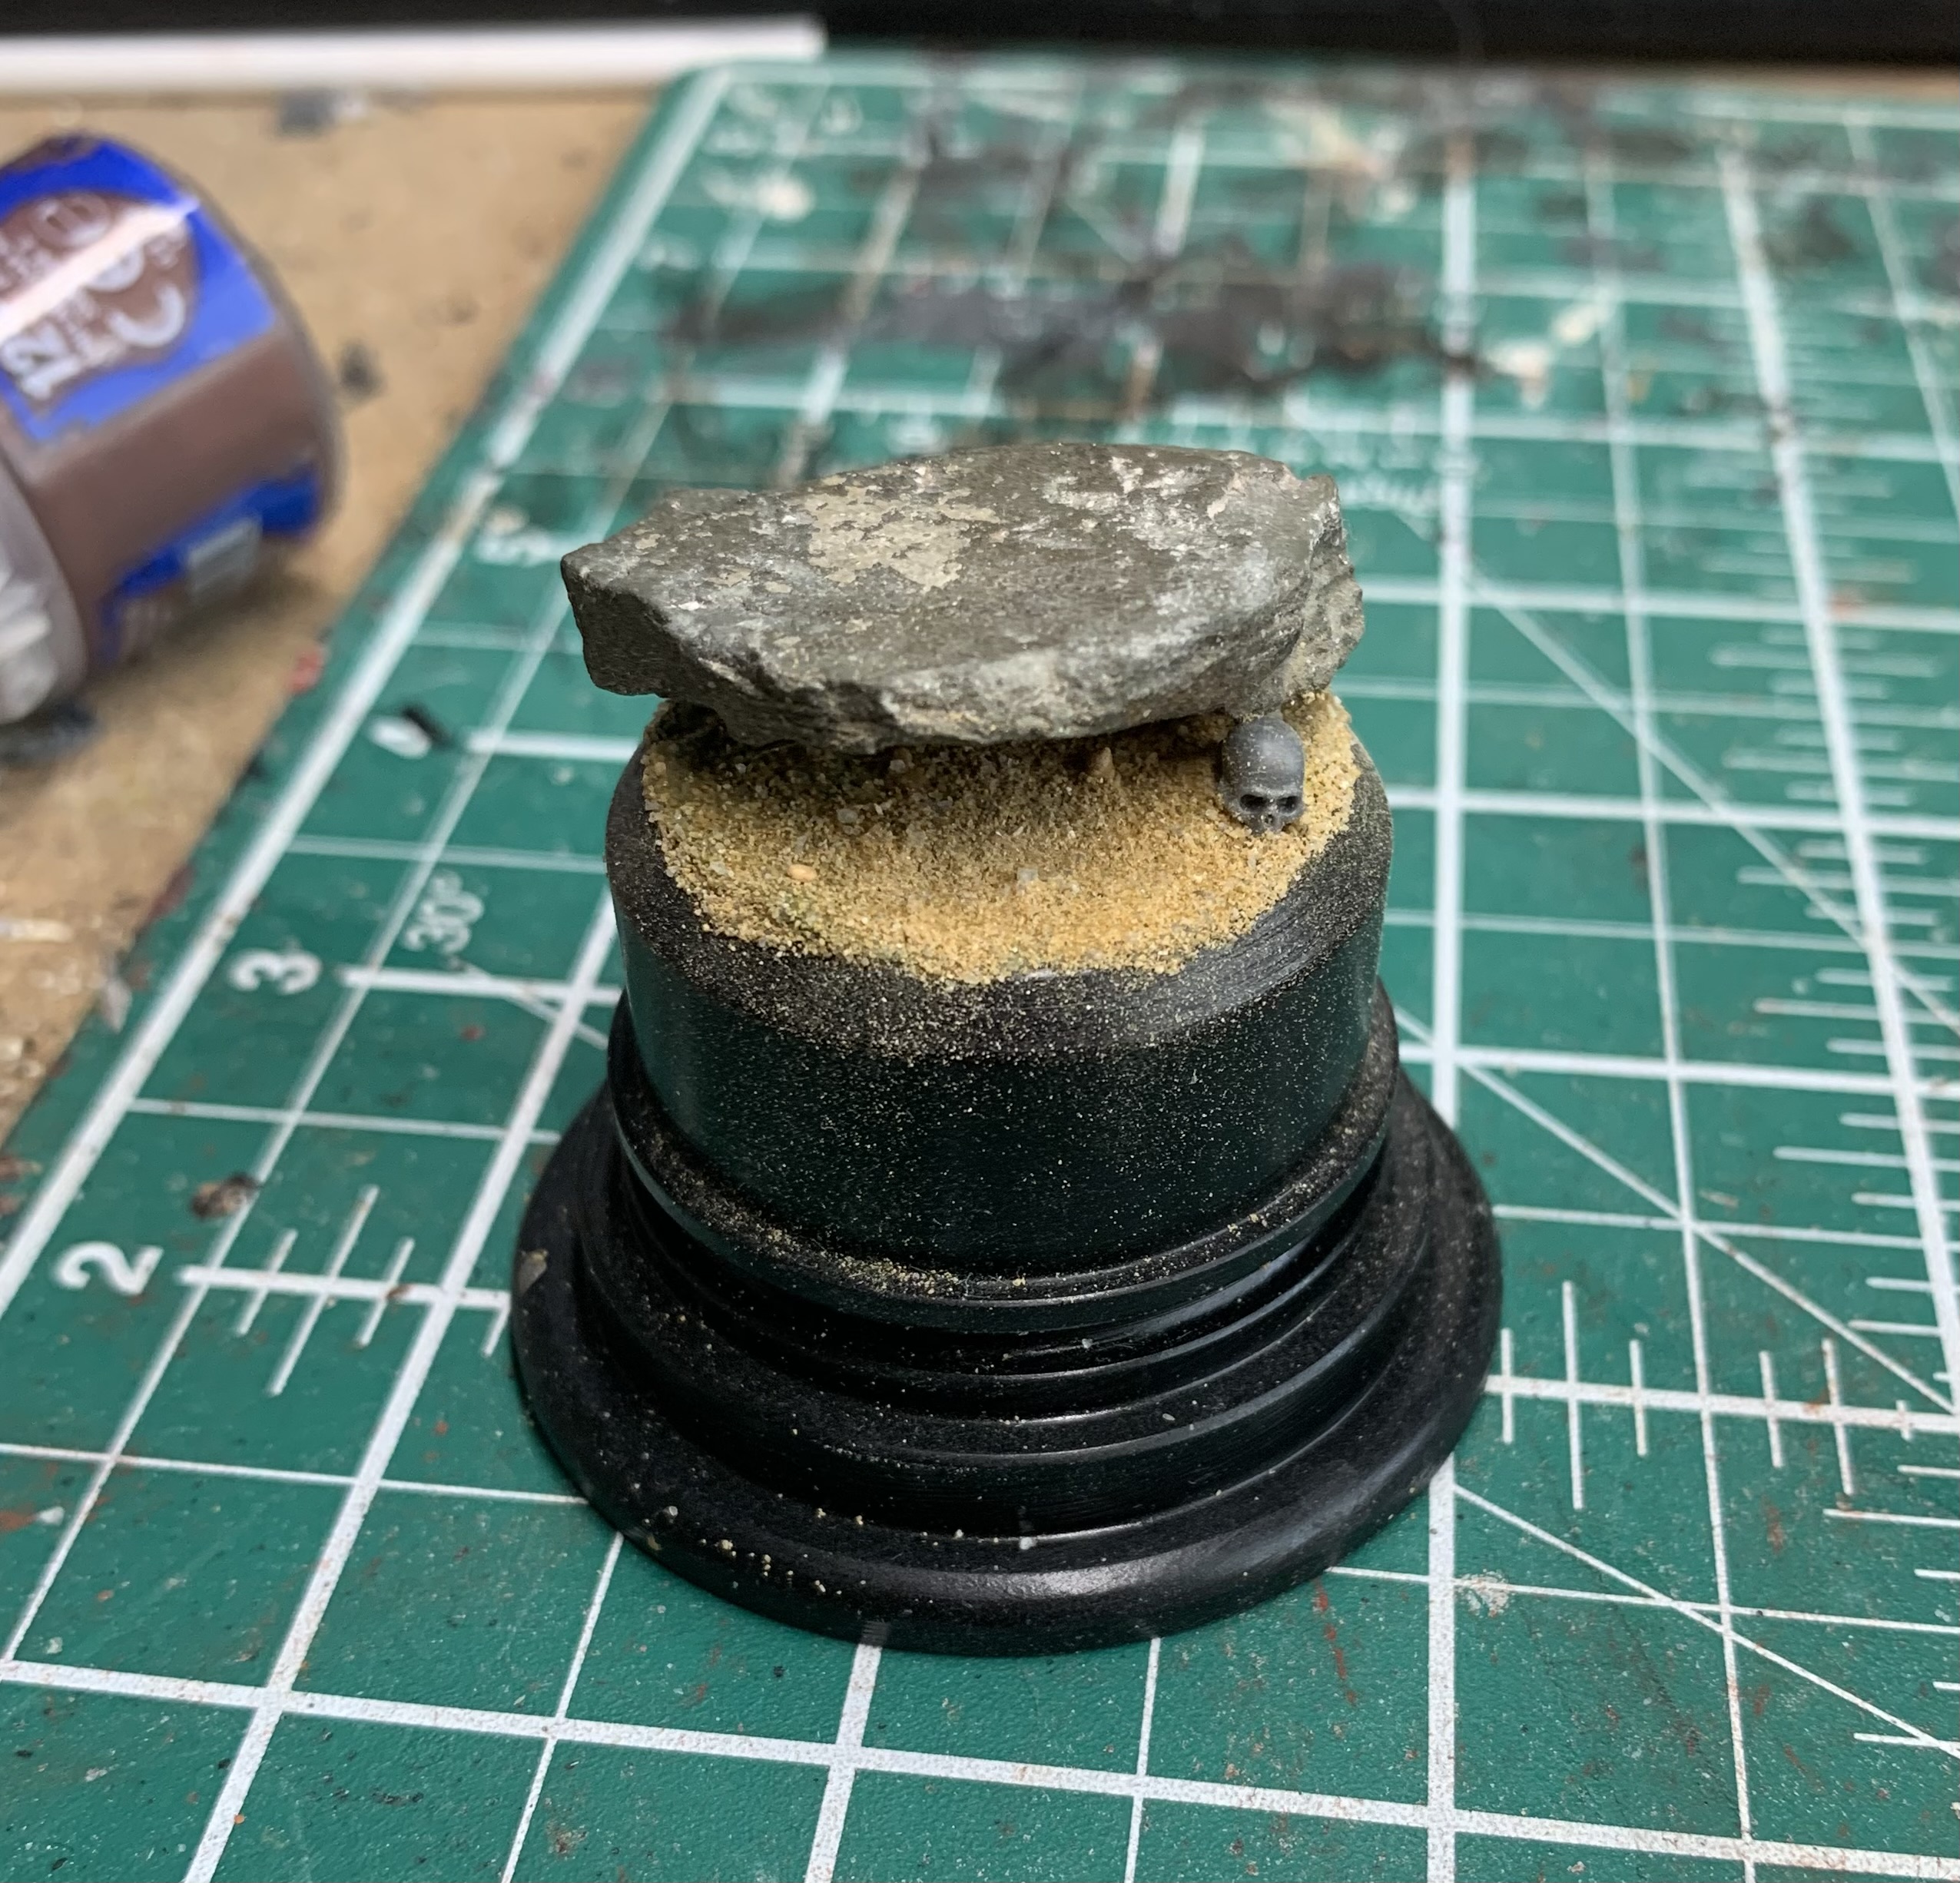
So, there’s my rock (glued down with plenty of superglue), and notice that it has a nice flat top for the miniature to stand on. It’s definitely worth thinking about how your mini is going to stand on the base you create – nothing worse than a floating foot! And you’ll notice I’ve also put in a trusty skull. Now, if you’re adding a skull onto your base, you need to consider the skull itself. Is it an old skull, or a new one? If it’s old (like I want the one above to be), you want it to be part of the setting, so I want this to sit below the sand I’m going to use, and I’ll be painting it to look old. But maybe your skull was just used in a sacrifice or a ritual – then you’d want it to sit above the sand, and be painted to look newer.
And there’s the sand. I’ve got a big tub of mixed sized grains and this was affixed using some watered down PVA glue. I sprinkled the sand on, and that means, and this is an important bit, we have to clean the sand off the areas where there should be no sand…
There we go, all cleaned up. Sand gets everywhere though, so be sure to give it a thorough clean. It’s also worth saying, that if you want some more stones on this, you want those to be superglued down before putting the sand on. I don’t because I want this to be really simple, but if you do, it’s rocks first, then sand. You’ll have to clean those too – make up brushes are great for cleaning sand by the way.
So it’s time to get painting, and I’ve started off with a base of the ever-reliable Chaos Black. You can use whatever colour you want, but I like CB as it does two jobs for me here – bases the model, and paints the plinth for me at the same time. Now, in order to not rub off any of that Chaos Black, I put a few dots of superglue onto the underside of one of the old painting handles from GW and fixed it on there. It snaps off super easy when the glue goes brittle and it means my grubby mits won’t spoil that nice matt finish.
That’s a lot of grey, right! I thought about doing a painting tutorial for these steps but they’re super simple, and the pictures would be bloody boring so I decided to skip that. Grey gives me a nice neutral base to work from so between Eshin Grey, Dawnstone, Administratum Grey, and Celestra Grey (with a little Agrax to help define some shadows), applied delicately, and with plenty of thinning down, I got my rock and floor all sorted out. You should be able to work out how all of that is done, but if you need a hand, let me know in the comments – I’ll be happy to walk you through it.
I bloody love Contrast Paints. I use them as glazes really, and in the above picture, you can see the rock has been covered in a thinned down Aggaros Dunes, and the floor has been covered in a thinned down Militarum Green. In both instances, I used about a 3:1 mix of Contrast Medium to Contrast Paint. It’s starting to look a little more natural now…
And now we have a skull. I do like skulls. To paint old looking skulls like these, I start with a base of Rhinox Hide and work up in diminishing thin layers to Ushabti Bone, and there’s a glaze of Seraphim Sepia over the top for good measure too. We do this now, because we’re going to add some colour, and we want that old skull to be a part of the terrain, so it needs a little bit of that colour too.
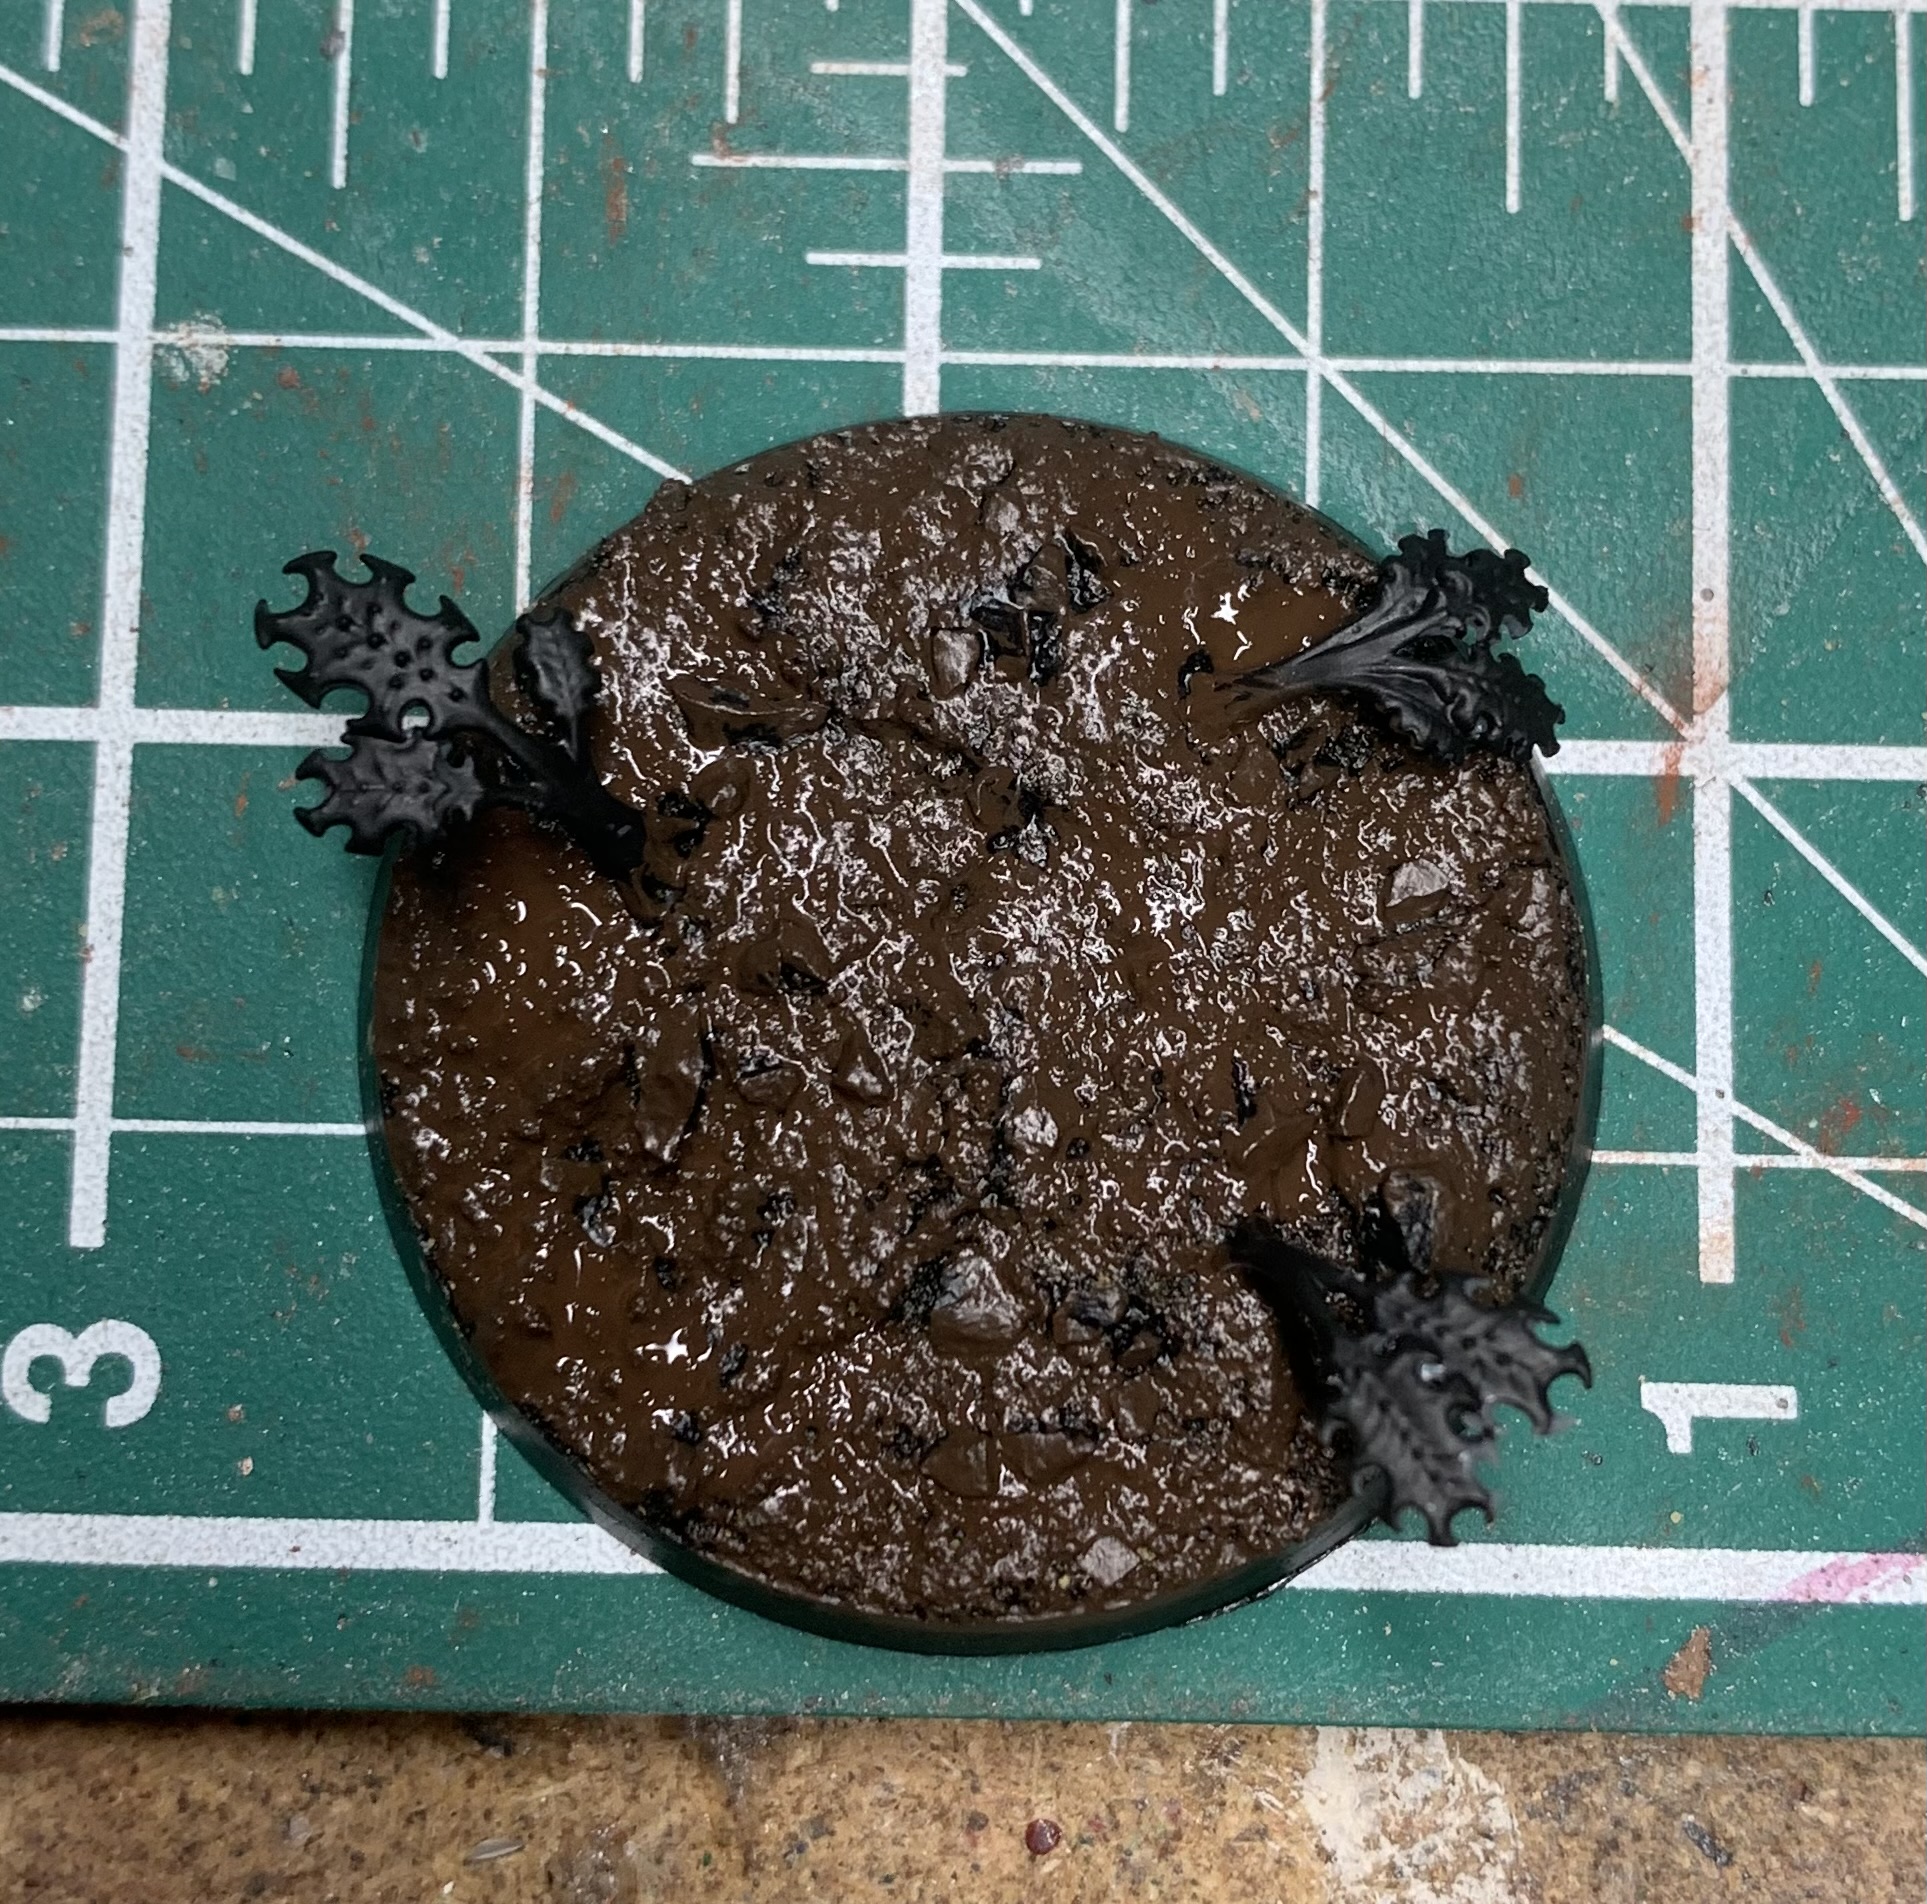
Using some thinned Athonian Camoshade, and some thinned Militarum Green, I’ve added some greenery to our base. Maybe this is on a cavern floor and moss, or mould has stained everything green. I also got some of this on the skull, but more significantly, this was used in rough, uneven patches across the floor and the rock.
I felt it needed some foliage, but if this is in a cavern, there won’t be much plant-life. So I soaked a ruined old paint brush down to the ferule in Darkoath Flesh and set that aside to dry. When it was dry, I mixed a little XV-88 into some more Darkoath Flesh, and highlighted the tips, before cutting the bristles off with my craft knife, and using a little PVA glue to fix it behind the skull there. All that’s left, is to clean up the lip of the plinth with some thinned Abaddon Black, and we’re all done!
It feels odd taking a picture of a plinth without a mini on it, but hopefully that shows you a simple way to create a nice looking display plinth for any of the models you’re particularly proud of. And this really is only scratching the surface of what you can do. As I said, there are those out there far better than me, but I hope this has given you a fun place to start, and a few ideas to be getting on with. Now I need to find a mini to put on the top of this! Onwards.
The hobby can be a weird place sometimes. And it gets in you brain, right? You see things that no-one else sees in the world because your head is full of paints and brushes and basing materials. You look at a twig like it could be a tree, or a rock like it could be a piece of crumbling rubble… and then there’s aubergine with black truffle. Right…?
Ok, some context would help. I was doom-scrolling through Instagram a few nights ago, and an advert caught my eye. Here it is:
Now, to most people, this would appear to be someone shaving black truffle on a piece of Aubergine covered in some sort of sauce, with sesame seeds, and whatever that green stuff is – is it cress, or a herb maybe? But did I see that? No. No, because my brain was in hobby mode, the black of the aubergine looked like a base rim at a fleeting glance and so my brain tells me that this is a display base someone’s working on. I also thought it looked quite cool – vibrant and wild, but realistic in a strange way too. Then I realised I was looking at an ad for a restaurant that I almost certainly won’t be eating at and I realised I needed a rest.
I put this onto my twitter and lots of people could at least see what I was getting at. I wasn’t totally in outer space with my thinking – it could be a base. So, well, despite having quite a lot on at the moment, I’ve written a step-by-step guide to help you create your own Truffled Aubergine base. Because that’s what I do, dammit.
I didn’t take any pictures of the base when it was just undercoated so I’ll tell you how I did it. I put down a relatively thick and uneven base of Armageddon Dunes, which I then sprinkled with some very small stones, before pushing in some of the smaller Barbed Bracken pieces. Easy. In hindsight, I’d have used a little super glue on those bits of barbed bracken to help steady them a bit, but you don’t need to if you’re prepared to be delicate with them. Then I undercoated the whole thing with black paint, and that leads us to…
Step 1: Rhinox Hide – just cover the whole base in it. Doesn’t matter if there’s a little black left showing here and there though.
Step 2: Rhinox Hide/Skrag Brown (1:1) mix -Hit about 75-80% of the base with this mixture.
Step 3: Skrag Brown – Focus more on the centre and the areas where you put down the mix in step 2, and hit a little less again – make sure you can see all the shades coming through. You can work on this while the last stage is still drying too.
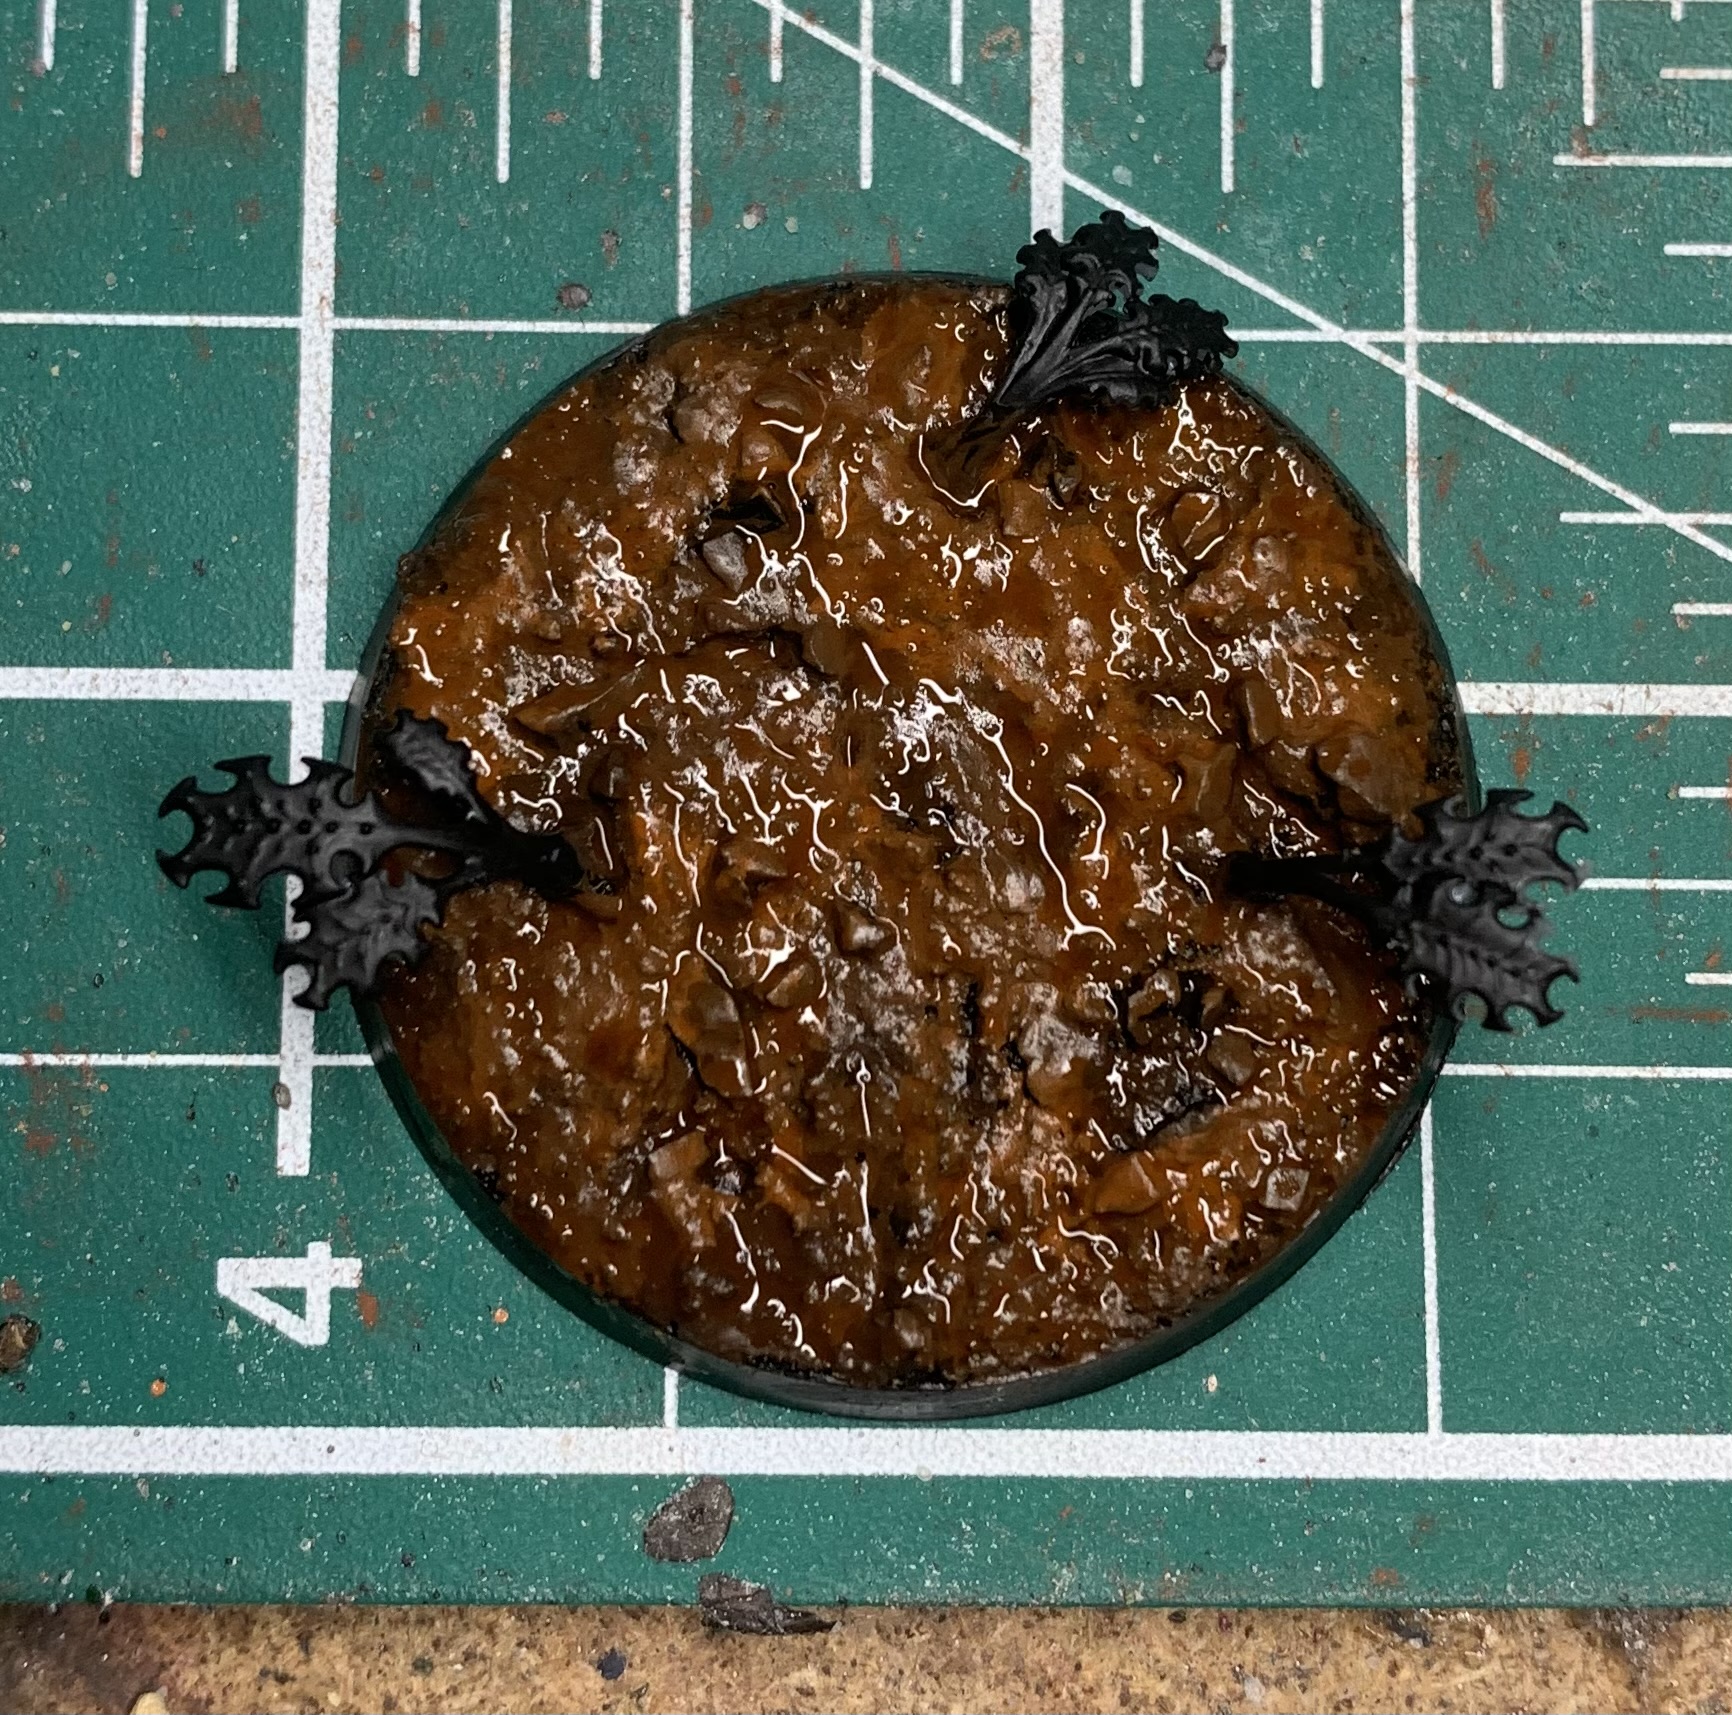
Step 4: Fuegan Orange – Once all the previous paints are dry, put down a layer of Fuegan Orange. I could have gone with a slightly thinned Gryph-hound Orange here to make it more orangey, but I like the subtleness that the shade gives me.
Step 5: Skrag Brown/Firedragon Bright (1:1) mix – hit some of the most raised areas with this mix. It’s fine that the shade is still drying in the recesses – you should just be dotting this around the higher up bits anyway in a non-uniform sort of way.
Step 6: Ungor Flesh – Time to pick out the little rocks we drizzled over the top of the base while the Armageddon Dunes was drying – these are our Sesame Seeds! One or two layers being careful not to get any onto the dirt.
Step 7: Feugan Orange – You could use Seraphim Sepia here if you wanted them a bit muddier, but it’s that dark orange look in the original image that led me down this route. Let that dry and more onto…
Step 8: Ungor Flesh (again) – just pick out the bulk of the Sesame Seeds with Ungor Flesh leaving the lower parts and any recesses still with the wash on them.
Step 9: Ungor Flesh/White Scar (1:1) mix – just hit the tips of these little stones with this to help make ’em pop! Now, onto those leaves…
Step 10: Dorn Yellow – Start off by putting down a couple of layers of Dorn Yellow as a base. Be gentle with these if you didn’t use glue – they’re a bit bendy and fragile.
Step 11: Athonian Camoshade – Hit these with some shade and you don’t want it to pool too much, but it’s not big drama if it does.
Step 12: Dorn Yellow – Just pick out the stems with some of the original base paint here.
Step 13: Dorn Yellow/White Scar (1:1) Mix – hit the stems again, just lifting those tones a little. Apparently this caused my camera to lose focus but that’s not something new on this blog!
Step 14: Dorn Yellow/Moot Green (1:1) mix – hit the lower areas of the leaves with a couple of thin coats of this paint. Don’t worry about losing detail in the centre of the leaves here – we’ll come back to that.
Step 15: Moot Green – the rest of the leaves get a nice coat or two of Moot green to make them a little more appetising.
Step 16: Athonian Camoshade – A little of this shade down the middle of the plant and our greenery is done!
Step 17 – The Truffle – So, there’s no easy way to do this really, unless, like me, you happen to have a collection of tiny leaves made from real leaves that were collected a couple of autumns ago before being baked and pushed through a fine mesh. But you could use pencil shavings, old herbs… something that looks like dead foliage. Just put down some watered down pva glue in patches and sprinkle this on. If you’re feeling very rich, you could use real truffle!
The PVA will dry a little glossy, but that works for random wet patches on the forest floor. If you don’t like this though, you could always go over it with a little matt varnish.
Step 18: Abaddon Black – The final touch, the Aubergine itself. Just hit the base rim with Abaddon Black, and you’re done!
I quite like it! It definitely has a very “forest floor” look to it, and there’s a bit of alien forest to it as well, thanks to the Barbed Bracken. I think I could have gone a bit more orange with it – made those tones a bit more vibrant to fit the image on the ad, but I’m happy enough with where I got to. This is what’s great about seeing the world through hobby eyes every now and again – it takes you down weird little journeys like this and what you find at the end can be pretty decent if you set your mind and brushes to it. Is it a perfect representation? No. But if anyone ever remarks on this base, I’ll tell them that it was based entirely on an ad for Truffled Aubergine. I guess it’s a case of compliments really going to the chef!
Until the next time my brain makes me do weird stuff like this again, have a fun time with your paints and toy soldiers. Onwards!
In the days of pre-sculpted bases and texture paints (both of which are awesome by the way – those Necromunda bases…), the art of basing can sometimes feel a little lost. Basing has never been the sexiest bit of the hobby, but it’s a skill that isn’t just worth learning, but one that can make your miniatures special to both you as the painter, and to those looking at it. A base helps to place your miniature in its world or its universe, and it’s something that’s worth taking the time to learn and enjoy. I promise you, sometimes, the base, whether you’re army painting or competition painting, can be the most fun part of a miniature. Here are 9 tips and tricks from me, to help you get the most from your basing.
Stealing stones from a pub planter
That stone came from a pub on the north side of Hyde Park in London
We all have a limited amount of funds, and frankly, actually spending money on basing material is a bit much when you HAVE TO spend money on the actual cool miniature itself. But what if I told you half of the materials in my basing materials collection were either free, or cut price? A lot of miniatures companies, large and small, like to deploy the “we saw you coming” technique, and I can’t blame them, but I can undercut them by telling you that so much stuff that you think costs money really doesn’t. The title of this section comes from the days before lockdown when I would go to the pub and they would often have slate filled planters in the garden. Slate is a great material, especially for characters, but it’s not the only freebie. If the gardener of the family is weeding or getting rid of plants, take what they want to throw out, dry it, and use the roots as small saplings or trees, even roots! If you’ve got a couple of quid, go to your local pet store and buy some fish gravel and budgie sand – you can get kilos of it for next to nothing and it will last even the most prolific army painter years. There’s treasure everywhere, Hobbes, and if I had a penny for all the mornings I’ve woken up to find my coat pockets stuffed with stones, bark, corks… I’d have £1.35!
Use a different shade that scares you
Carroburg Crimson was used across the base of this dreadnought
Rocks aren’t grey. One of the easiest basing methods is to put down some sand (as mentioned above,Budgie sand’s great if you’re feeling frugal) or texture paint, base paint it, shade it black (or with Agrax if you feel fancy) and then highlight it. Well, how about you use something different to a dark or muddy-looking wash? How about using Carroburg Crimson? Or Drakenhoff Night? Or an orange wash, or a green wash, or… well, anything other than black/brown? This can be a great way to frame your minis. If you’re doing Ultramarines, why not do a red-tinted base to make that blue pop more? if you’re doing Black Legion, any colour will help add uniformity and interest to your army while also framing those darker toy soldiers. If you’re starting a new army, have fun and do something different. It will help to put your army in a unique setting of your own design, make it recognisable, and allow the character to punch through.
Tufts are not the only organic
I guess Nurglings are kind of organic too, right?
Tufts, be they Citadel tufts or from any other company, are really fun ways of adding an organic touch to your bases, but they’re not the only trick up a hobbyists’ sleeve. Tiny amounts of greenstuff can help you create mushrooms, toadstools, and (what I call) spore puffs – just little spherical things that might be full of fungal spores. Or take some autumn leaves, or coloured paper and buy a leaf punch to help convey a forest setting when you add them to a base. What’s more, there a companies that make actual teeny-tiny flowers and bushes to use on your bases. With a little time, and a little money you can have your army tramping though a veritable Eden. if there was ever a way to bring your bases to life, this is it.
The simple pool and making it special
A lot of hobbyists think that to install a water feature on your mini, you have to invest loads in water effect products but really you don’t. Yes, those products are great, but I’ve made watery pools of life from glue, contrast paints and a gloss varnish. Ok, if you want a flowing river, yeah, you’ll need something that can do that unless you’re very good with greenstuff, but for a simple pool? No, all you need is a well in the base, a glue to fill it that leaves you with a flat surface when dry, and some colour. Contrast paints are great for this, and when you cover them in ‘ardcoat, you’ll get a small pond that can make characters stand out, and put your army in a verdant and life-giving realm or area. Or, depending on the colour you use, it can be a pool of blood, or bile, or lava… whatever you need and it takes no real effort or money to do.
That’s my glowing rock!
Ok, so it doesn’t always have to be the rock that’s glowing.
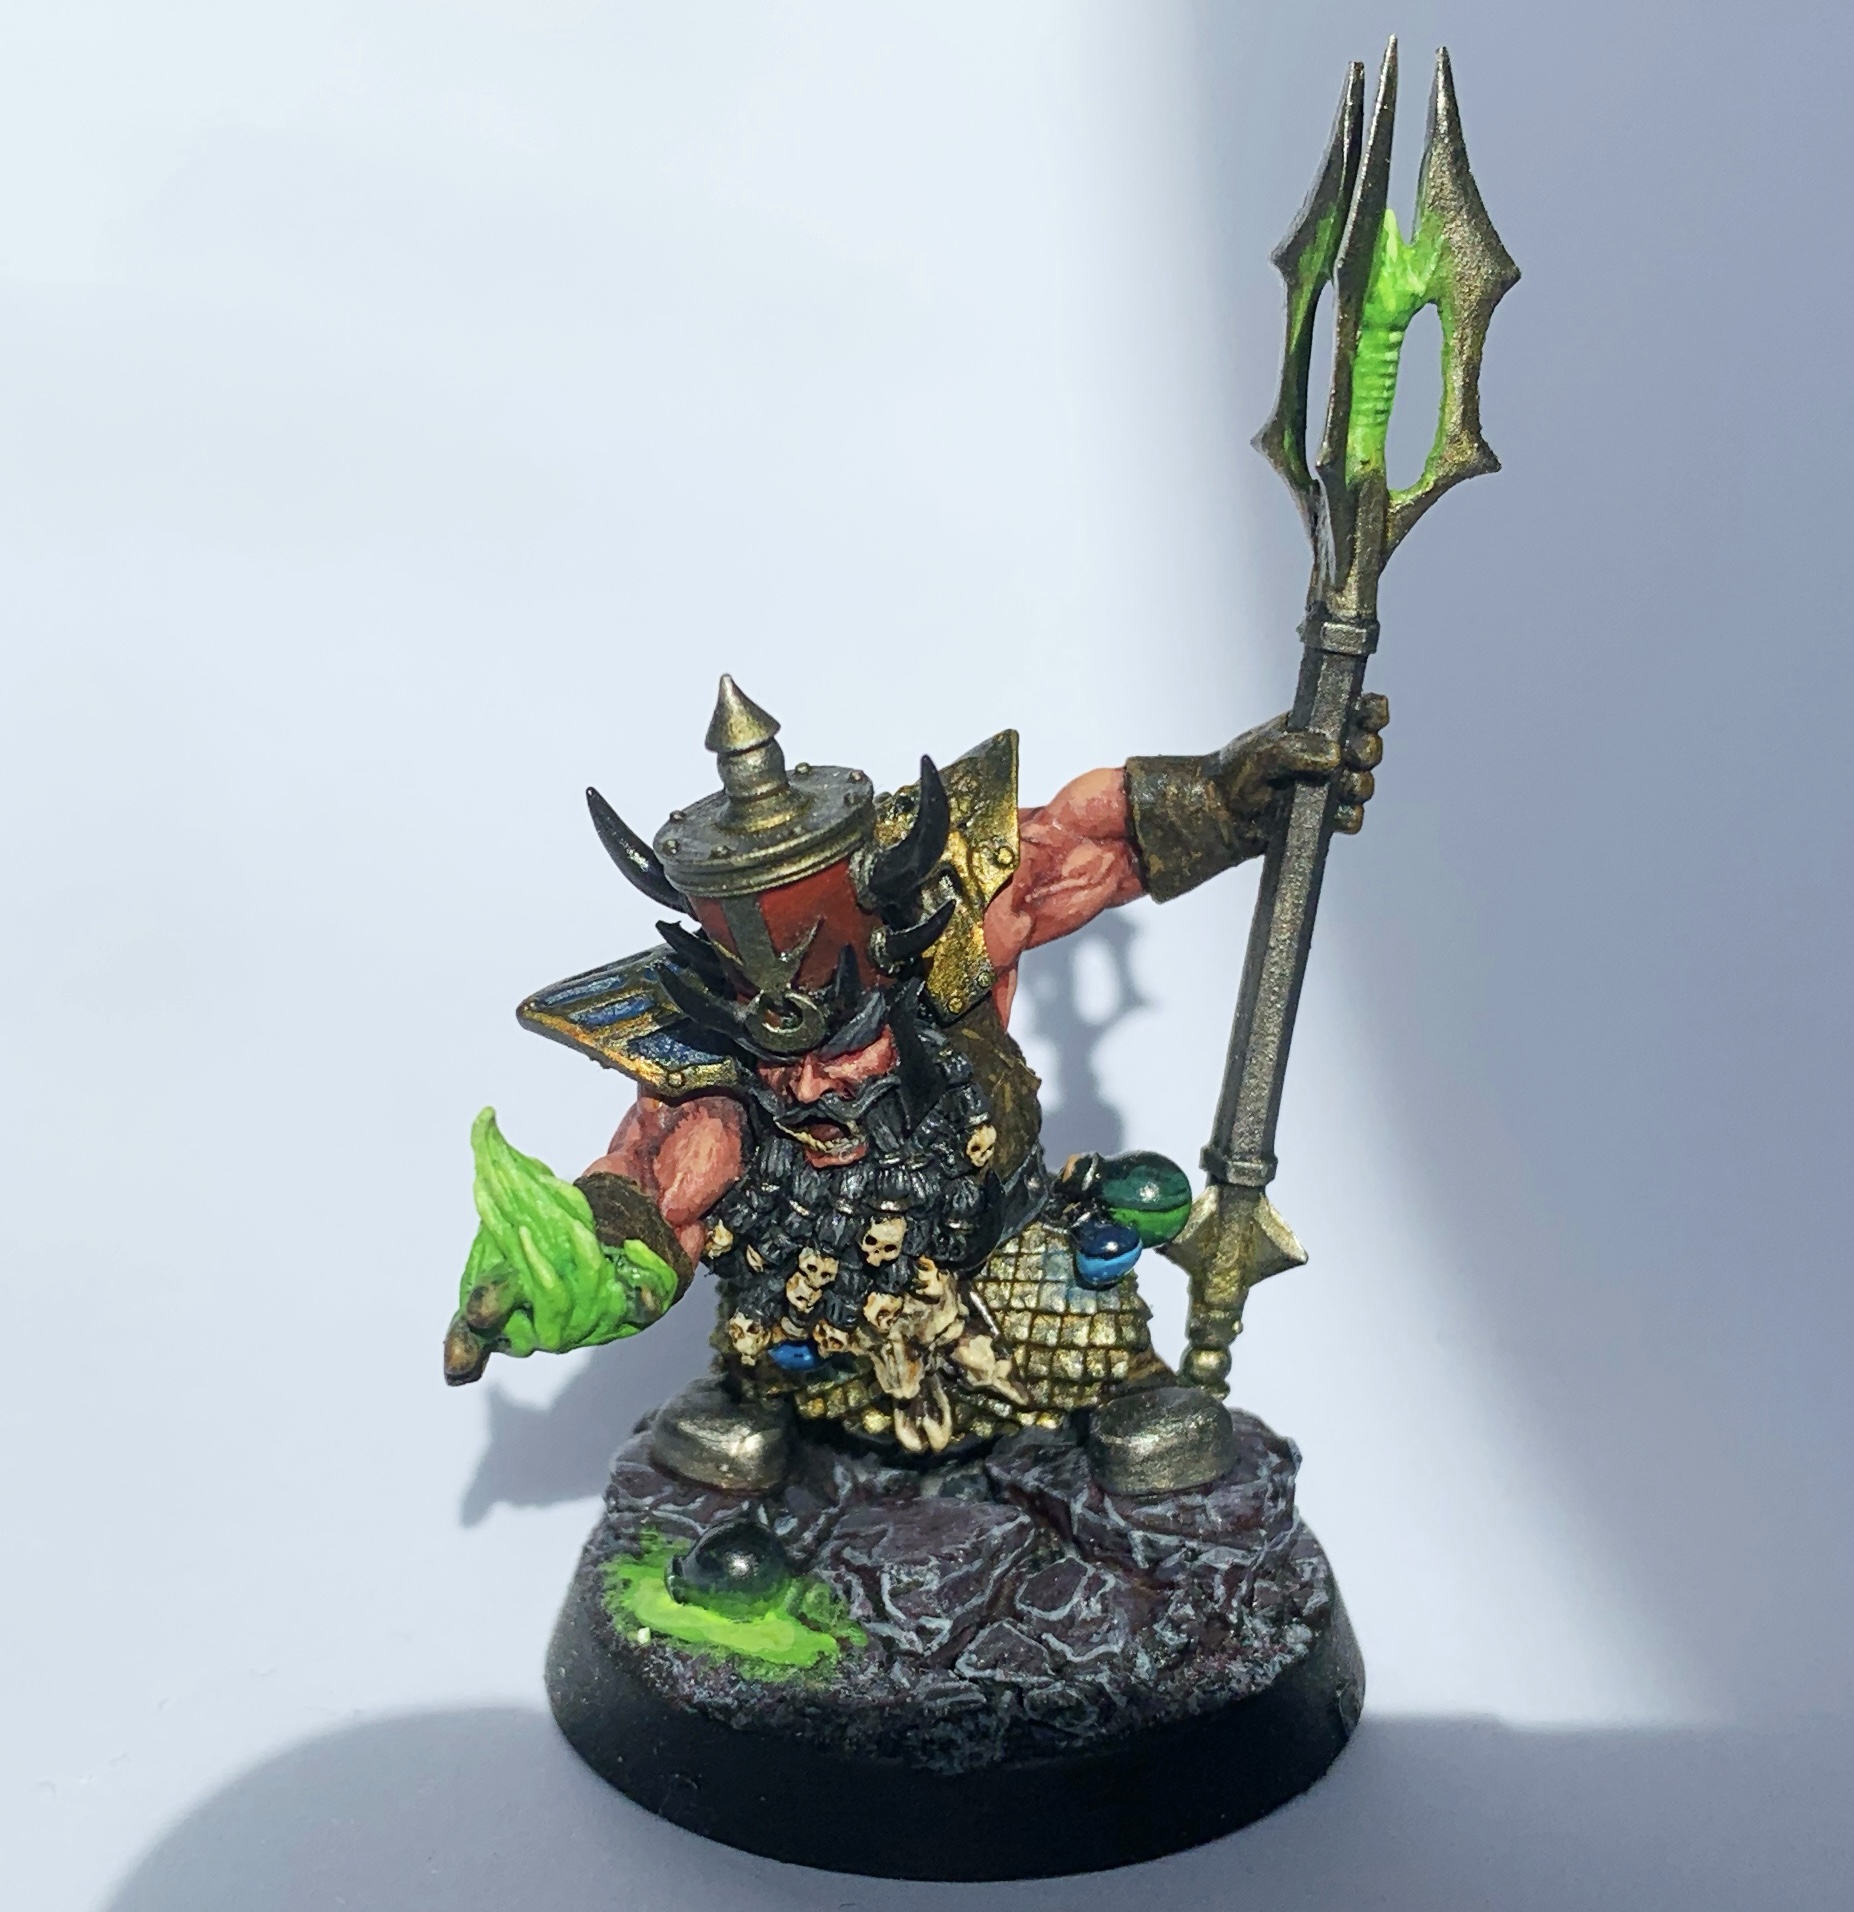
I remain of the opinion that OSL gets overused especially by those who don’t understand how light works. A small campfire spreads its orange light all over a Stormcast Eternal… who has been painted like he’s in daylight? Sorry, it looks naff. But, very subtle OSL used by anyone can make a detail on a mini’s base all important. That glowing orb, shining icon or, yes, that sickly green glowing rock can add a very simple detail to a base that just helps to make your army special and recognisable. You don’t have to go mad (it’s better that you don’t – straight jacket rental prices be crazy for a start), but maybe your general has the biggest glowing rock, or the most of them, and in your squads, only one or two appear. It’s easy to do, and makes things different to what everyone else is doing.
Debris and the player you hate/love
Poor Black Templar…
Most of us are not alone in this hobby. And most of us have substantial bits boxes, even when we’ve only worked on a single army. So how about theming your army, through basing, as a (playful) “screw you” to your best mate? When you’re both working on armies, do a bits exchange. Those heads and weapons that neither of you need, just slide them across the table to each other, and then incorporate those into your bases (or hell, even buy some bits if he or she is initially unwilling to supply you with trophies). Trust me, the Dark Angels player will be delightfully horrified by seeing the decapitated helm of a Ravenwing biker at the feet of your champion. The discarded T’au pulse rifles strewn across the bases of your mob of Boyz… a wonderful way to make your army matter more both in your eyes, and in the eyes of your chief opponent.
The Importance of Elevation
Even ancient Dragons need a good vantage point
Not to sound like someone who looks down on others, but when you’re higher up, you just feel more important. And this works for miniatures as well. If you place your captains, chaplains, librarians and any other bosses on elevated base, it makes them stand out as more important in your army. It’s a trick that makes characters more characterful, and sets aside the minis you care about from the ones who are probably going to die to the echoes of your disinterested shrugs. You can achieve this for the cost of almost no money, either by using bits of cork board, or by using those stones you robbed from a pub garden planter back in the first tip (and the only reason it’s not listed as “no cost” is because I’m presuming you were at least decent enough to buy a pint before pilfering their planters). It’s one of the easiest tricks, it’s almost free, and it makes for a great looking hero.
Complimentary colours
Nothing like a blue base for a red dude
In the same way that “rocks aren’t grey”, it’s worth thinking more about the colours of your bases. Those martian paints always seem to work best when the army standing on them isn’t somewhere on the red spectrum. Dark minis look best on light bases, and visa versa. And this should flow through to anything else you’re adding to the base. Making some mushrooms for a red space marine? Don’t make them red. Adding some tufts to a green nurgly dude’s base? There are other natural colours than green? Use your basing to compliment, border and frame your miniatures to help them stand out from themselves and spark the imagination in yourself and others. Opposites attract!
Kinda dusty/dirty round here
It’s an easy and obvious trick to put in there but one that is one of the most successful at grounding your toy soldiers in the base you’ve built for them. Got an ash-covered base? The drybrush some grey going up the mini’s legs. Are they marching through a muddy plain? Drybrush some brown onto his or her lower legs. it really is one of the best uses of drybrushing and it’s easy, but it kind of gets overlooked when talking about the most effective ways of making your toy soldiers part of the world you’ve placed them in. Simple as anything, it can make the biggest of differences, so, if you want your basing to do the most for your minis, make sure you do it!
=][=
So there you have it. If you knew all of these, then well done, but I hope you at least got some insight from this post. Basing can be so much fun and with a little know-how and not much money, you can transform your miniatures. And I got to show you a few of my minis that I haven’t shared here for a while. Anyway, I hope this gave you some ideas, and until the next time, dear readers, Onwards!
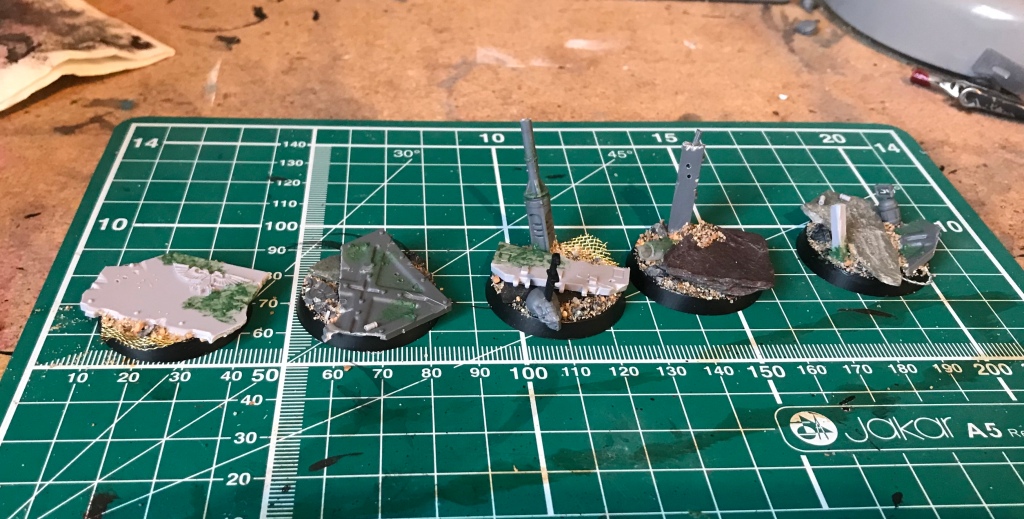
After the flurry of activity last week, I’ve been taking it a bit easy of late. Well, not really – I’ve been buzzing around like a blue-arsed fly as the popular phraseology would have it, but not much of that activity has been focussed on my painting. But last night I found just a scrap of time to put some things together and so I can bring you an update today, featuring first, a look at the next project.
When I took my BA Vet squad to Nottingham for the Horus Heresy & Necromunda Weekender Golden Demon, they earned me a pin, which I am still absolutely thrilled with. And, as mentioned before, when I picked them up after the event, I asked one of the judge chaps there about what could help turn them from a 4th place entry to a 3rd place entry or better. He told me to put as much effort as I had put into that 10 man squad into a five man squad instead. So that’s what I’m doing.
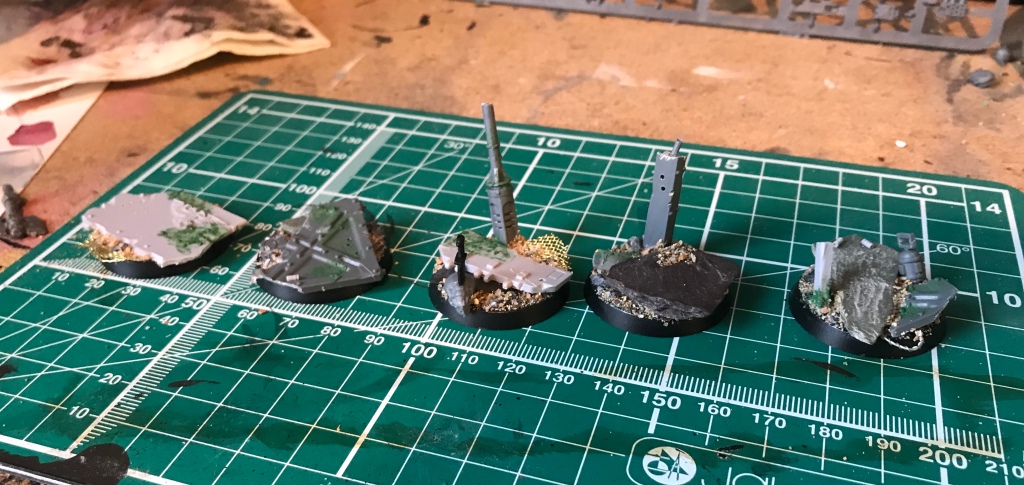
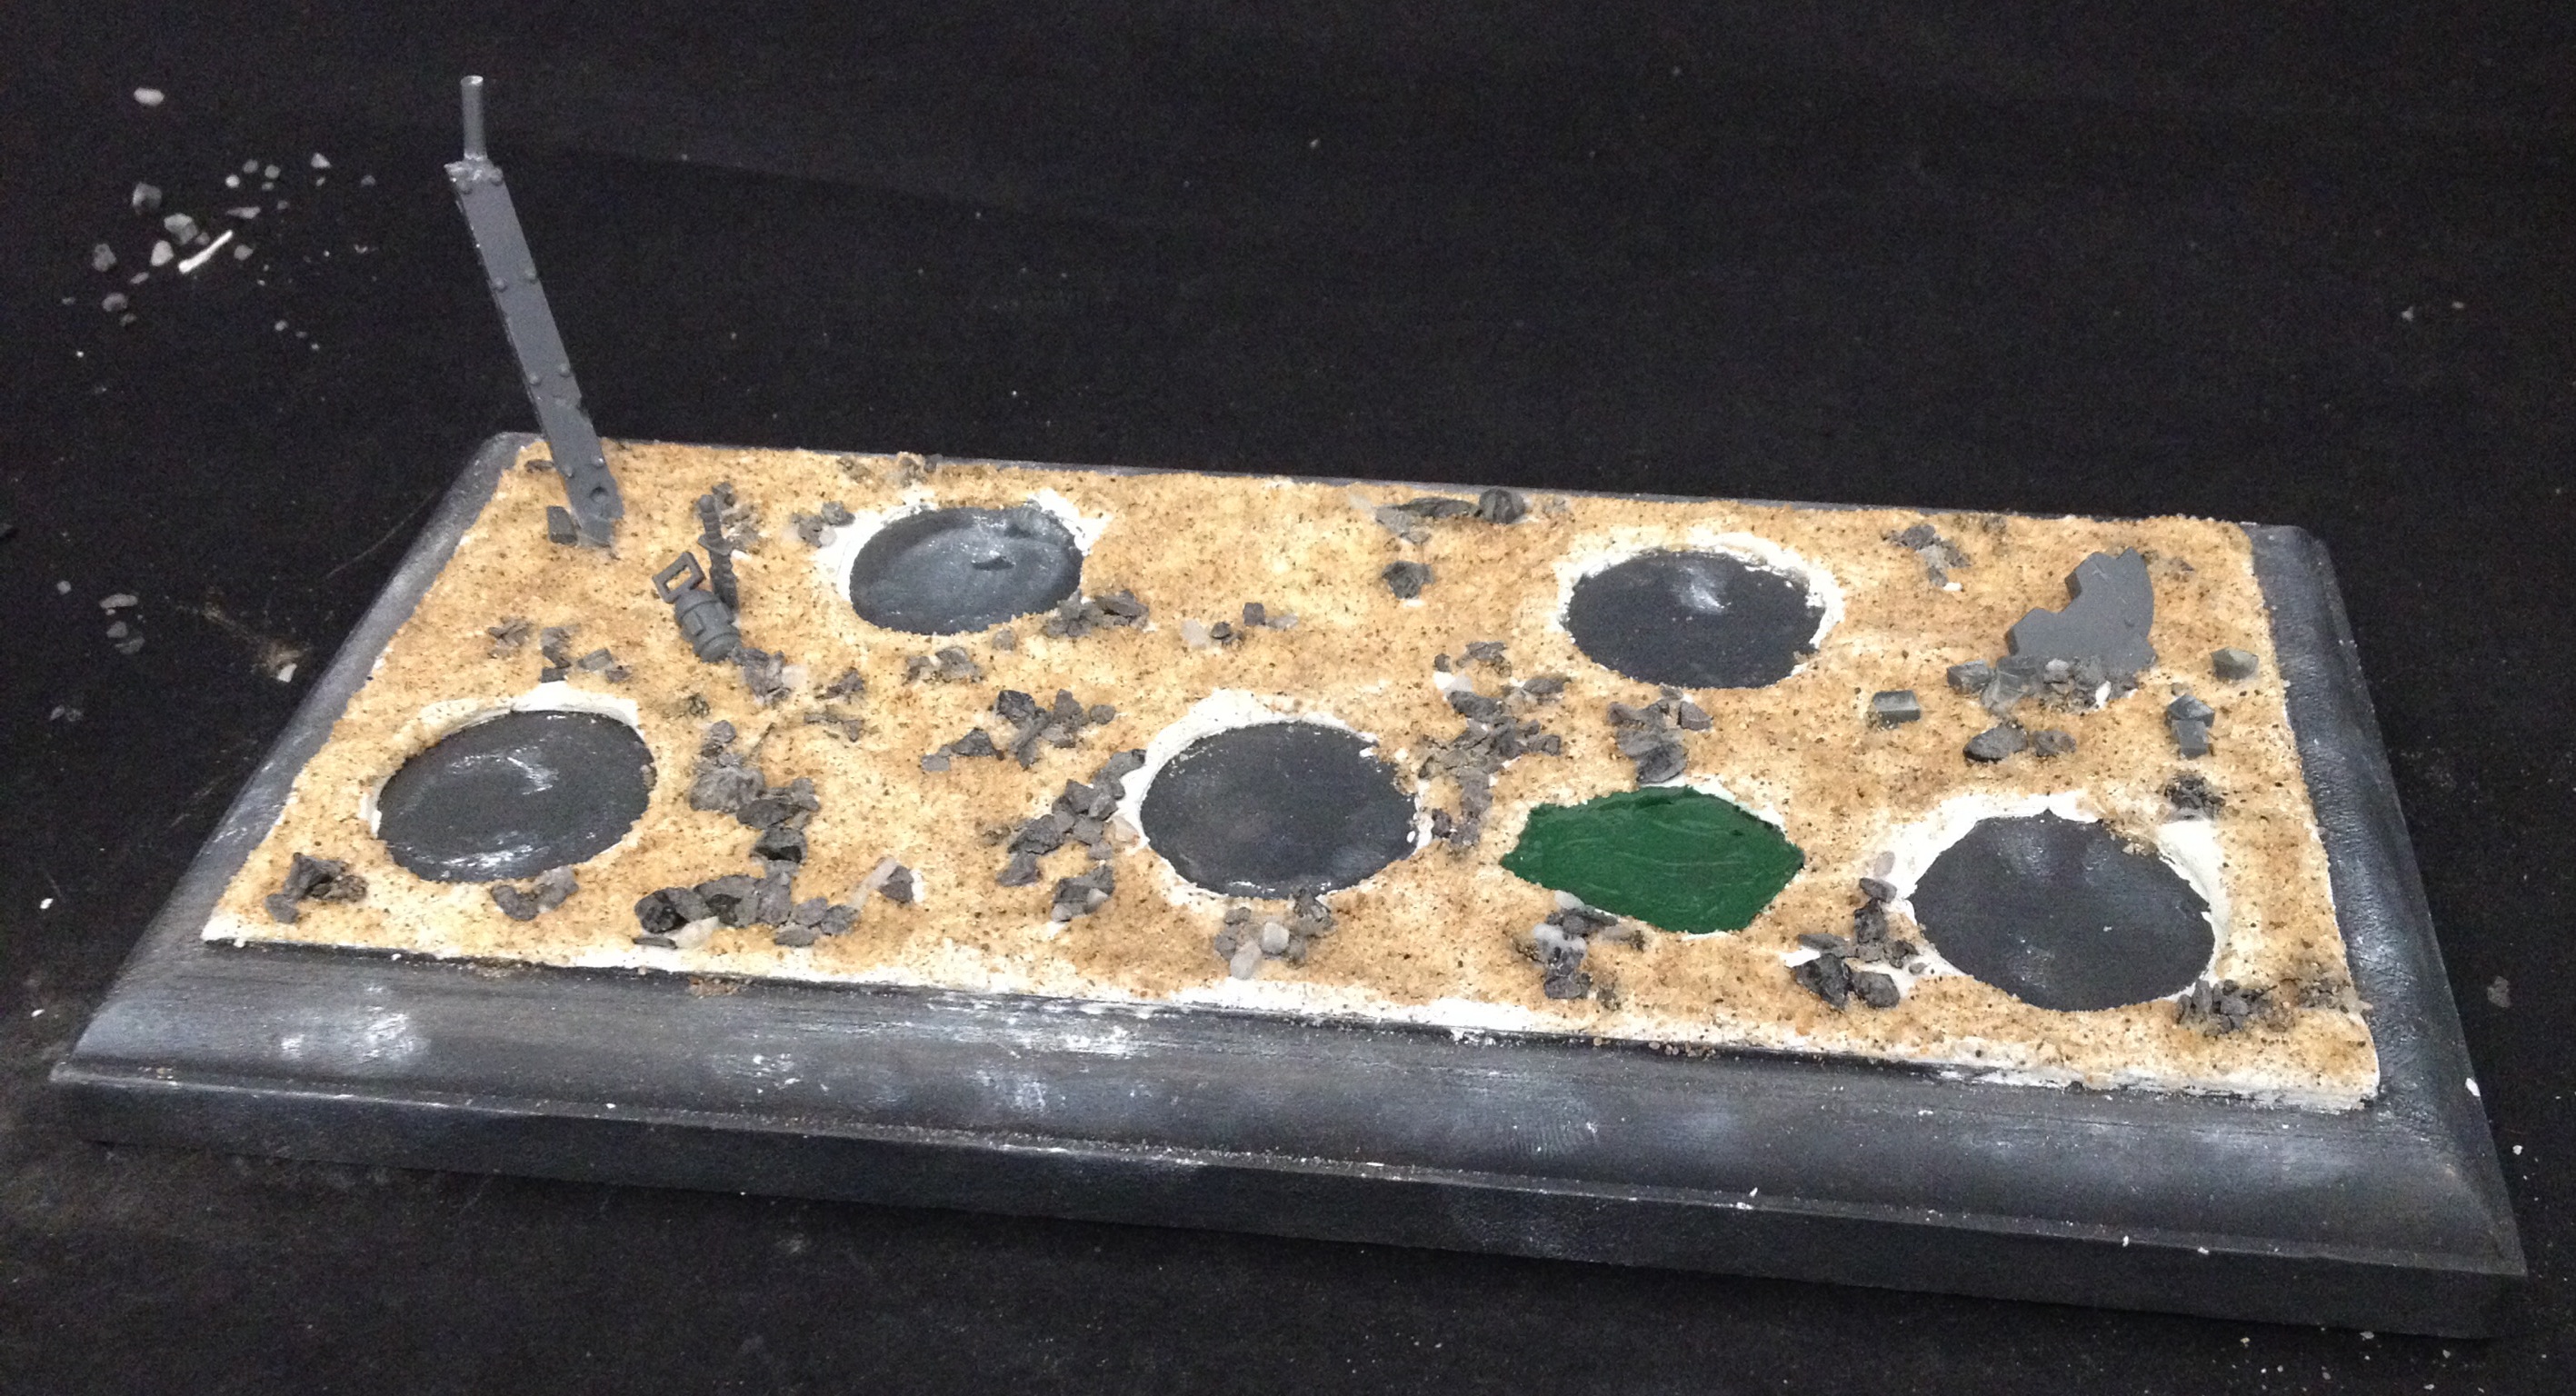
Now admittedly, this isn’t much to look at. Yet. I’ve put together the five bases I’m going to be using for this project, and it was plenty of fun hacking up my bits box to create these post-apocalyptic micro-scenes that will function as the setting for my five man squad.
I’m going to be doing Blood Angels again, but this time around, they will be from the 41st Millennium. The captivating tales of sons of Sanguinius and their desperate defence of Baal against the Tyranids have inspired me, and these are essentially going to be a red version of the Tyrranic Wars veterans of the Ultramarines. These guys are going to be battered, mismatched and looking desperate, yet defiant.
But for now, you’ll have to settle for these pictures of some bases. Work begins again on this project this evening, and hopefully soon, I’ll have more interesting things to show you. Preferably something red. I’m hoping that the theme will also help me out here, though of course the primary focus is going to be on the painting side, and I need to switch gears from clean to dirty yet again.
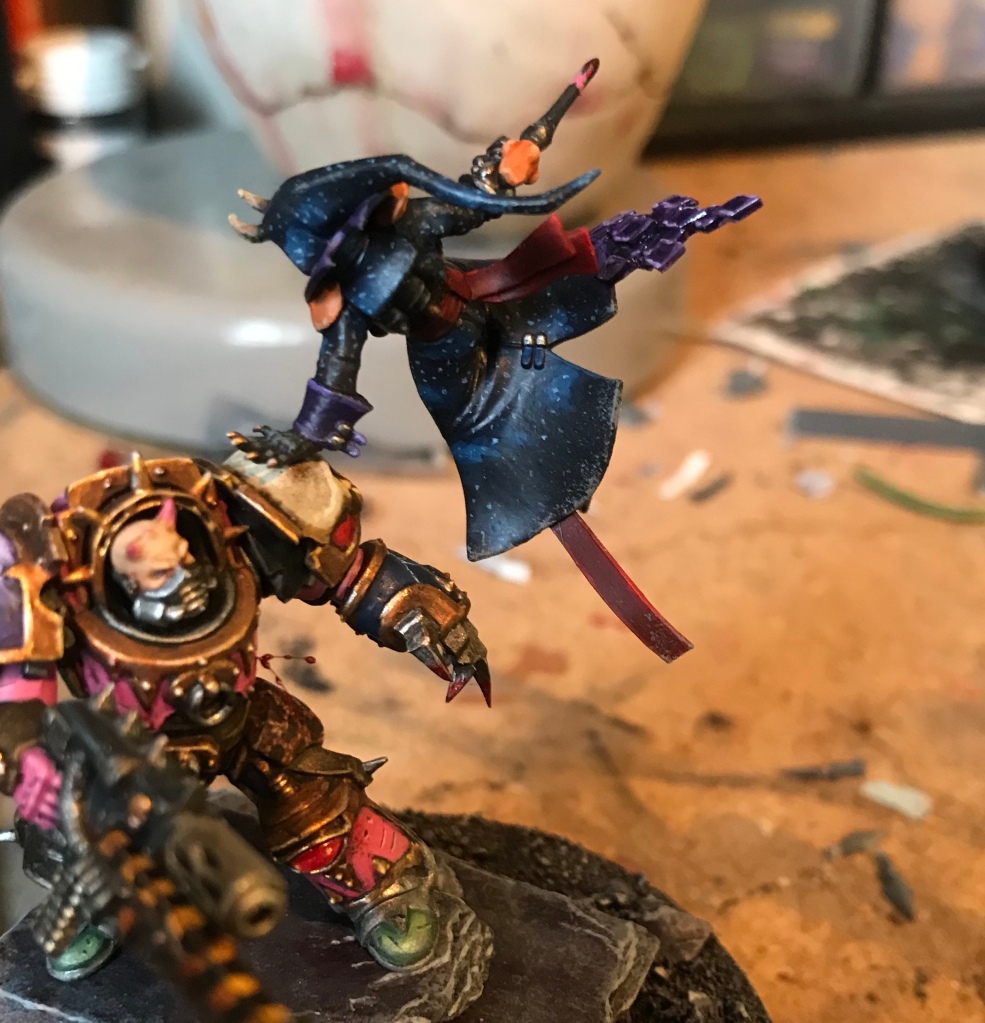
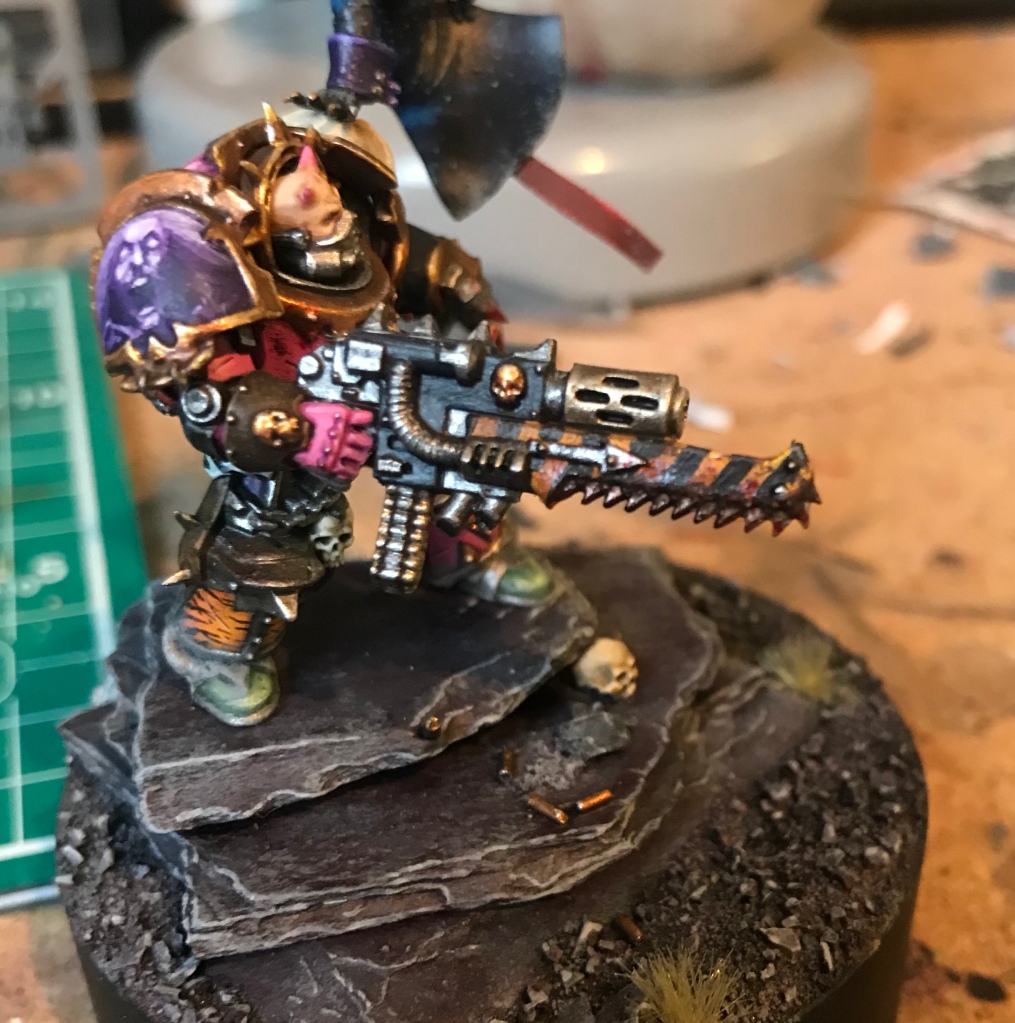
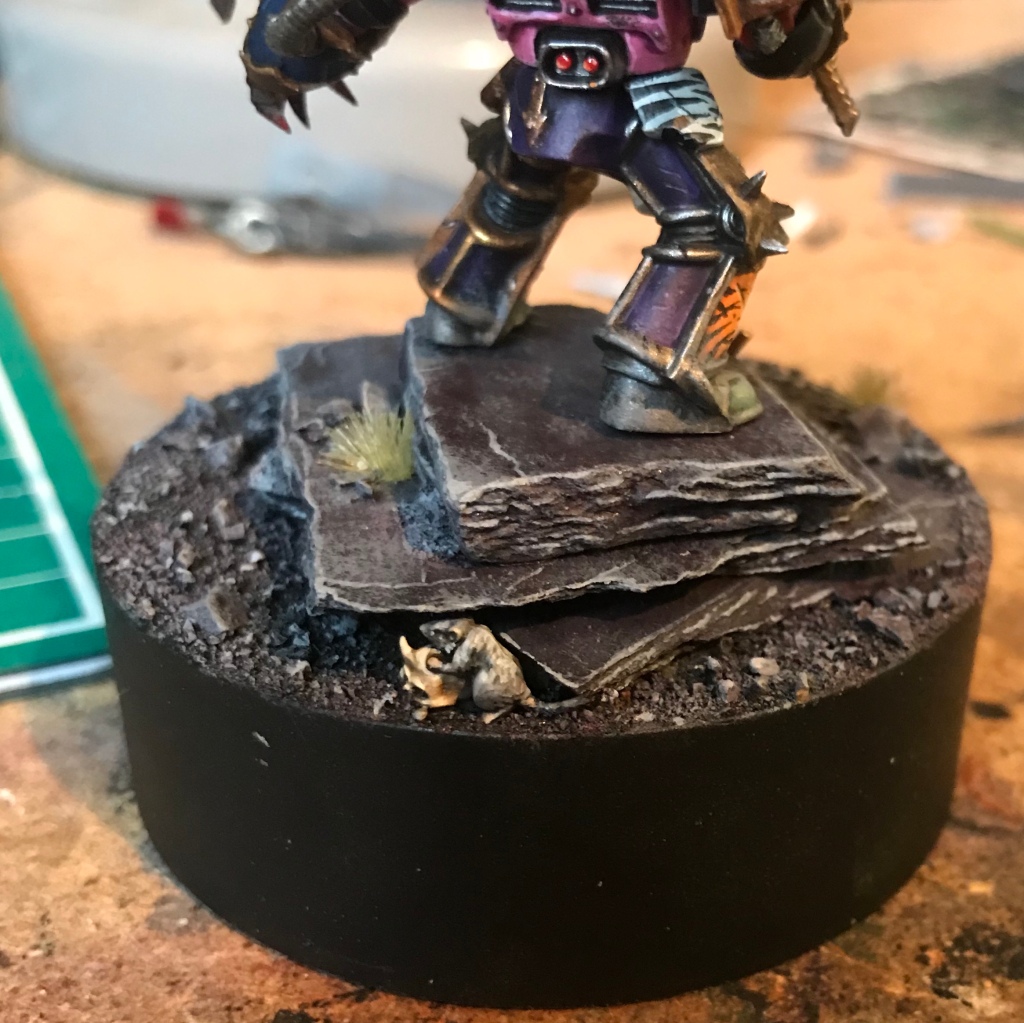
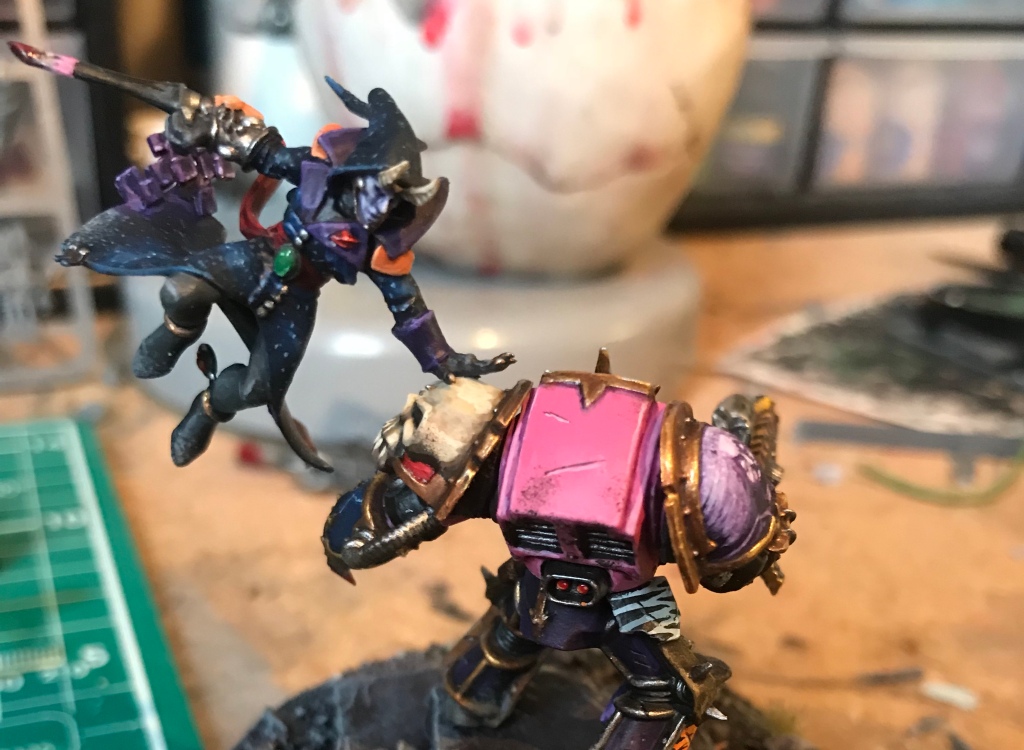
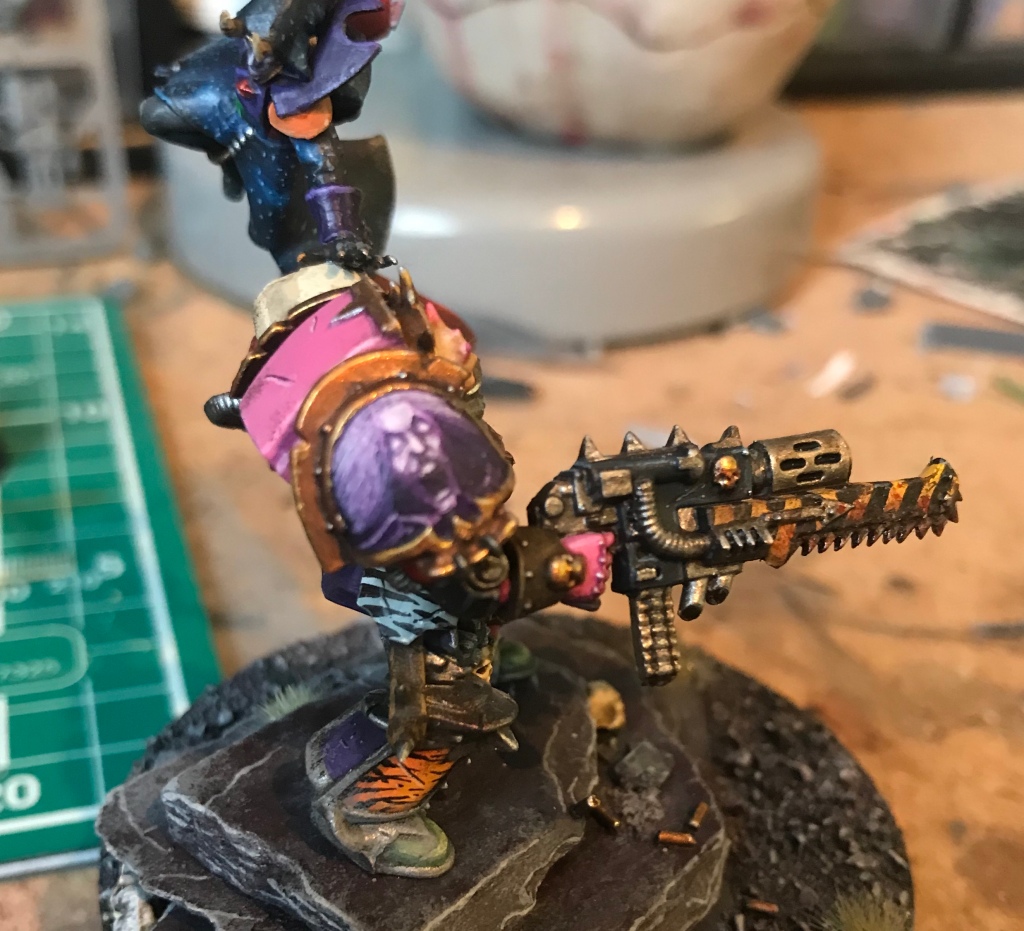
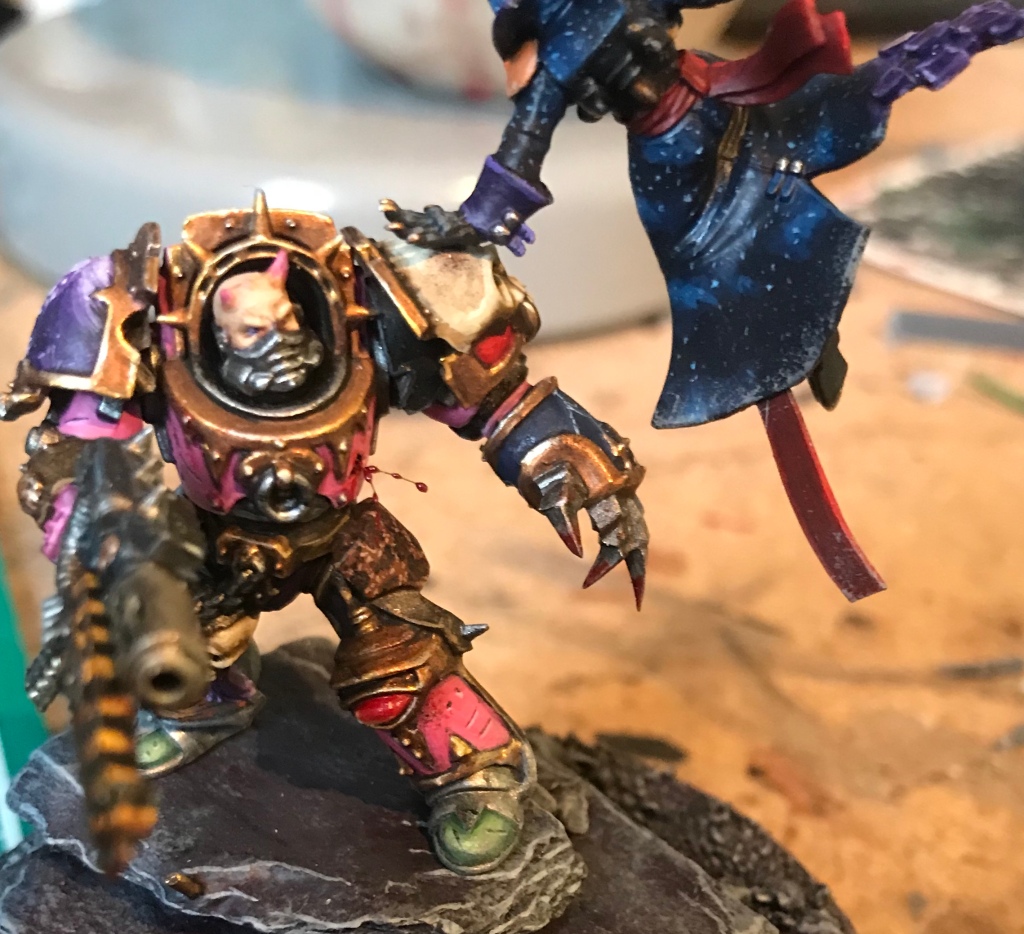
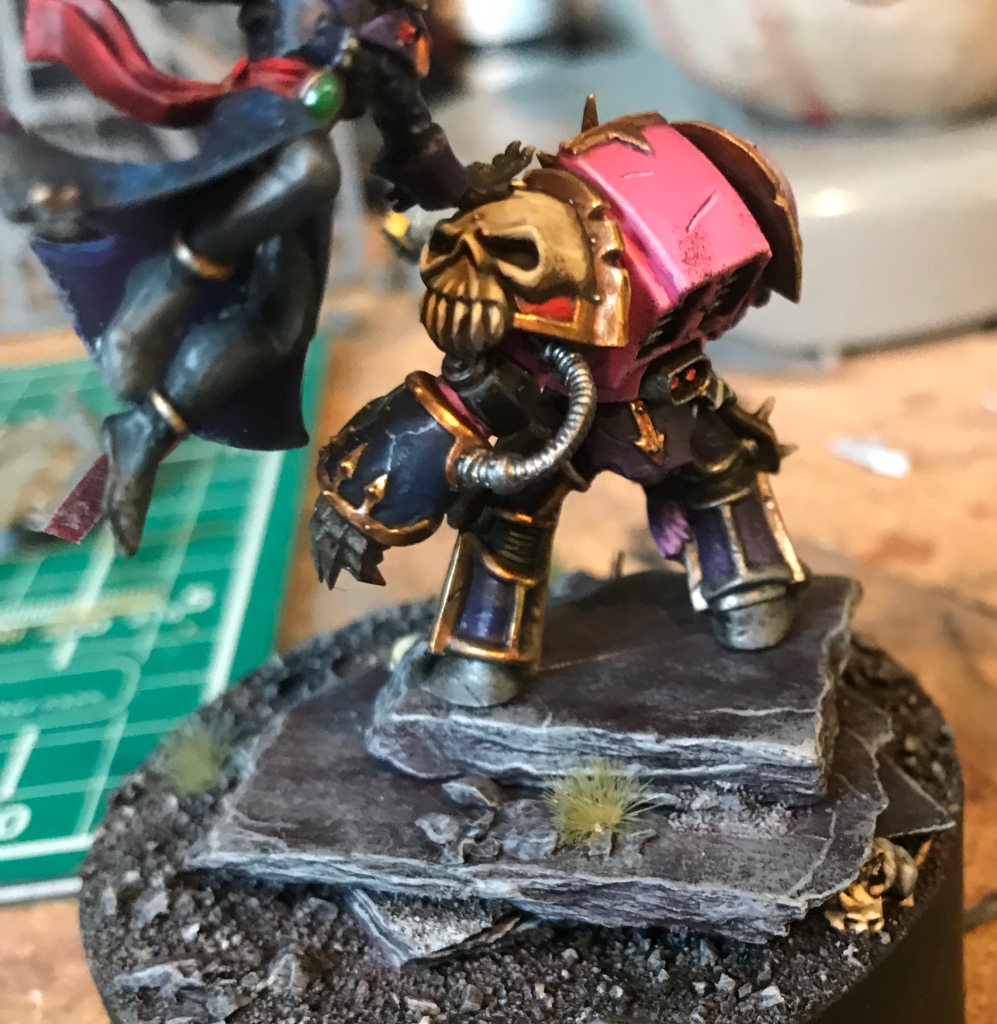
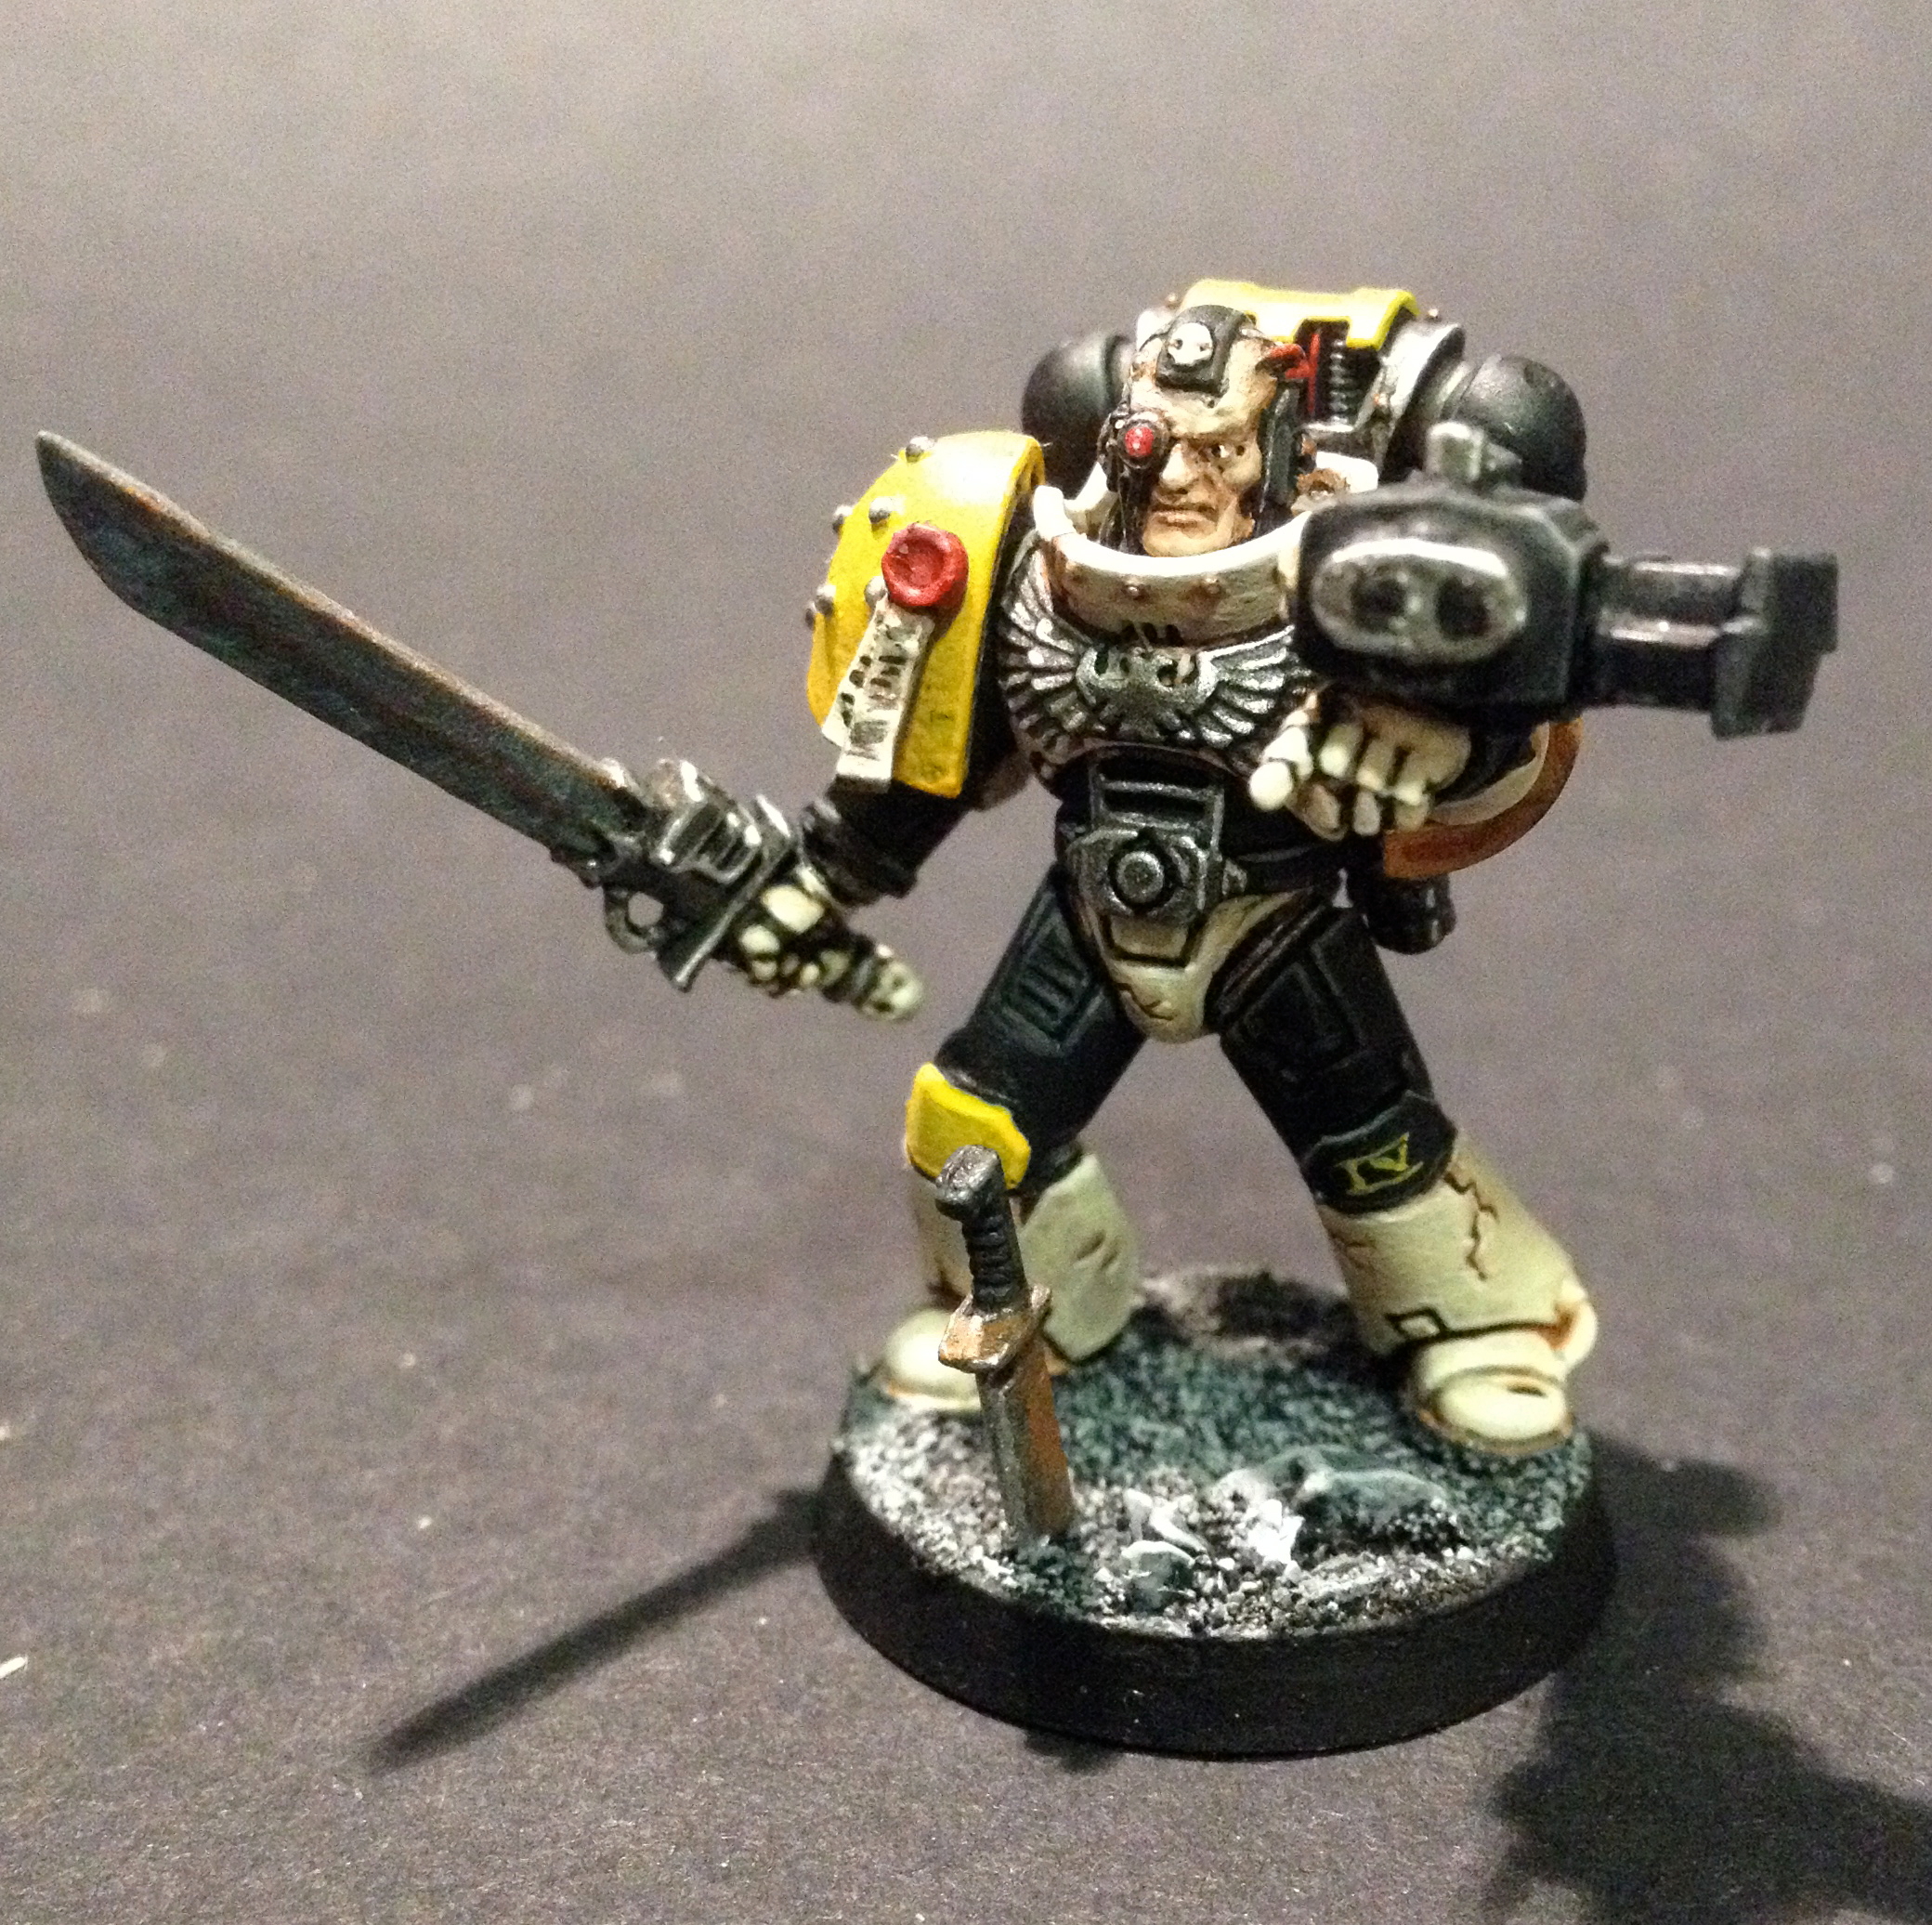
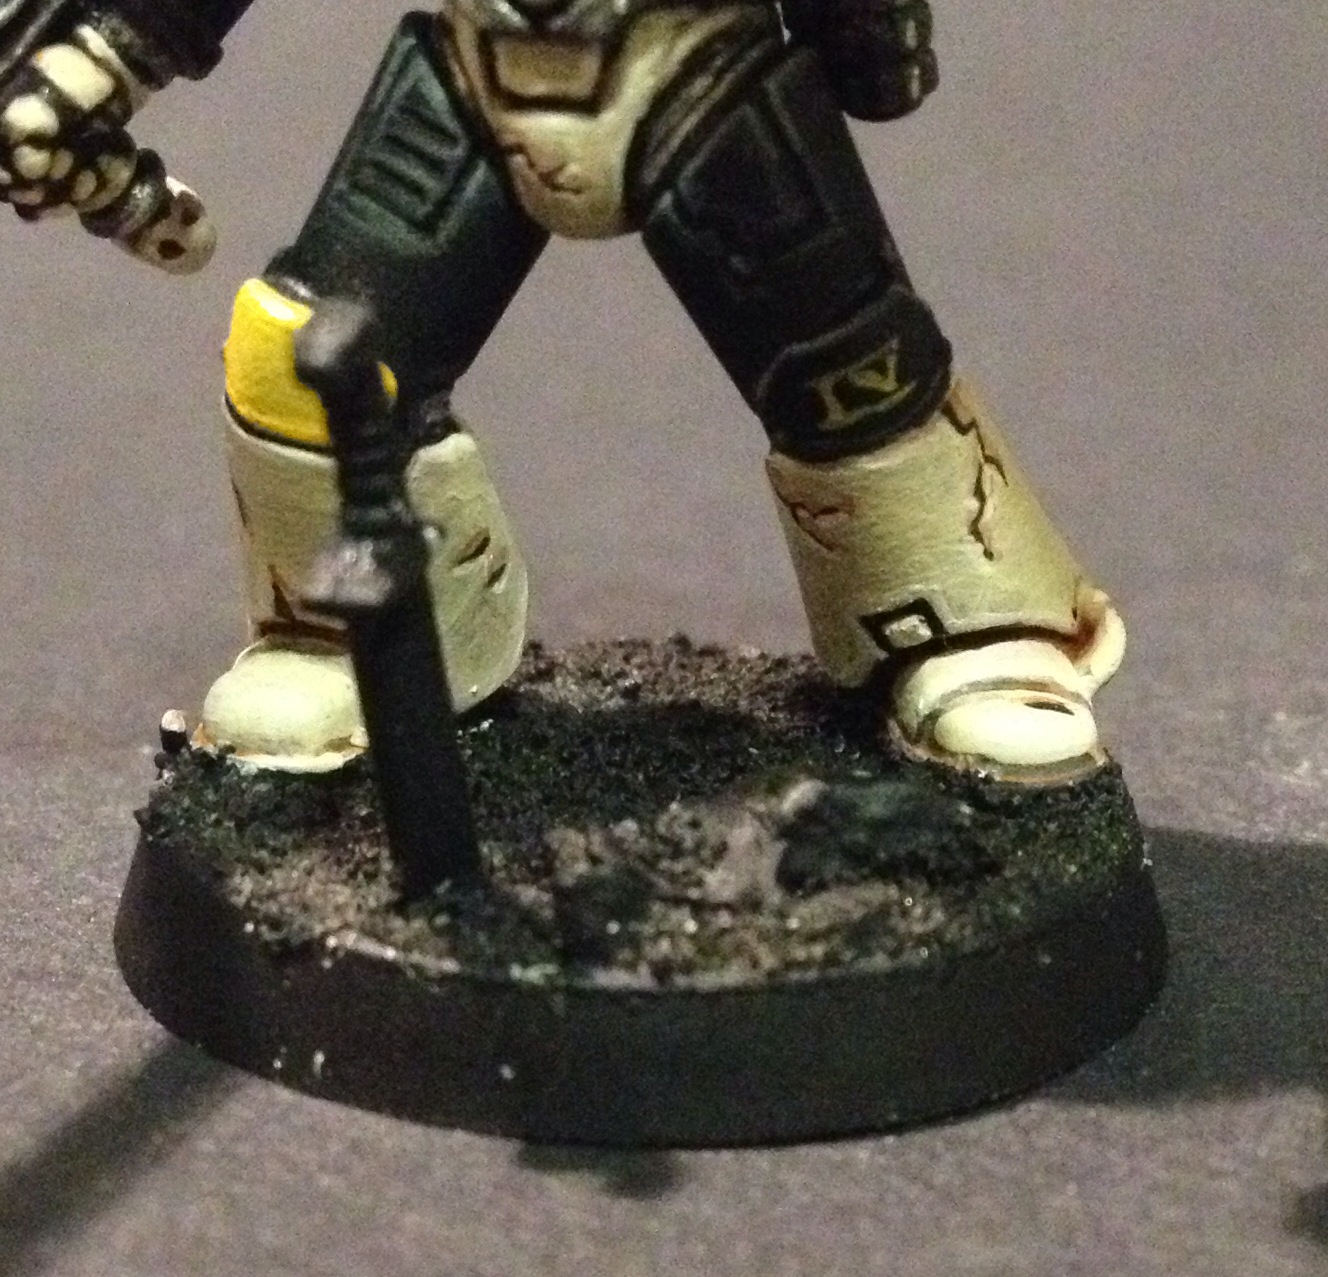
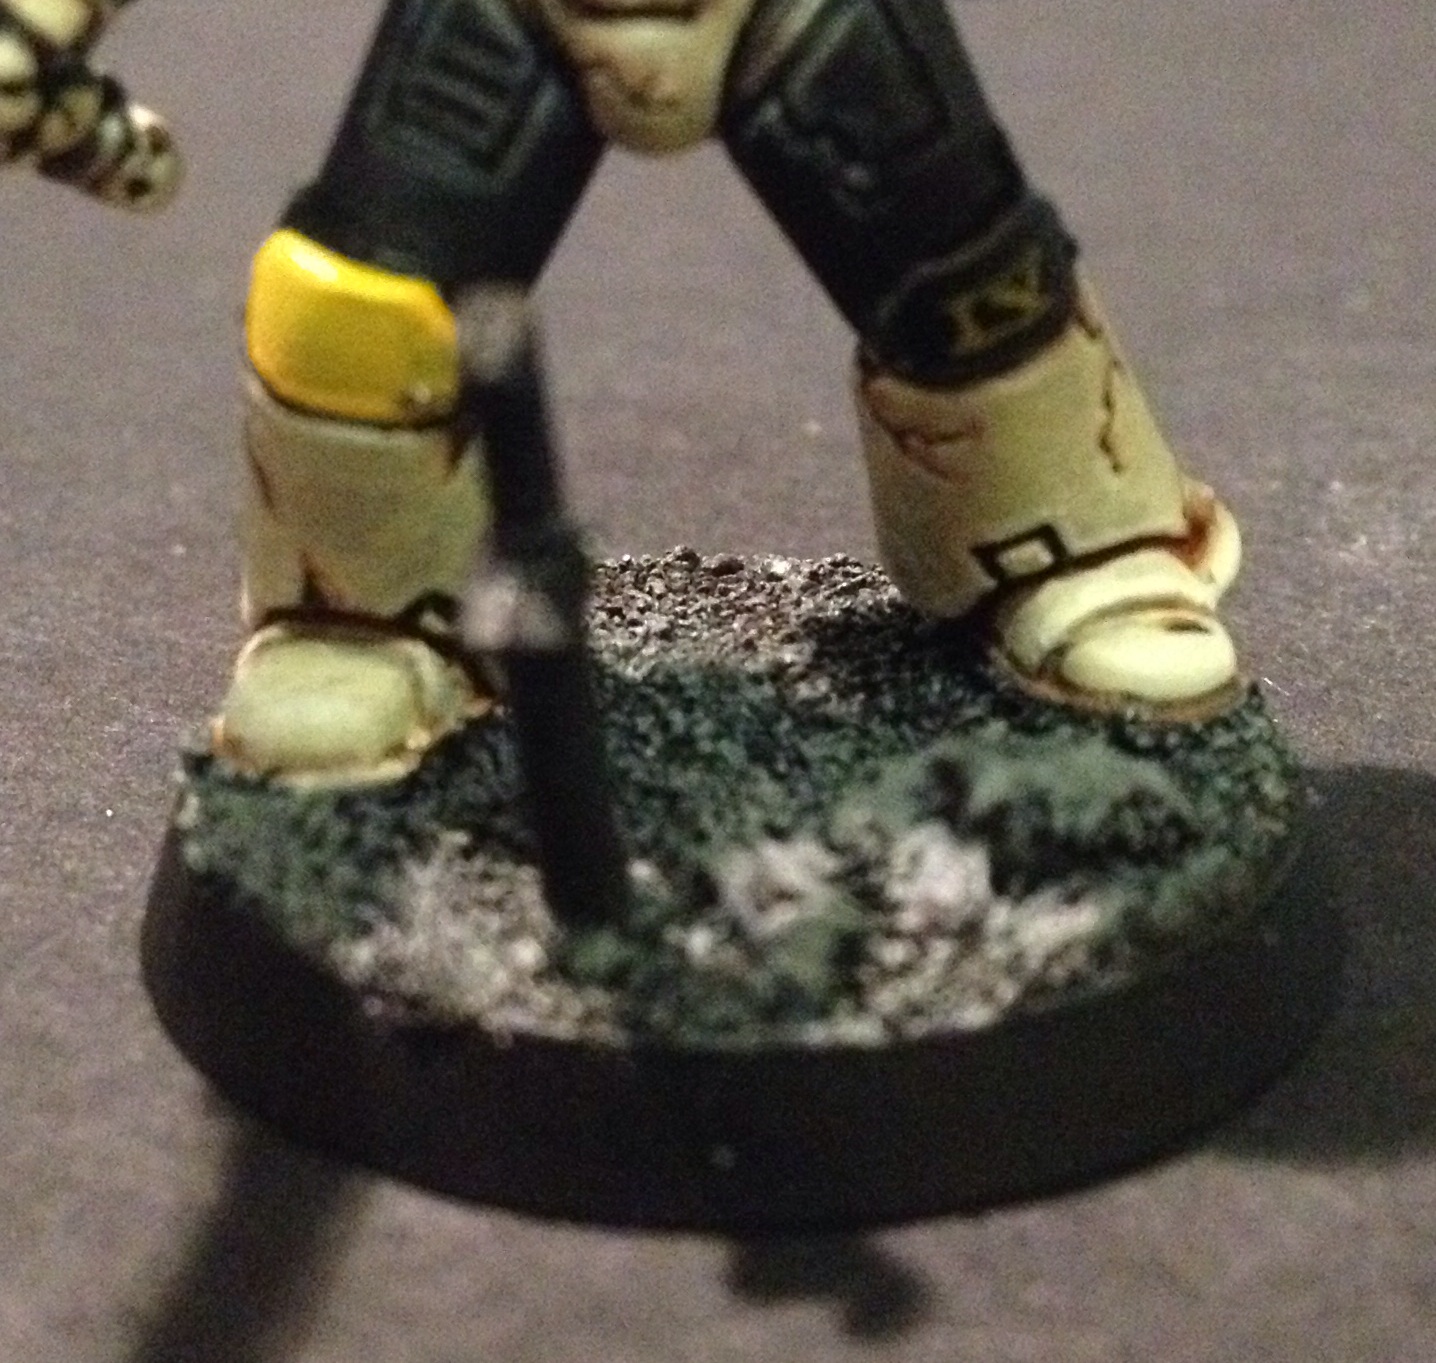
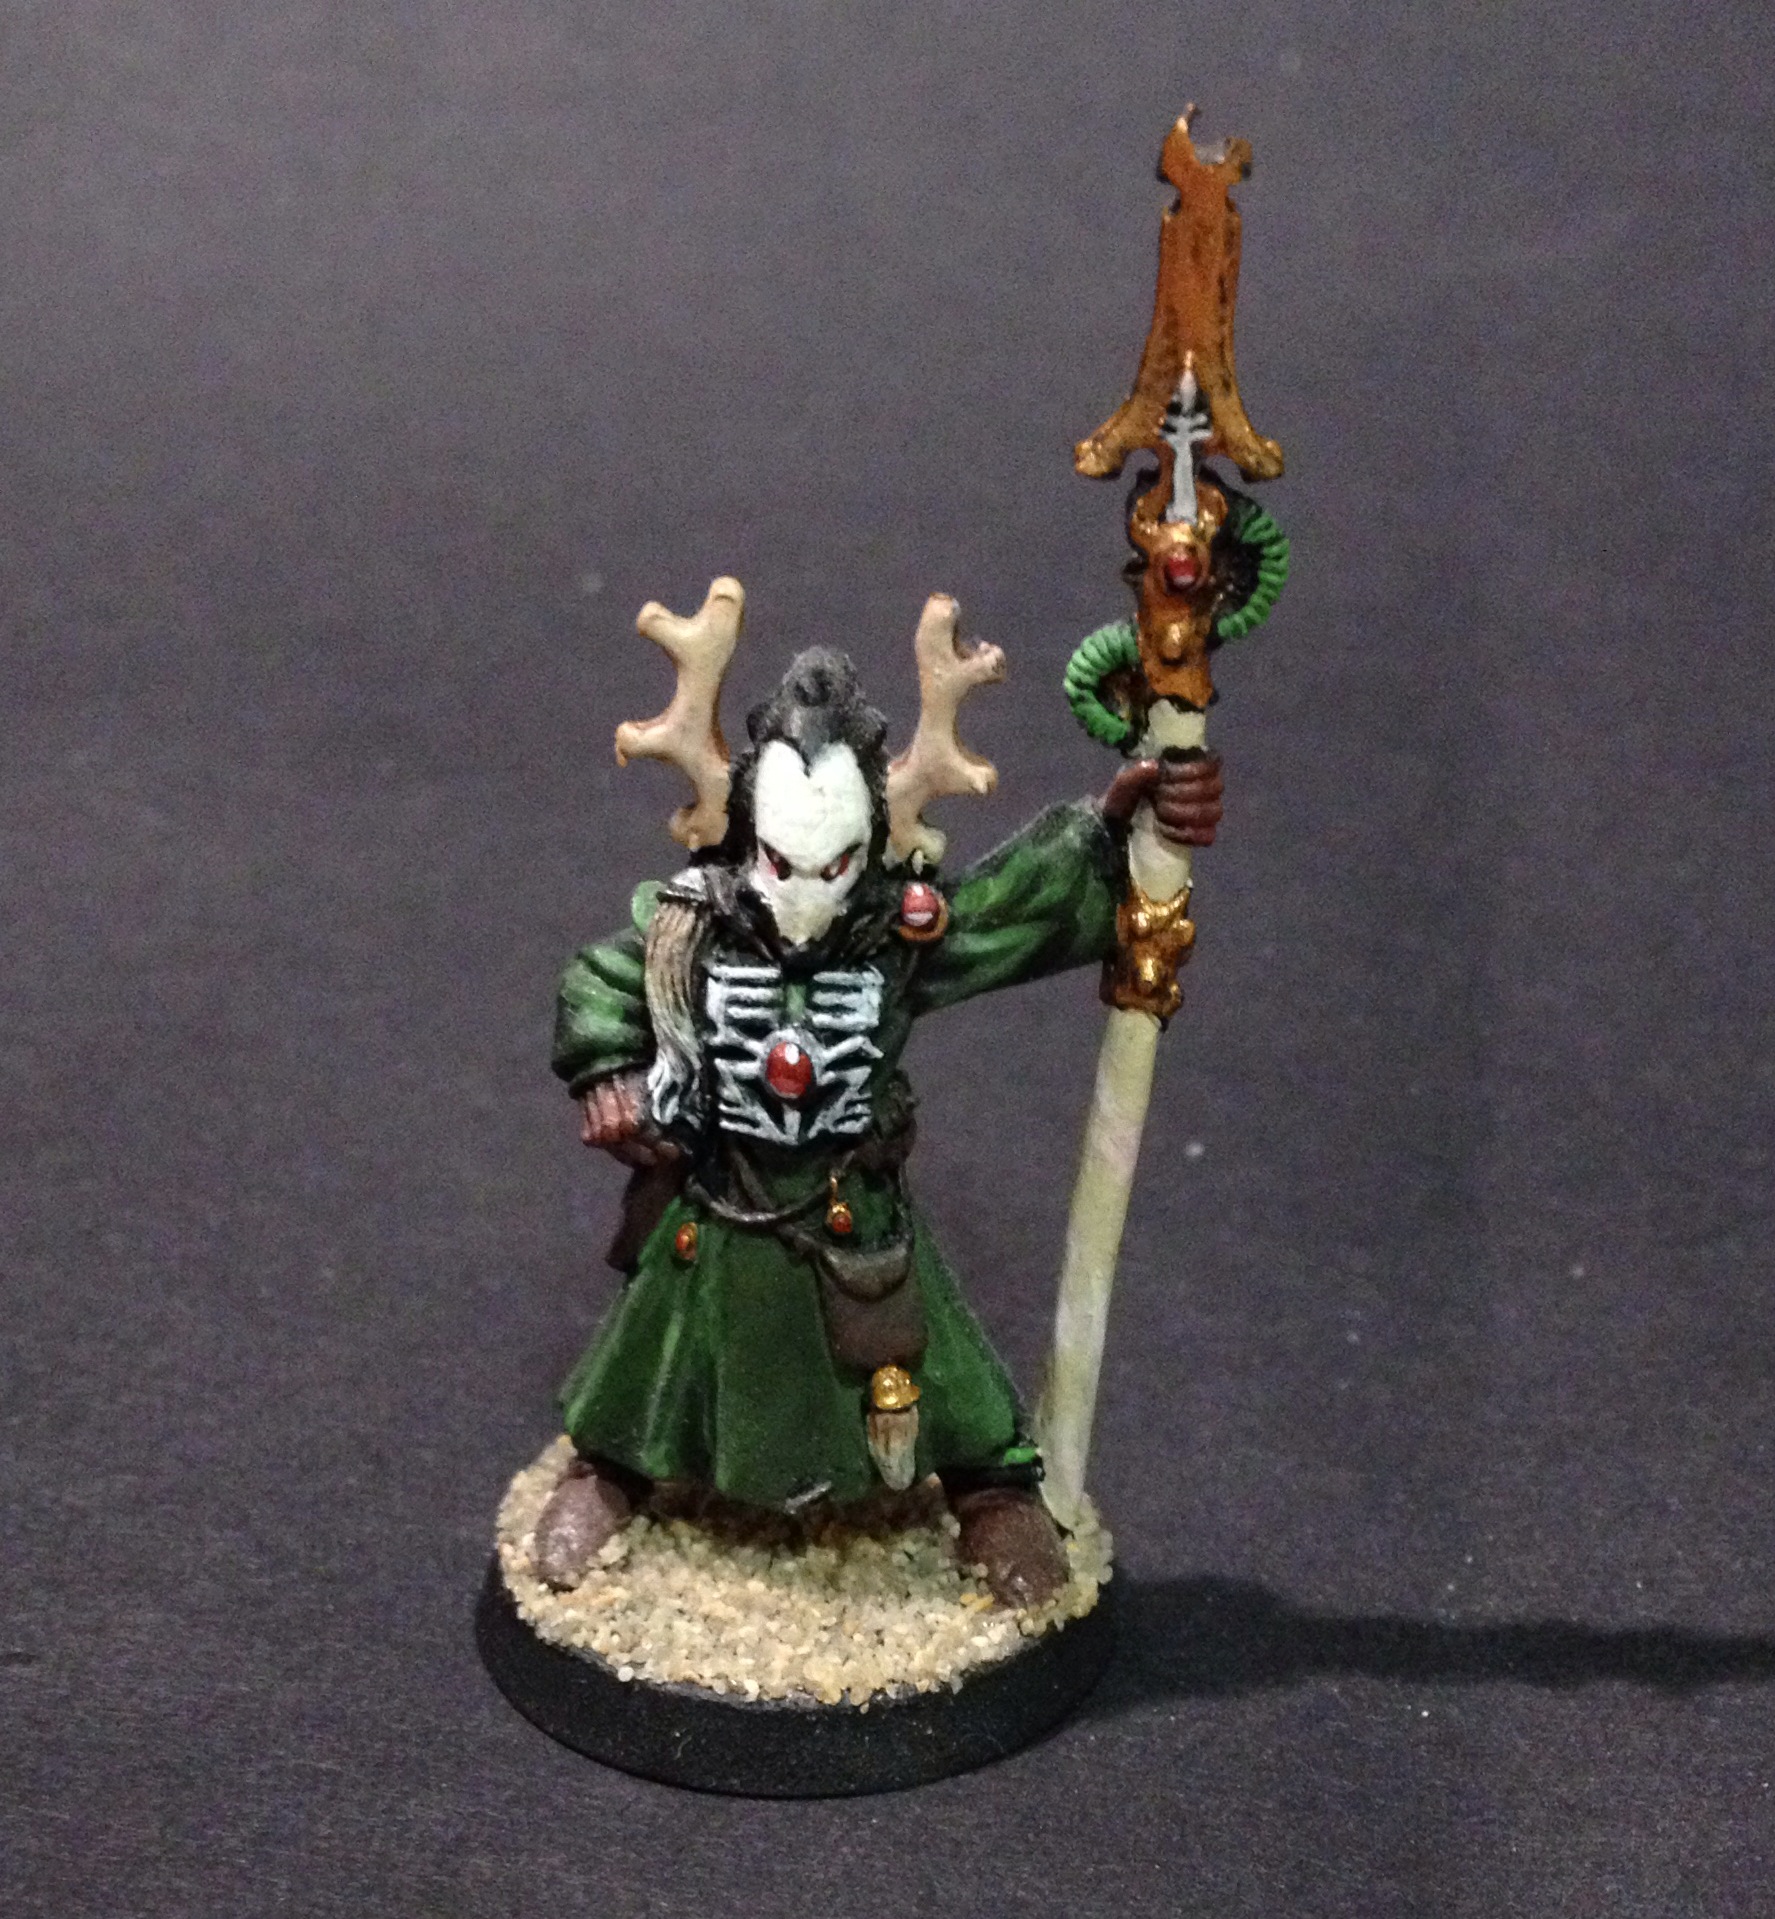
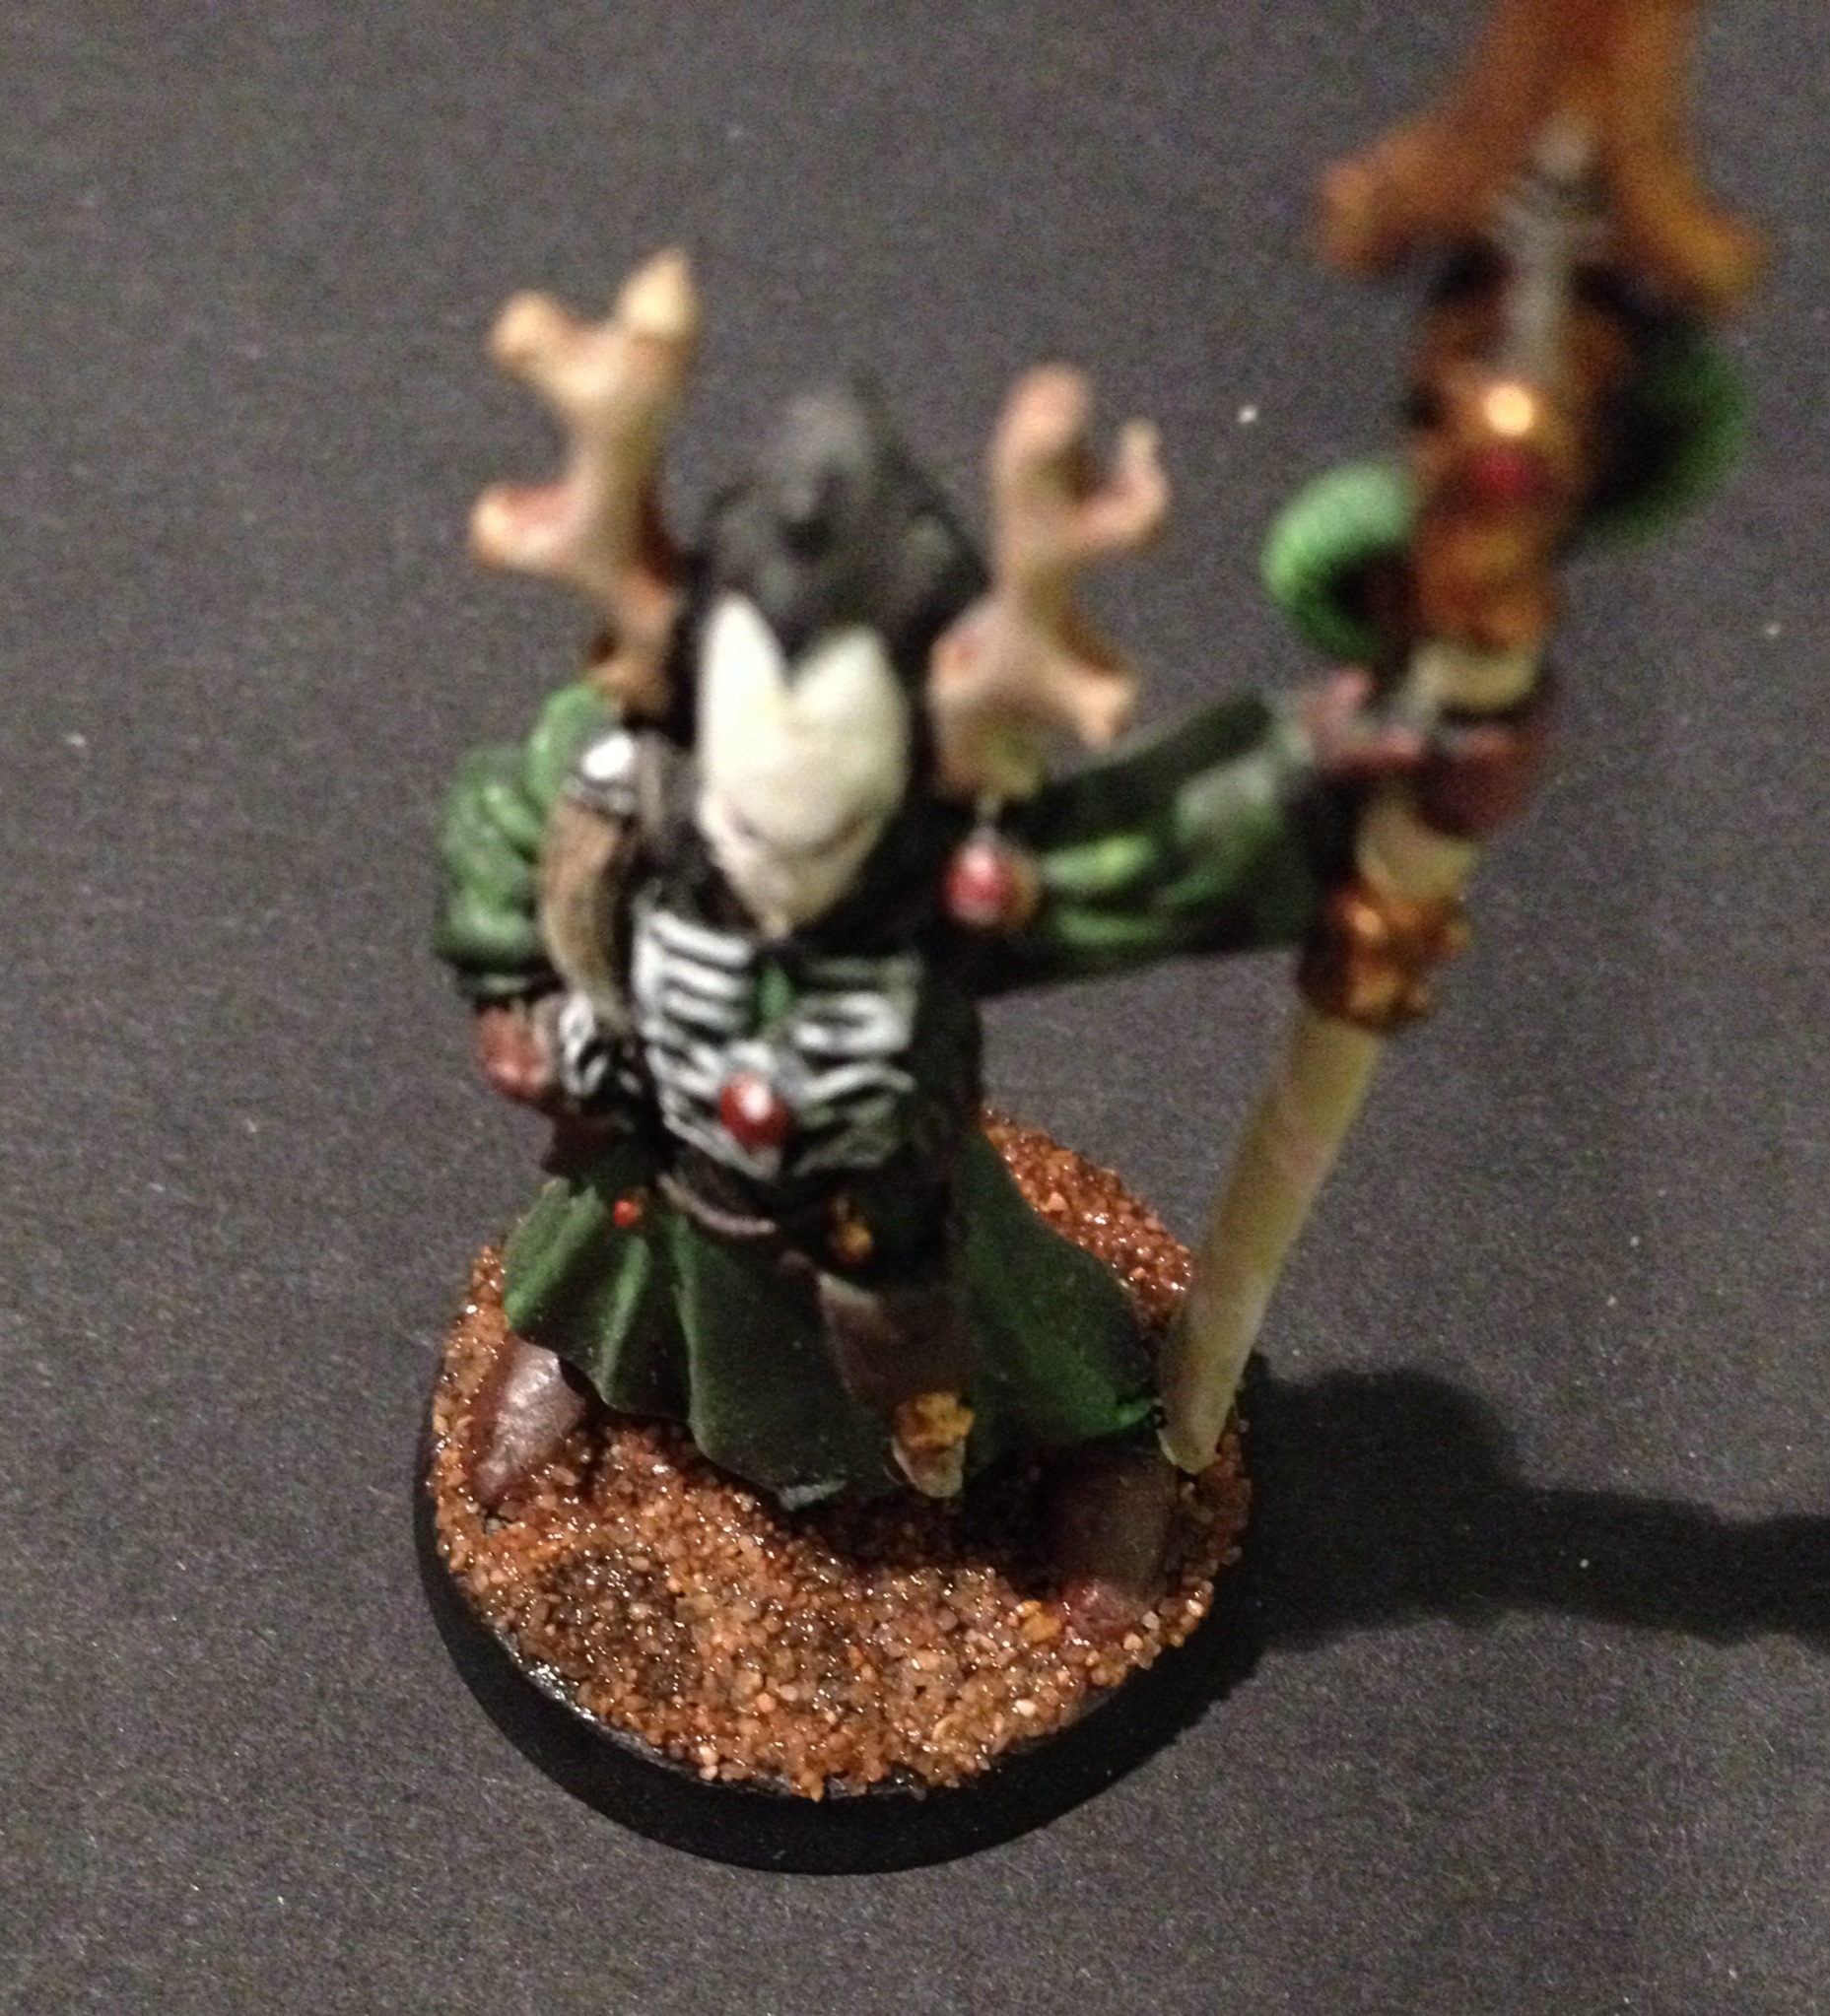
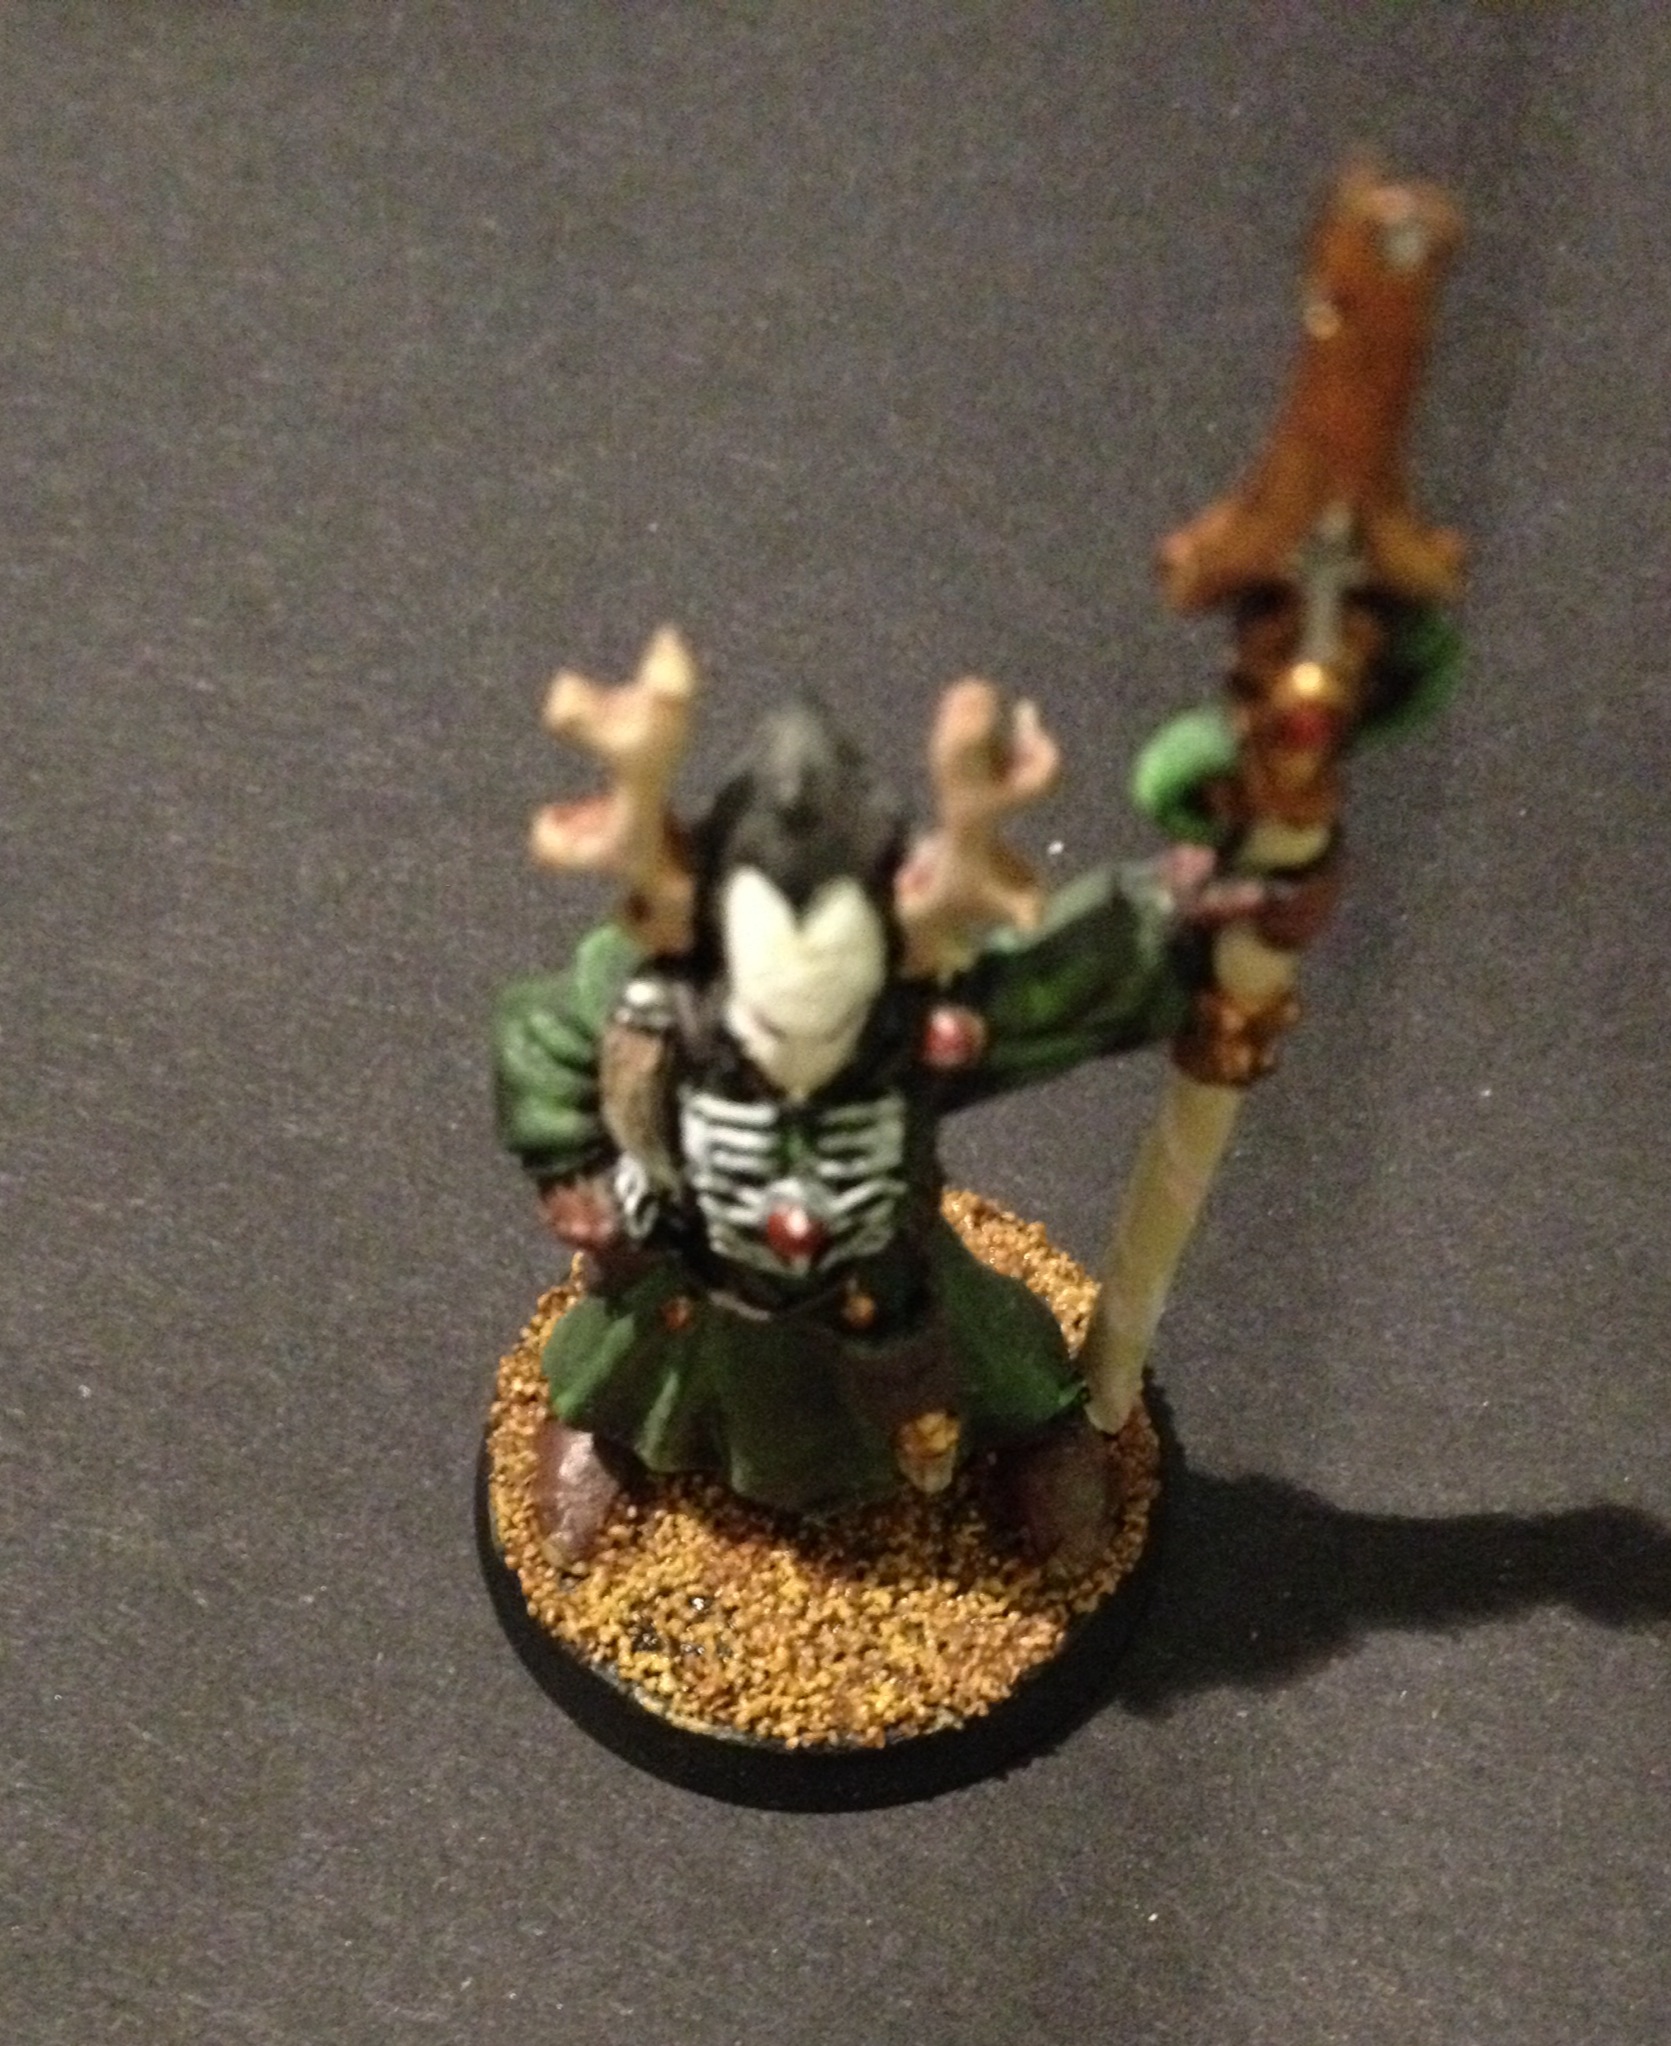
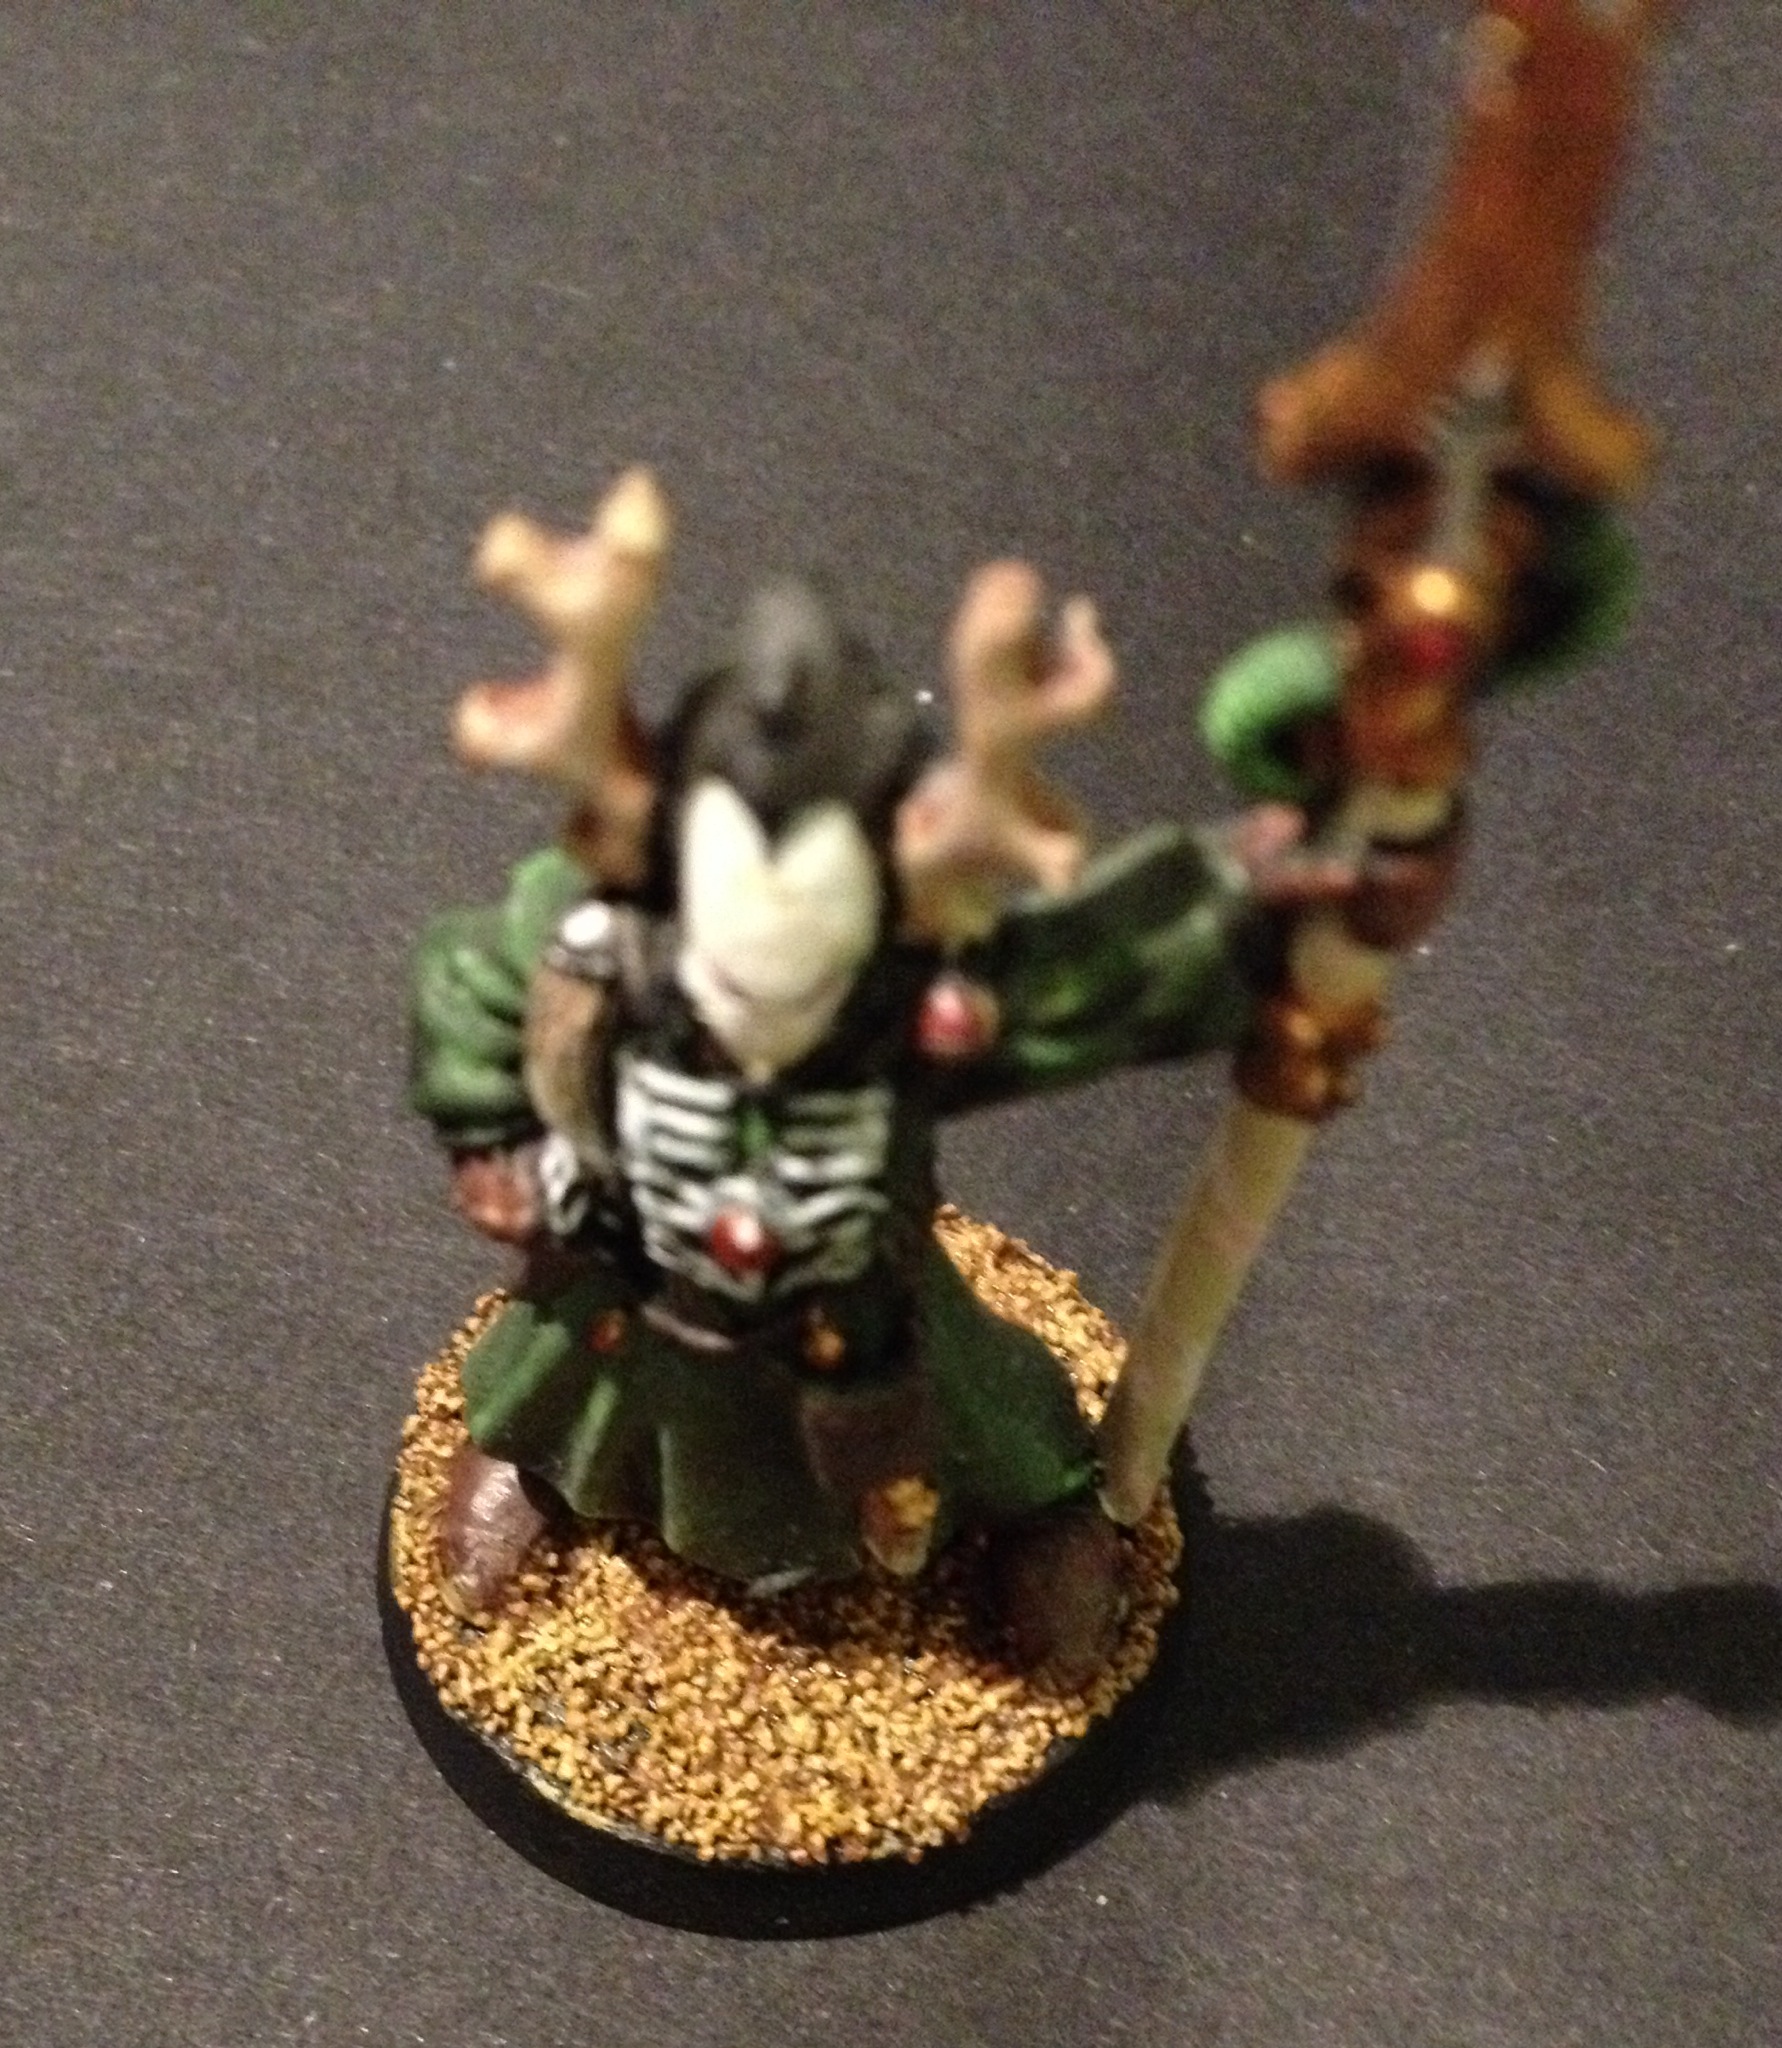
So, now let’s turn to the 2nd part of this update. I have been asked, both on this blog and other places to give you some close ups of the duel that I showed off last week, highlighting a bit of the detail that has gone into that piece. Well, as I am feeling particularly generous, I have acquiesced to said requests with the images below. Now, this was done with my iPhone camera, and given that I am one of the world’s leading ‘not the best’ photographers, I promise nothing in terms of quality or lack of blurriness. But still, I hope you can spot the bits of freehand, weird details, weathering and spurting blood. You’ll also get a better look at the star field on the Harlequin’s jacket. Here’s a dump for you:
And so there you have it. One is always a little nervous about blowing up 28mm scale miniatures to such sizes and though I’ve spotted a couple of things that I’d update and fix, they look ok. Nothing too bad to worry about at least.
That’s all I have to update you on now, but stay tuned for further progress, and hopefully more of that soon. May your efforts go more speedily than my own, and may you have plenty of fun as well. Onwards!
I may not have been posting much recently, but that doesn’t mean that I’ve been neglecting my hobby work and though I’ve not been able to get any new models painted, I have been able to create a fancy-pants display base for any painting competitions that I might enter in the future. Currently featuring the Vanguard Veterans from my Mortifactors project, it’ll work for any of the models that I base in this style, and that’s pretty useful. And because you’ve all been good little hobbyists, I’ve taken lots of snaps of the process of creating just such a piece, and will hopefully give you lots of hints and tips. Let’s dive straight in…
1. In the beginning, there was wood…
So, I picked up a wooden plinth at Salute, though really any piece of wood will do you. I then primed it with some grey primer to protect it a little from the paints and moisture of the clay. I had a vision in my mind of what I wanted it to look like and I wanted to play to some of my strengths, so I stuck down the girder that you can see at the back there because I know I do a good girder. Then, knowing that I wanted to have five minis with standard infantry bases on there so I used my much abused and shamefully neglected cultists and stuck them on there with some blue tack.
Next up, I used white milliput and covered the top part of the plinth. I didn’t use lots as I didn’t want to go too high. I also left a patch for a puddle.
Once it was covered, I stuck in a bit of rhino hatch and left it to dry. And once it was dry, I removed the cultists, making sure that I moved them a little. Milliput shifts a tad and even when you think it’s dry, it still has a little expanding left to do. You can rescue it with a little sandpaper later on, but it’s easier to do it this way and means less hassle further down the line.
2. Texture.
The next part of the process involves adding the texture. This means adding first some rocks (small clumps and clusters of differing sizes around the base in a scatter pattern) and then by adding some sand. I also added a knife and a melta bomb for setting. Finally I layered the bottom of the puddle with some green stuff to removed the wood texture from the bed.
When all of that was dry, I gave it a quick blast with some Chaos Black undercoating spray and then left that to dry too. Modelling done, it’s now onto the painting.
3. Let’s get colourful.
The first stage for this is dry-brushing with the Citadel paint Dawnstone. Use an old brush and keep it a little rough and natural looking. Then, make sure all the rocks are painted a little more solidly with the same paint.
Now, using Administratum Grey, I edge highlighted all the rocks, and then dry-brushed the same shade all over the rest of the base, highlighting rather than covering. For the most part, that’s the majority of the base done. Now for some details…
4. It’s the little things.
All the details come next. Among them is the above rusty rhino door which utilised various technical paints. Next up is the puddle which involved painting the bed in browns, then covering it in a brown/black wash. After that, I used a clear setting multipurpose glue and finally covered it with some more brown wash and some gloss. This is what it looks like:
The knife, melta bomb and girder were all painted to go with the theme. I used the same greys that were used throughout the base for the girder, silver for the rivets and the reinforced pole which then got the rust effect treatment. The knife got really rusty too, but I kept the melta bomb looking pretty clean as if it were newer. And that’s the details done.
5. The finish line
The last step involved covering the edges with a couple of coats of Abaddon Black. I also had to clean up the edges of the actual scenic part of the base and remove some errant sand and glue. Then I applied the paint using the Daler Rowney System 3 brushes because those guys don’t leave brushstrokes and they’re a good size too. And that’s it! Done. Here’s the finished article:
Last thing is to add the models. I’m really happy about how this turned out and I think the Vanguard Veterans look great sat on there. If I work up the courage to enter a competition, this will provide a nice base for a squad entry and it’ll look spiffing on my shelf too.
Any questions, ideas, comments or constructive criticism, please leave them below. I shall leave you with a last shot of my Mortifactors Vets looking awesome. Onwards!
This is the 2nd of my posts relating the the most basic of basing techniques, and today, we’re looking at urban-themed bases. I’m going to take you through exactly how I created the above base and, as well as the base, I’ll also take you through the process to make the rusty knife that features in the image above. This isn’t by any means an advanced basing technique, but I hope it helps to rid the hobby of bare bases and give you some ideas for your own minis.
Also, I apologise for the image quality – when I get a good camera, I will reshoot what I can!
Step 1: Undercoat Black
Either add sand to your base before you undercoat (that’s what I do – glue the feet/legs to the base, add sand and rocks, then spray with Chaos Black), or gently, using an old brush, add some chaos black so that it covers all the sand/rocks. Also, I snipped the tip off a knife and superglued it to the base point(less) down before undercoating.
Step 2: Dry Brush Grey
Using an old brush, dry brush the whole base with a medium grey shade. I used Citadel’s Dawnstone.
Step 3: Dry Brush/Highlight Lighter Grey
Next, take a lighter grey and dry brush again, but this time, use less, maybe leaving a few areas with almost nothing. Also, if you have rocks on the base, edge highlight these with the same shade. I used Citadel’s Administratum Grey.
Now, for the most part, that’s it! It’s really simple and looks really good. It’s very little effort and is a billion times better than a bare base. If all you were looking for were the colours I use for my bases, that’s it. Below this is just about the knife, so let’s dive in…
Knife Stage 1: Blade/Guard in Silver
Painting the guard and blade, I used Citadel’s Leadbelcher.
Knife Stage 2: Rust Part 1.
This was fun. I love the new technical paints from Citadel, and Typhus Corrosion is great for giving something a grimy look. Spread it all over (best with brushstrokes going down) and it works great with the paint used in the next stage…
Knife Stage 3: Rust Part 2.
This is Ryza Rust, another of Citadel’s new technical paints. When using it, you need almost none of it on your brush. A tiny bit will do because you don’t want your rust to be fluorescent orange – a bit of subtlety is required. Go over most of the knife with this, with it slightly more orange closer to the base, and on top of the guard (google ‘rust’ and look at how it forms).
Knife Stage 4: Highlights
A slight highlight on the blade edge, and around the edge of the guard using Runefang Steel brings a lot of depth to the knife. With a tiny bit of grey highlighting on the handle (I used Mechanicum Standard Grey) and you’re done!
Both the sand and the rocks came from Games Workshop’s Citadel Basing range which can be found right here. Actually, I’d like to really recommend the Citadel Warhammer 40,000 Basing Kit – lots of rocks, some brass and some nice bits of resin too.
As I mentioned, when I can afford to invest in a better camera, I’ll retake what shots I can but this is basically it. Quick, easy and effective. I hope you enjoyed the tutorial – pop a comment below if you’ve got any questions or comments!
Basing miniatures is not everyone’s cup of tea. Some people don’t bother at all, while others simply paint the plastic green or brown. Well, I’m hear to help with a series of posts that will be called Basing Basics. There are loads of wonderful and amazing examples of bases all over the net that utilise advanced techniques and take days to construct. These articles are just going to show you the very (very) basics and maybe we’ll do some more advanced bits and pieces later.
To start with, we’re going to look at sand. You can pick this up at any modelling shop and just cover your bases in it. And there’s nothing wrong with leaving it at that, except that it doesn’t end up looking like sand. I always thought it looked like porridge, so unless your army is battling on Oatius Prime in the Segmentum Cerealus, you need to do a bit of work.
It’s really quick and easy to make sand look like sand and I’m going to use my old Eldar Warlock to help illustrate this. Let’s dive in.
Step 1:
Simple as. Cover your base in an even coating of PVA glue (not too much) and dip your mini into the sand. Leave it to dry and watch the porridge take shape.
Step 2:
Once the sand is dry, using a larger brush, cover the base in a flesh wash. I used Citadel’s Reikland Flashshade. Once all the porridge is covered, leave it to dry thoroughly.
Step 3:
Take an old brush (because the rough sand will knacker the point of a good one) and a sandy coloured paint (this is Citadel’s Zamesi Desert) and dry brush the whole thing. Make sure you let a little of the darker colour come through.
Step 4:
When that layer has dried, mix equal parts Zamesi Desert and Bleached Bone (or equivalents) and dry brush again to highlight. Don’t go over all of it, just a few bits here and there. You only need a tiny bit to bring out a lot more depth.
Step 5:
To finish off, a bit of Dryad Bark (dark brown) around the sides of the base, and you’re done! This last step just makes the whole thing look a little better on a desert table and gets rid of the last bit of bare, black plastic.
Well, how simple was that!? This is a really quick technique (that barely deserves the name) and though you’re not going to win the Crystal Brush with it, it may help your army look a little better on the table top and really add a finishing touch to your minis. Anyway, I hope some of you will find this a bit useful at least – let me know by popping a comment below. Onwards!


 40kaddict
 4gotowar
 Castigator's Chaos
 convertorum
 darkfuturegaming
 ftgtgaming
 Mind of the Daemon
 taleofpainters
 talkwargaming
 Twisted Brushes
 weemen