Hey friends! As GW were kind enough to send me the new Legions Imperialis boxes, and because I’ve been very much enjoying painting up some Blood Angels, I thought I’d put together an article all about how I’ve been painting them. If you’re looking to paint up some extra-tiny IXth Legion, I hope this little walk through will help you out!
I should also point out that this is a basic tutorial – this isn’t going to win you any awards, but it should help you have a lot of fun getting your army done quickly. So let’s get to it…
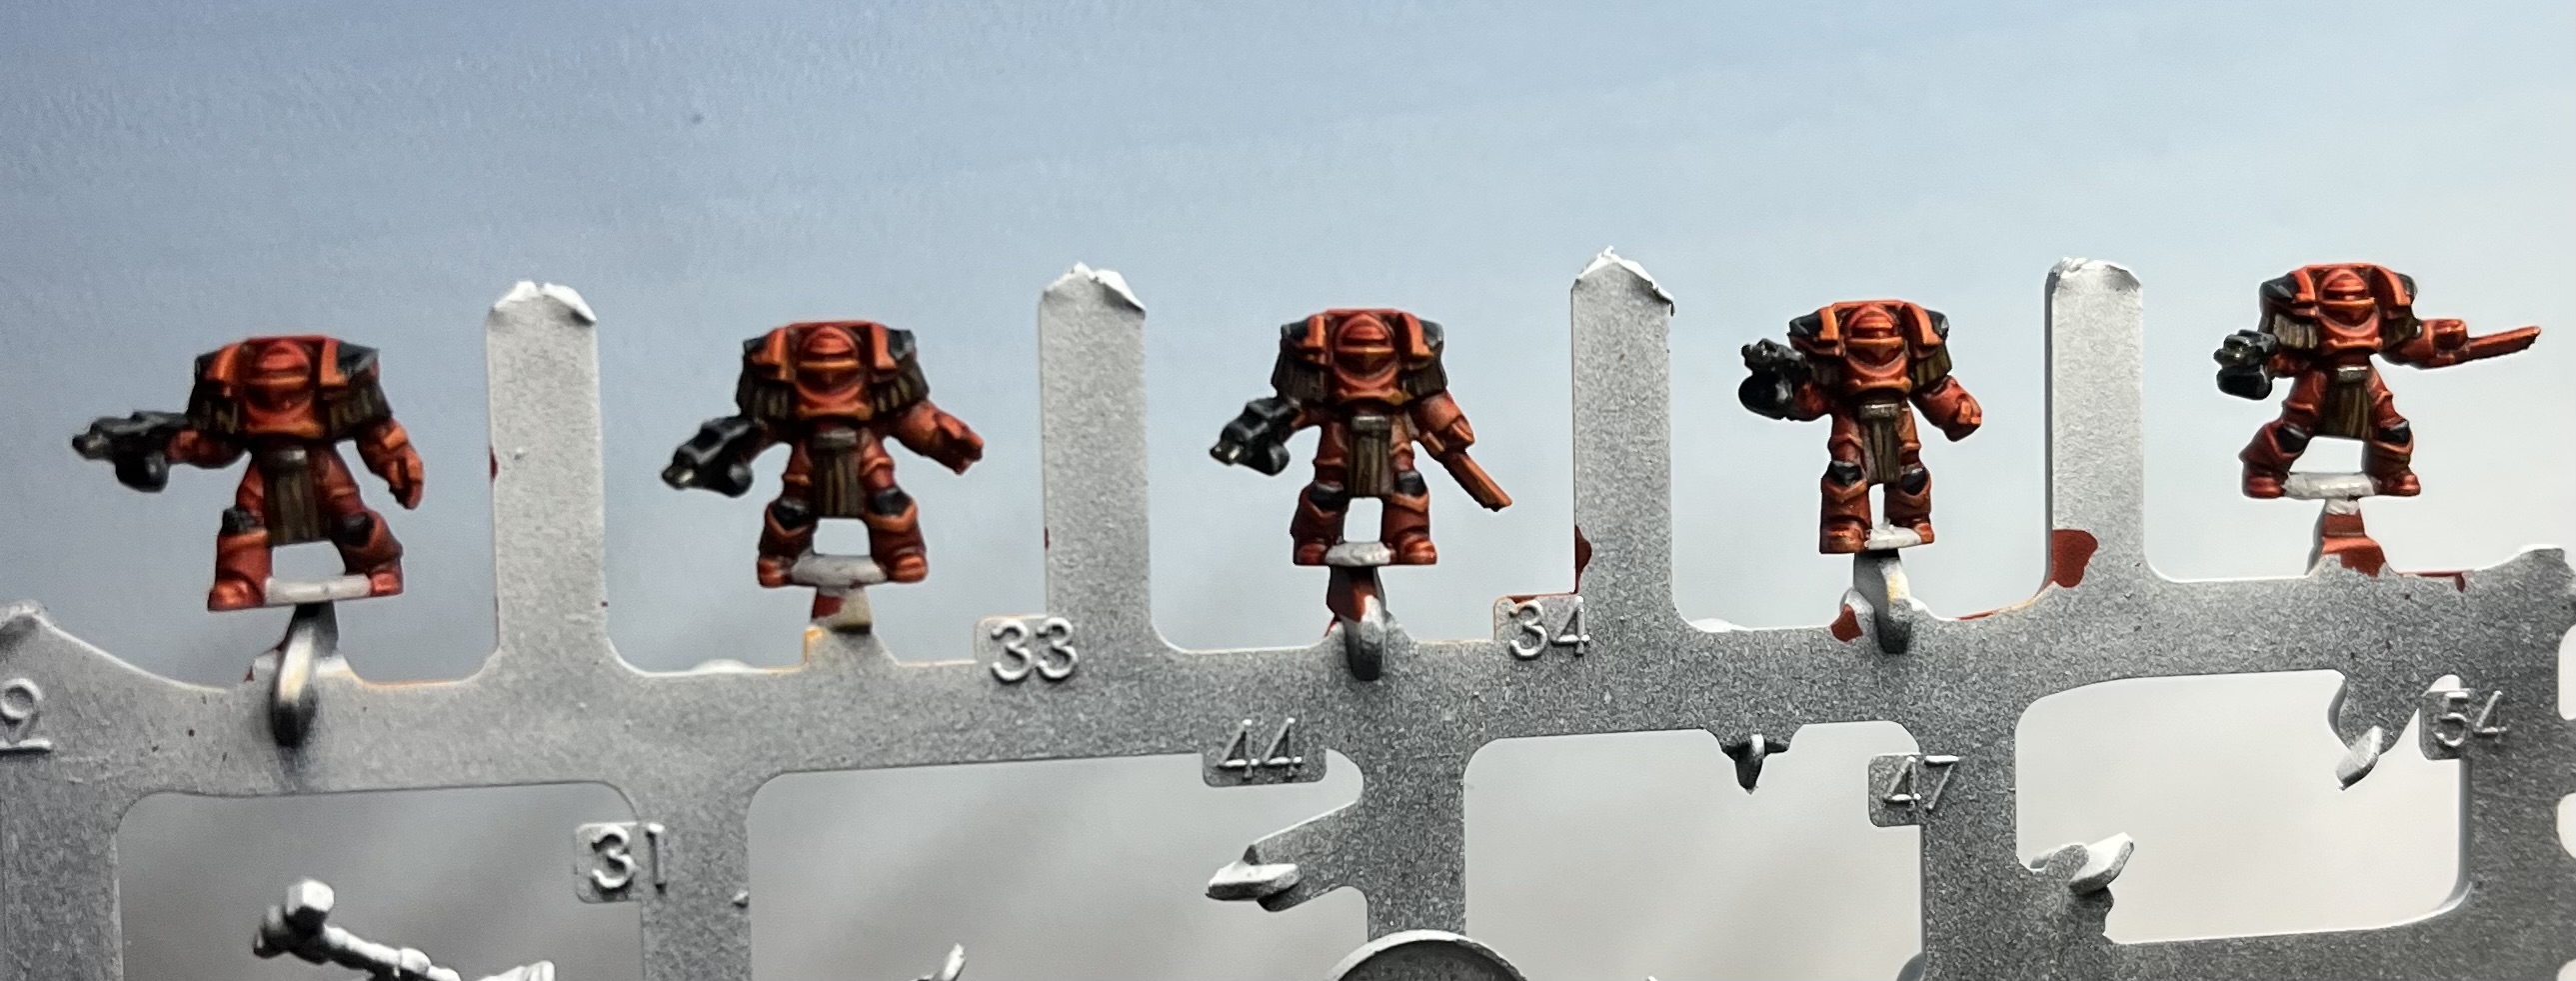
Prep the Sprue
Ok, so painting on the sprue requires some minor prep work. Before starting with the paints, you need to remove the mold lines, if a tiny mini is connected to the sprue anywhere else than the base, you’ll need to snip and clean that, and if any minis come in two parts, it’s worth actually building them on the sprue. For that last one, think of the heavy weapons support squads on the Space Marine sprue – stick the Missile Launcher onto the Devestator before undercoating. Once all of that is done (it really doesn’t take long), you’re ready to start spraying.
Black Then White Spray
I started off with a light spray of Chaos Black, Spraying up the sprue from below. You don’t want a thick coat – you just want to fill in the shadows really. Let the black dry and then hit them from above with a healthy coat of White Scar. You want to cover over 90%(ish) of that black, but keep it in those shadows. Let that dry, and get your brushes ready!
Blood Angels Red
You’re going to want that magical “one thick coat” of this read all over the miniature. Don’t worry about trying to avoid anything – we’ll use thicker paints for later steps and they’ll cover this easily. So get that appropriately named paint all over.
Fire Dragon Bright
And once the red is dry, crack open the Fire Dragon Bright, work some into the bristles of your favourite dry-brushing brush, and give the mini a light dry brush all over. And the red is done!
Block in the Black
I wanted black knees, bolters, and shoulders on these terminators, so I blocked those in here with Abaddon black. Once the black was dry, I added some highlights with Dawnstone on the edges. And we can call that done!
Silver and Leather
For any areas that were going to be metallic, I simply applied a coat of Leadbelcher, and for the leather straps on their arms, I gave these a covering of Rhinox Hide, before putting down some tiny lines of XV88 to highlight these. I then gave the leather areas a thin wash of Seraphim Sepia, and the Leadbelcher was given a thin coat of Nuln Oil.
Stripy Fists
Next up, I went to work on those power/chain fists. I carefully painted on a couple of thin coats of Averland Sunset, and once this was dry, I did a couple of thin lines of Abaddon black. Remember; at this scale, you don’t need to be hyper-accurate to get things looking good.
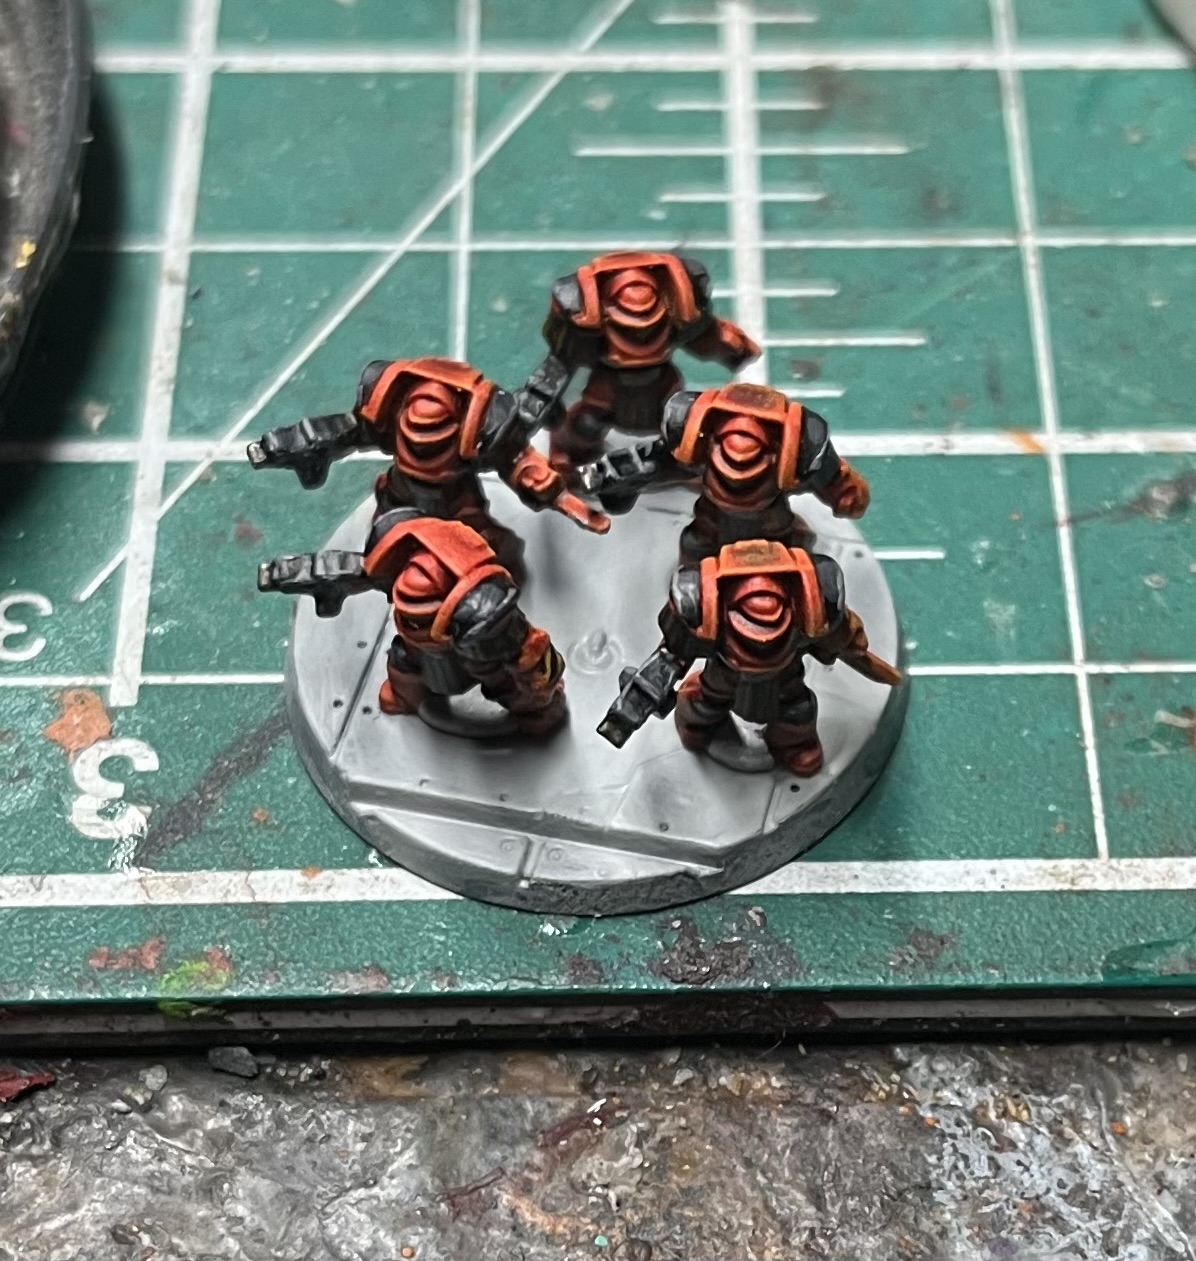
Clean the Bases
The last little step is to clean up the little bit of base that’s actually on the model – the bit between the feet. My bases start off with Grey Seer, so I just painted these over with a couple of coats of that. And once this is dry, you can stick your minis to their base and get ready to finish them off. But we’ll save the basing for another article…
That base was pre-painted with Grey Seer before the terminators were stuck down – that makes things soooooo much easier.
There you have it! I hope this was fun and enjoyable to read through, and that it’s inspired you to tackle your own teeny termies with some added confidence. These models and this scale is very forgiving, so I really suggest just diving straight in. Onwards!
Well, the last painting tutorial I put up here went down rather well, so I thought I’d chance my arm at another one here on the blog and this time, I am going to show you, through the medium of my questionable photography, how to paint a “Star-field” cape – a cape that looks like it’s showing stars in a galaxy. Something like this:
Obviously, I’ve used this technique for Aeldari things, but it could be used on Chaos Space Marines or even loyal Space Marine capes. It’s a fun little technique that once again uses the “Drab Four” – Abaddon Black, Eshin Grey, Dawnstone and Administratum Grey, though we’ll also be adding in the 5th Beatle of this group; Celestra Grey later on. It’s a fun effect, and I hope you’ll find it useful in the future.
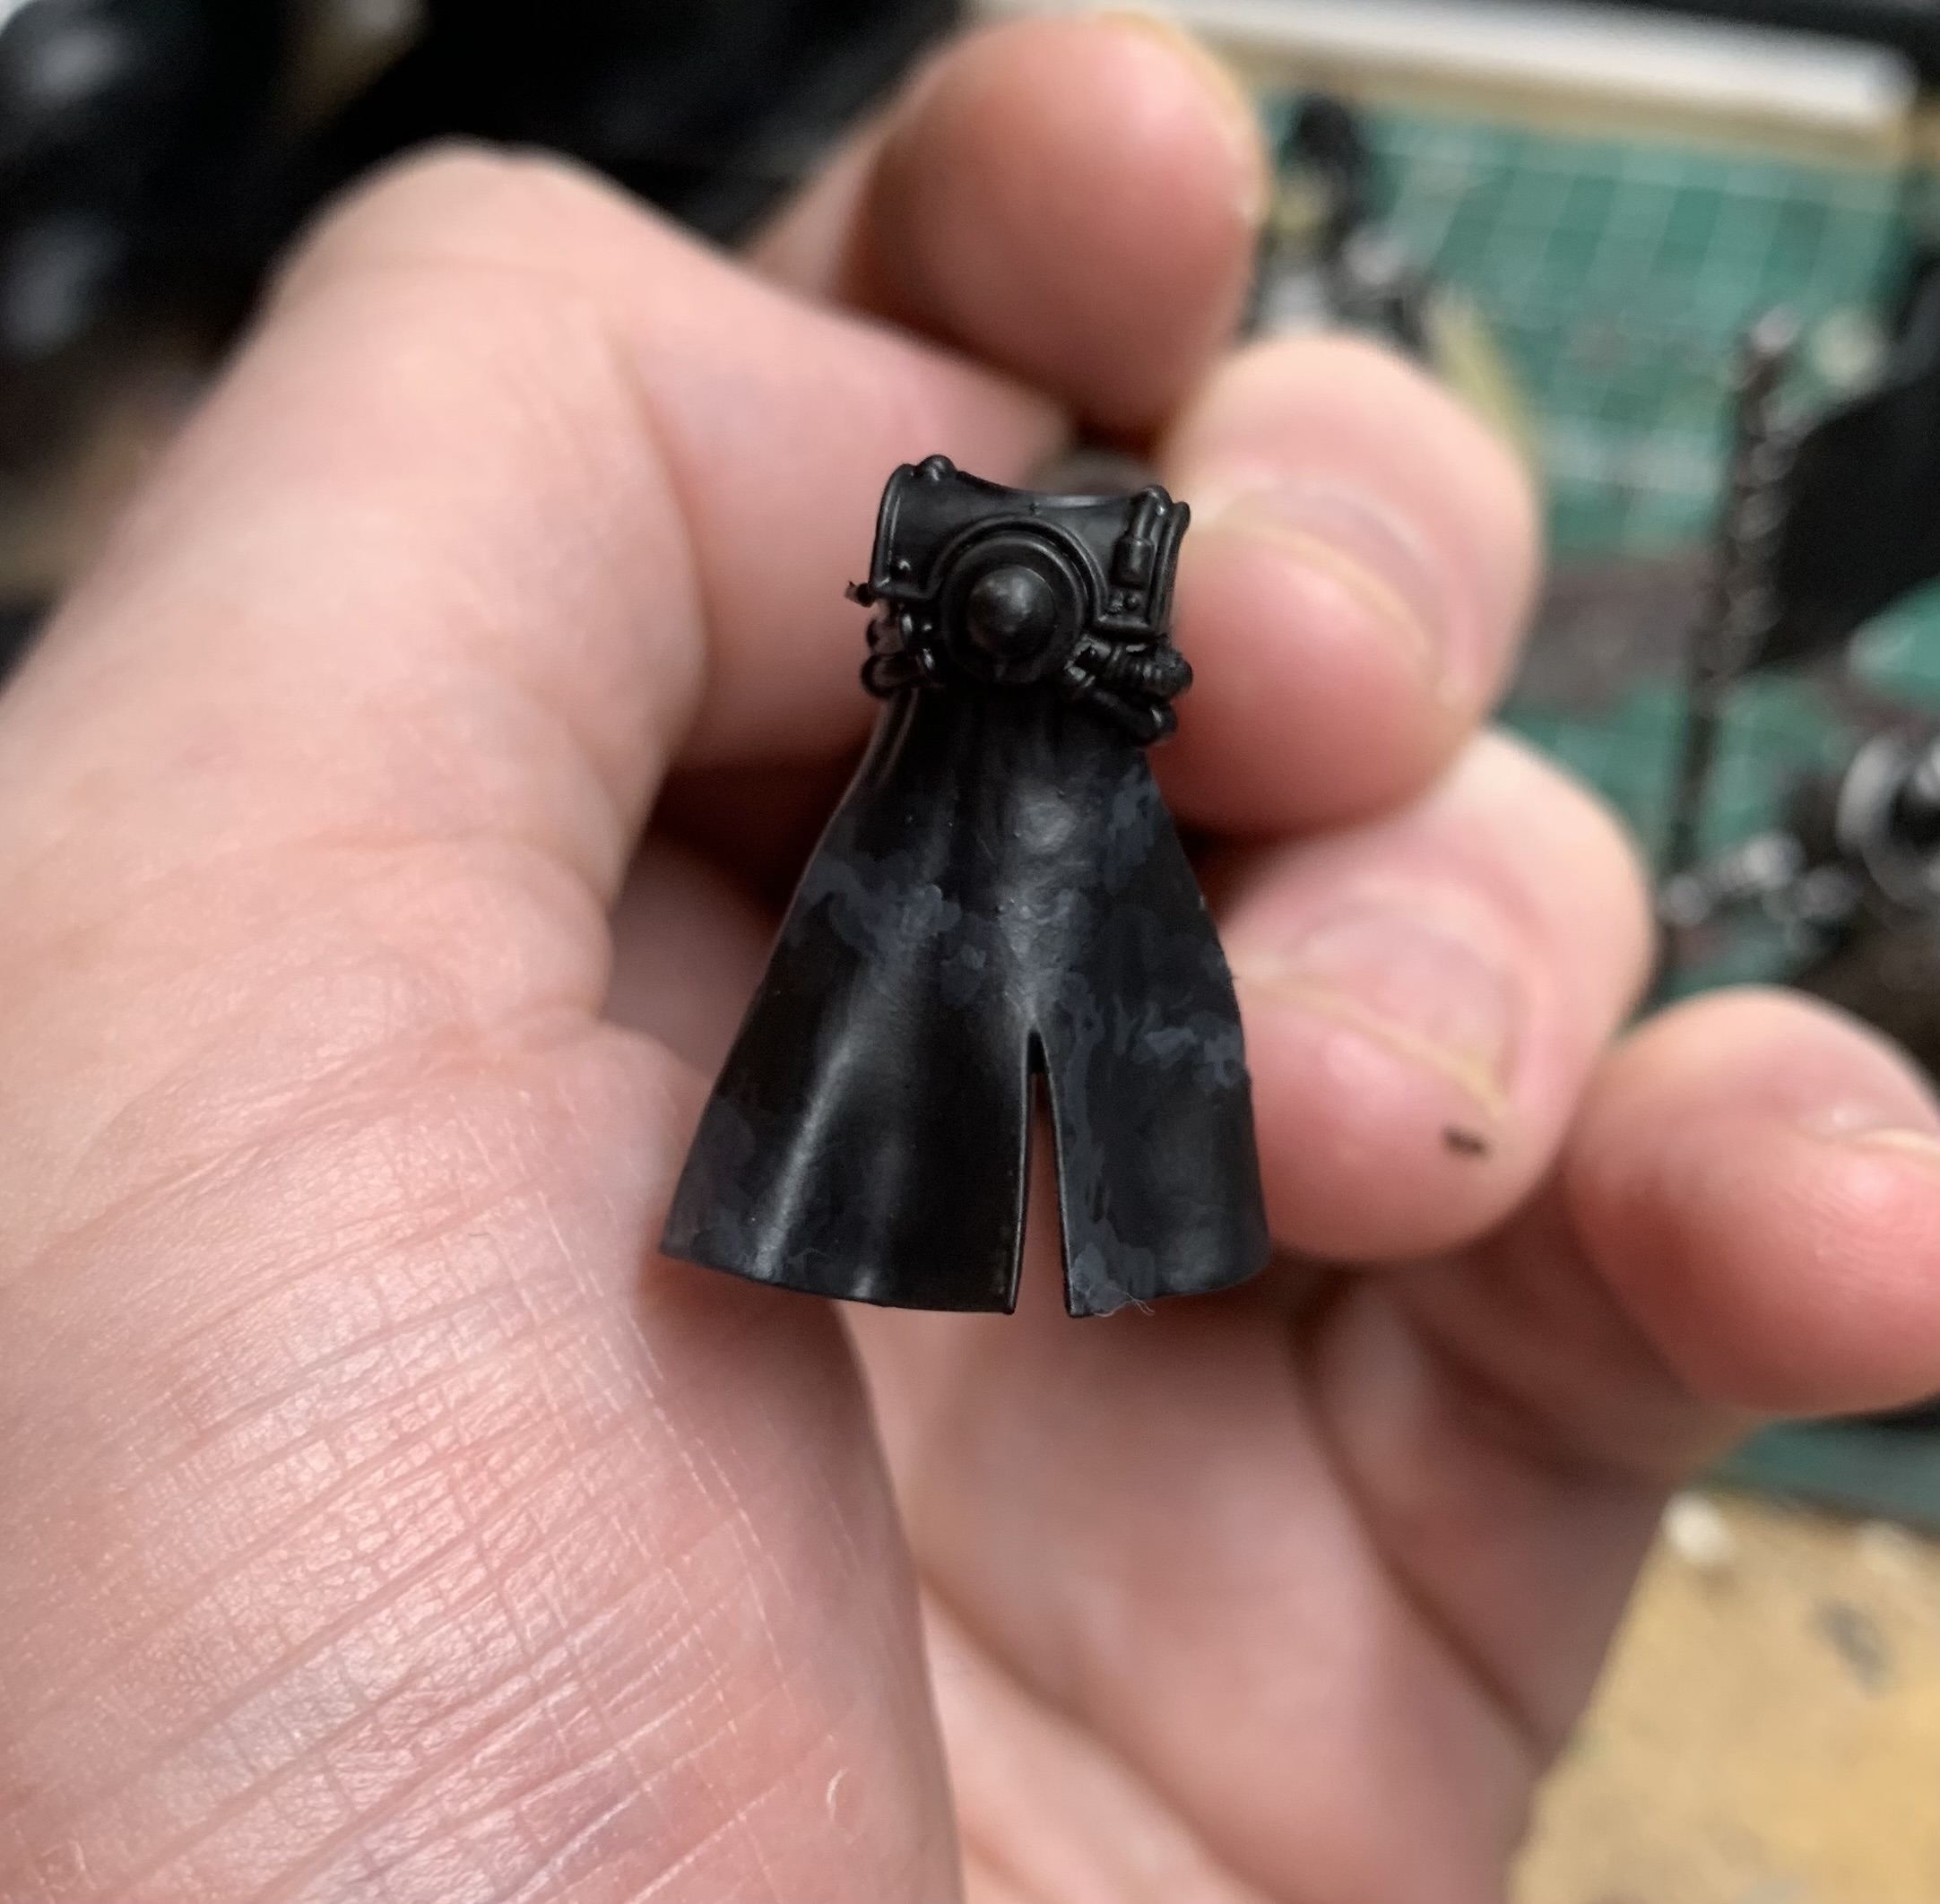
So how are we going to use our Drab Four? Well, first off, we’re undercoating with Abaddon Black – a smooth coat over the whole cape is what you need. But it’s also worth considering that this tutorial is also going to get you away from the idea of ‘Black and White’. Pure black and pure white don’t really exist in the real world, and it’s a bit of a trap that many a hobbyist falls into – thinking that the lightest point is white and the darkest point is black, and that’s very rarely true. Actually seeing colours and shades is a hard trick to learn and very few of the painters you really look up to will push the tonal contrast quite this far unless the particular style dictates. With all of that being said, Abaddon Black is considered quite a weak black (more of a very dark grey than anything) so that’s why we’re ok to use it here. And besides, we’re going to cover it with something else later. Here is our “black” cloak:
I’m not entirely sure why you needed a picture of a black-painted cloak, but I took the picture so you’ll have to put up with an image of my gross hand. But this is going to form the basis of our cloak before we start mixing paints and adding them to what we’re doing. First off, here’s how we’ve mixed things up:
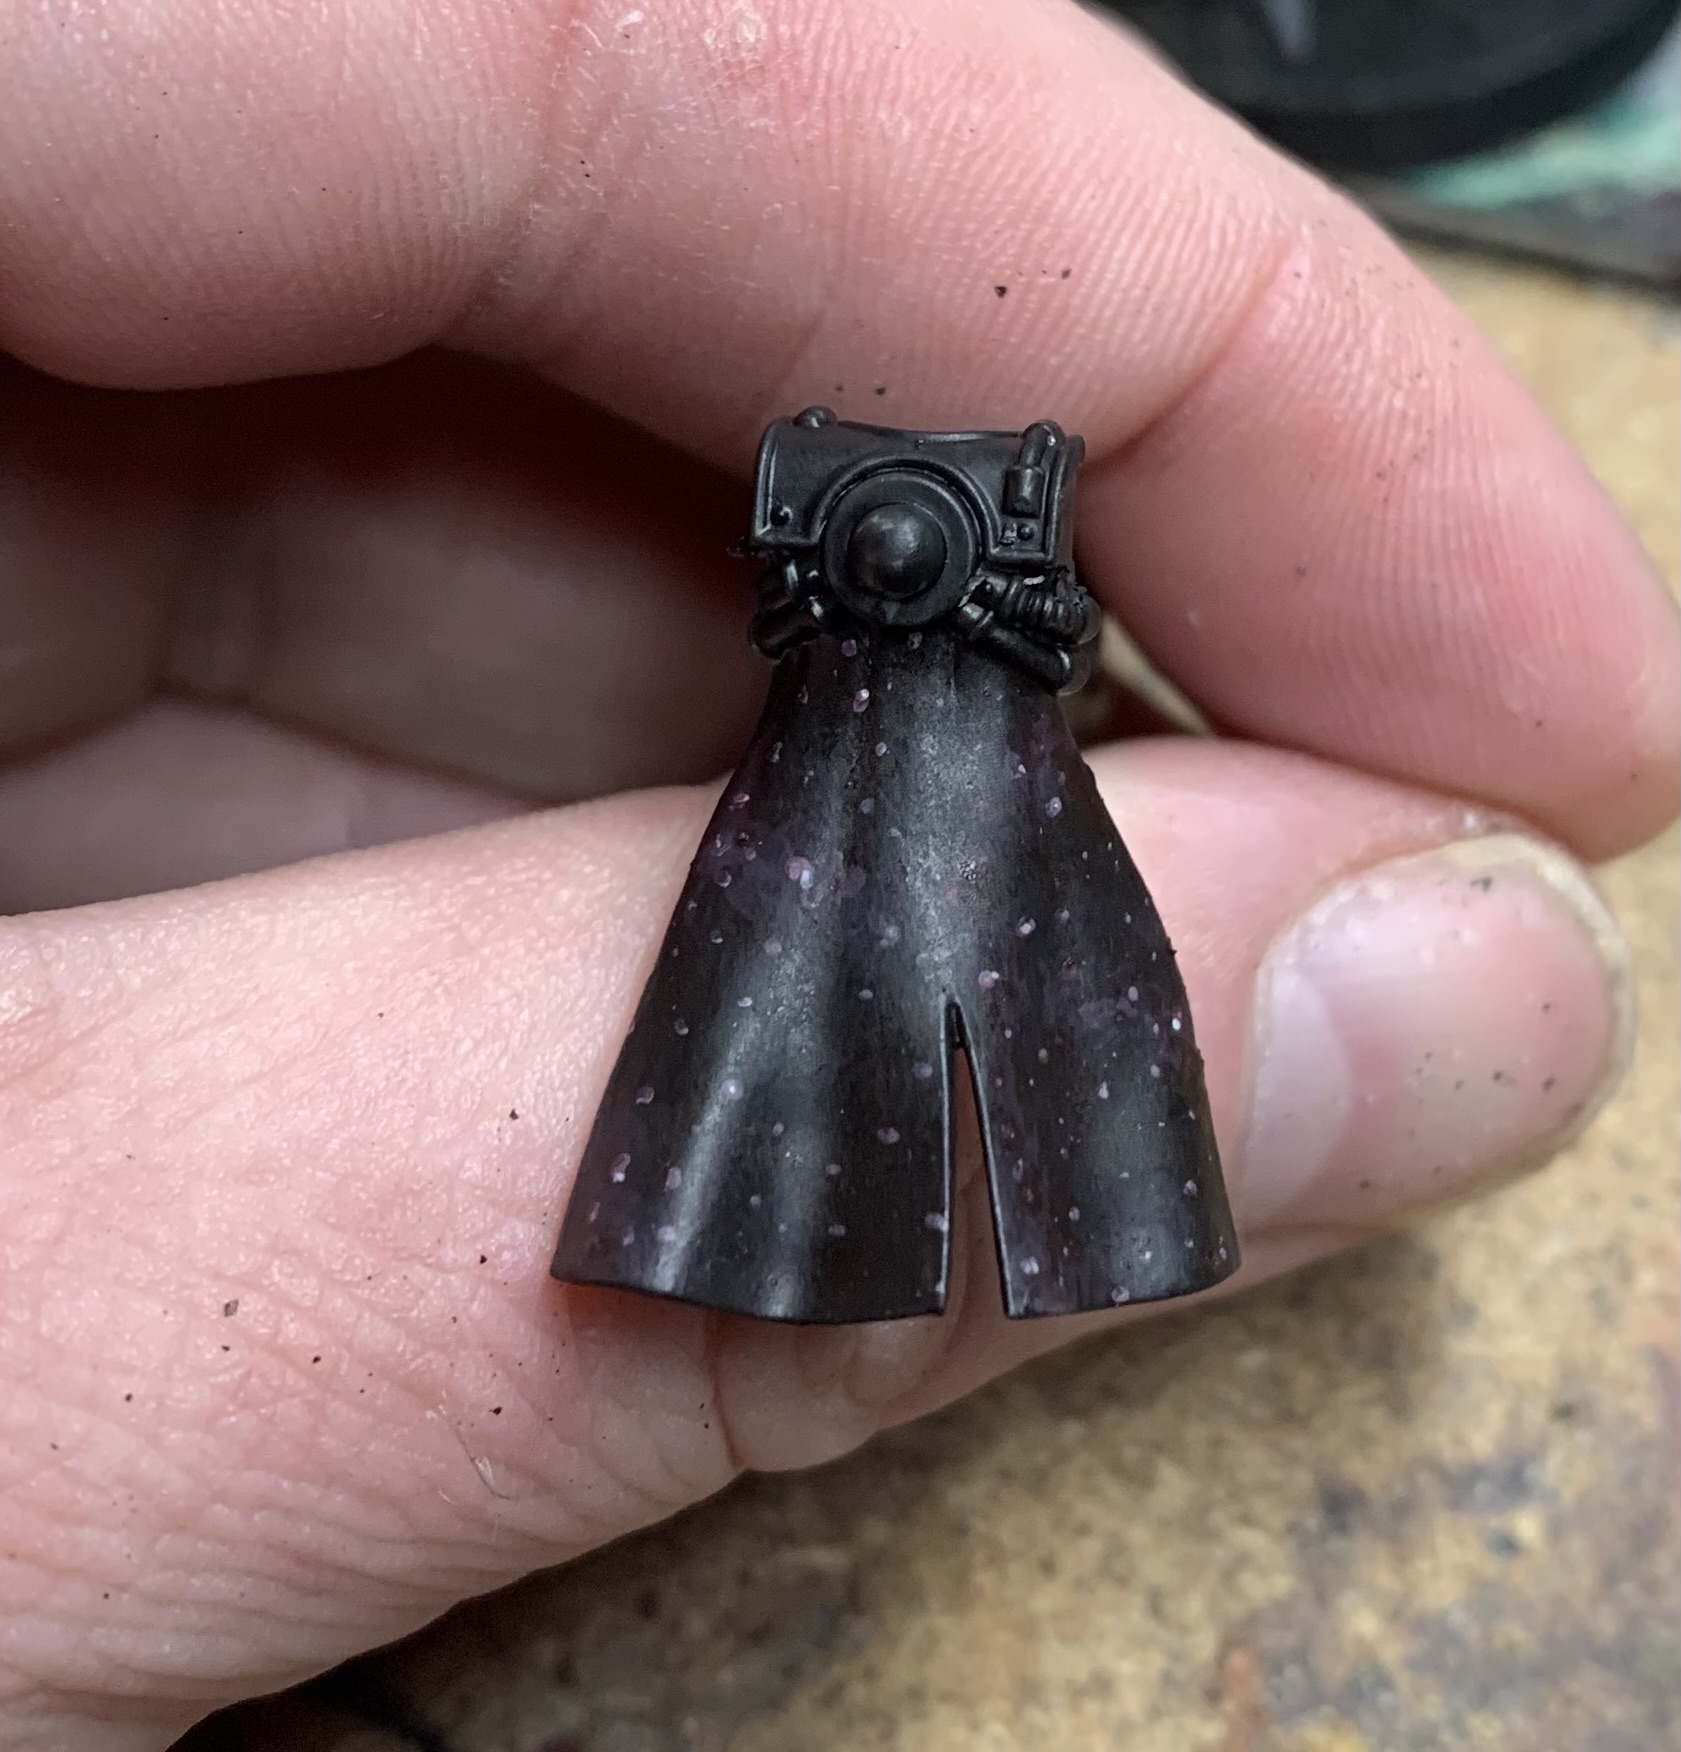
Now, I promise this will make sense in a second, but we’re going to use the Black-Eshin Grey mixes to give us the “clouds” that we associate with galaxies. Then we’re going to use our lighter greys to create the actual stars. Here’s what we do with those darker shades:
I know the above is very subtle but trust me, there’s some different paint on there – this is why I didn’t do full step-by-step photos of the last tutorial because so many of the steps just looked black. But I picked out a rough pattern and then for the next couple of steps, using the above mixtures, I reduced the coverage – painting inside the shapes that I began to define in the above image.
Do you see how I kept the shapes loose and rough here? There are no straight lines in the brush-marks there. Now, You could take this one further with a 1:1 Dawnstone/Eshin Grey mix if you wanted to push the contrast a little harder, but this will do for me here. Now it’s time to paint some stars.
I’m not often an advocate of using a size “000” brush, but whatever helps you get the finest point is worth it here – if a tiny brush gives you the confidence to do this, have at it. You just want tiny dots, and you want them to not have any sort of geometric pattern – pure randomness is better. The above was done with pure Dawnstone, and next, we move on to pure Administratum Grey:
Some stars shine brighter than others, and predominantly here, you’re going to be placing tiny dots of Admin Grey inside bigger dots of Dawnstone. Again, use the best, sharpest tip you have on a brush for this work. Don’t press into the mini – just let the very tip of the brush give the mini the tiniest peck. A soft little kiss is all you need.
Then you’re going to cover it all in a shade or a very-thinned-down contrast paint. This will help to blur the edges even more, and make it more… I don’t know what the word is… “galactic”? Those images you see from Nasa don’t show grey galaxies, right? They are often in different hues like pinks, blues, greens, purples, reds… and while I used Carroburg Crimson on the above, you can use any shade of paint you want. But it needs to be as thin as a Citadel shade paint or you’ll lose a lot of the detail you’ve put down.
And finally, you’re going to pick out a couple of these stars (or a few) and you’re going to give them the tinniest dot of Celestra Grey, because again, some stars shine brighter. And that’s how I do star-covered cloaks or capes. maybe the above images don’t sell it enough thanks to my manky fingers and the fact that the mini is going to be several times as large as it actually is, but look at those two minis at the top of this post again – that’s what it will look like in real life. And if you want to push it, you can add more steps of grey galactic cloud, make the patterns more intense… have a play. I’m sure you’ll have some fun.
It’s nice to get some tutorials back on the blog, and if you have anything you’d like me to make a tutorial of, just let me know on Twitter or reply to this blog post. More than happy to do more of these for those that want them. Onwards!
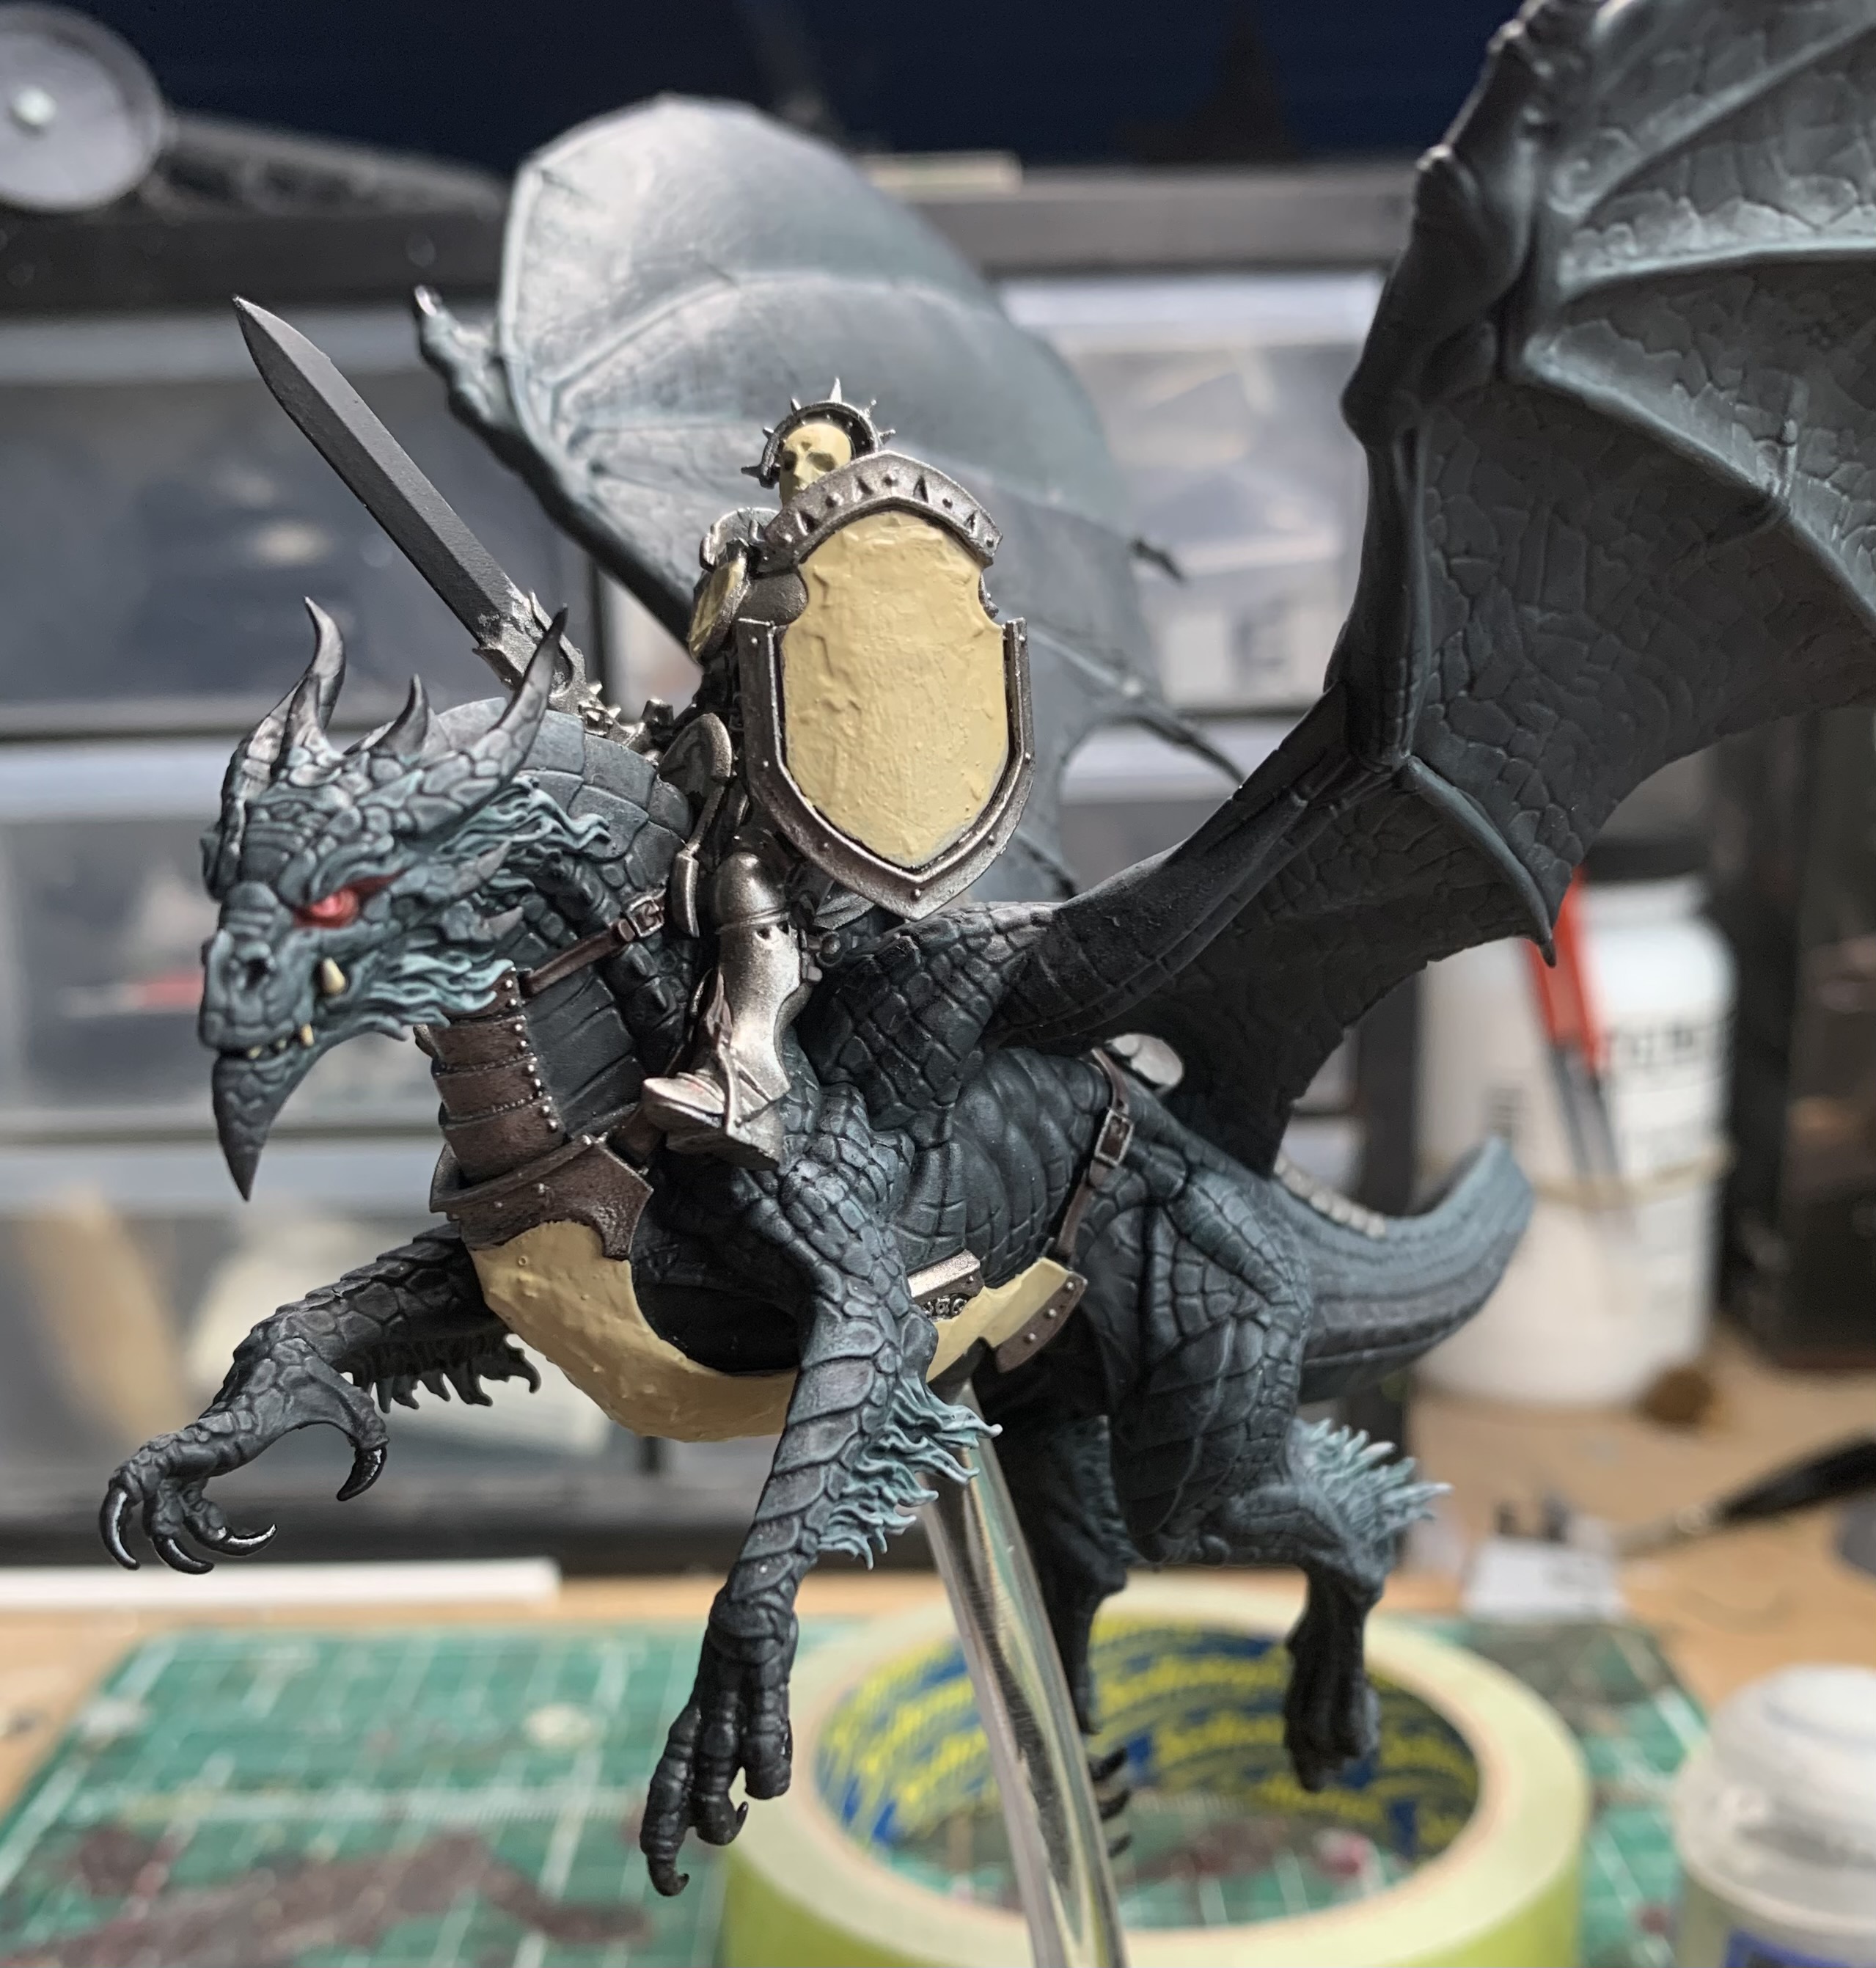
Games Workshop were kind enough to send me some of the brand new Stormdrake Guard recently and I have added them to the ranks of my Stormhost – the Ashen Stars. I showed the first one I painted off to the folks on twitter and asked if people would like any tutorials based on the model and I got an emphatically positive response. So, here we are – that’s exactly what you’re getting today. I will show you how to paint black dragons and rusty old armour and I promise you that these are very simple schemes to work on. I painted my Stormdrakes like this because I have very little time to dedicate to this army, but I still want it to look good, so I went with a down and dirty set of methods that do the job. Will these techniques help win you any awards? No. But can they help to create something effective and striking on the tabletop? I hope so, yes.
How To Paint A Black Dragon
First off, we’re going to tackle the dragon skin and we’re going to be using the age old technique of drybrushing. While some people look down on drybrushing, it’s a great way for a painter to achieve organic transitions and cut down time when painting a big mini like this. You can get a very nice effect and as long as you remove most of the paint from your brush before putting it to the mini, it’s very hard to make it go wrong. Just keep a very light touch and use the right sort of brush, I use something like this:
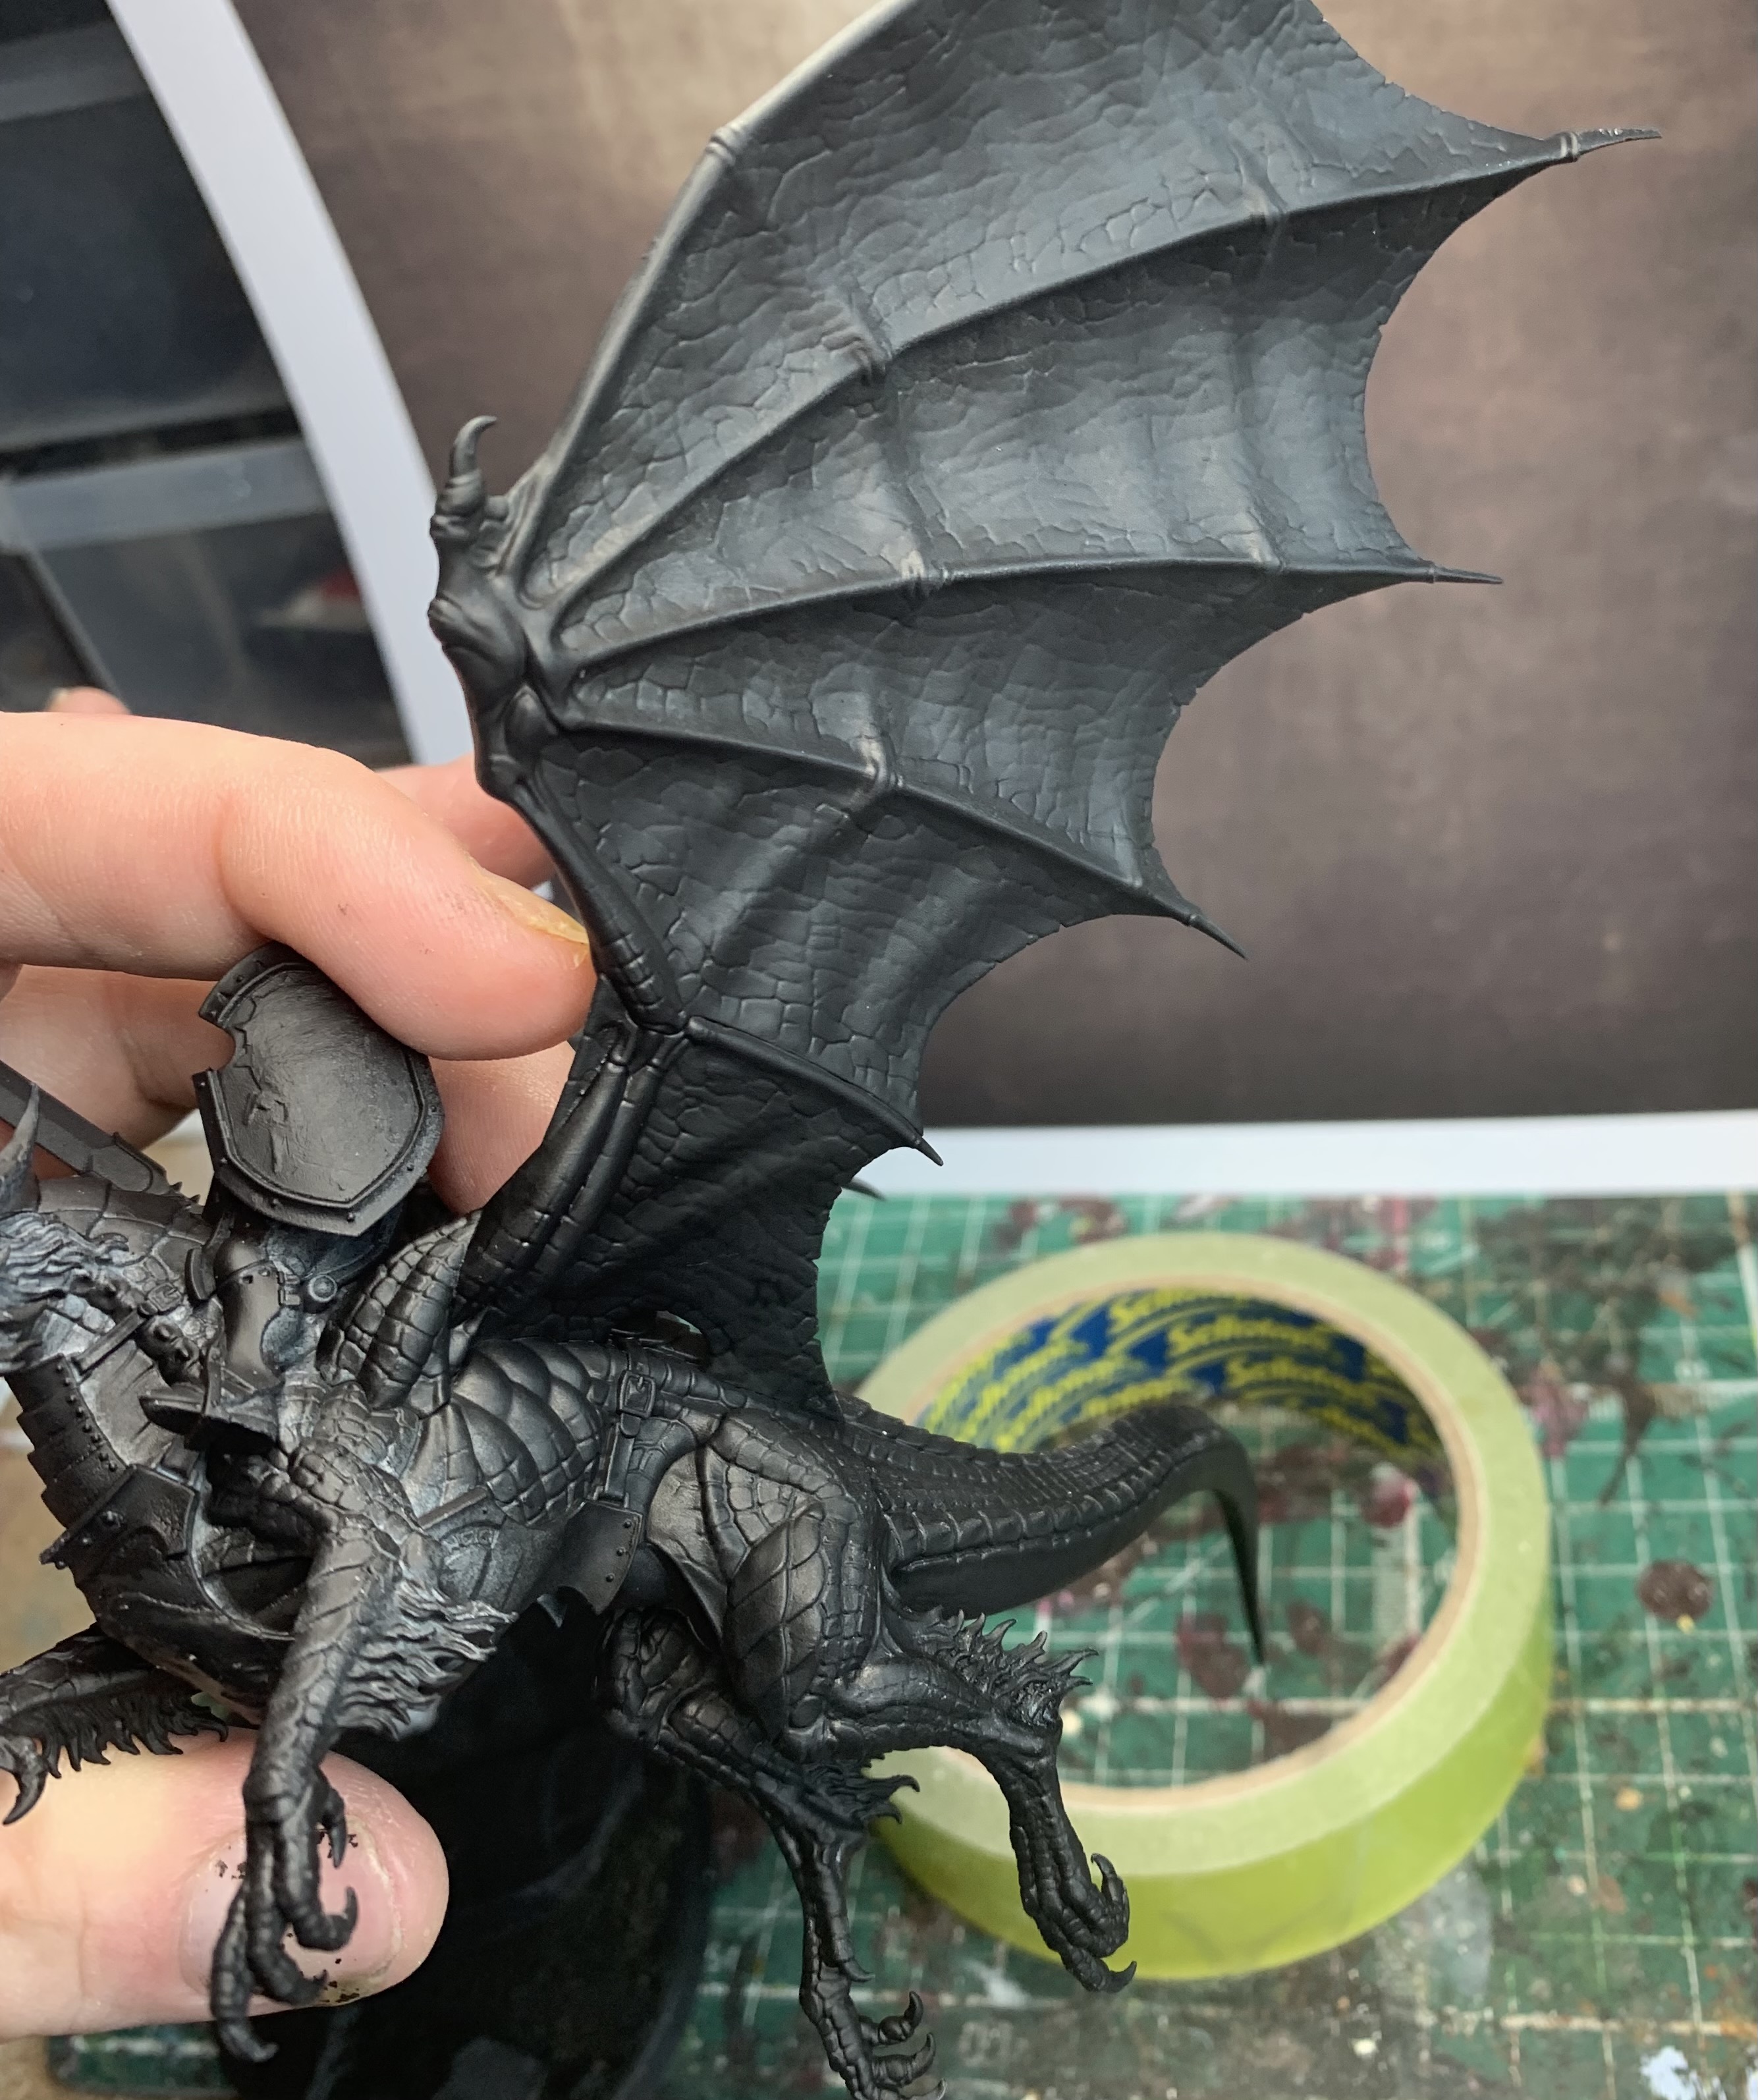
Well, for the larger areas anyway. Stiff bristles with a broad tip, this brush is perfect for this sort of work. And now that we have our brush, we need to meet our paints that I think of as the ‘Drab Four’ (a slight nod to Type O Negative there too). As we’re working on a black base, we’re going to use Abaddon Black, Eshin Grey, Dawnstone and Administratum Grey (you can of course use similar paints from other ranges – this is just what I have). All of our drybrushing is going to be done using these paints in various combinations. But before we get there, we have to get our base colours down. It’s also worth knowing that we’ll be thinking of our light-source being overhead. To that end, after giving the whole model a nice even spray of Chaos Black, we’re going to coat the underside of the model in Adaddon black because it is a little darker.
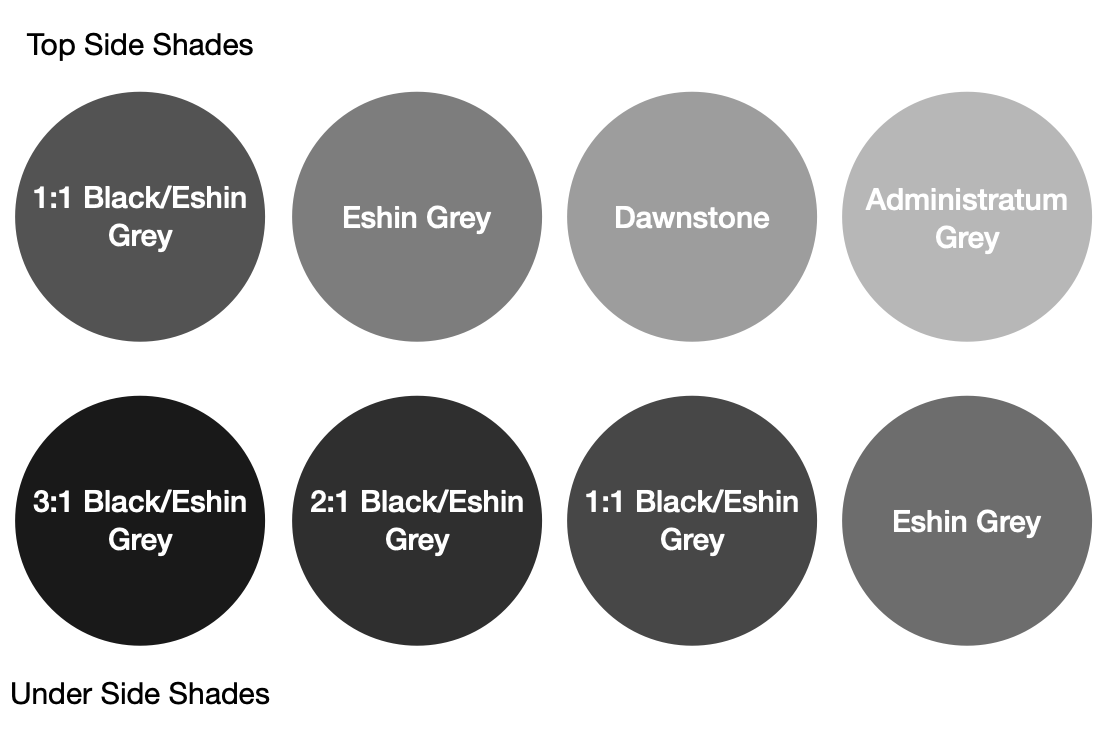
Because we’re now treating this as a miniature of two halves, we are going to drybrush the underside and the top side with different shades using our ‘Drab Four’. Now, I was going to show you eight different photos of a black dragon becoming slightly less black but that just looked stupid so instead, we have what every fun blog post needs; a diagram:
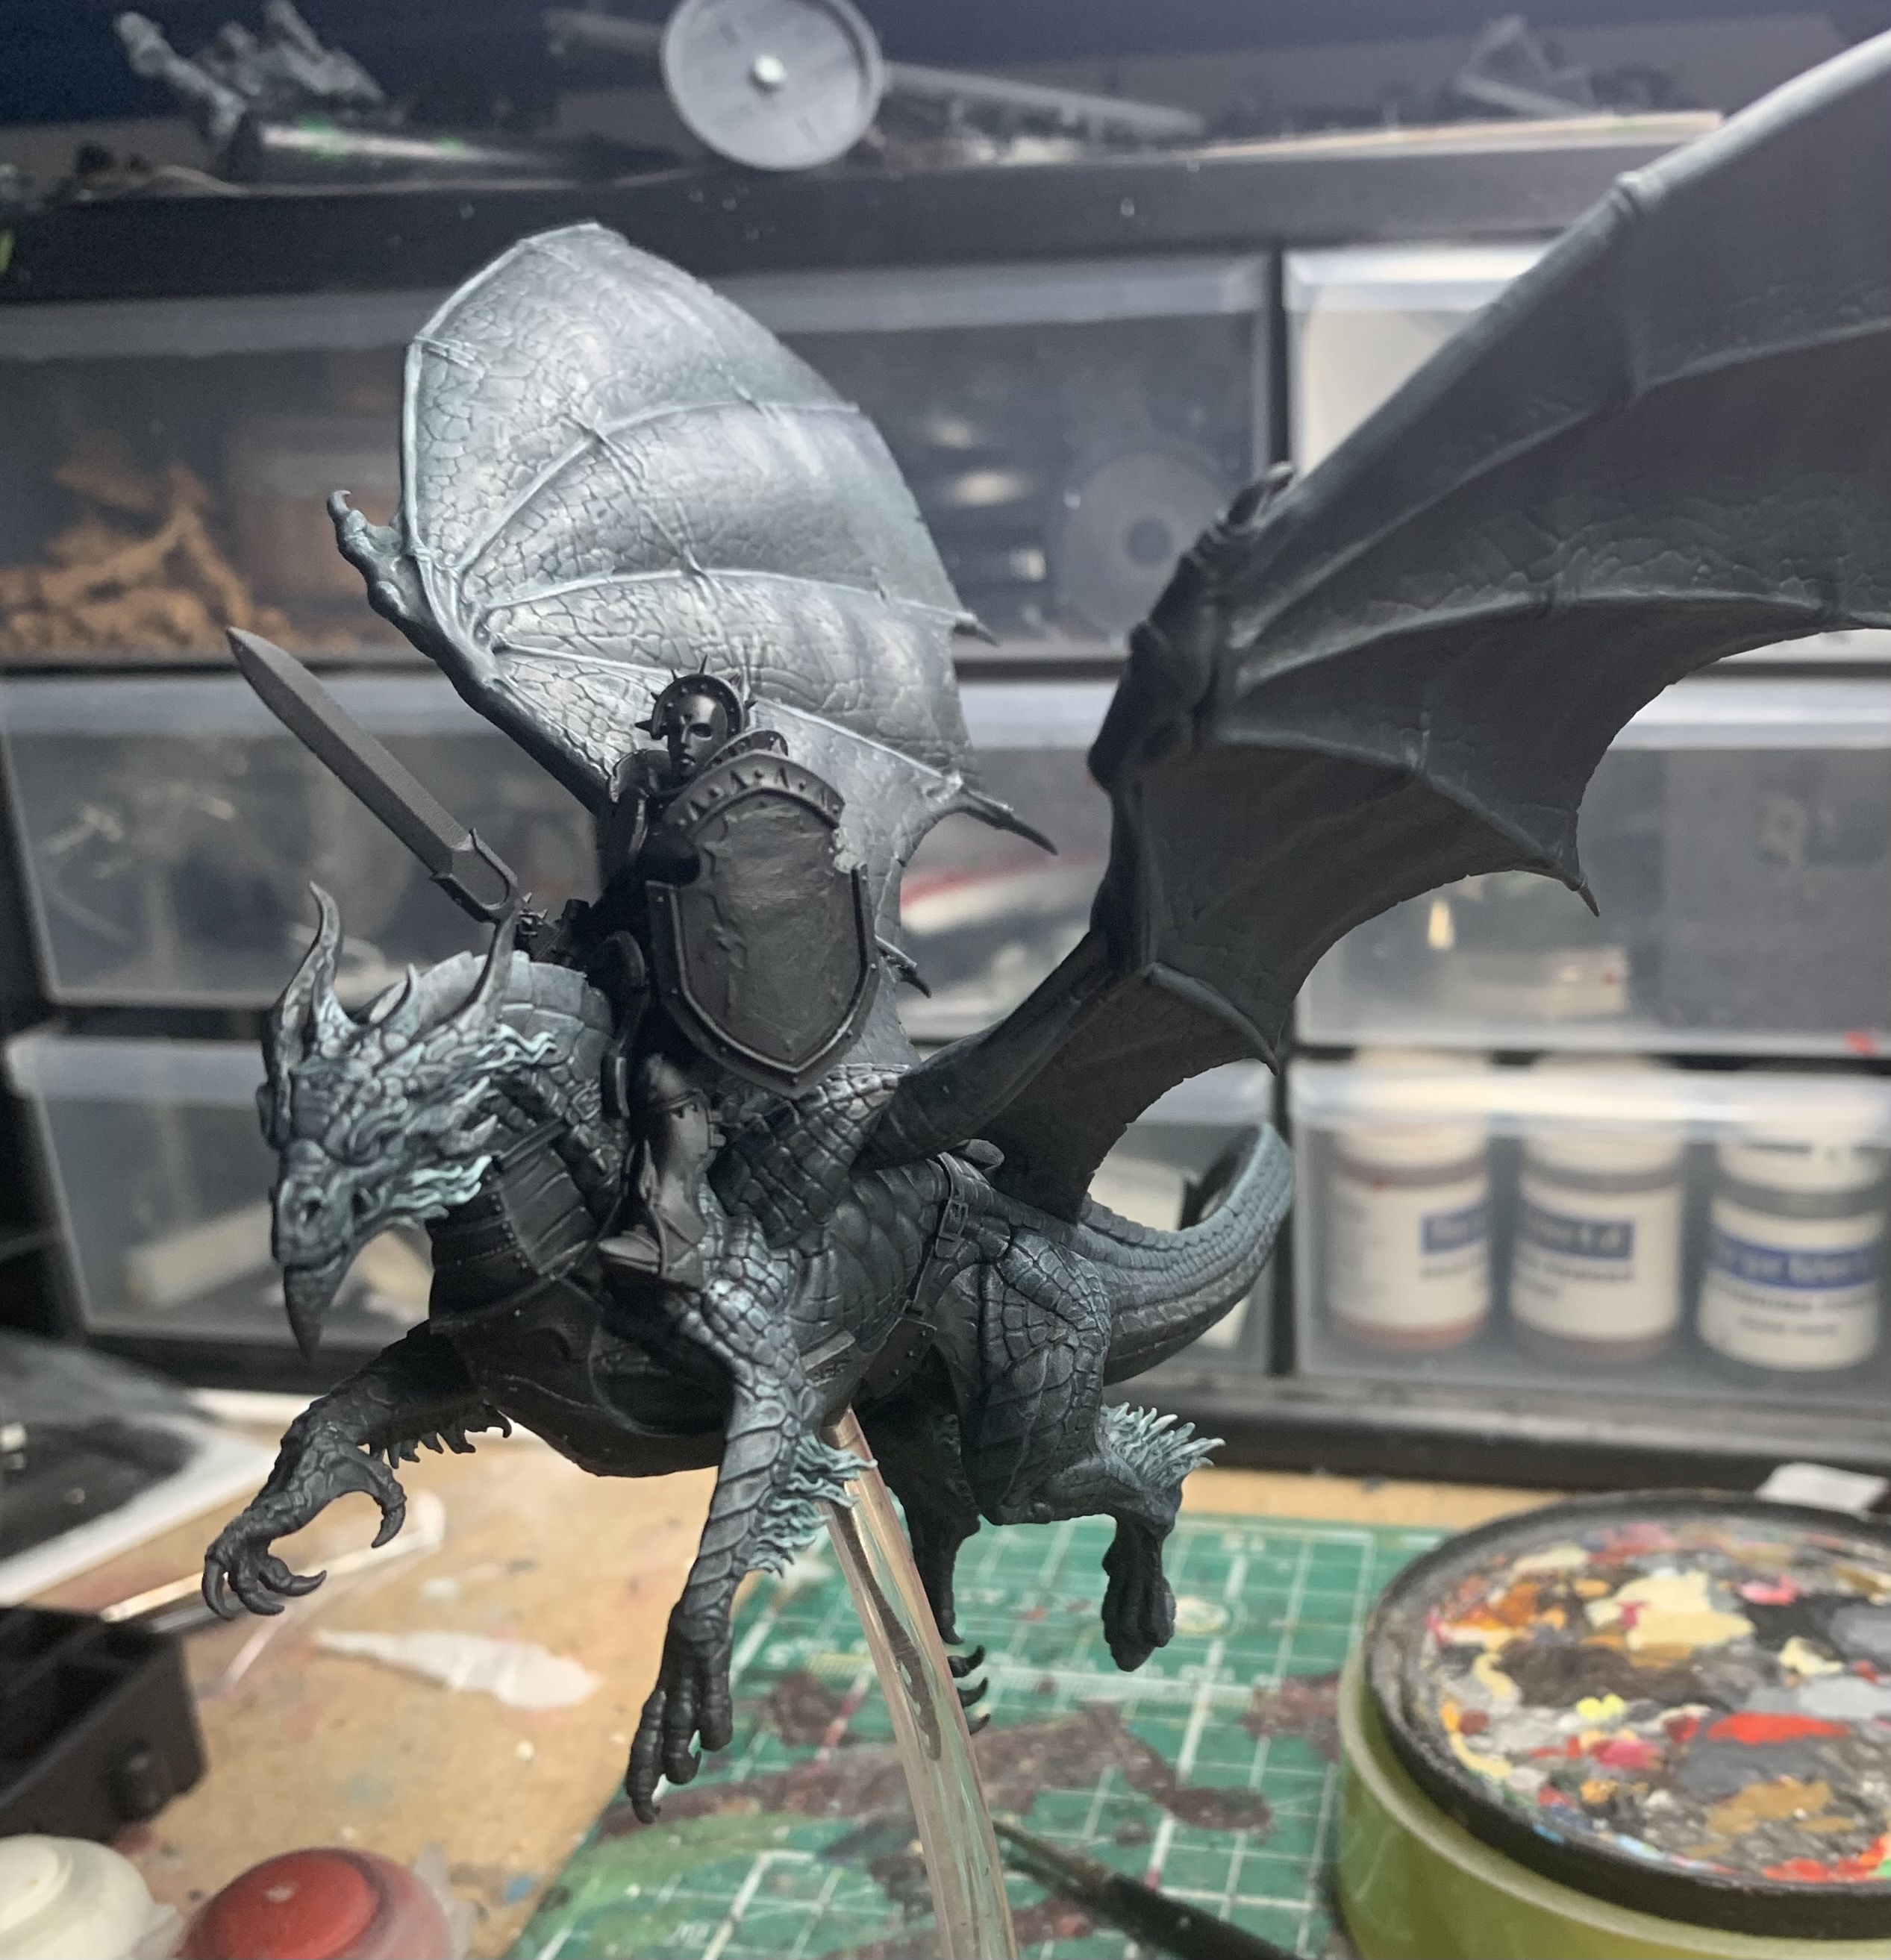
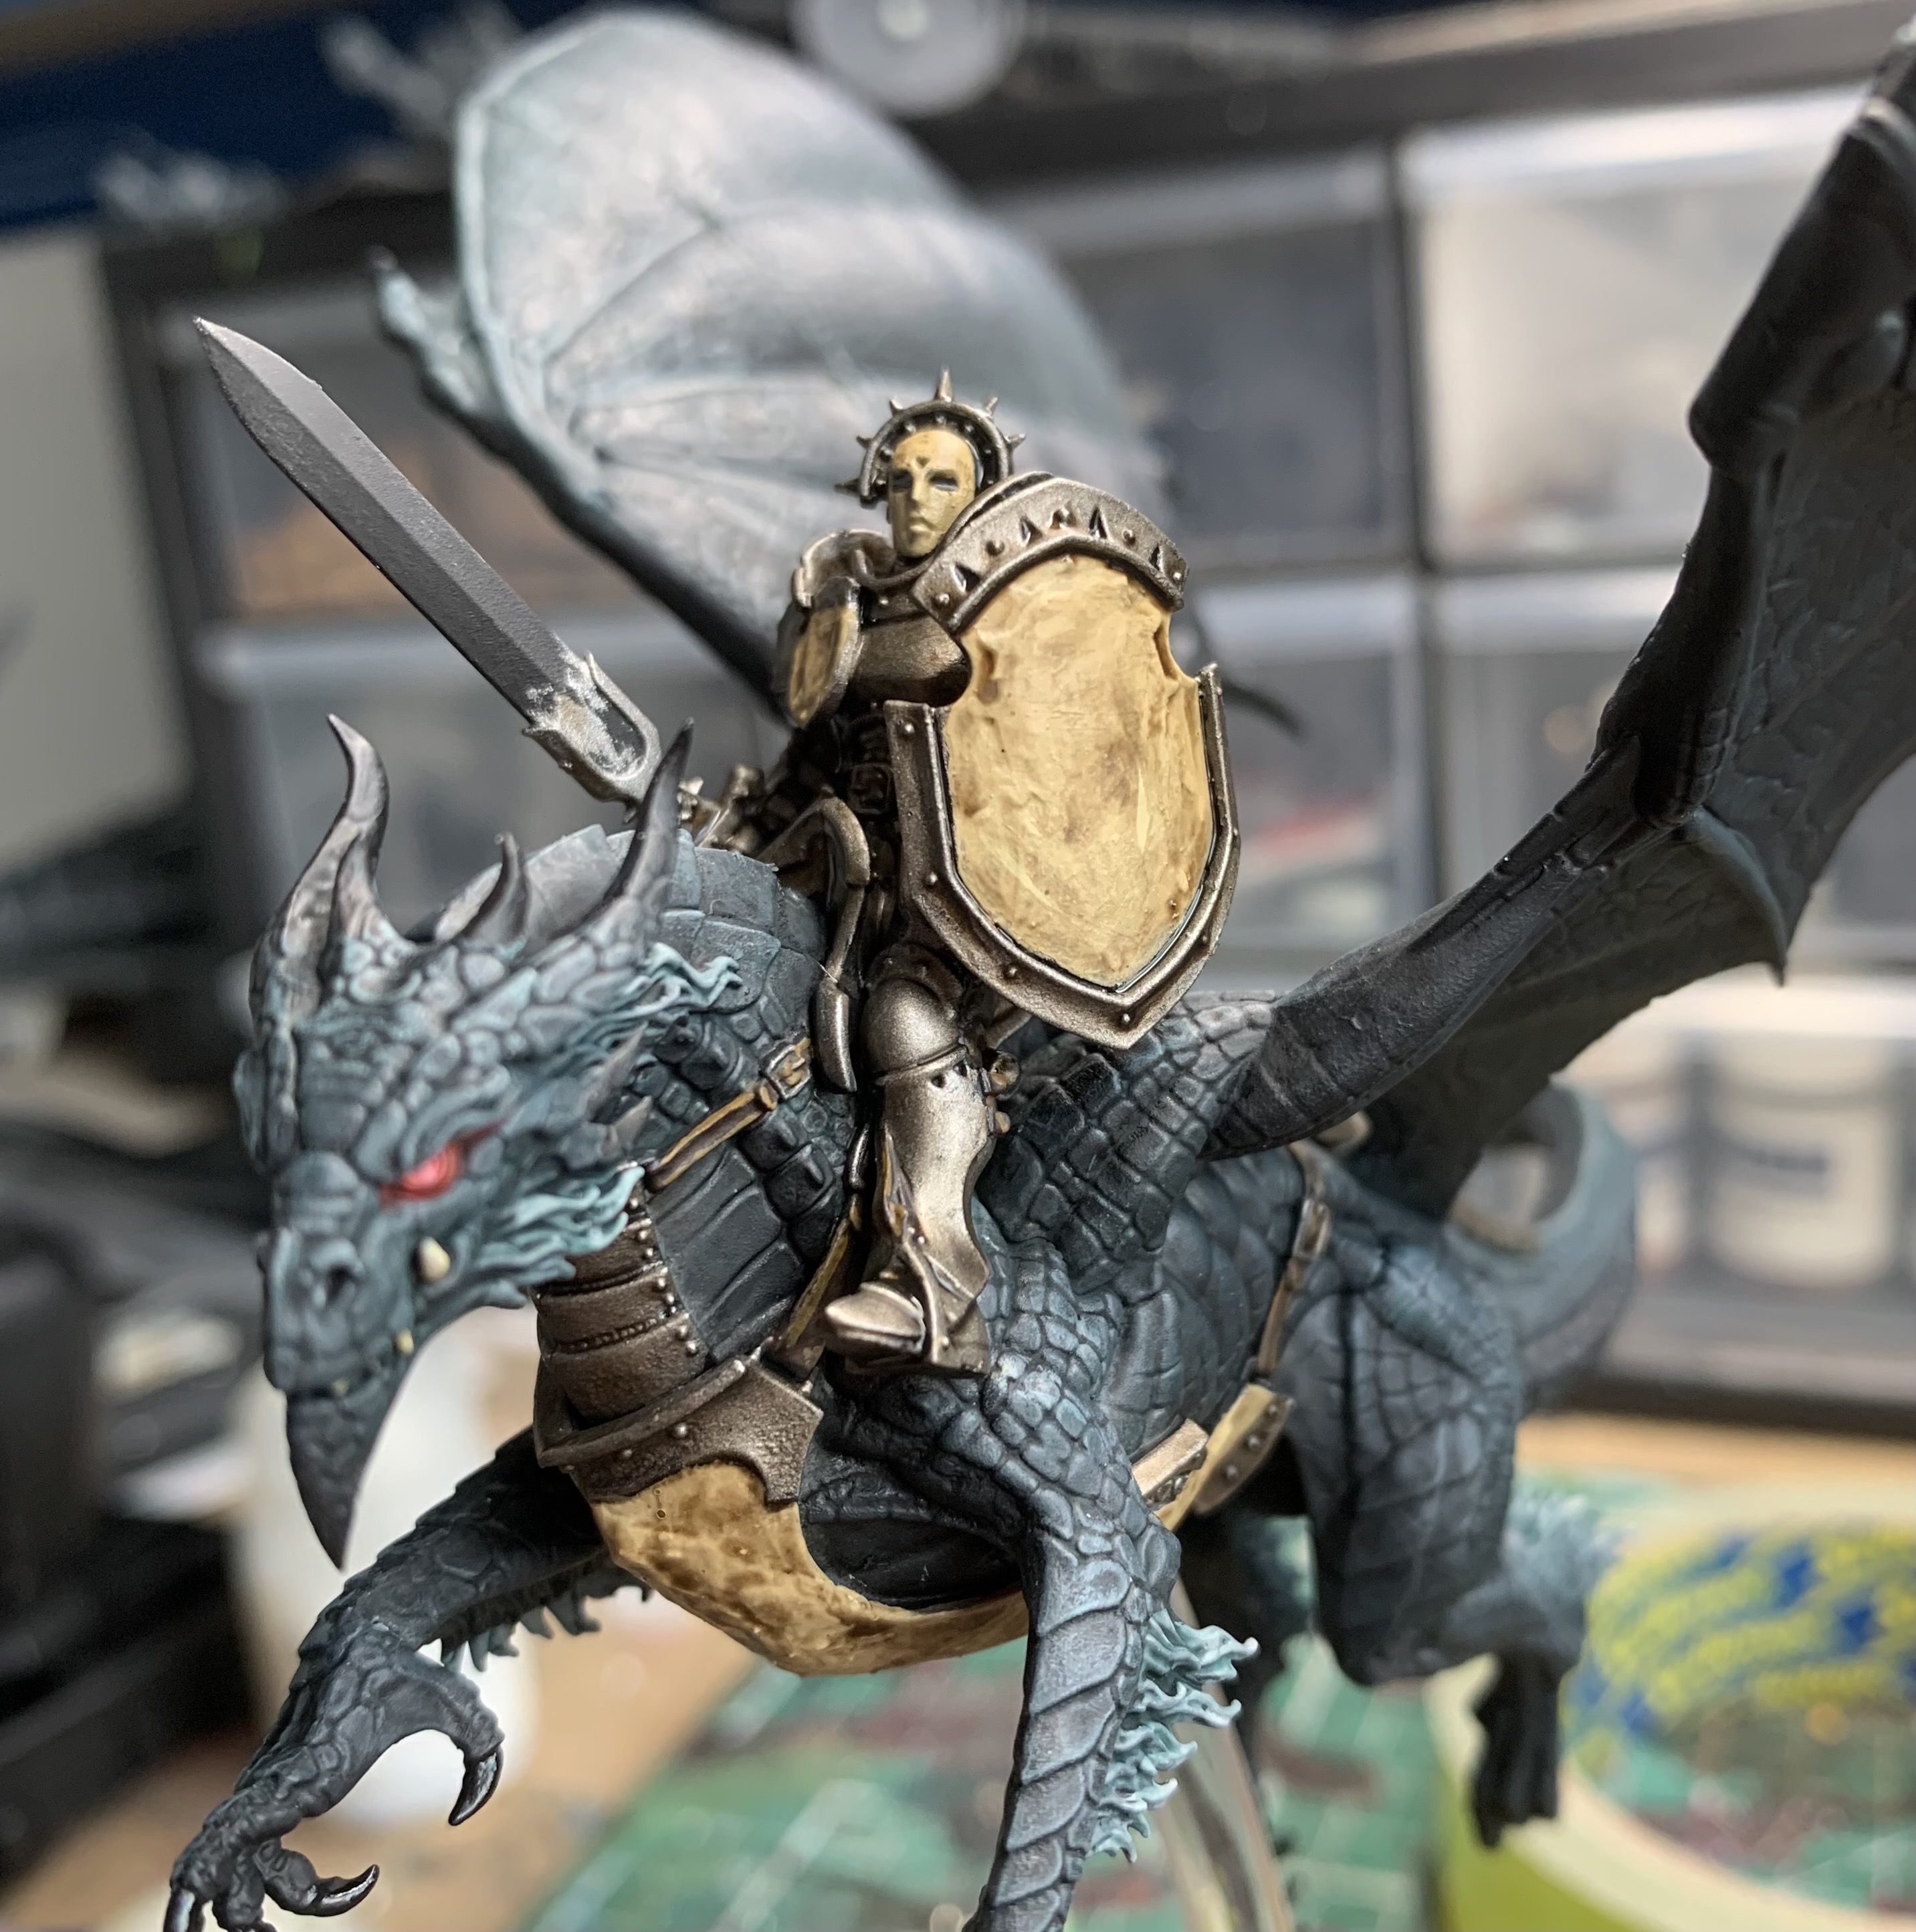
So the Underside will never get lighter than Eshin Grey, while the top side will go all the way up to Administratum Grey. You start with the darkest shades and cover the whole area you’re working on (top side or underside) and by the time you’re using the lightest shades, you should only be hitting the most prominent parts. It looks very subtle on the underside, but subtle is good on organic things:
Then, above the wings, it can look a lot more vibrant even when using these greys:
Next up, you want to take a smaller brush and apply that last high light of Administratum Grey to the highest points and also paint the ribs in the wings – the bits that lead to each of the individual talons (Eshin Grey Underneath, Admin Grey on top). You’ll also want to paint the hair, using Dawnstone as a base, and Administratum Grey as a highlight colour.
Almost done. One last step and our dragon scale is complete. All that’s left is to cover this in an even coat of, well, it’s up to you. Using the Citadel paint range as a guide, Shade paints will give you a subtle tone, but if you want something more vibrant, a slightly thinned Contrast Paint will do the job too. For this dragon though, I used Coelia Greenshade to get a nice, dark look – perfect for a black dragon.
Like I said, you could use other paints (I think Druchi Violet or Carroburg Crimson would look amazing as alternatives), but I’m very happy with this. I suppose technically this means it’s only “Battle Ready” but I’m ok with that.
Anyway, now that the bulk of it is done, we don’t want to linger too long on the rest of the details. Next up, I’m going to give this dragon shiny black talons, and I’m going to let actual light give them some very smooth highlights. I went around all the talons (on the feet and the wings) and blocked them in with Abaddon Black. After this, I gave each a coat of ‘Ardcoat. Done. Why highlight these naturally shiny parts when the light bouncing off them can do all the work for you?
I also blacked out the horns on its head at some point though I didn’t add ‘Ardcoat to those – I just wanted to set them apart a little bit.
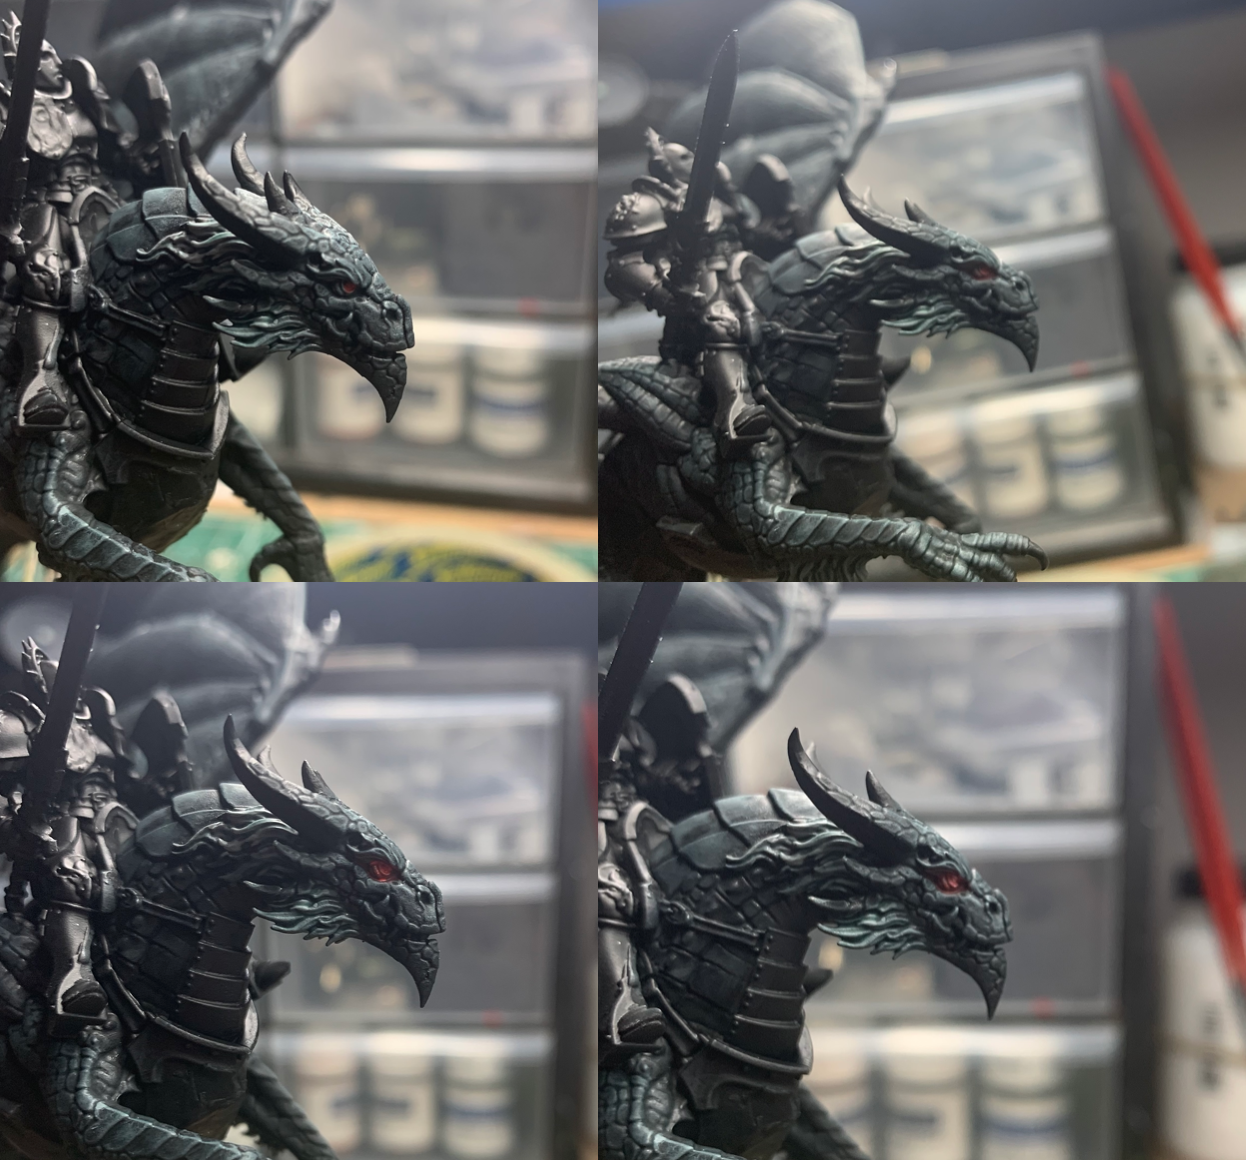
Next up it’s time to do the glowing red eyes. Take Mephiston Red and put some of this on the actual eyeball. Next, thin that Mephiston Red down plenty and paint it into the the recess that the eye sits in, always drawing the paint back to the eye itself – this is our glow. Do the same two steps next with Evil Sunz Scarlet but don’t go so far away from the eye with this paint, and again, draw it back to the source of the glow. Now add some White Scar to some Evil Sunz Scarlet and just hit the eye with this. Give it a second highlight if you like with a bit more white in the mix for a spot highlight.
The last thing I did was the fangs. A little Ushabti Bone, then a wash of Seraphim Sepia, before bringing it back up with Ushabti Bone and a Spot Highlight of Screaming Skull.
There you go. Dragon is done. Quick, easy and it doesn’t look too bad either. Like I said, you won’t win awards with this, but it does end up looking quite striking on the tabletop.
How To Paint Rusted Armour
Now I’ve been painting up this rusted armour in this way for 4 years now and it serves me well enough. I mentioned in another post not too long ago that it’s sometimes hard to get back into the habit of painting metallics like this after my personal preferences have changed quite a bit over that time, but it’s a nice, easy way to do things and it holds up just fine if you don’t glare at it too closely. Also, if you’re going to be quick, remember that weathering hides a multitude of sins.
First off, we’re going to put down three base colours as seen above. We have Ushabti Bone, Leadbelcher, and Rhinox Hide for the leather areas. A couple of coats should do. Be as neat as you can, but we have ways of fixing things later so don’t worry if you miss a spot, but try and stay as clear as you can from the dragon skin – much harder to touch up.
I got the leathers out of the way next. Edge highlight with XV88 and then coat with Seraphim Sepia. Done. This is a very simplified and quick version of the same technique I use for most of my leathers and it works just fine here in this very basic form.
Then the bone and silver areas get a nice coating of Liquid Talent (Agrax Earthshade) before leaving it to dry. Don’t let it pool too badly though – we’re going for quick not (figuratively and literally) sloppy.
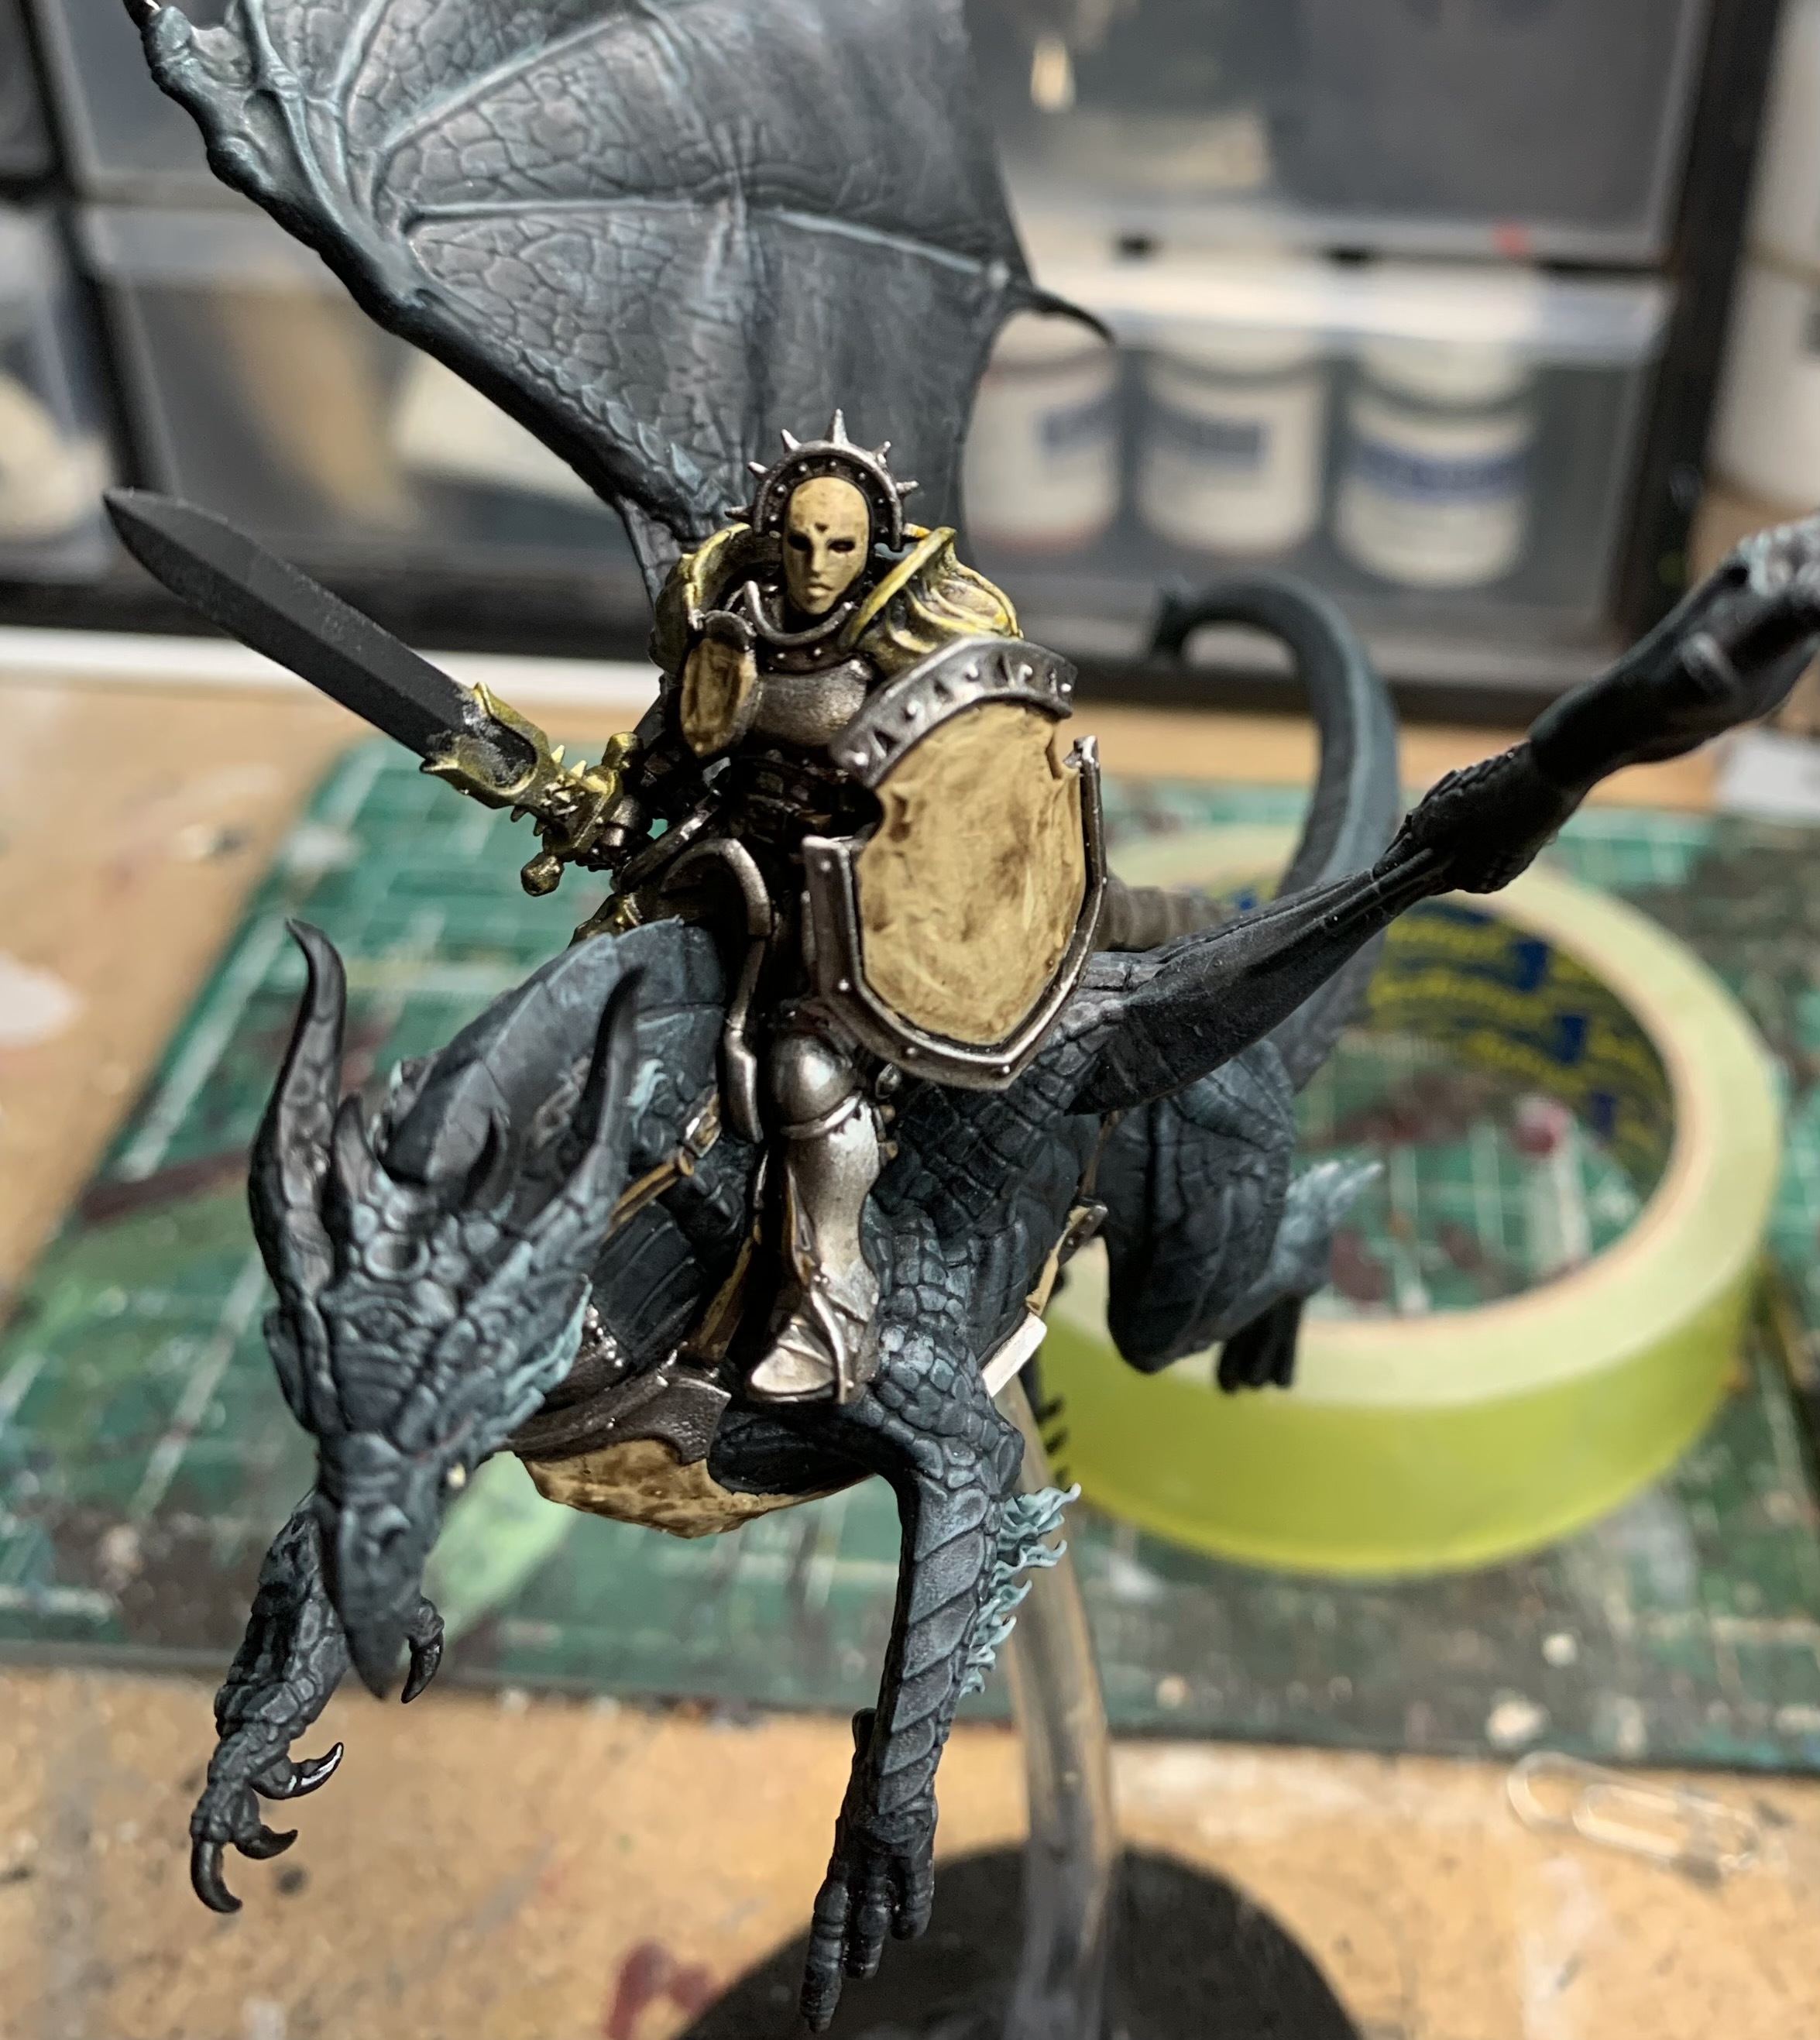
Next we’re bringing the Silvers back up. Focussing on the higher areas (that might catch the light source from above) we use Leadbelcher again, before applying a spot highlight and fine edge highlight of Ironbreaker at those high points. Make sure you hit those rivets with Ironbreaker too.
Now we’re going to use a Contrast Paint to make some areas a nice brassy/gold colour. I used a mixture of Contrast Medium and Nazdreg Yellow (about 3:1). Seriously, since Contrasts came out, I have painted nearly all my metallics with this method and it just makes everything so much easier.
Then we’re going to do something similar with the bone colour that we did with the silvers. Bring it back up with Ushabti Bone, leaving only the recesses with a sign of Agrax, and then use Screaming Skull on the higher areas and areas that would catch the light.
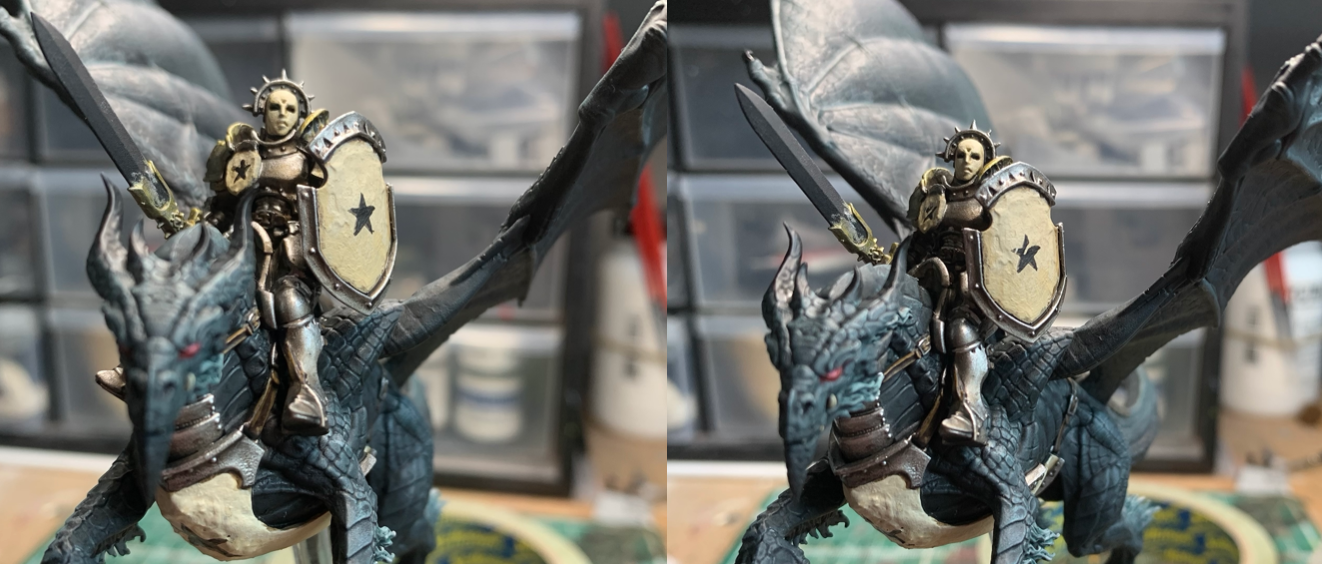
Now, I can’t not freehand something on a miniature ever, and this army does have its black star motif. It’s a good time to practice your freehand here as you’re going to be able to scuff up any areas you’re not happy with. I really messed up the one on the tilting shield, but hey, that’s what weathering is for, and you can see in the second image above that I just used some undiluted Screaming Skull to make it look like its been scratched. Now, let’s have some fun with weathering…
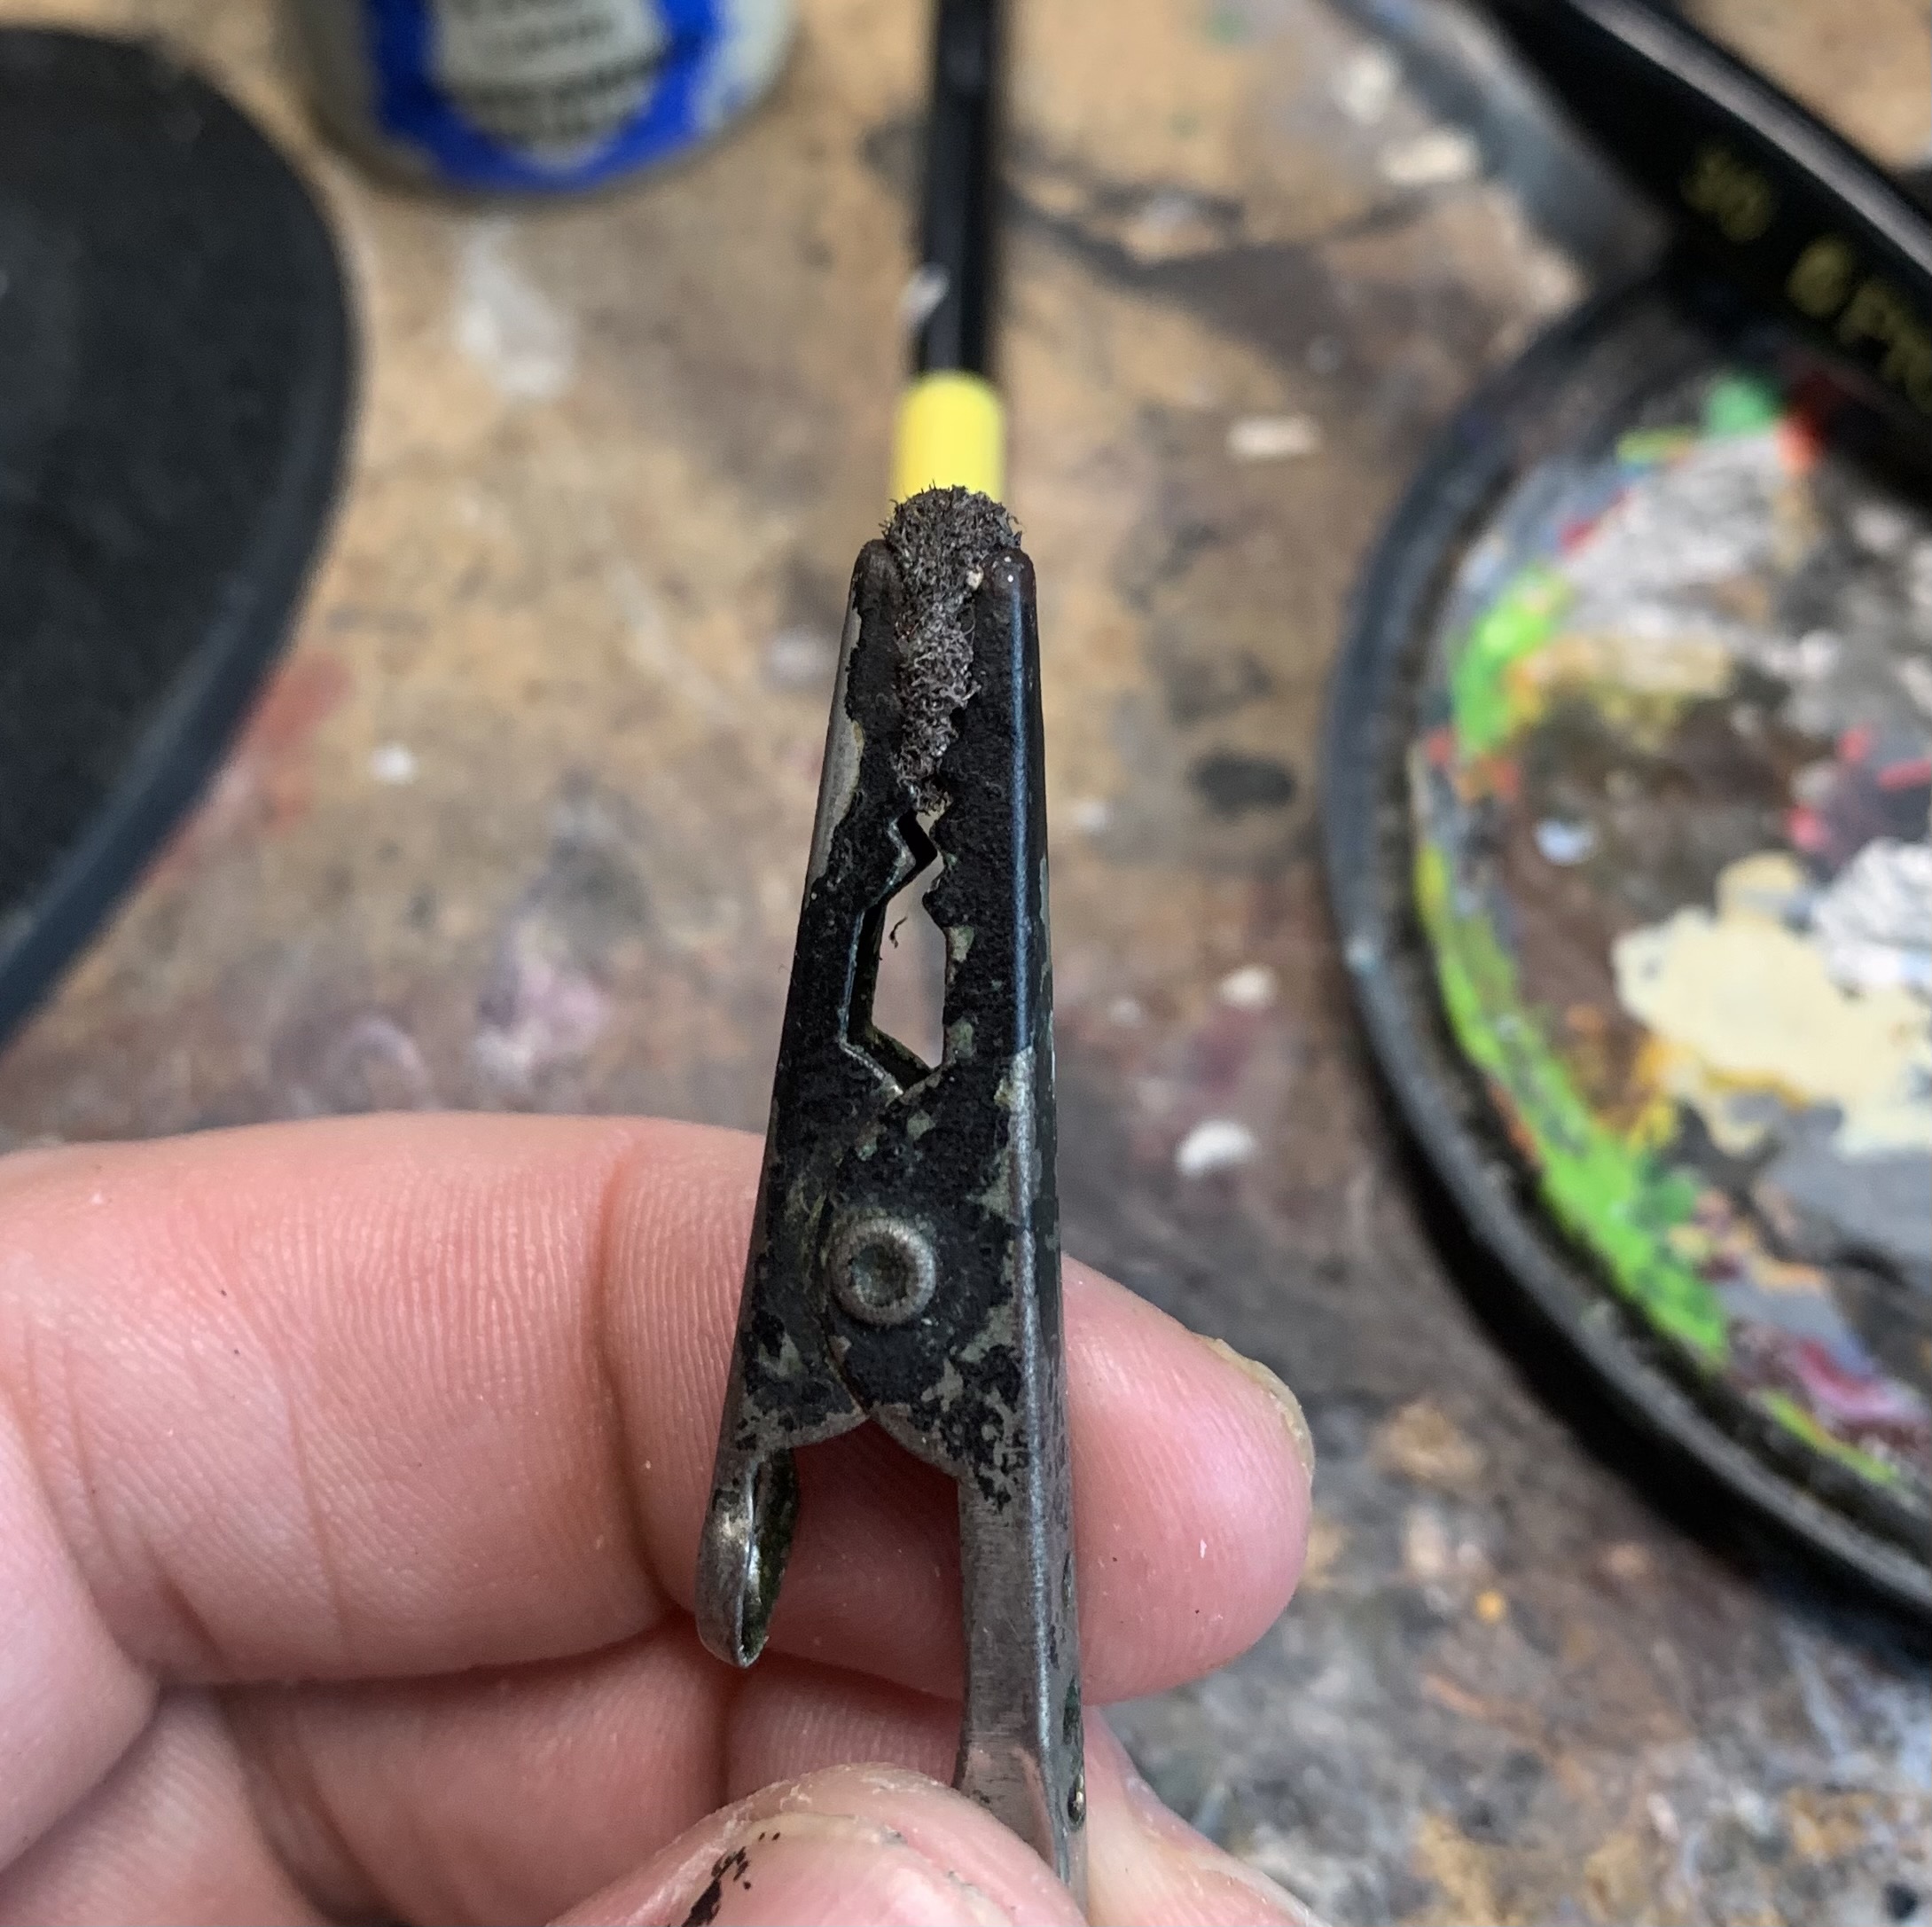
First off, we’re going to want a bit of sponge. This is some pick and pluck foam which I like to hold in a crocodile clip as it’s easier than smooshing my fat fingers against the model and it allows me to get into more crevices with the paint. Tweezers work too, but the good thing about a crocodile clip is that its resting position is closed and so you’re not squeezing it all the time.
And this is what we get. Hit all the different areas with Rhinx Hide (make sure you only have very little on the sponge and wipe off the excess) but there’s no need to go overboard – less is often more with this sort of thing.
Now, take a knackered old brush you don’t care about but that’s still got some stiffness in its bristles and splodge a few areas of metal with Typhus Corrosion. Try to keep the edges of these areas rough and once they’re dry, get a little Ryza Rust on your brush and smoosh that into those areas, and dry brush it around a little bit. This is also a great stage to cover up any areas you’re not happy with. Again, less is more with this step, but you can still have plenty of fun.
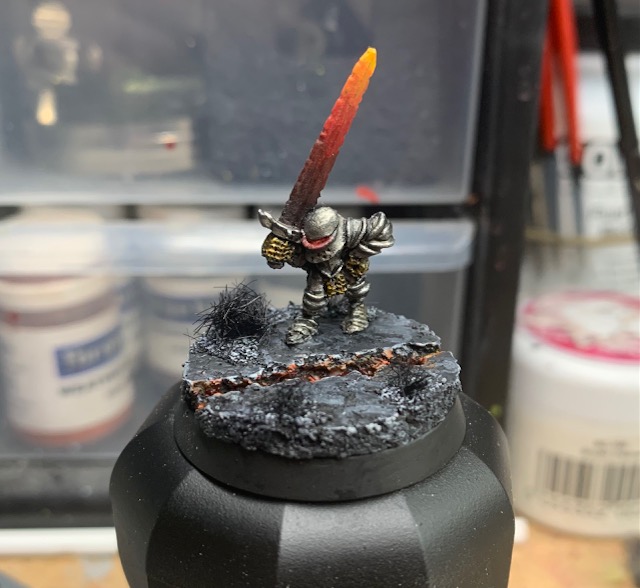
Pretty much the last thing to do on the armour, if you want to, is to add some drips. More Agrax Earthshade is applied in a downward motion, and then a little of the drip is lifted off at the top to help thin the original streams. And that’s us done. After these steps I painted up the sword…
…and did the base to match the army…
…and I’m calling this dragon and its rider all done! I really hope you found this tutorial useful and that you learned a couple of fun, simple and easy-to-do techniques from it. If nothing else, I hope it makes painting dragons a lot less scary in the future. These were great miniatures to work on, but just be warned that those talons like grabbing hold of anything and everything nearby – the wing from this dragon got snapped off at the beginning of painting because the little sod caught the sleeve of my shirt and jumped from my painting desk. I’m so close to being done with this army – fingers crossed I can have it all finished soon. Onwards!
Unless you’ve been living under a rock, you’ll have seen the brand new Death Korps of Krieg miniatures from the upcoming Kill Team release. I was lucky enough to be sent a copy of the new Kill Team box and while a full review will come at some point, it’s important to acknowledge that the miniatures inside got me painting again. The Death Korps have always been a favourite of mine since I first read about them in Warriors of Ultramar many moons ago. I never got round to painting any, but with this box, I was determined to give them a go. What’s more, I wanted to come up with an easy and quick scheme to help you paint yours.
Before we dive in, I just want to say that the miniatures and scenery are worth buying this box for alone. Even if the game’s a lot of fun, the minis are fantastic. You get loads of options with the Death Korps and my bits box has swelled with spares after this, but the level of detail is exceptional. I would caution you that they could be very fiddly, but they don’t need to be – you get needle thin bayonets and a tiny rack of medals, but you don’t need to include those if you don’t want to. Can’t wait to see what can be done with the orks!
On to the tutorial. Like I said, this is meant to be quick and simple scheme but we want them to look decent too. And there is that odd thing about the Death Korps that they draw us to paint them like they’ve been transplanted from the early 20th century and placed in the 41st Millennium. My advice is to just lean into that because it’s pretty hard to do otherwise – why fight it, but maybe use the good guys as your source of inspiration.
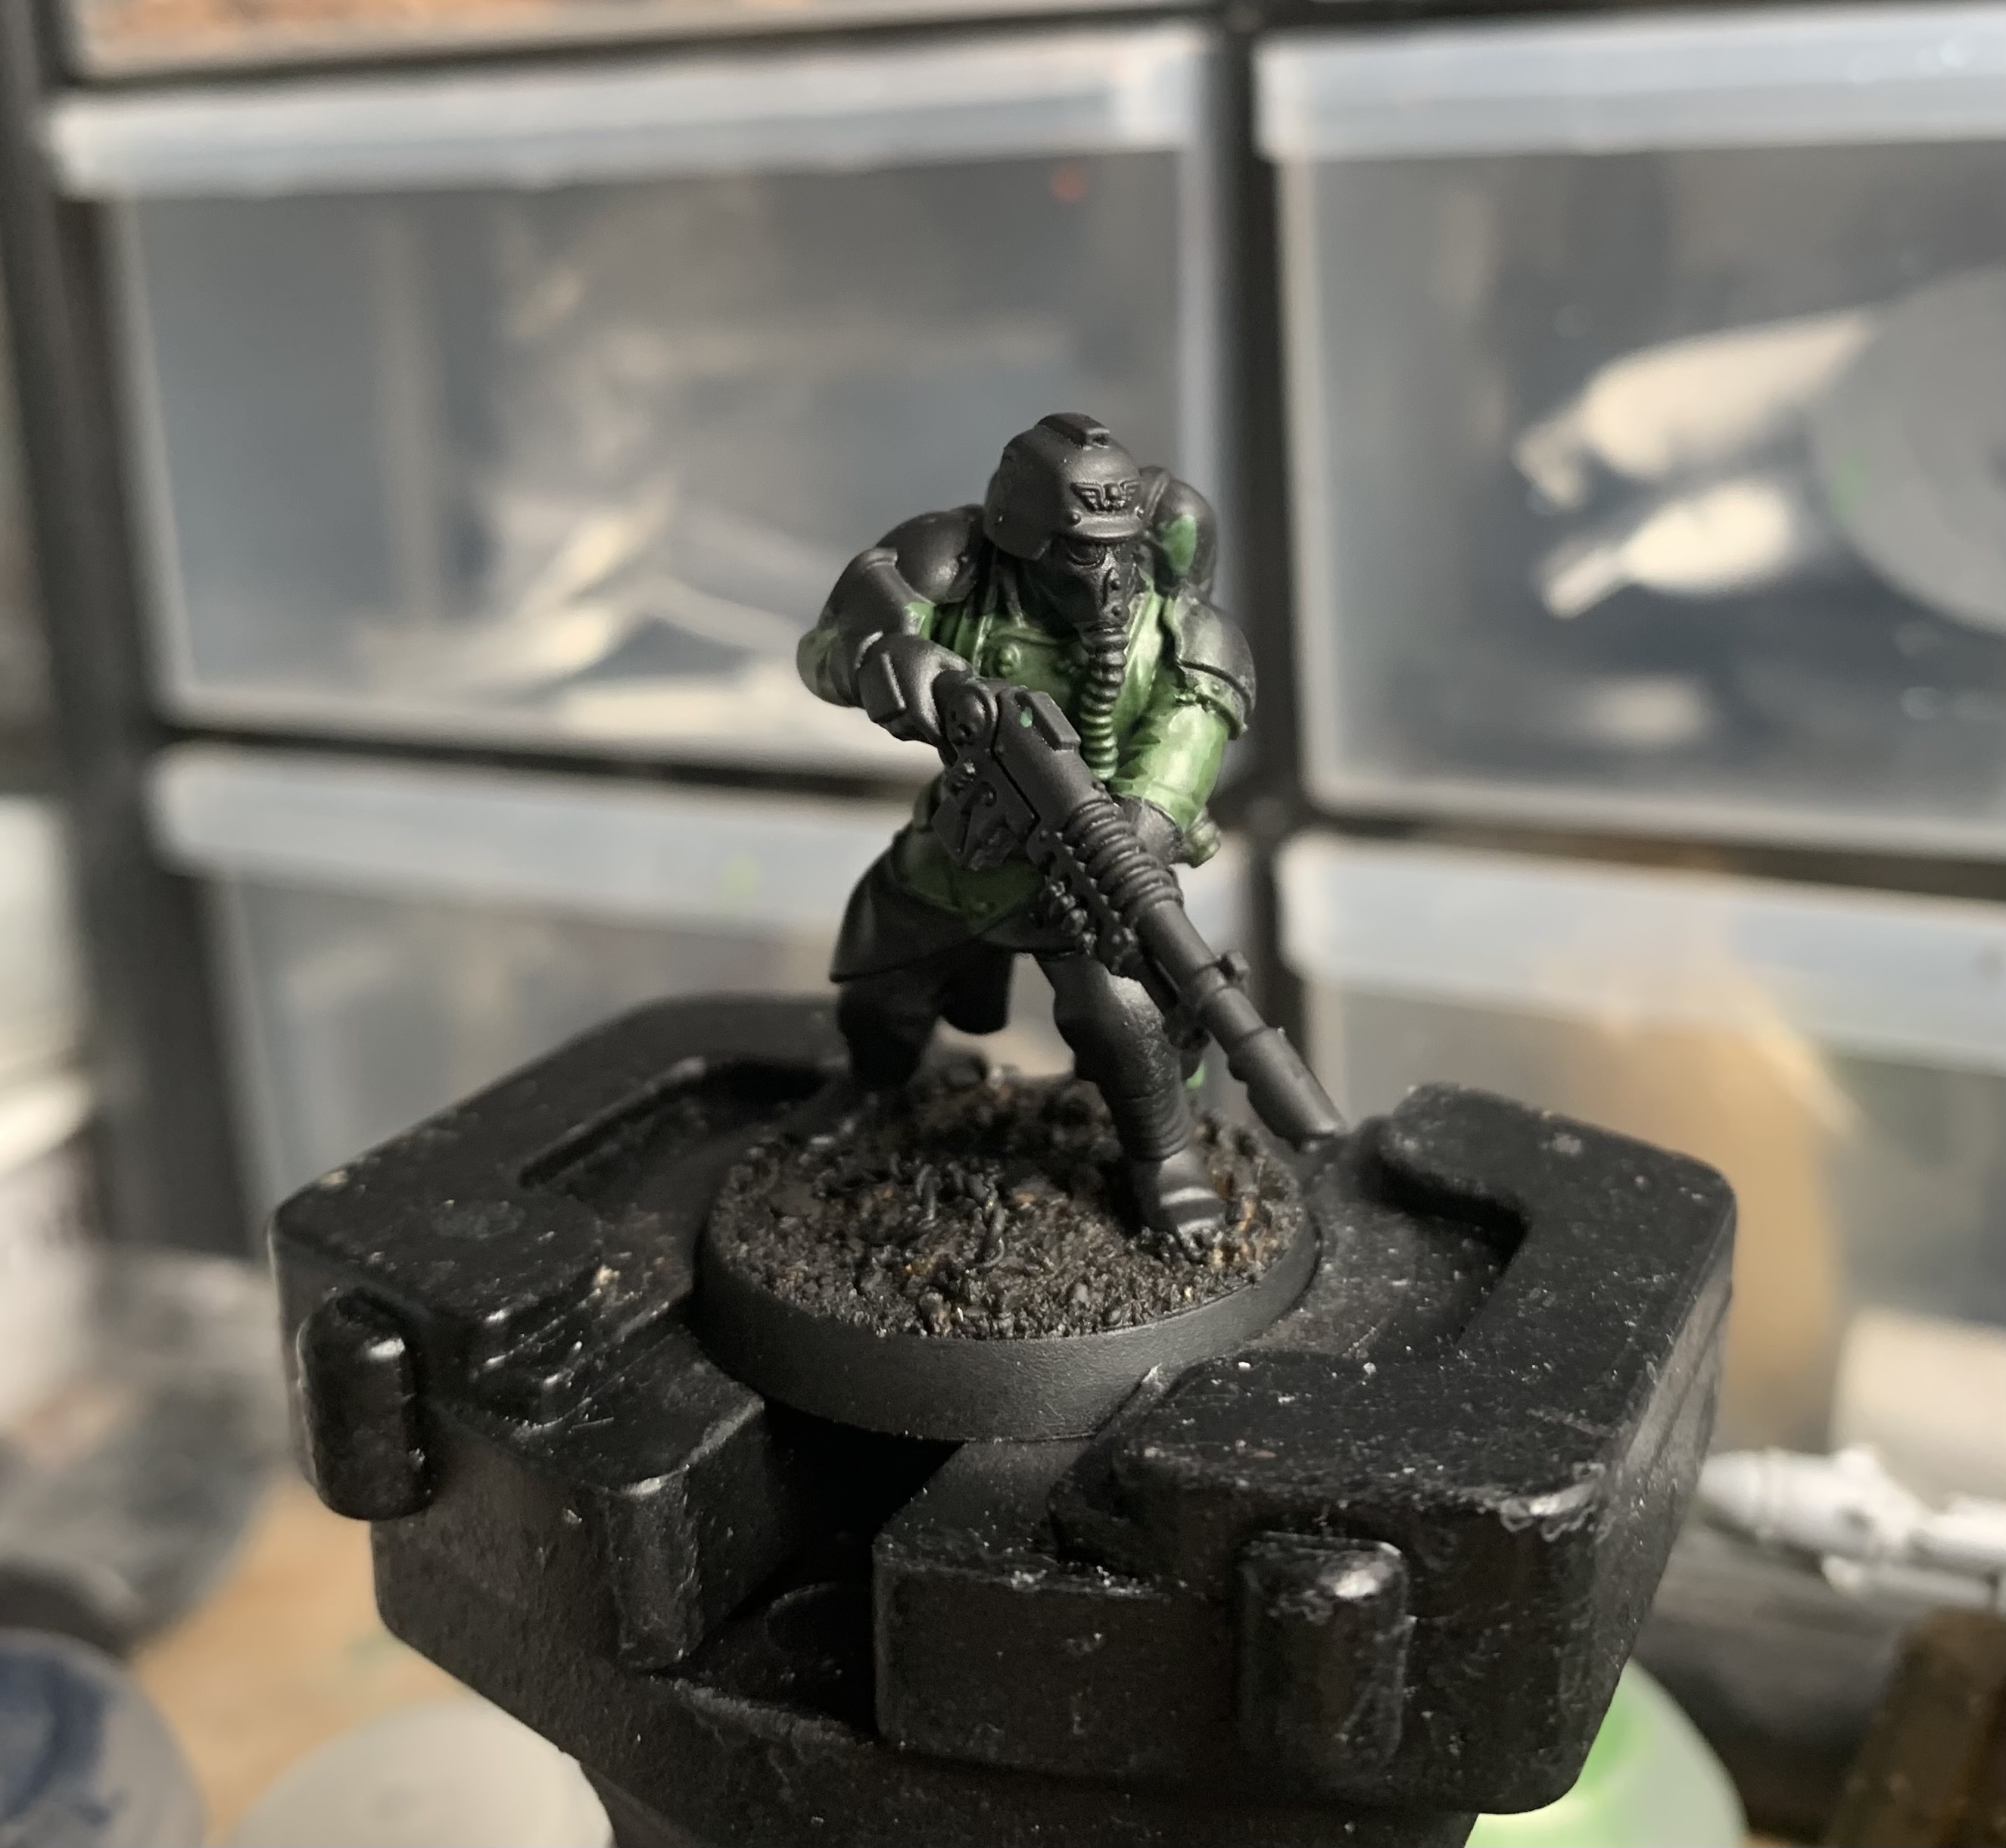
Green Coat
We’re starting with the green coat here. When trying to do something quickly and simply, working from larger areas to smaller areas helps a lot, and this is quite fun because you don’t need to worry too much about staying within the lines. I didn’t. But I did use a couple of thin coats of Waaagh! Flesh to get a solid green base all over the coat. I then used Militarum Green contrast paint to cover the whole thing. Once that was dry, I took very, very thin (like super watery) Straken Green to highlight the higher areas. And that’s that done. Pretty simple so far, right?
Green Trousers
Super easy this, but you do have to be neater with this step. Just paint the trousers. A couple of thin coats of Straken green were applied, then covered with Athonian Camoshade. Once that shade paint was dry, I touched up the higher areas with Straken Green and then used a blend of Straken Green with a little Flash Gitz Yellow in it to hit the very highest areas with a spot highlight. Why use yellow instead of white to lighten the green? It just looks a bit more military-y to me and white in green invariable ends up looking like a type of toothpaste.
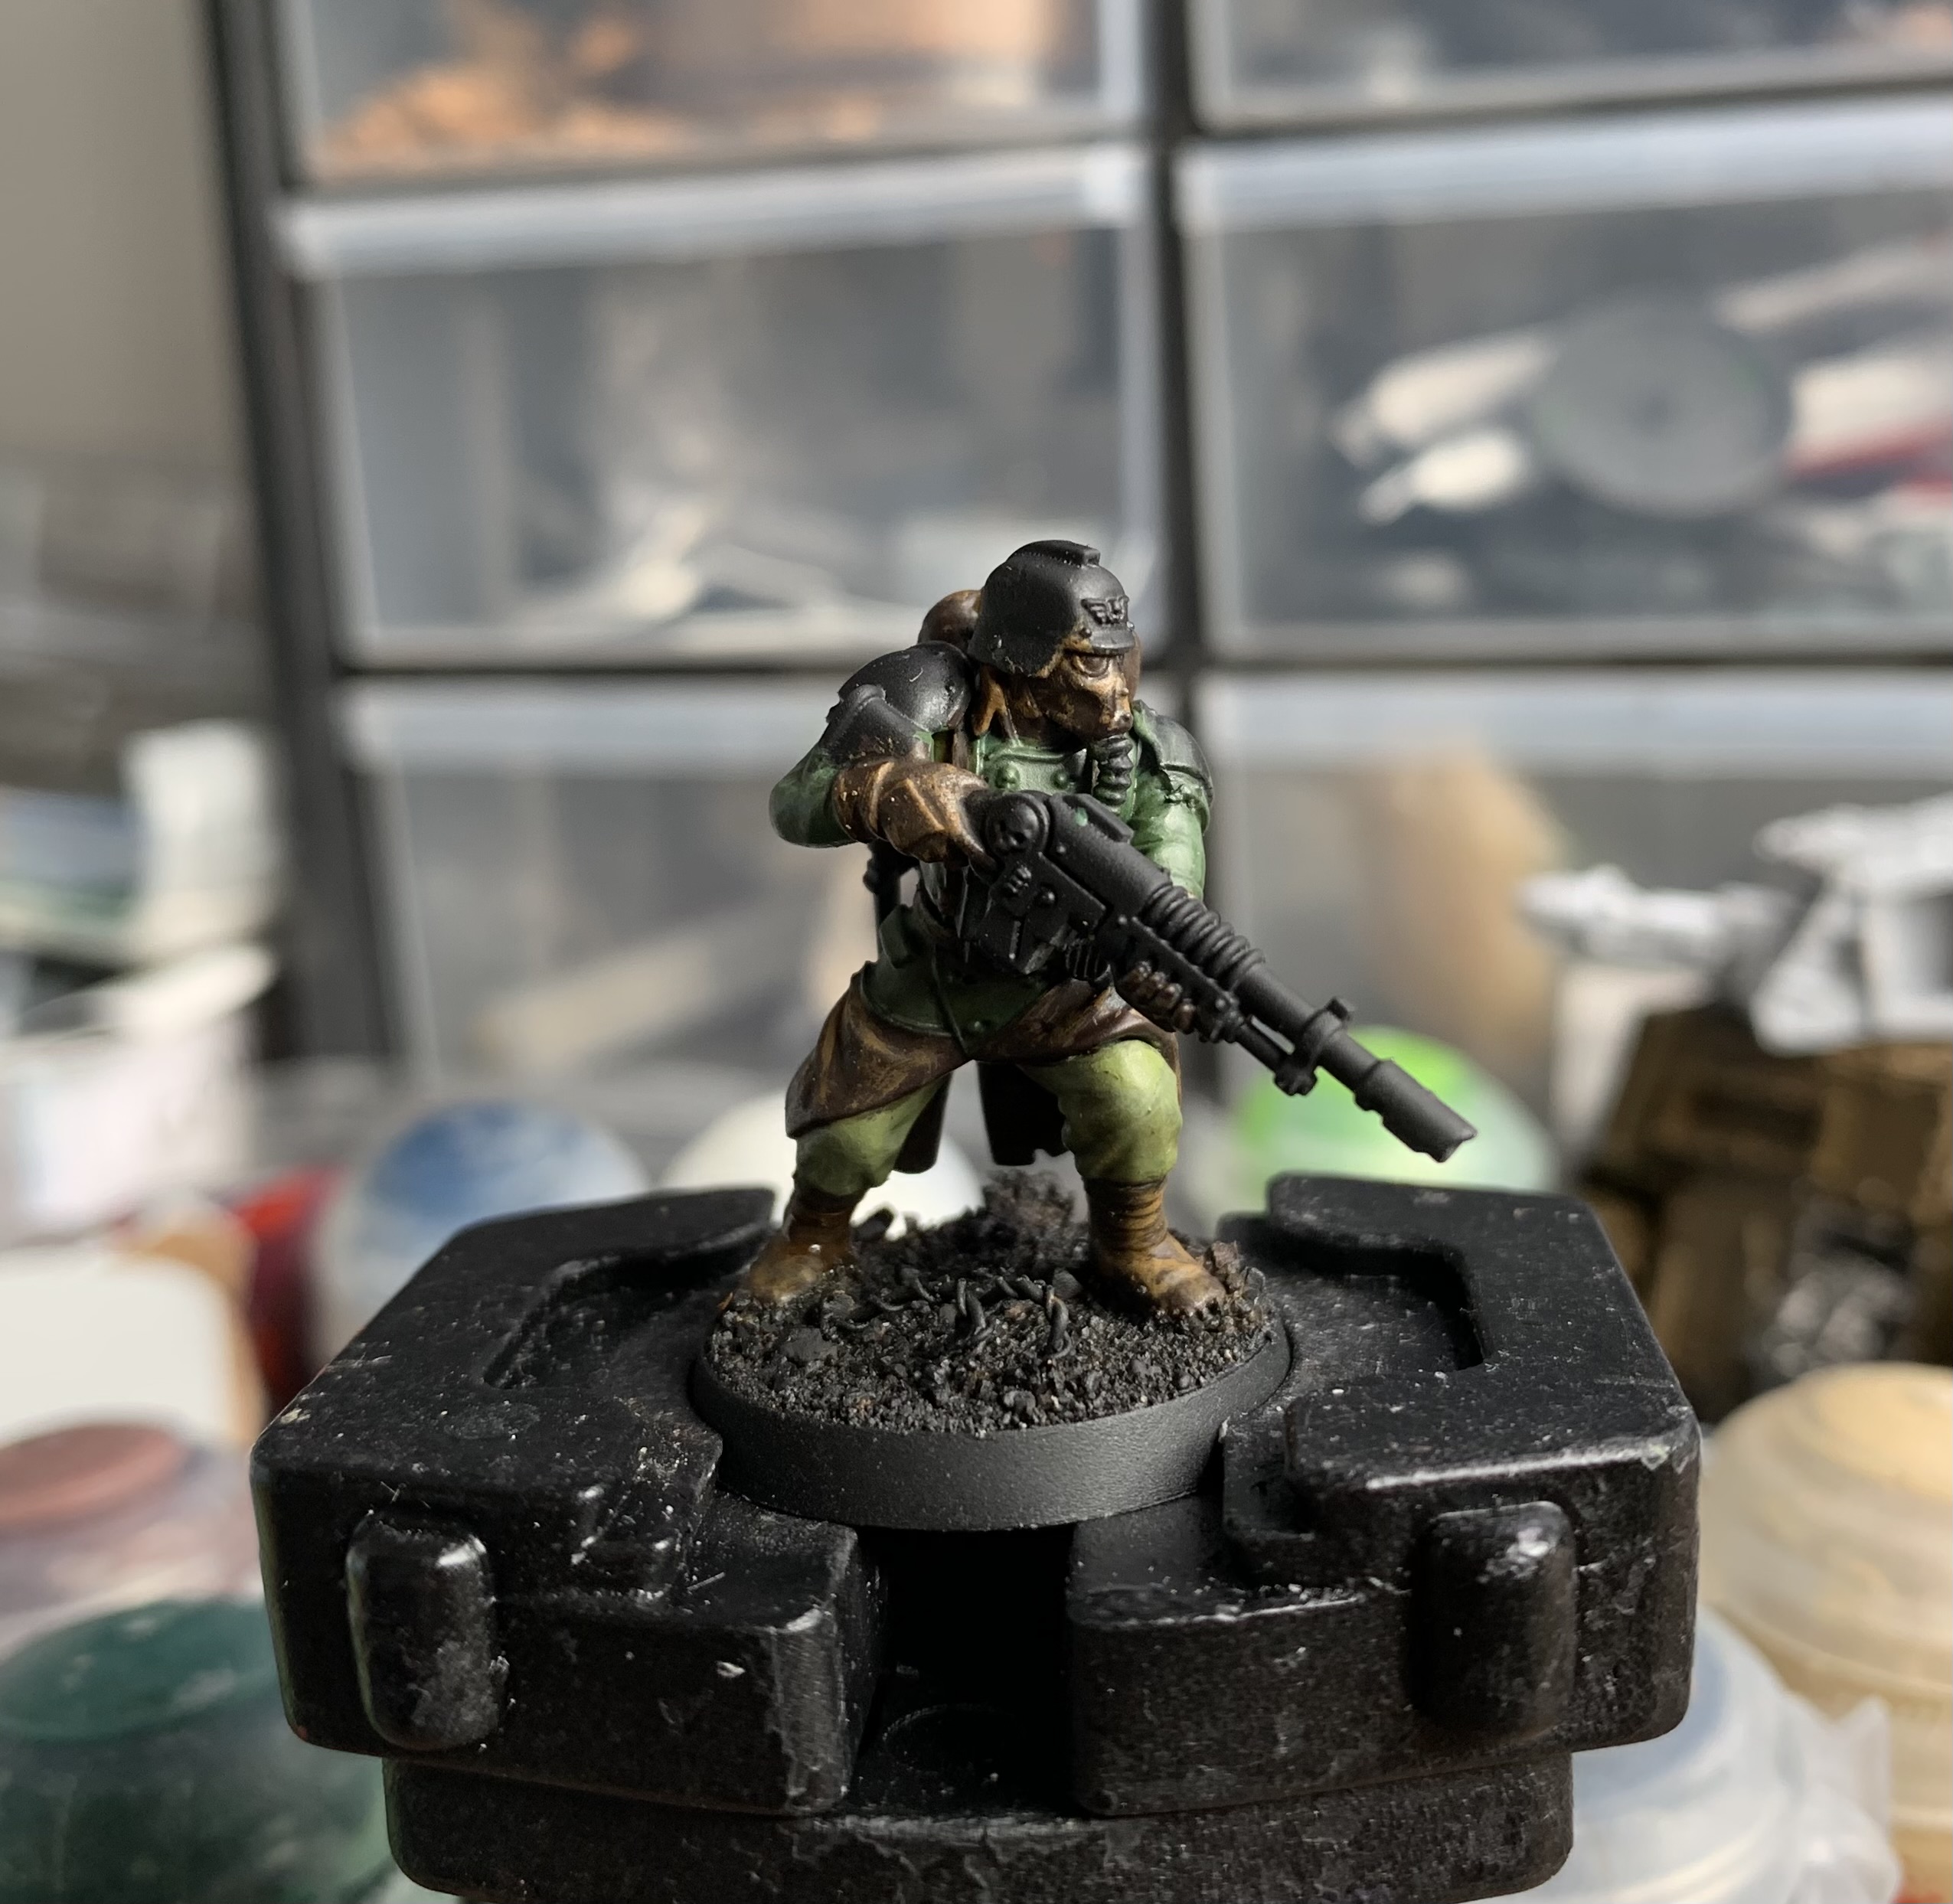
The Leathers
Next up, the leather areas. There’s a lot of them, with pouches, coat flaps, boots, belts… so be sure to hit them all. Base with a couple of thin coats of Rhinox Hide, then drybrush lightly with XV88 before covering them with an undiluted wash of Seraphim Sepia. And you’re done.
The Metals
Ok, this isn’t super quick and simple but once you get into the swing of things, it gets a lot easier. Base coat everything with Leadbelcher. Then you’re going to want to do a sort of TMM thing here but in a kind of quick and slightly sloppy way. Rather than explain that, I’m just going to link to this video from Ben Komets and Painting Buddha that shows you far better than I how to do it but you do not need to be anywhere near as neat as a Slayer Sword winner. The paints I used to help me were Iron Warriors, an Iron Warriors/Abaddon Black 50/50 mix, and then an Abaddon Black pinwash followed by a highlight of Ironbreaker.
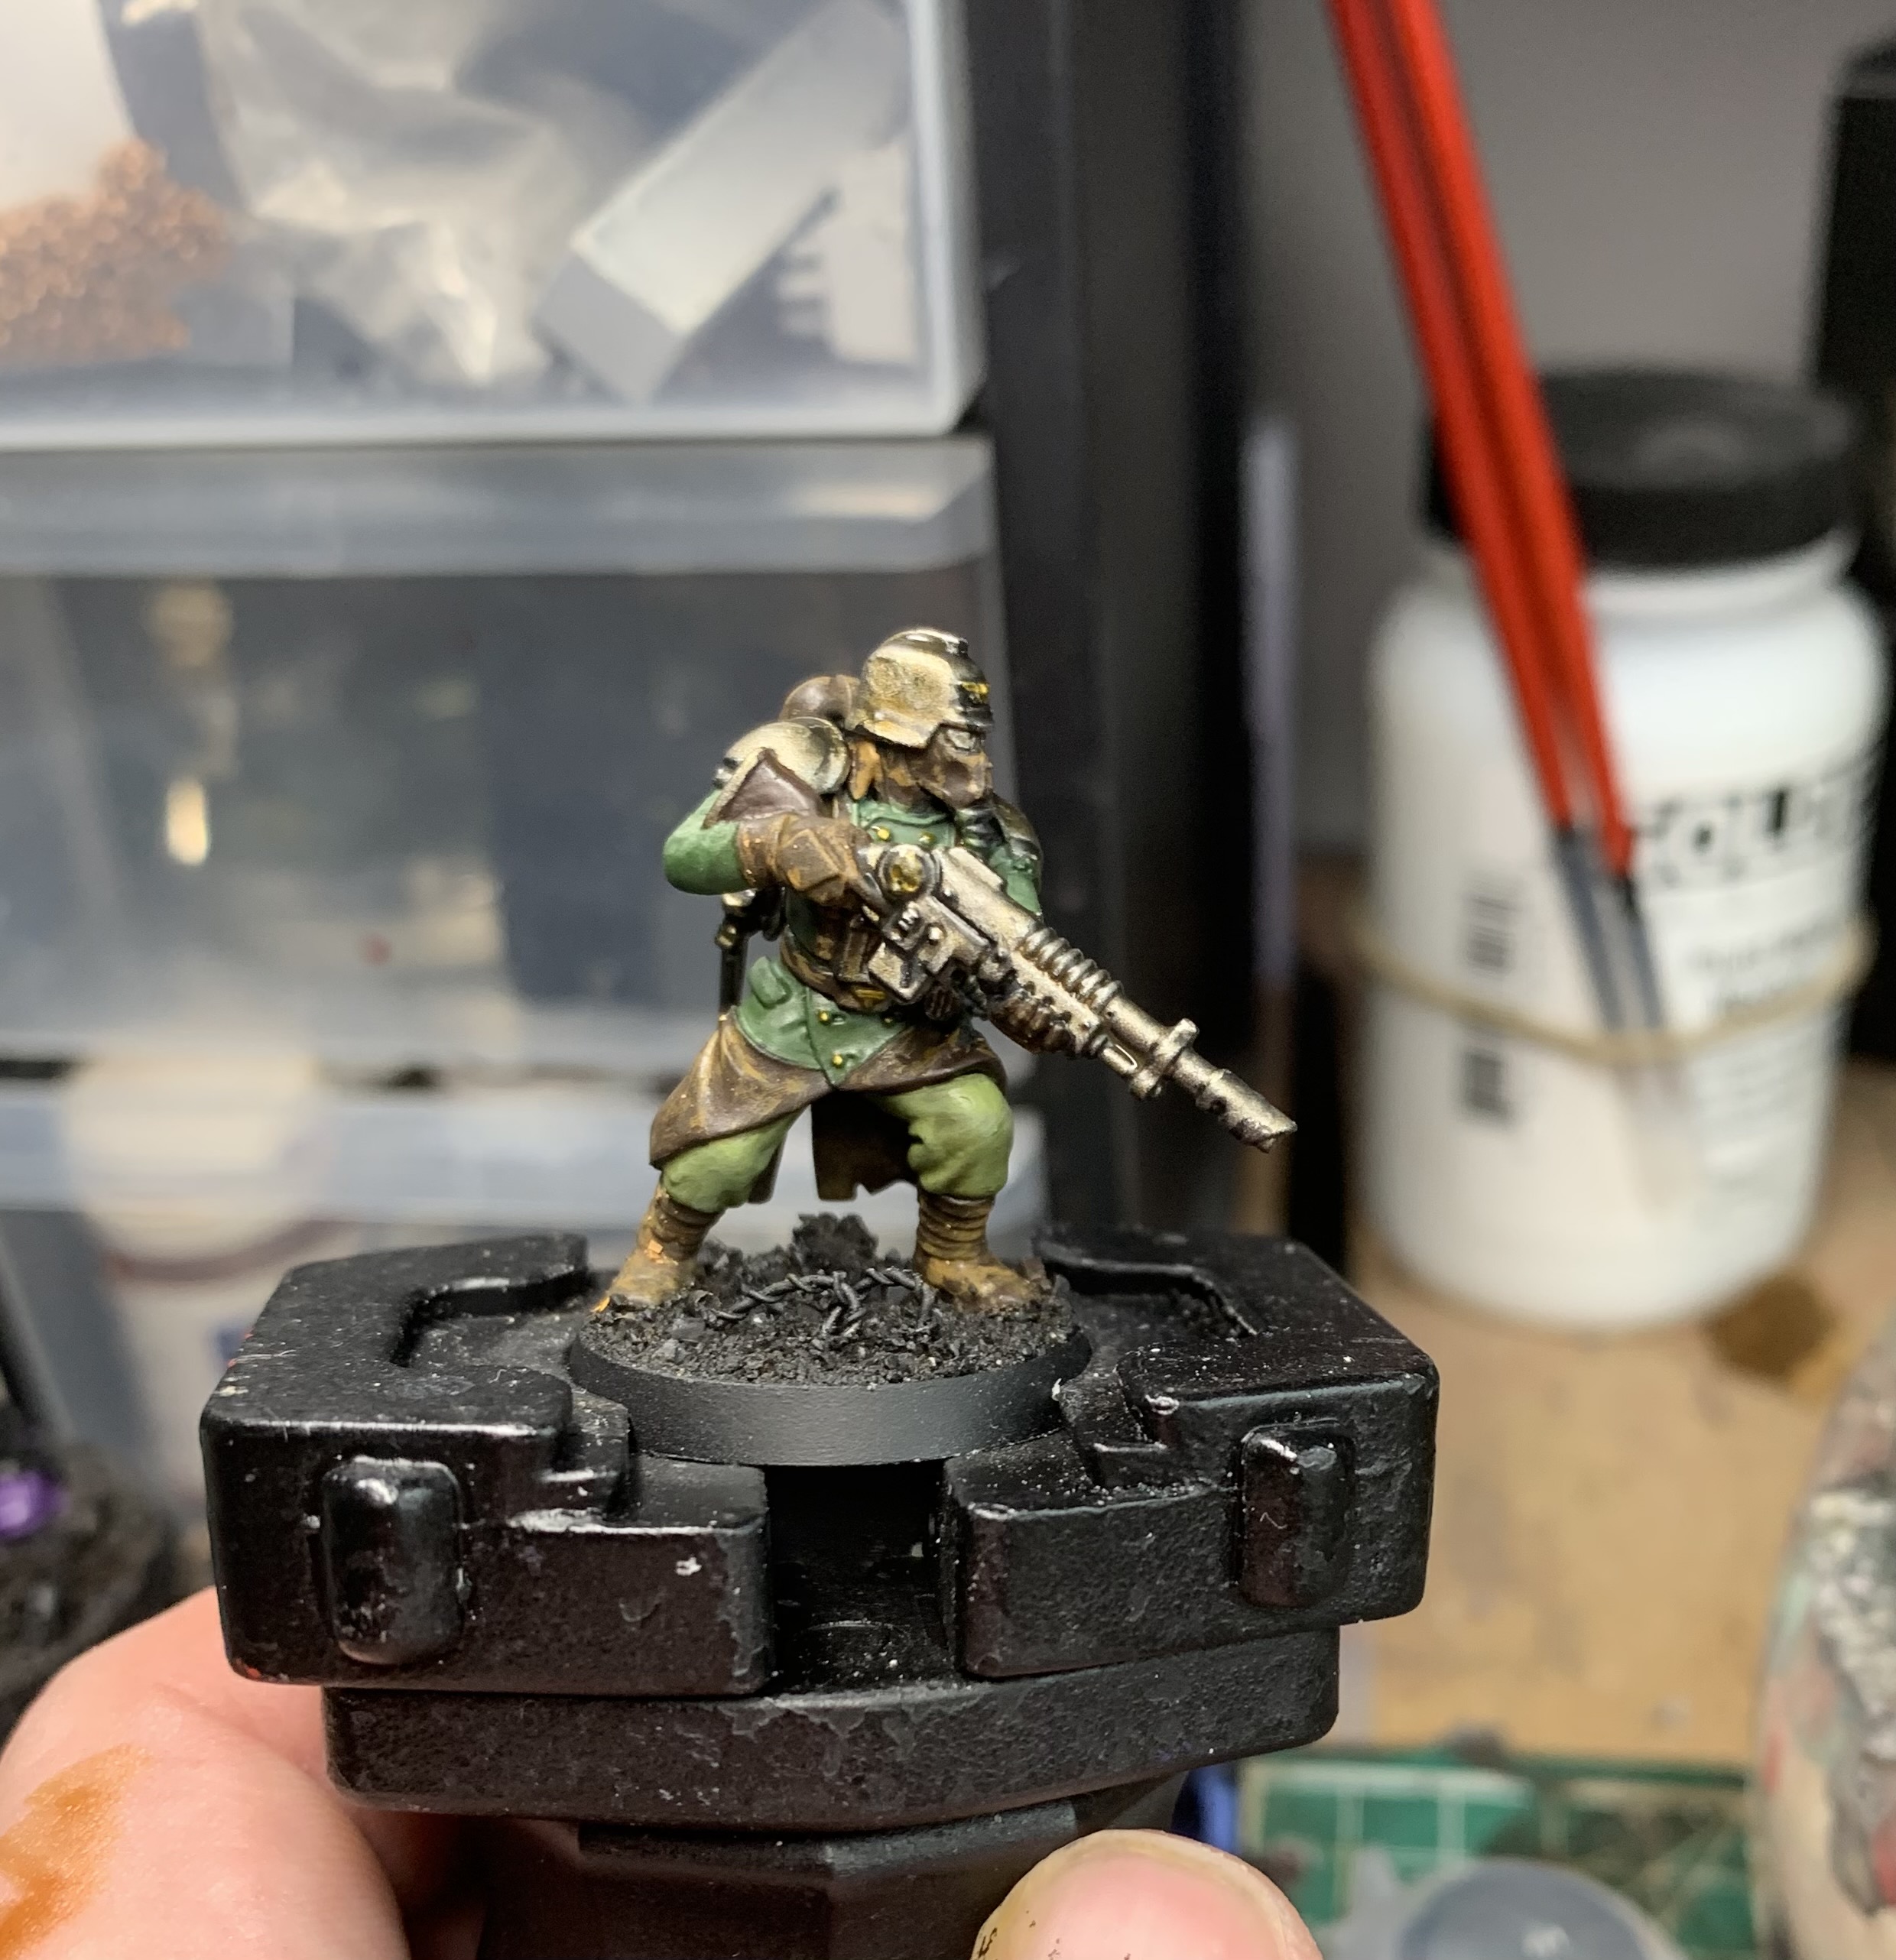
Next, I covered most areas with a 50/50 mix of Skeleton Horde and Contrast Medium to make it look grimy. But a few areas (buttons, aquilas, etc) I used some Nazdreg Yellow straight out of the pot. And that’s all the metallics.
Finishing Up
Yep, we’re nearly done. There’s a few little bits to do and then the basing. Paint the gas mask tube black and give it some grey highlights. Paint the eye lenses black and then cover them in Ardcoat. The wooden stock on the gun is Rhinox Hide with streaks of some other browns and beiges (your choice) covered in a thin coat of Agrax Earthshade. And that’s it for the finer details.
For the base, I used a basecoat of Dawnstone, with a few larger rocks picked out in Eshen Grey before washing it all with some Athonian Camoshade. When this was dry, I highlighted with Dawnstone and then Administratum Grey. The barbed wire was painted with Iron Warriors, then areas were covered with Typhus Corrosion before dabbing those still wet areas with Fire Dragon Bright. Ironbreaker was used to highlight the barbs.
Quick and Easy
What do you reckon? It genuinely didn’t take me long to do this, and if you’re batch painting the 10 of them in this box, this could be a very quick way to get them all done. Hopefully, at least one of these quick and easy techniques can be of some use to you.
The metallic step is a wee bit faffy but once you get into the swing of things, it really goes by fast. I’ve already started the batch painting process and as I’m usually incapable of painting 10 of anything, and I don’t want to just give up on them straight away, it must be decent enough, right?
I hope that is in some way useful and as mentioned I look forward to writing a larger review of this in the future. As ever, stay excellent. Onwards.
Ok, this should be a relatively short one from me today. It’s a tip that will save you money, feed you, and it may even help you to achieve some better paint jobs too. How’s that for a slice of fried Retributor Armour?
I’ve seen a lot of people spending money on wet palettes and I want to tell you that you don’t need to do that. I was lucky in that when I was in my early teens, my friend’s mum (who’s a professional artist) showed me how to make a wet palette. I was painting canvasses at that time but it’s the same sort of thing for miniature painting – it’s all just acrylic paint. And now, I want to pass that knowledge on to you!
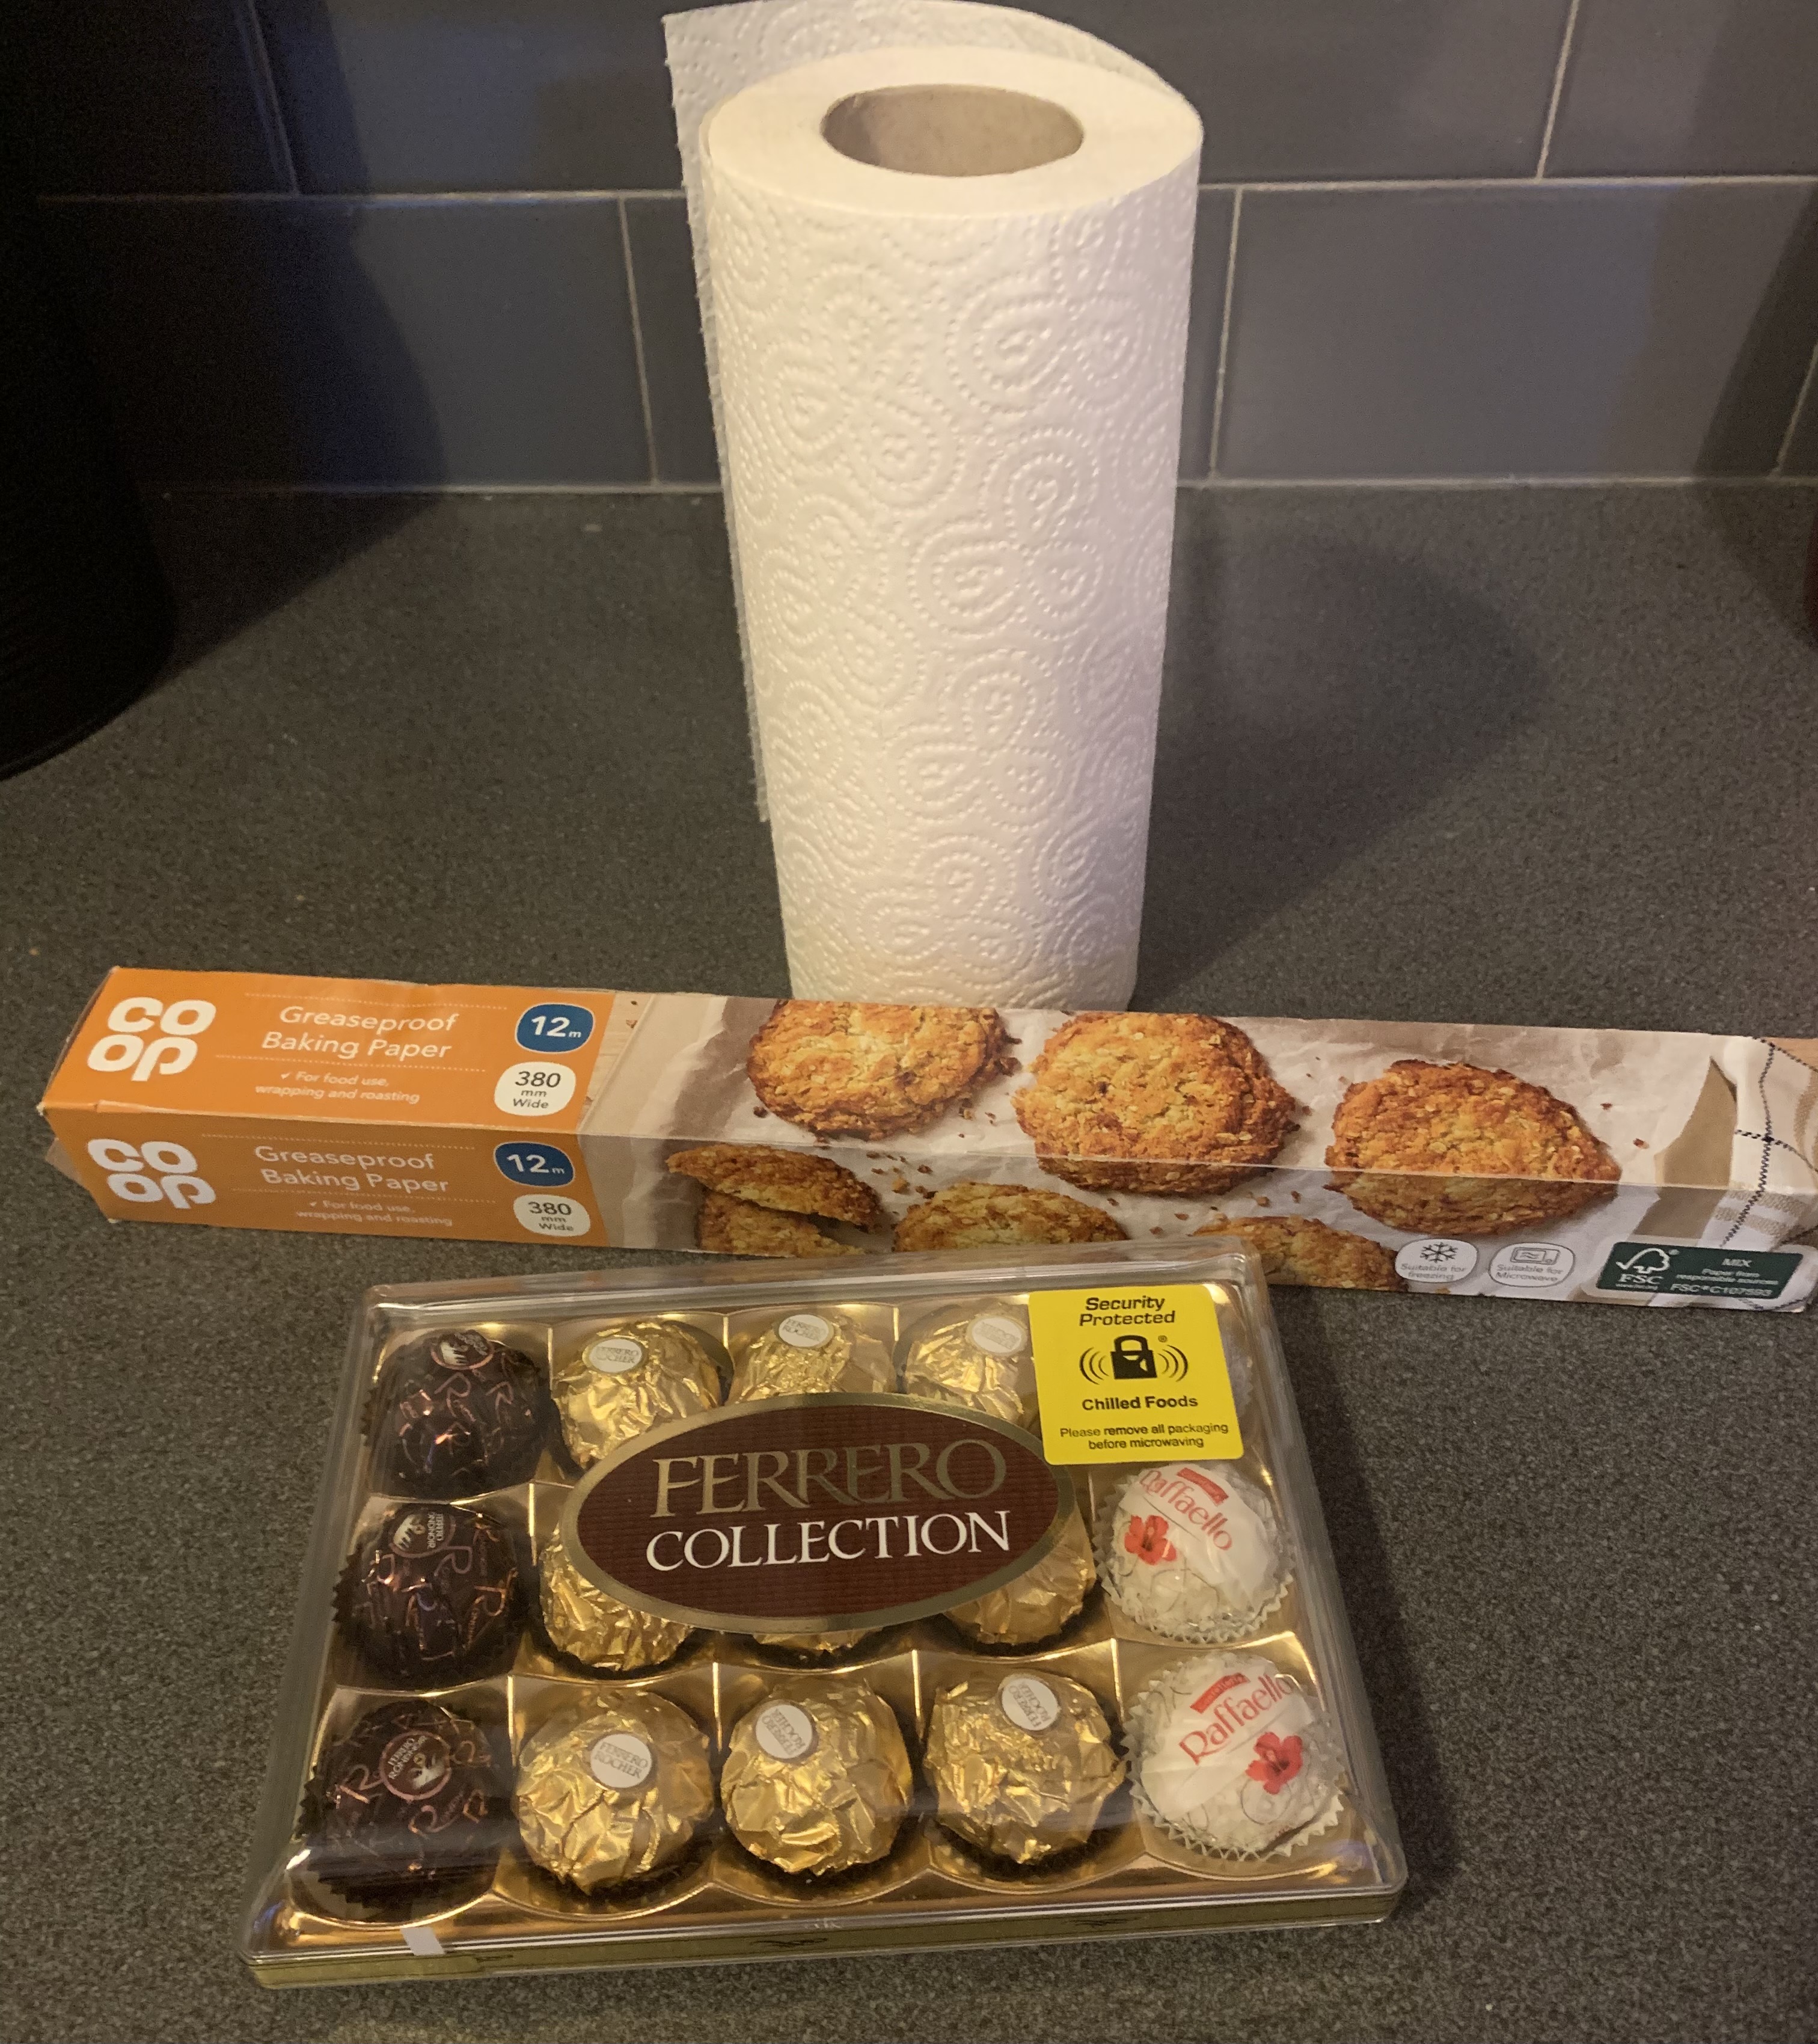
Here’s what I use:
Why, Ambassador…
The way I look at this, it’s the makings of a wet palette and it comes with free chocolates (which I’m already eating – yummers). Remove the chocolates, fold a couple of sheets of paper towel into the tray, cover it with a layer baking paper cut to size and, well, you have a wet palette. It’s that easy. Well, you have to get it wet of course but a bit of tap water’ll do. Here’s the one I’ve been using for the last few months:
You can sub in a J Cloth, layer of sponge or even a duster for the paper towels if you like – as long as it’s absorbent, it works. And I’ve seen some folks use black baking paper as that helps if you predominantly undercoat with black (it looks a little more like how it will look on the mini). I have yet to discover the goth baking suppliers that sell this, but I’ve not been looking so it may be very easy. And I guess you don’t need to buy chocolates (I mean, why wouldn’t you?) as all you need is a tray with a lid (the lid helps keep it wet so is essential) and any such thing will work just fine.
Why do I want one?
Well, this will keep your paints “alive” (read “wet”) for longer. If you’re mixing colours, this gives you a bit more time to paint at your own pace, and helps when it comes to touching up mistakes too as you can easily go back to exactly the shade you were using. I don’t use mine for everything – in fact, unless I’m doing something tricksy where I need a lot of those mixed colours, or if I’m trying to be really fancy and I want a tonne of different shades of the same colour (this gives me the time to work without fearing the paint drying), I don’t really use it. If I’m working with a colour straight out of the pot, I just use a regular palette. But, another reason people use them is because it technically saves money by keeping the paint wet and usable for longer but I always think we’re dealing in pennies there, even for the pricier paints (given the tiny quantities you’re likely working in) so whether it saves you much in this way is up for debate.
So there you go. Short and simple, and if it helps you out, I’m glad. Now, I have a load of chocolates to eat so if you’ll excuse me, onwards!
It’s been a long time since we’ve had a basing basics article, right? So today, I have a real doozy for you. We’re going to be creating quick, simple and easy to paint lava bases, featuring old, dried black lava, and hot, flowing lava too. This is really simple and looks really cool (well, warm actually) too. Let’s dive right in!
What You’ll Need:
Cork – I bought some cheap cork coasters from Amazon (but you can probably get them somewhere nicer if you look)
Sand – modelling sand if you have it, budgie sand if you want to buy cheap(sic)
PVA Glue
Vallejo Plastic Putty – liquid green stuff will do in a pinch, but this stuff is seriously good and very handy so worth the minor investment
Superglue
Black Static Grass (optional) – you can get cheap 4mm flock from sites like MDP – 10g will last you a lifetime!
Paints (using Citadel for convenience):
Black Undercoat
Abaddon Black
Eshin Grey
Dawnstone
Administratum Grey
Drakenhof Night
Celestra Grey
Averland Sunset
Dorn Yellow
Gryph-hound Orange
Fleshtearers Red
The Build
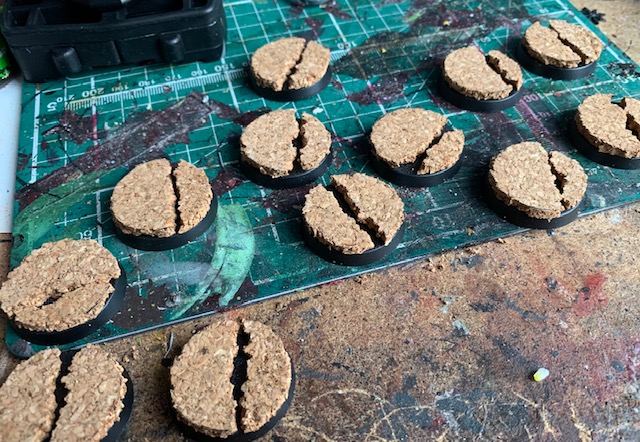
Step 1 – Cut out a piece of cork the size of your base. Use a biro to draw round it on the piece of cork, cut it out with a craft knife, and then break it down the centre. Remove a bit of cork from each side of the break you’ve just made (you can pull it off with your fingers) and then glue the two halves to your base (use superglue for this) leaving a little gully in between.
Step 2 – Carefully put down a layer of Vallejo plastic putty at the base of the crack/gully and allow to dry. This stuff comes with a great, thin applicator nozzle that makes this really easy. Don’t be too smooth with it – a little lumpy is good #tinderprofileopener
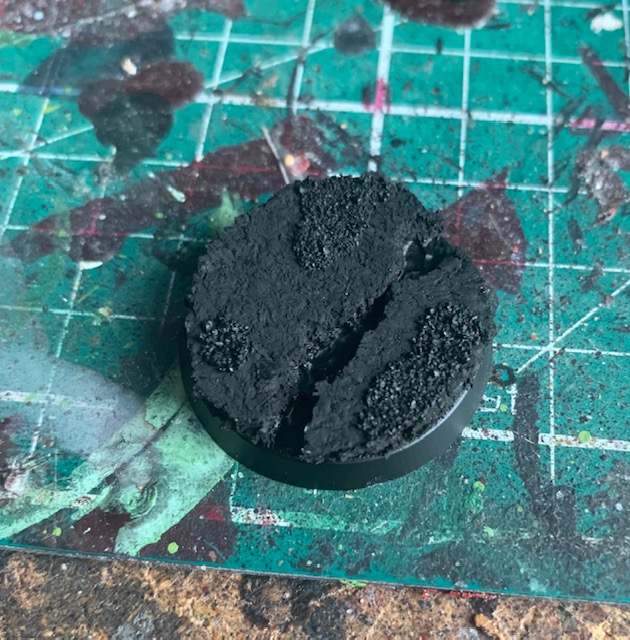
Step 3 (not shown – forgot to take a photo of this bit) – glue a few small patches of sand onto the top of the cork. Once all of that’s dry, you can undercoat black.
The sand must flow… wait, that’s not right…
The Painting (get ready for a lot of grey/black looking images!)
Step 1 – Cover that black spray paint with Abaddon Black (trust me, it’s a nicer black to work on and will help obscure just enough of the cork details). Be sure to get into all the nooks and crannies inside the crack – leave no cork dry or untouched. #whytheykickedmeoutofthatwinemerchantsthatonetime
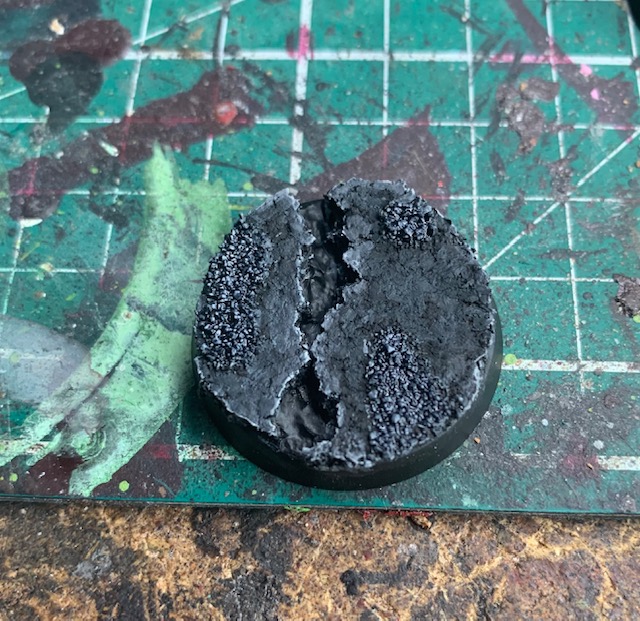
Step 2 – Mix a bit of Eshin Grey in with Abaddon black and do a very thick edge highlight on the whole thing.
Step 3 – A slightly less thick highlight of Eshin Grey
Step 4 – A thin edge highlight of Dawnstone. Actually, this paint is going to do some heavy lifting here. Make sure you hit some of those edges in the crack too. Drybrush some Dawnstone onto the sand areas, and, finally with this, water it down plenty, and do some rough patterns across the top of the cork. I didn’t do this enough in this step and added some more later on in the process.
Yes, this is a lot of pictures of greyish bases – it gets more colourful soon. I promise.
Step 5 – Now do a really thin highlight touching the lip of that crack (#saucy) with Administratum Grey. Also, a very light drybrush over the sandy areas.
Step 6 – Once the Admin grey has dried, add some Drakenhof Night to the sandy areas. This is going to help everything to pop just a little.
Step 7 – While that is drying add some small spot highlights of Celestra Grey at the most pronounced parts of that crack – these should be really small and thin.
Step 8 – Going back to Admin grey, now that the Drakenhof Night has dried, pick out a few grains of sand to highlight. You can do this with a very light drybrush too to speed things up if you like.
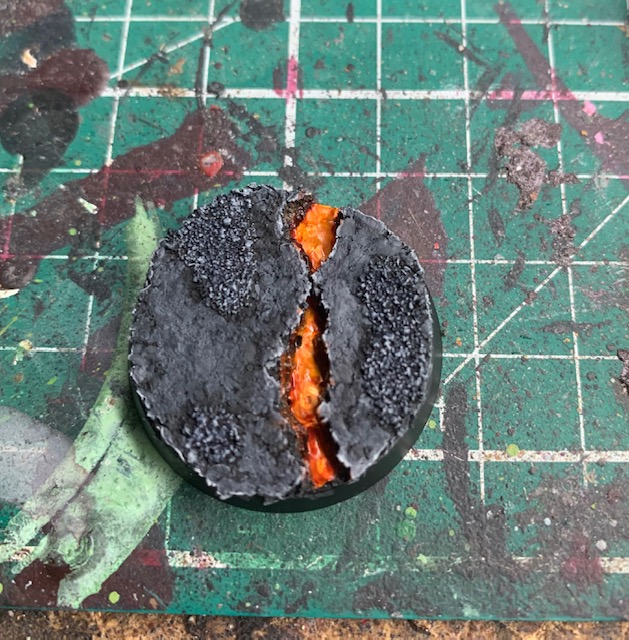
Step 9 – A bit of colour! You want to do a couple of thin coats of Averland Sunset over the plastic putty. Make sure it’s nice and solid before moving on to the next step.
Step 10 – Use some Dorn Yellow (you can go straight from the pot – no need to thin this) and pick out some raised areas in this fresh lava.
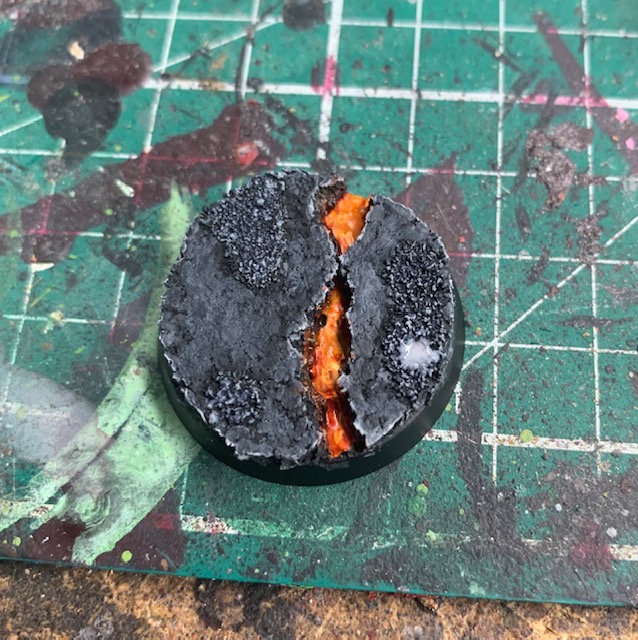
Step 11 – Once this is all dry, add a thin-medium layer of Gryph-hound Orange to this flowing laver. And make sure you hit some of the walls too. This is kind of a “poor man’s” OSL but it works really nicely for this.
Step 12 – Add some Fleshtearers Red to the edges of the orange. Use very sparingly and wipe away any excess. That’s all the painting done!
Bonus: Adding Static Grass
Static Grass is kind of old fashioned these days, but until they make good looking black tufts, I’ll stick with this. And it’s good to keep the old ways alive too, I guess. So, if you want to add it, it’s this simple:
Step 1: Take some of your static grass and put it onto a clean surface. Preferably one with a lip. This stuff has a habit of getting everywhere, so don’t even breathe on it (or look at it funny). It’s best to have it easily to hand like this too – saves reaching into the bag each time.
Yes, it does kind of look like pube shavings
Step 2: Place a little PVA glue on a sandy bit of the base.
Step 3: Take a pinch of flock. Roll it in your fingers, even it out, get it all facing in the right direction, and carefully place it onto the PVA. Alternatively, if you have a static grass/flock applicator, that’s even better (but I don’t, hence the instructions). And that’s it! The PVA dries clear so once you’ve left it a little while, it should look like this:
And who’s that little dude at the top of the post? Well, he’s part of a really fun little project I’m working on, but more on that soon (actually, let’s make it tomorrow). In the meantime, I hope this is useful and I hope you have fun with it! If you use it, I’d love to see it, so hit me up on Twitter or leave a comment with a link to your example below. Onwards!
In just a couple of weeks, I’ll be heading up to Nottingham for the Horus Heresy and Necromunda Weekender and I’m very excited about it all. Among the many things to do and see, there is a Golden Demon competition going on, and I wasn’t going to take anything because a) it’s a bit of a hassle, and b) I know the quality of those attending and I don’t want to feel too bad about my own paint jobs. But as I’ve said before on here, you should enter these things for you, and not for other people, and I like to show off my work. It may not be the best but it can stand alongside (albeit slightly behind) the best.
With that in mind, I decided to man-up and take a couple of things along. I’m hoping a certain leopard-print-cloak-wearing Praetor will catch some eyes in the single miniature competition, but I want to take a squad too. While I have more than a few display stands for single miniatures, I wanted a plinth that could hold 10 miniatures on 32mm bases. Could I find one of these? I could not. I scoured the net, asked around, and got nothing.
So, I made my own. What’s more, I’m actually pretty happy with it (considering I’ve not done much woodwork for the past 15 years) and I thought I’d take you through the process of how I built my squad display stand, especially as you may have to make your own one day too. Here goes.
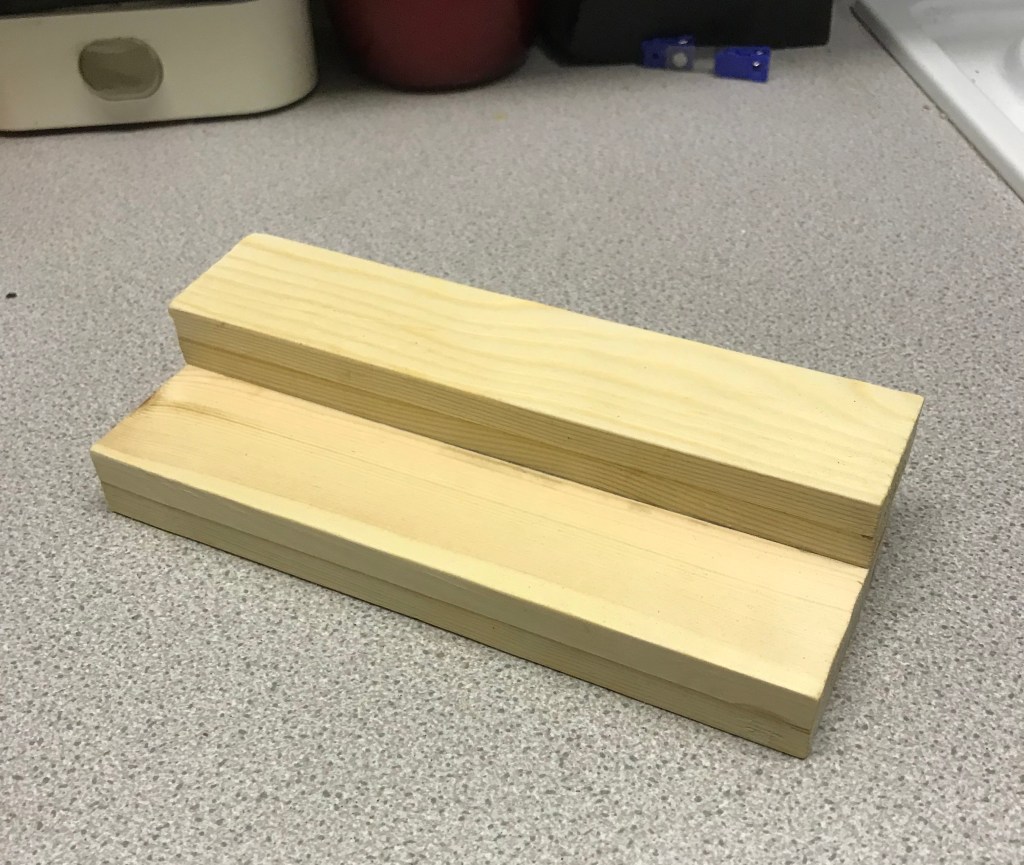
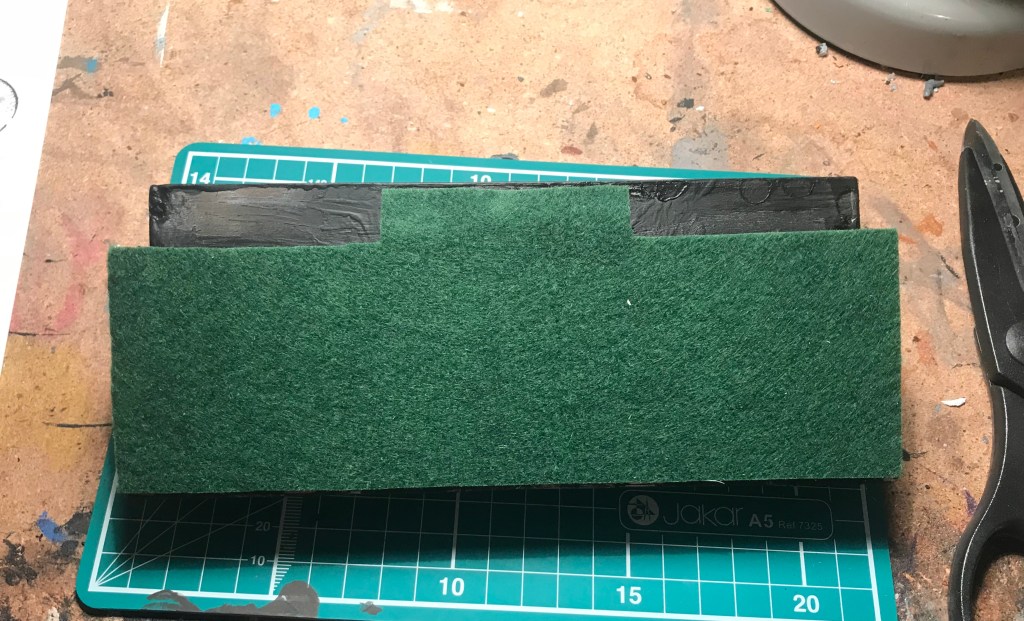
First off, I was up and early one Saturday morning to head down to what passes for a lumber store in my neck of the woods (we’re very good for antique silver birch logs for a fireplace, not so hot on untreated pine planks down my way) to pick up some wood. I bought low quality but straight edged pieces that were a couple of feet long, along with some Gorilla glue, a couple of clamps, and some felt.
I measured everything up and arrived at the conclusion that I’d need a couple of pieces that were 21cm long. I then realised that the wood that I bought was too thin, and that I’d actually need four pieces and a little more of that Gorilla glue than I’d planned on using. After the measuring (twice) and sawing (once), and a little gluing, this is what it looked like:
With everything sawed and sanded (including another little piece to act as a stabiliser for my stand’s stairway design), I did need to make a couple of fixes. Annoyingly a couple of clamps that I’ve had for ages went walkabout, so I had to improvise and I did it badly – we had gaps by the time the glue had dried (O, forgive me, Mr Pitcher [my former woodwork teacher at school] for I have failed you!). But being someone who has a lot of greenstuff around anyway, these weren’t hard to fill (I know this is not the traditional method, but it does fit the theme). A little more sanding, and all was sorted, at least to a level I could live with.
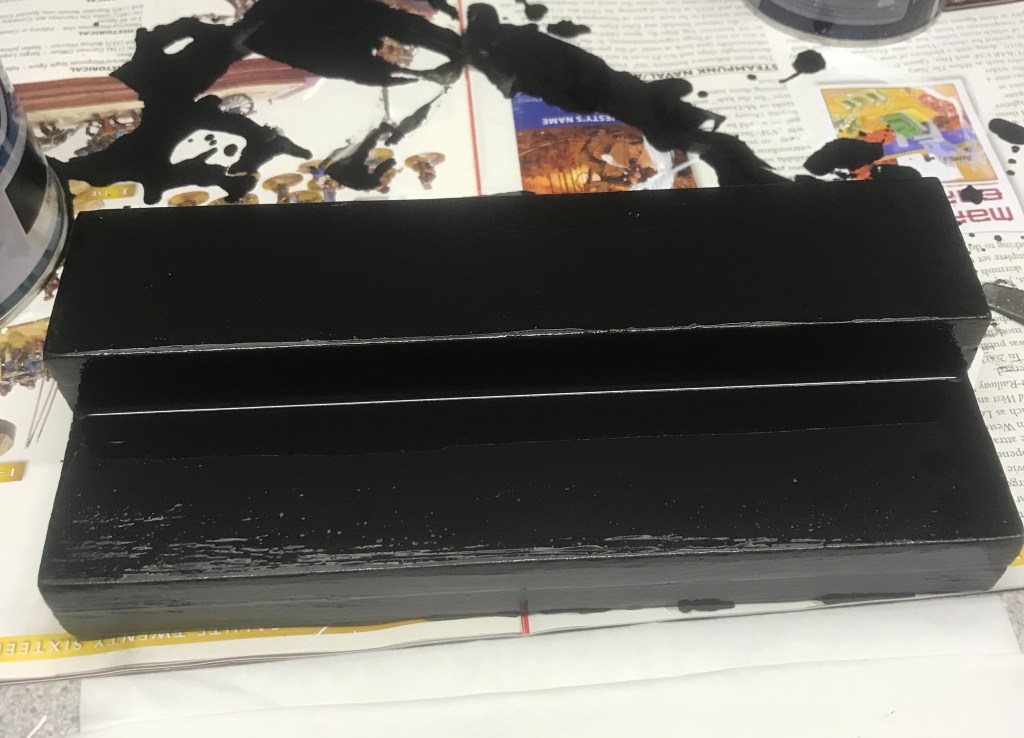
A trip to the paint store, and I had some primer (as seen above) and some black satin paint. Dulux Satinwood Once was what I bought, but boy do I wish I’d read some reviews of that paint online before buying. Here it is with the Once paint on:
The problem here is that the 16 hour drying time mentioned on the can is a complete lie. I actually don’t know how they get away with having it printed on there. Reading online, some people who had used this had tacky shelves for months afterwards. My fingers left big imprints, and I was left with oily black residue all over my hands, and that was after it had been drying for over 48 hours in a dry room! I had a decision to make, given that Nottingham is in just a couple of weeks. Here’s what I decided:
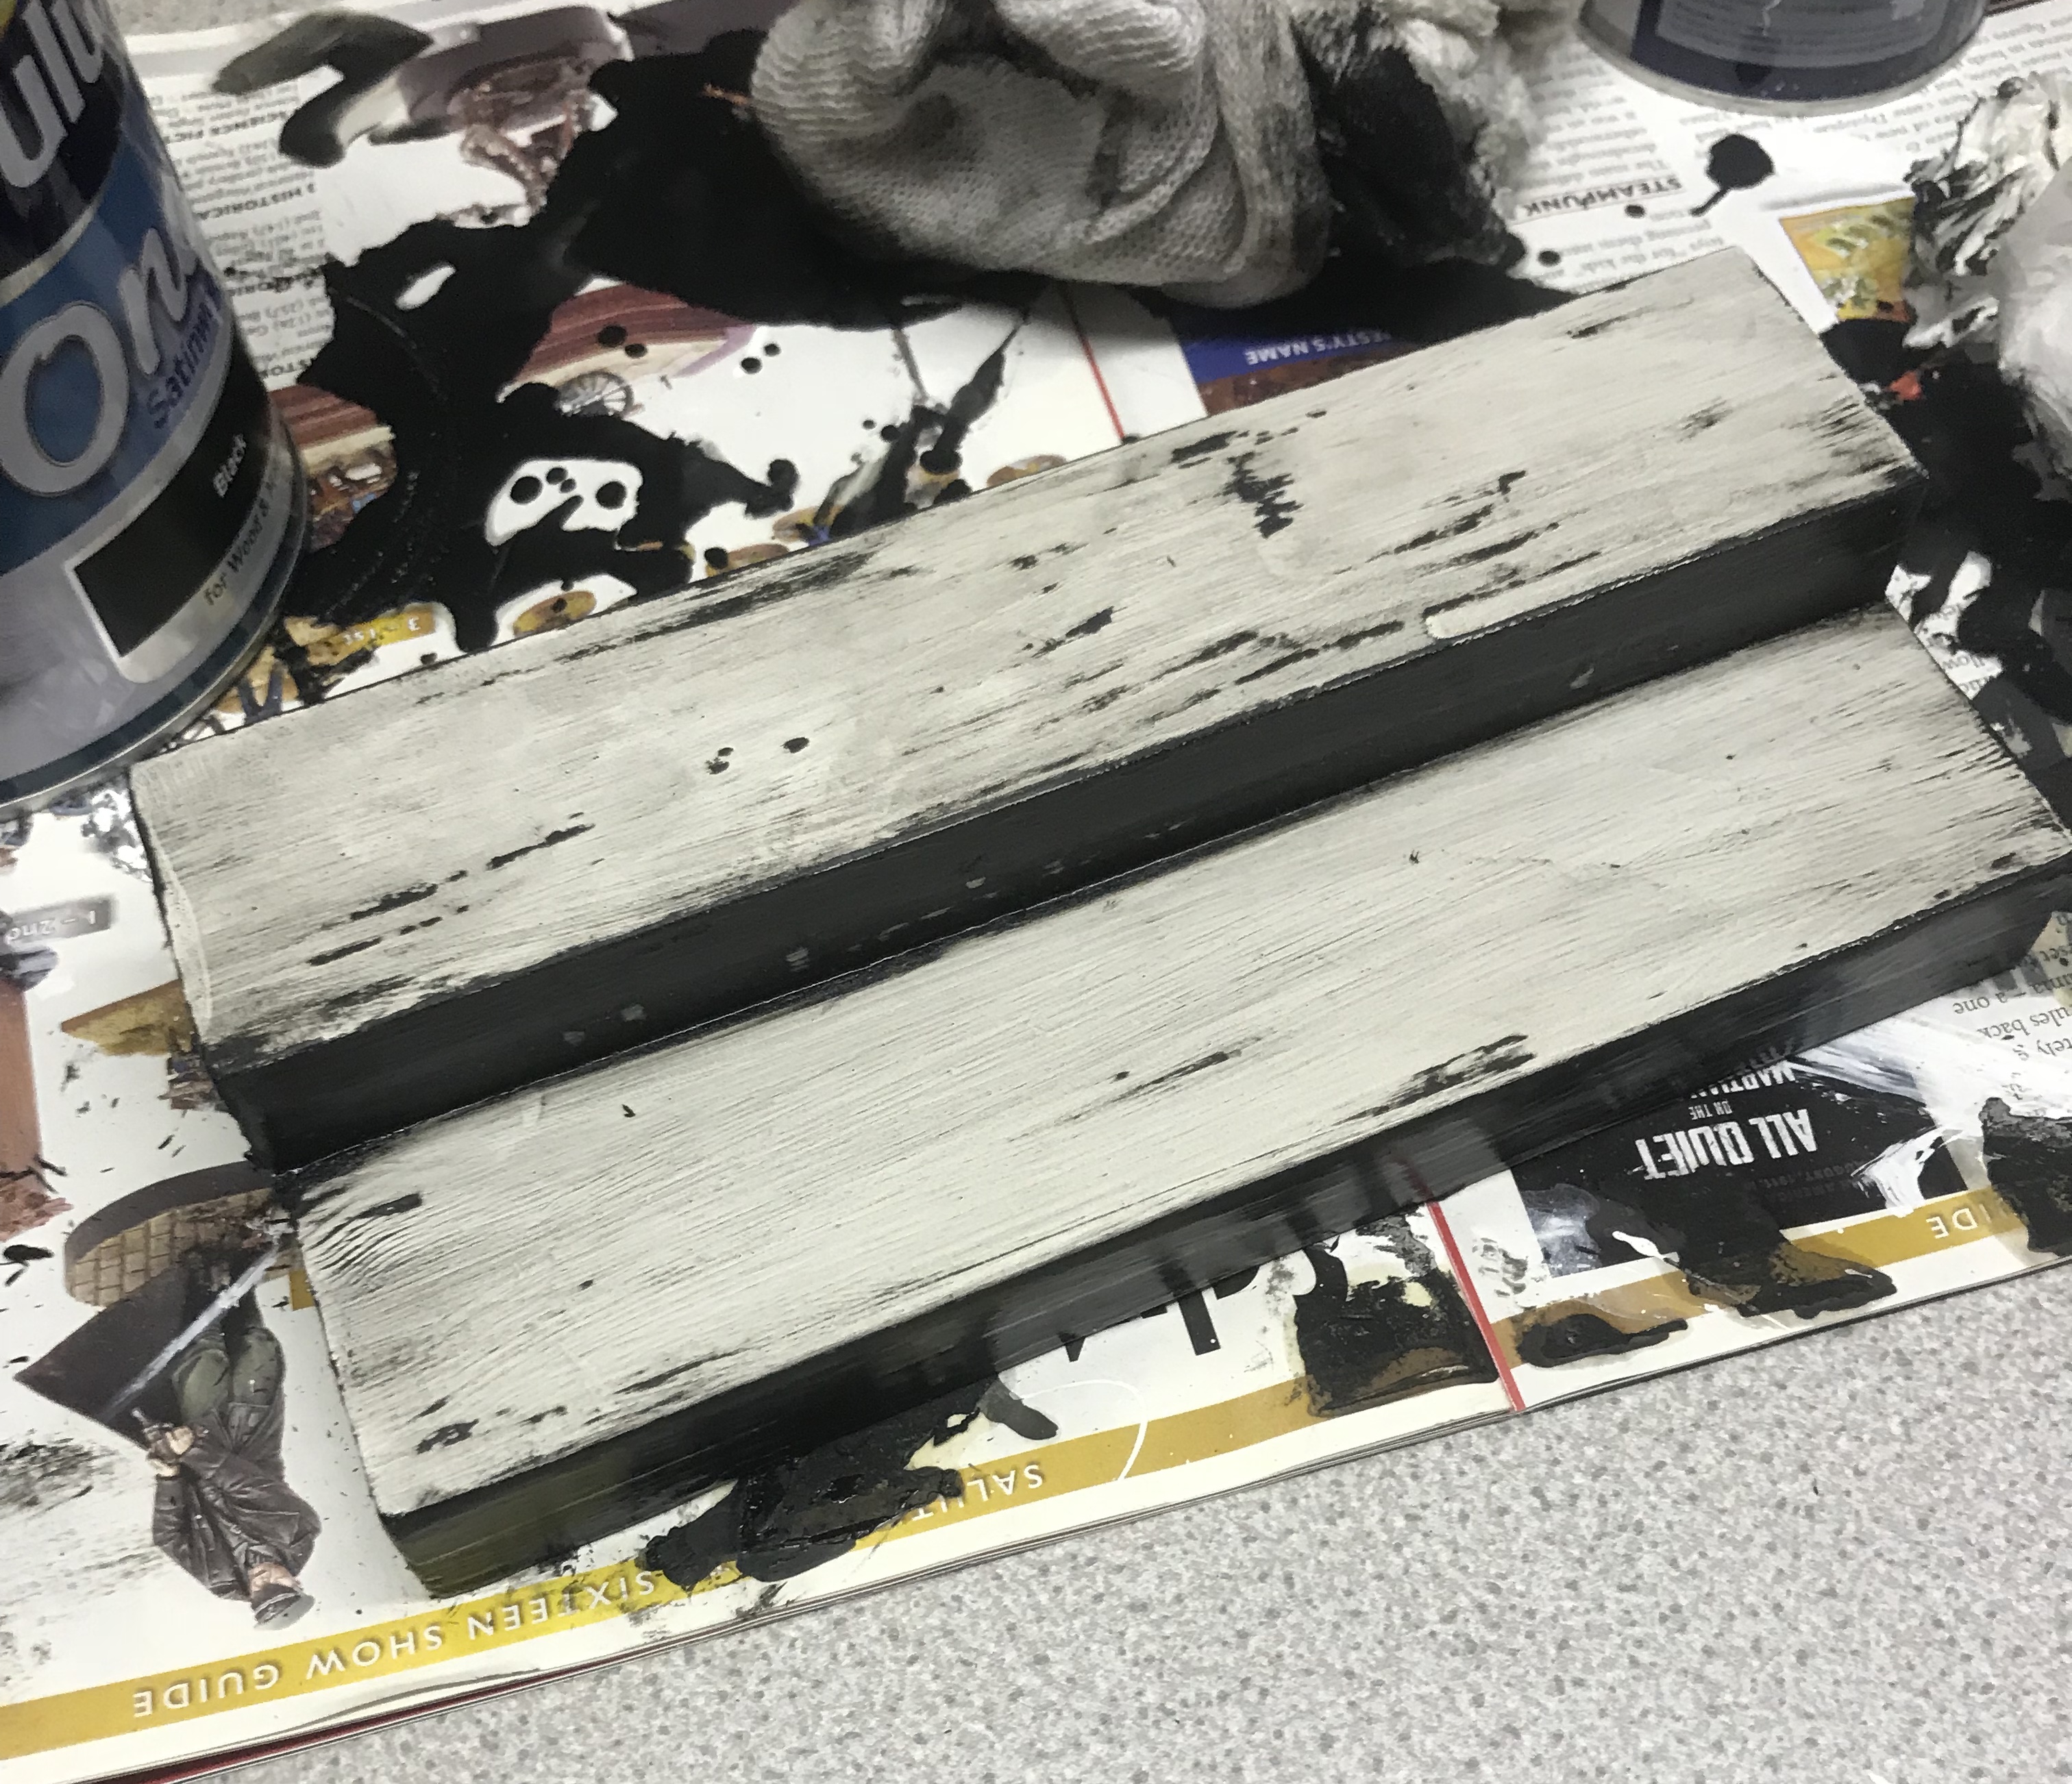
I stripped it. As much as I could. It had cured quite well over the upright sections, but even that was loose and tacky. I literally lifted it all off with just a dry tissue too – don’t use this paint if you can avoid it. So what did I do? I used the paint I should have used all along. The unsung hero of so many painting projects. I speak of course of Chaos Black spray. And once that had been applied all over in one even and easy spray (which of course was dry in 5 minutes), it was time to think about magnets.
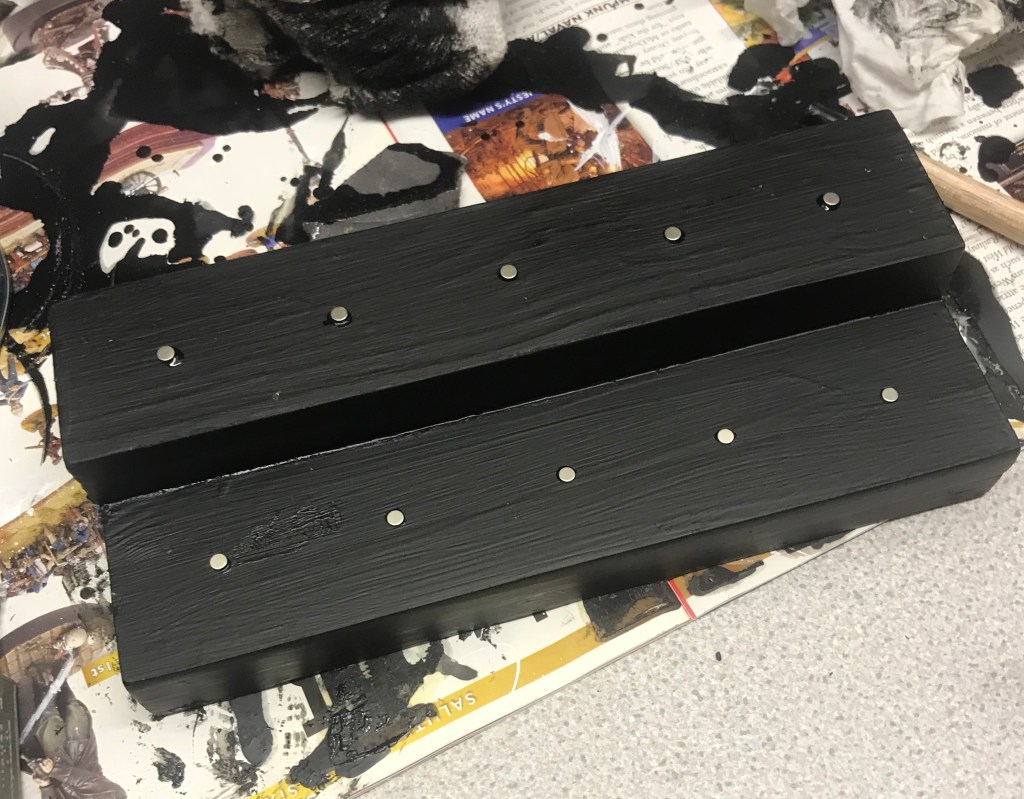
I had thought about drilling out spaces for miniatures to sit in, but I don’t intend to get caught out the next time a base size change happens, and it would be good to use it on other units as well, so instead, I resolved to add 10 mini magnets to the stand, and add a small metal washer to the underside of each mini’s base (£1.99 for 50 steel/zinc washers at Robert Dyas – bargain). This way, the miniatures could be packed together without worrying about them shooting off and sticking to each other. After gluing these in place, I applied another thin coat of Chaos Black, and when that had dried, some Purity Seal spray was used to add a little protection. Last up, I added the padding to the underside:
And we are done! Here’s a little look at the finished product again:
And you know what, I am genuinely proud of this. It may not be the finest bit of carpentry ever, but it’s mine, and it does just about pass muster. It’s a simple design, well executed, and I made it – like I said, genuinely proud. I could have done some things differently, but in the end, I am thrilled with the result, and it was truly rewarding to see each miniature gently snap to it.
I’ll be taking my Veteran Blood Angels Tactical Squad up to Nottingham on the 3rd, so if you’re popping along to the event too, keep an eye out for both the miniatures, and my marvellous carpentry (and me!). I very much doubt they’re good enough to do much up there, but after all of this, I just want to see my stand in all of its glory.
To help you make your own, the length is 210mm, and each surface is 44mm wide. Magnets were placed along a centred line at the following points: 25mm, 65mm, 105mm, 145mm, 185mm. The height of the lower level is 22mm, and the upper level is 18mm. I hope that helps if you do make one yourself! Onwards!
Have you ever made a plinth? Have you ever bought a plinth for a squad? Tell me your plinth stories in the comments below. Plinths!
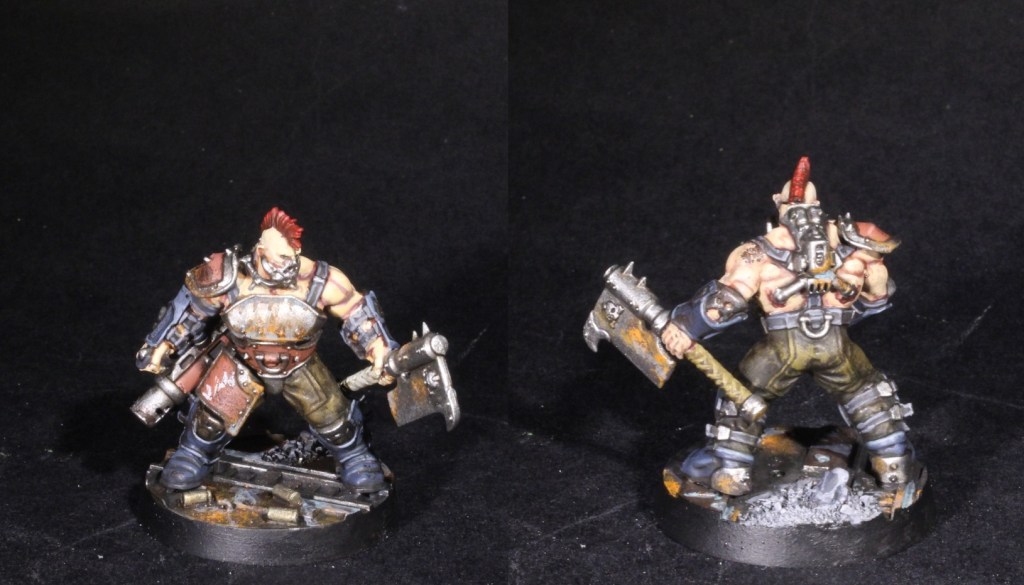
A few people have asked me how I put painted the trousers on my Goliath gangers. They’re in a worn leather style that’s perfect for coats, cloaks and more, especially if you don’t want to do shiny black or clean brown leather. So, I’ve put together a very quick, basic tutorial for these that you can use as a reference. Here goes…
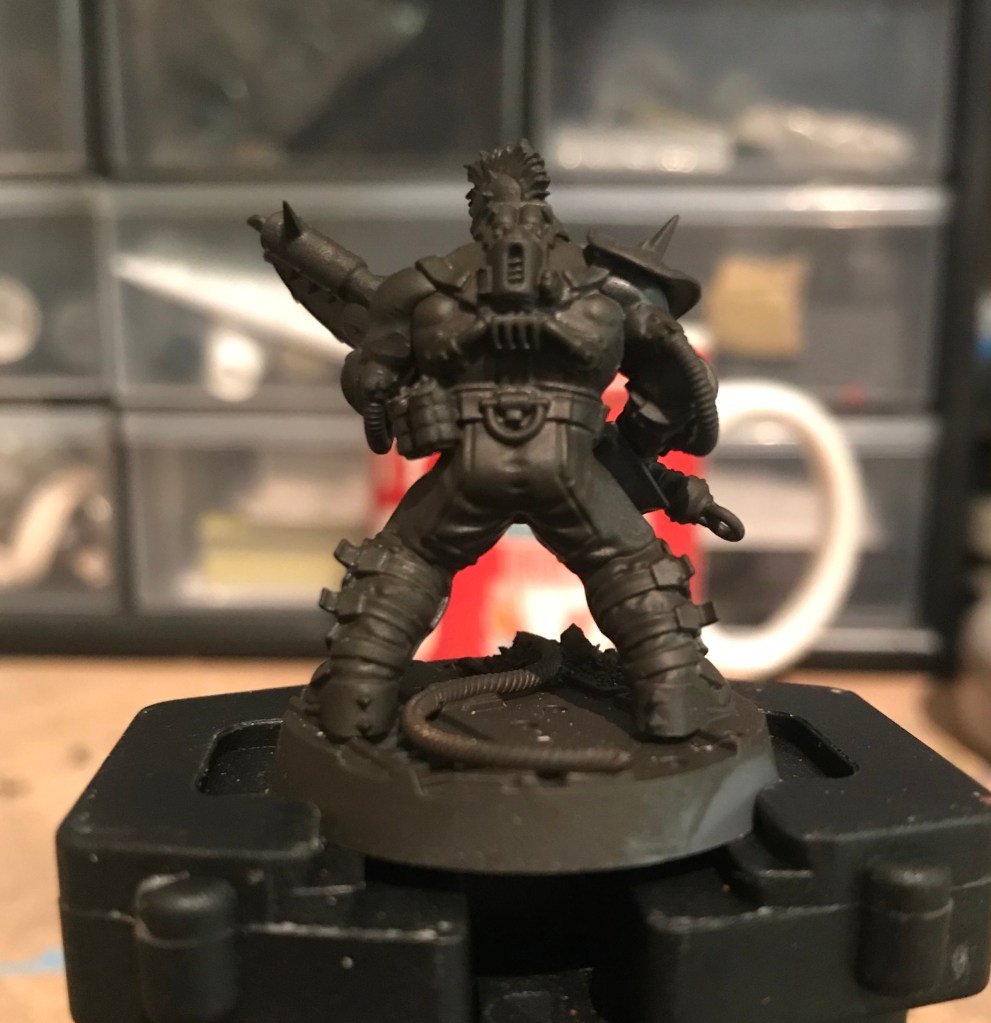
Step 1: Undercoat – Rhinox Hide
The Rhinox Hide spray is perfect for undercoating Necromunda miniatures. It’s a nice solid colour that can lend plenty of depth. I sprayed up all of my gangers with this before starting.
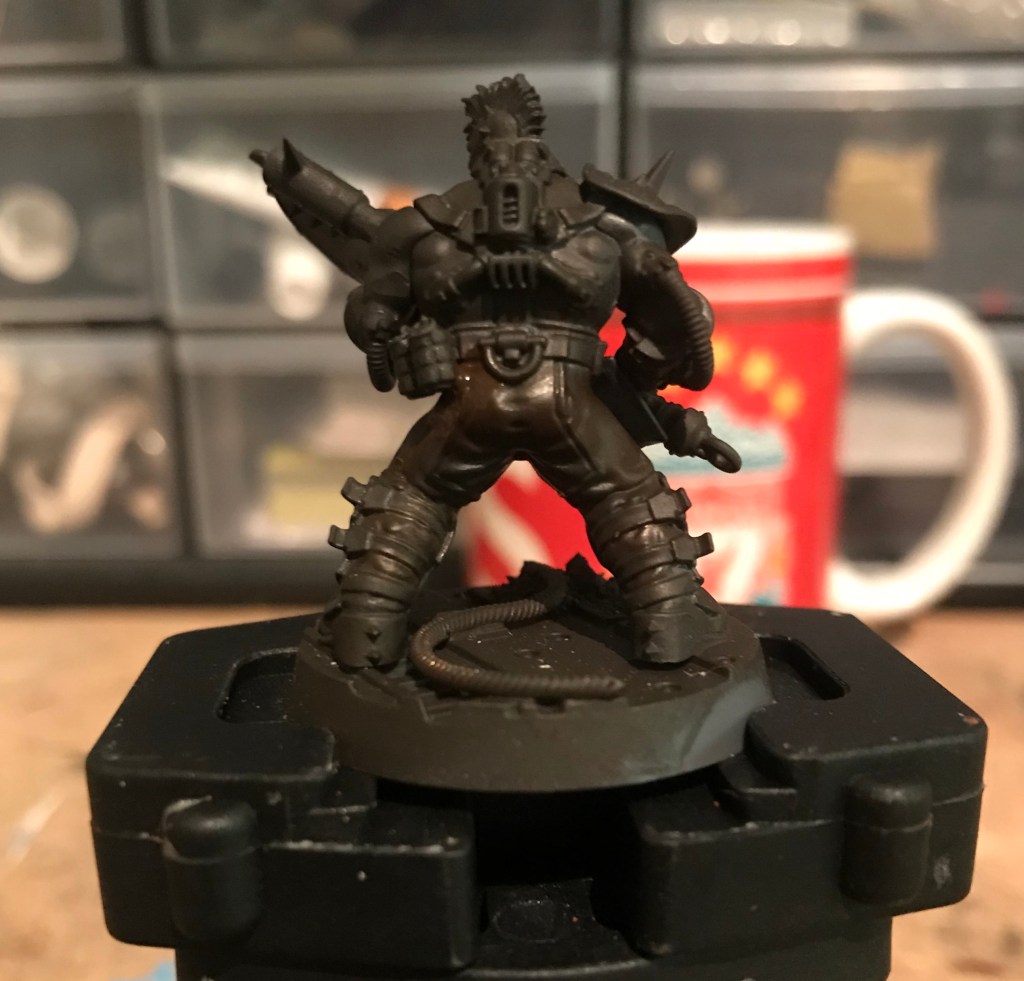
Step 2: Basing – More Rhinox Hide
At the moment, you’re establishing a nice, uneven but matching base and while the spray is perfect for an overall undercoat, it is a tad darker and more matt than the Rhinox Hide that comes from the pot. Add the paint from the bottle to the areas that would get hit by light, but don’t be too neat with it – we want plenty of unevenness here.
Step 3: Wash – Agrax Earthshade
The paint my spellcheck likes the least, add an all over coat. Be a little more liberal with this than you’d usually be with a wash, but only a little.
Step 4: Detail – Rhinox Hide / XV-88 (1:1 Blend)
Here, you’re going to be doing a swirly, dry-brushing sort of action across the trousers. You only need a light touch, very little water (if any – the cardinal sin!) in your paint, and very little on your brush. So yeah, I could have just said drybrushing. I don’t know why I didn’t. I woke up at 4am today and listened to a disappointing cricket match so bear with me. Do that, here, and you’ll be good.
Step 5: Detail – XV-88
Now, you want to do similar to last time. Ensure you catch the raised areas and aim for the higher light catching parts again, but be more conservative with this one. Very dry drybrushing called for. And keep it a bit uneven too.
Step 6: Wash – Seraphim Sepia
Cover the whole lot in Seraphim Sepia. And you’re done! Let it dry and soon, it will look like this:
Well, the weapons and rest of the miniature won’t magically change into something completely different, but your mini’s trousers will look like they’re made from old, worn leather. Or cloak, hat, coat – whatever you’ve used this technique on.
I’m getting through my Goliath gang now, so expect more pictures of those guys soon. I hope you found this post useful, and that your own painting projects are coming along as you’d hoped or better. Onwards!
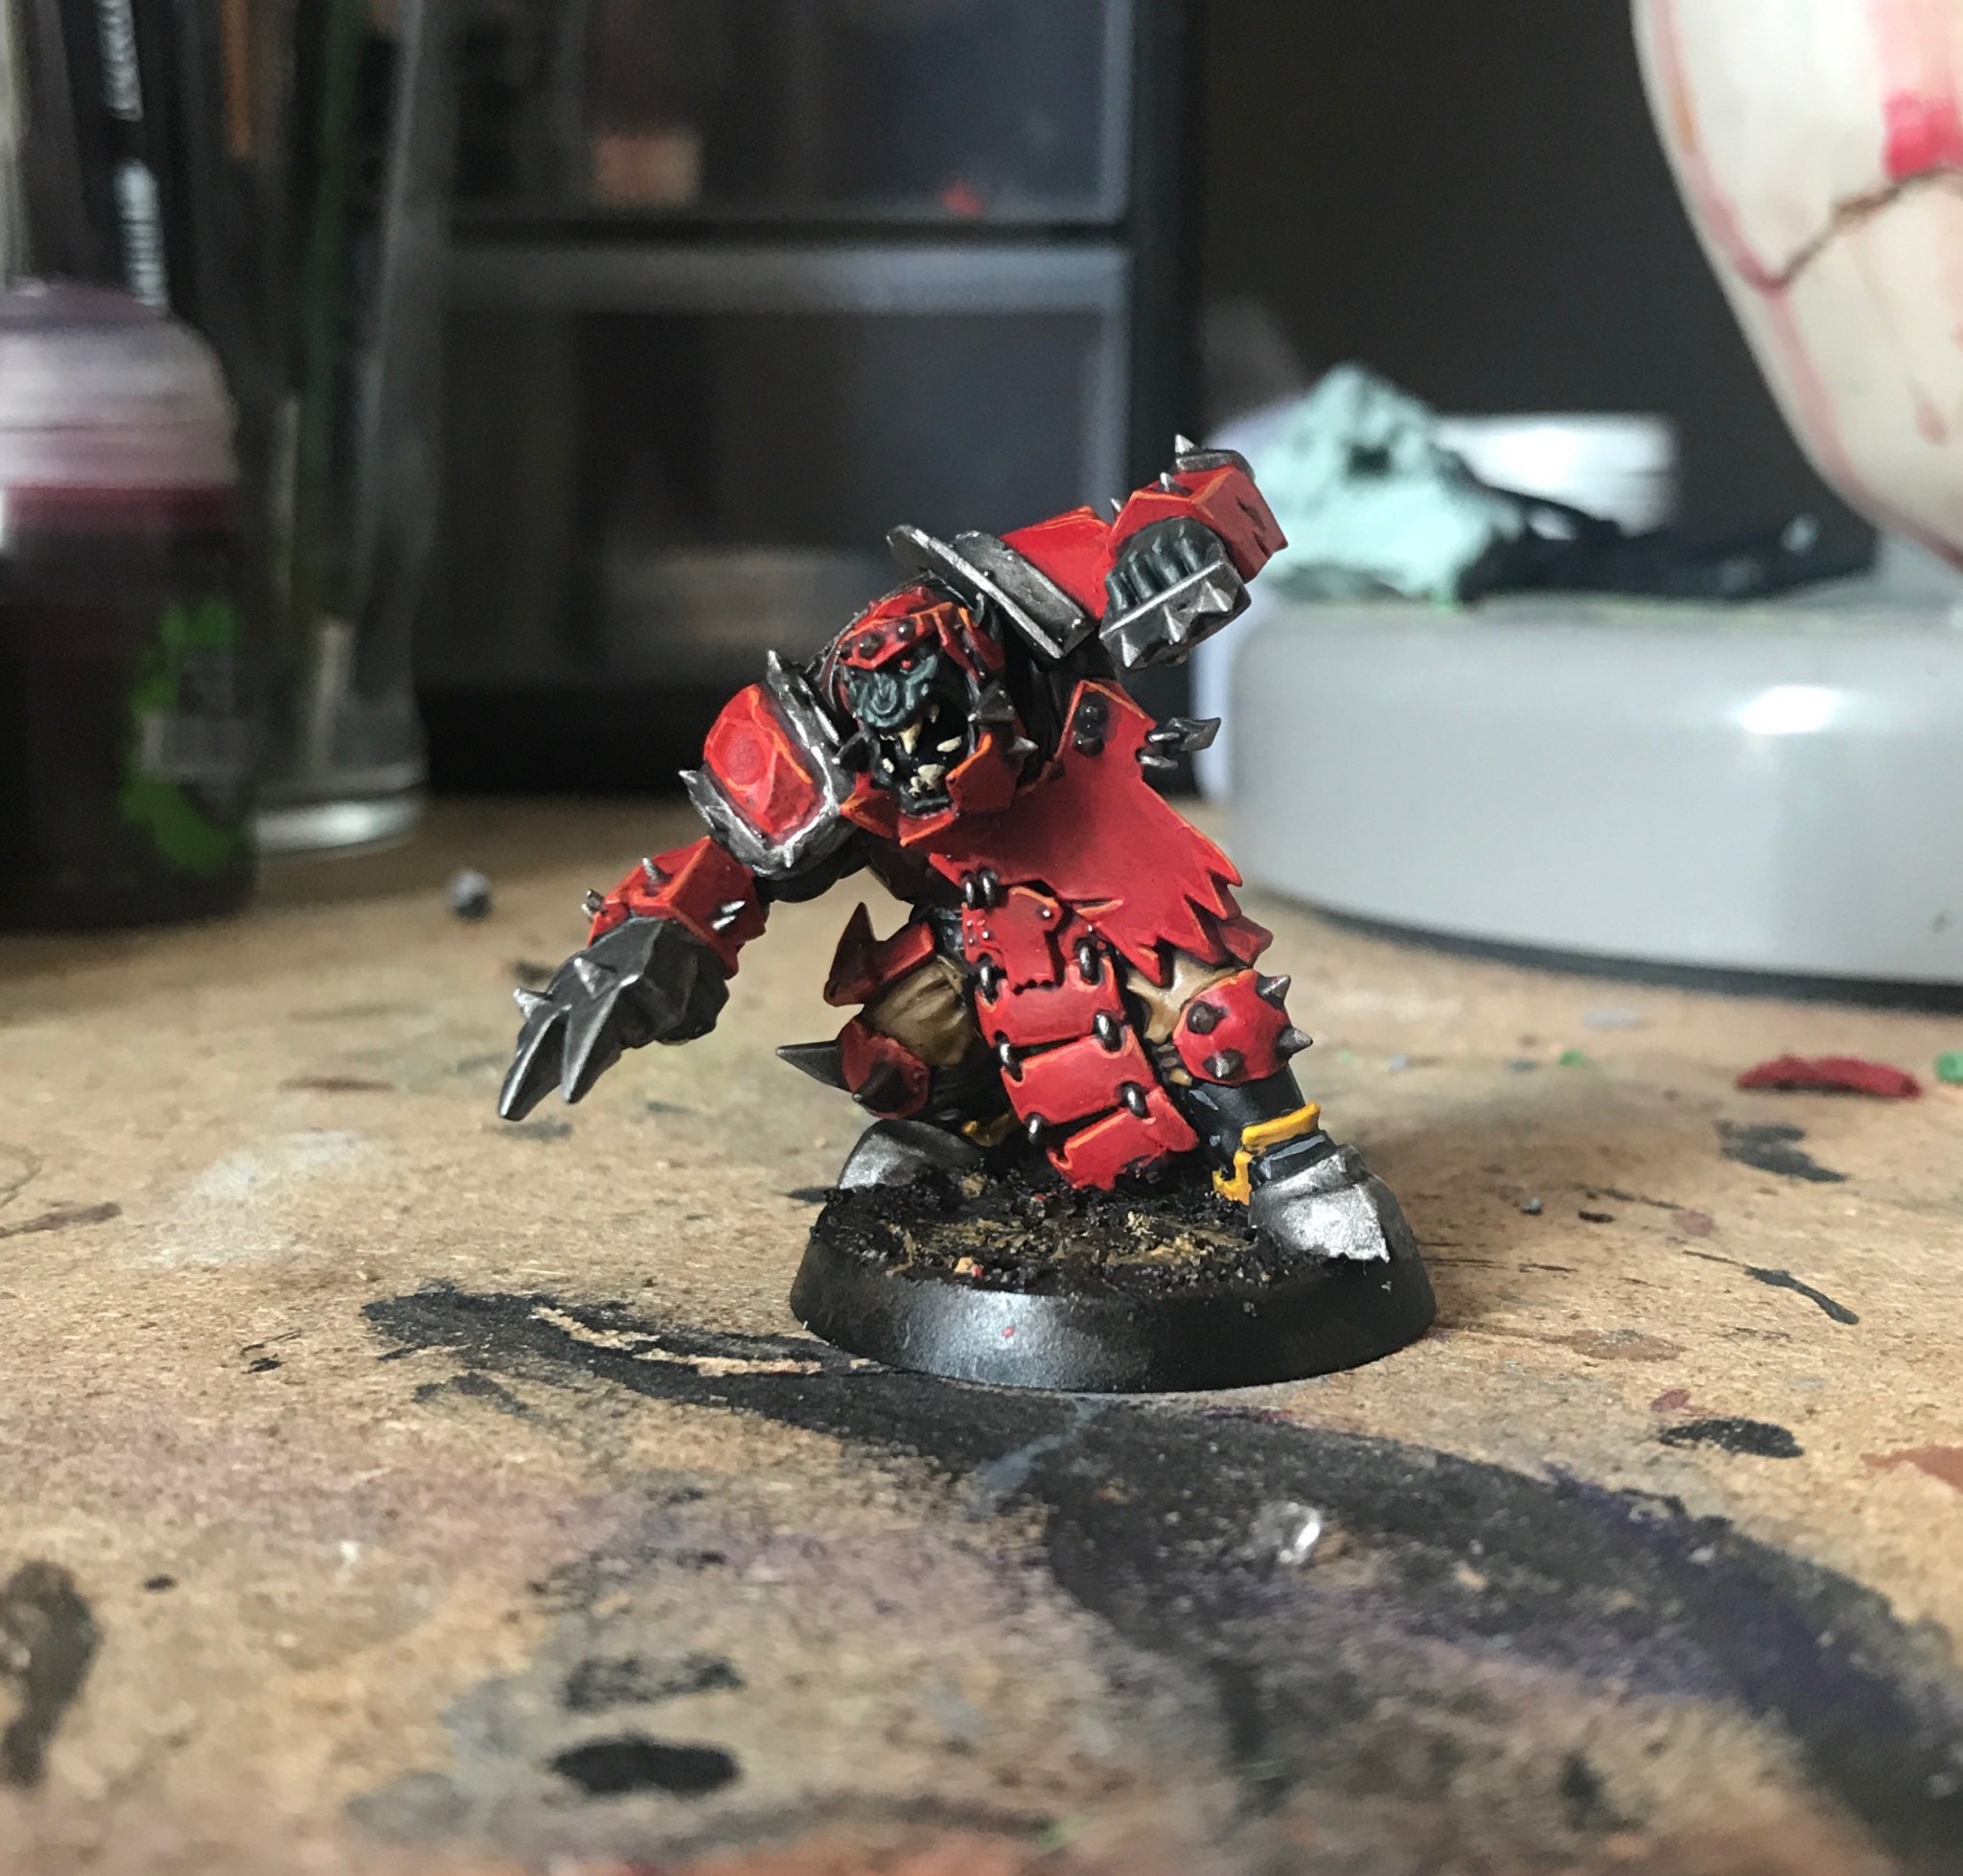
I wanted to show off a bit more of the Orc Blood Bowl team but it’s still not done and I didn’t want to do just another WIP post as I’ve shown them off a couple of times now. So what I thought I’d do was show you how I’m painting them. I’m not much of a batch painter, and this method has worked for me throughout this project. You may do something like this yourself already and if that’s the case, you may as well skip on to the last photograph and see the finished project. But for those of you who are interested in how I do what I do, this is where it starts…
Stage 1: Undercoat
Not the most interesting of stages, I shall grant you. I put the muddy stuff down first (I used Blackfire Earth which is a difficult bugger to get down but leaves a lovely effect) and undercoated in black because this is going to be a dark looking miniature when finished. When you start, you may see some patches didn’t get much of the Chaos Black Spray so just touch those up with a little watered down Abaddon Black.
Stage 2: Basecoat
The entire miniature is given its base colours. There aren’t that many of them but keep it all neat. I made the skin with black and Waaagh! Flesh – after all this is a Black Orc and you want a nice dark, almost ‘Dark Angels’ sort of green. In the words of our Lord and Saviour, Duncan, you want to use two thin coats all over. And don’t get frustrated if you miss the odd bit and have to go back to a colour you’d thought you were done with – it happens to the best of us. Also, Rhinox hide has gone down on the base.
Stage 3: Wash
Everything gets washed aside from the red and black on this miniature. Use a complimentary shade for each different colour, such as an orange wash for the yellow areas, or a deep green for the green areas. The silver areas, and a few gaps and cuts in the red get treated with Nuln Oil to add some real depth. In fact, this is going to add shadow and depth all over the model, which you then bring back up in…
Stage 4: Highlight
This is a bit of a long winded stage but it really does add so much to the model. With steady hands avoiding the recesses and keeping to the edges, you work with lighter colours than in the basecoating stage. For skin, you want to build up the colour over several stages for a more natural look. And for both the silver areas and the red areas, you can use a highlight and lowlight. For example, over Mephiston Red, for down facing edges use Evil Sunz Scarlet, and Fire Dragon Bright on the upward facing edges to represent light hitting them. But for many areas, you only need a single highlight colour.
Stage 5: Details
Think of this as drawing with a brush. You’re adding patterns and details that aren’t built into the sculpt. This is the little brother of true freehand painting, and on this Orc, I’ve added the ‘Orcidas’ stripes, the torch emblem on one shoulder and the number on the other. Because it’s Orcs, I don’t want to be too neat, but if you’re working on a miniature that ought to look a little more perfect, you need to practice your steady hand. I also took off some of the white by using a rough old brush with a little Mephiston Red on it. This neatly leads us on to…
Stage 6: Effects
Typhus Corrosion is your friend here. This is the stage where you add the mud, rust, wear and tear. A bit of rust on the bare metal is always a nice touch, and of course a bit of mud on a Blood Bowl player is very good. In fact, after taking these photos, I went back and added a little more mud (especially to the shoes) and I sponged on some black spots and ‘wear patches’ too. I also added some ‘Ardcoat to the mud to make it look wetter, and a touch to the eye as well to give it some life.
Stage 7: Basing
Our final stage! Clean up the base (you don’t need to go green – I’m going retro for this) and keep it neat. A subtle bit of white lining on the patchy flock that was added using a little PVA glue and a quick dip in the flock box.
And that’s your lot. I love seeing how the miniature comes together under the paint. I’m getting closer to finishing the core of the Orc team so keep a look out for that, though there are a few other little bits to add to the overall squad. But more on that later. I hope that’s given you a bit of an idea regarding how I do what I do, I also hope that it might help an aspiring painter or two. But who knows. If you have any questions, stick them below, and I will do my best to answer them. Onwards!
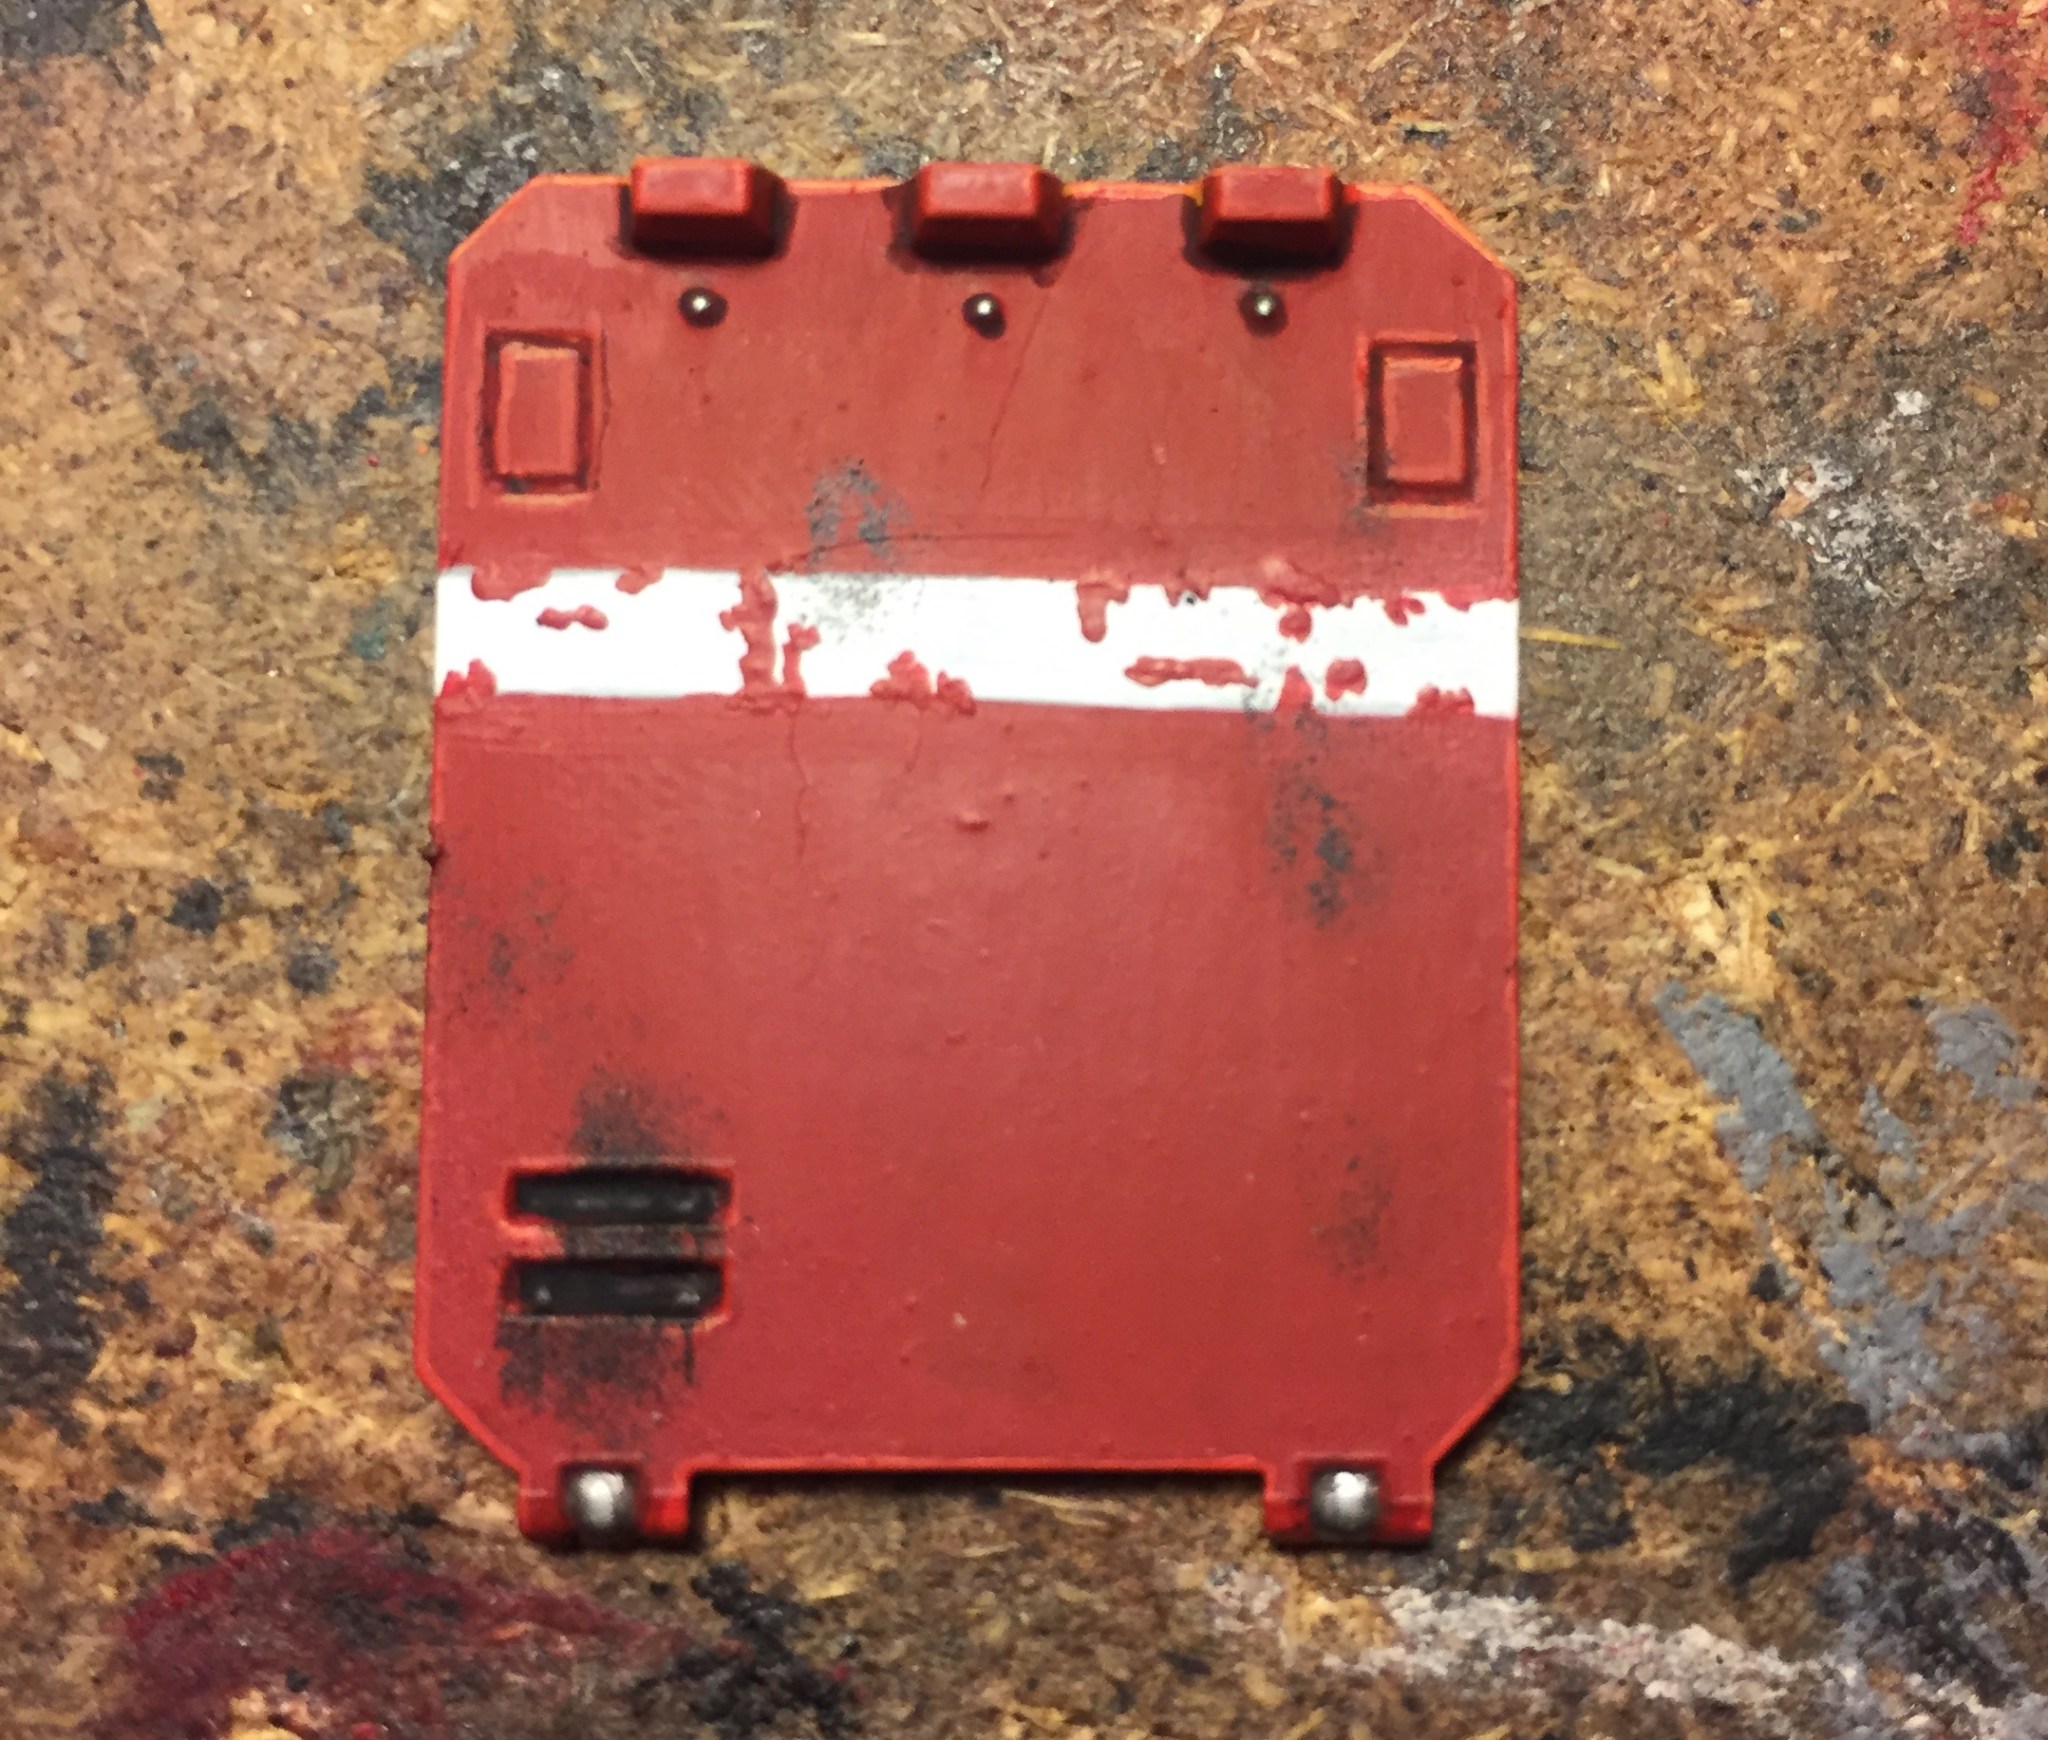
More than a couple of people have complimented me, or asked me about the weathering that I did on my recent Blood Angels rhinos. The compliments were very happily received and in order to answer the questions about how it was done, I thought I’d force myself to do one more blog post featuring these rhinos. So below, we have a step by step guide on how this is done.
Before we go into this though, I should say that this isn’t necessarily the best way to learn how to do weathering – it’s kind of a ‘cheat’ even though I don’t really believe that there’s such a thing as a ‘cheat’ when it comes to painting. If it works, it works. If you want to learn how to do this properly, Forge World books and a number of vids on Youtube will help you a lot more. This is a relatively fast method that looks pretty good (at least I think it does anyway). Here goes.
I started off by painting up this rhino door. It’s in basic red with a white stripe (not perfectly straight but it will do for us now. It’s been washed and highlighted too. Now let’s mess this stuff up.
Step 1
Using Mephiston Red, we put in some basic splodges around the white line. Don’t water this down as much as you might do normally or it’ll look pink against the white background. It will look a bit weird when it’s dry, but there’ll be enough going on that it’ll be fine by the end.
Step 2
The classic technique. A bit of Abaddon Black on a sponge – seriously, just a bit. Dip the sponge in the undiluted paint, wipe/dab off the excess on a paper towel, and apply lightly and sparingly over the model. Make sure you get a little on the white line – it’ll look great. Also, I was a little more liberal but focused around the grate like some fumes have come out (I know you wouldn’t have an exhaust in a door, but let’s pretend for now).
Step 3
It’s hard to see but I’ve added a couple of little drips to that vent. A mix of Rhinox Hide and Abaddon Black does the trick here. This is going to get covered up by what we do next, but it’s a nice little touch to add in areas where things aren’t going to get all dusty.
Step 4
If the dust and dirt is coming from the bottom (which it nearly always will be in my experience), start off by using Typhus Corrosion. Dab it around the bottom of the mini in a rough manner. This technical paint will add a bit of texture and shadow beneath our dust.
Step 5
This is why you don’t throw knackered old brushes away. This Pro Arte brush is far more useful to me in its current state than it ever was when it had a point. Take some Dawnstone and remove most of it from the brush with a paper towel. Then lightly brush it around the lower part of the door in a random pattern.
Step 6
Now take a bit of Administratum Grey and do the same thing that you did with the Dawnstone, only a little less so.
Step 7
Finally, touch up a any highlighting that you might need to, and you’re done! That’s it.
Simple as that, and it works well enough for me. I hope that’s helped out anyone who wanted to know. I shall now go and get on with painting up another tank using similar methods. Onwards!


 40kaddict
 4gotowar
 Castigator's Chaos
 convertorum
 darkfuturegaming
 ftgtgaming
 Mind of the Daemon
 taleofpainters
 talkwargaming
 Twisted Brushes
 weemen