
It’s been a long time since we’ve had a basing basics article, right? So today, I have a real doozy for you. We’re going to be creating quick, simple and easy to paint lava bases, featuring old, dried black lava, and hot, flowing lava too. This is really simple and looks really cool (well, warm actually) too. Let’s dive right in!
What You’ll Need:
Cork – I bought some cheap cork coasters from Amazon (but you can probably get them somewhere nicer if you look)
Sand – modelling sand if you have it, budgie sand if you want to buy cheap(sic)
PVA Glue
Vallejo Plastic Putty – liquid green stuff will do in a pinch, but this stuff is seriously good and very handy so worth the minor investment
Superglue
Black Static Grass (optional) – you can get cheap 4mm flock from sites like MDP – 10g will last you a lifetime!
Paints (using Citadel for convenience):
Black Undercoat
Abaddon Black
Eshin Grey
Dawnstone
Administratum Grey
Drakenhof Night
Celestra Grey
Averland Sunset
Dorn Yellow
Gryph-hound Orange
Fleshtearers Red
The Build
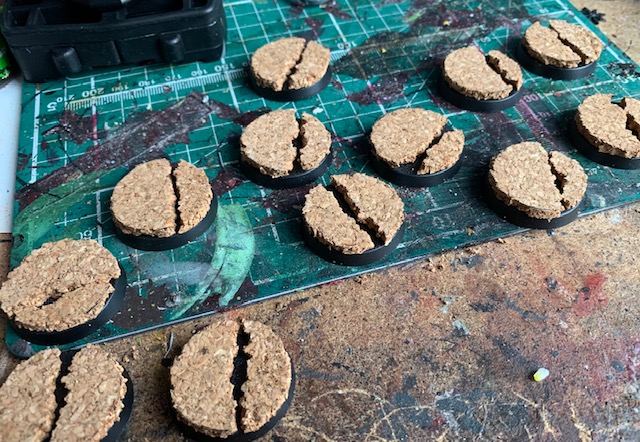
Step 1 – Cut out a piece of cork the size of your base. Use a biro to draw round it on the piece of cork, cut it out with a craft knife, and then break it down the centre. Remove a bit of cork from each side of the break you’ve just made (you can pull it off with your fingers) and then glue the two halves to your base (use superglue for this) leaving a little gully in between.
Step 2 – Carefully put down a layer of Vallejo plastic putty at the base of the crack/gully and allow to dry. This stuff comes with a great, thin applicator nozzle that makes this really easy. Don’t be too smooth with it – a little lumpy is good #tinderprofileopener

Step 3 (not shown – forgot to take a photo of this bit) – glue a few small patches of sand onto the top of the cork. Once all of that’s dry, you can undercoat black.
The Painting (get ready for a lot of grey/black looking images!)
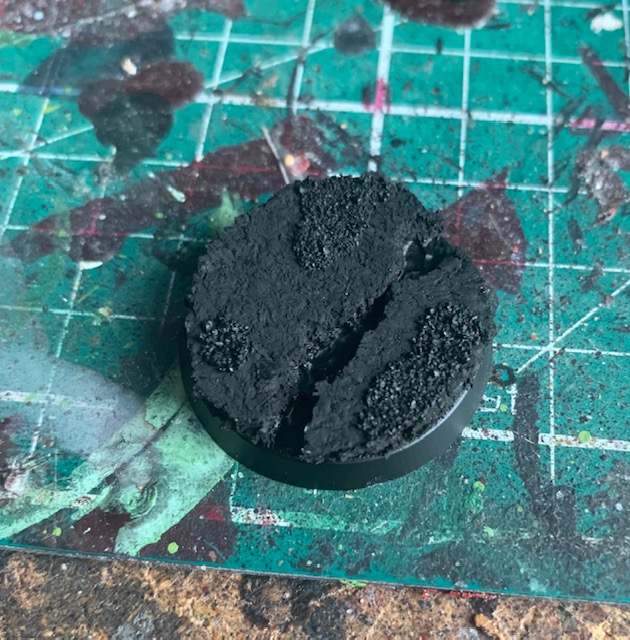
Step 1 – Cover that black spray paint with Abaddon Black (trust me, it’s a nicer black to work on and will help obscure just enough of the cork details). Be sure to get into all the nooks and crannies inside the crack – leave no cork dry or untouched. #whytheykickedmeoutofthatwinemerchantsthatonetime
Step 2 – Mix a bit of Eshin Grey in with Abaddon black and do a very thick edge highlight on the whole thing.

Step 3 – A slightly less thick highlight of Eshin Grey

Step 4 – A thin edge highlight of Dawnstone. Actually, this paint is going to do some heavy lifting here. Make sure you hit some of those edges in the crack too. Drybrush some Dawnstone onto the sand areas, and, finally with this, water it down plenty, and do some rough patterns across the top of the cork. I didn’t do this enough in this step and added some more later on in the process.

Step 5 – Now do a really thin highlight touching the lip of that crack (#saucy) with Administratum Grey. Also, a very light drybrush over the sandy areas.

Step 6 – Once the Admin grey has dried, add some Drakenhof Night to the sandy areas. This is going to help everything to pop just a little.
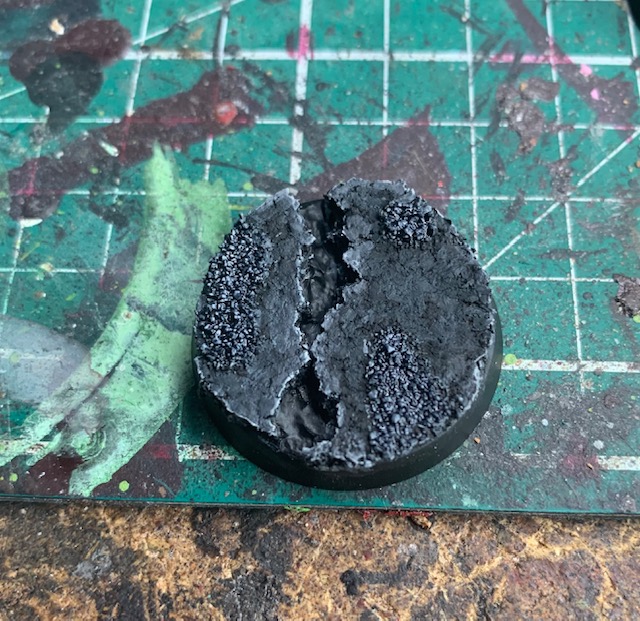
Step 7 – While that is drying add some small spot highlights of Celestra Grey at the most pronounced parts of that crack – these should be really small and thin.

Step 8 – Going back to Admin grey, now that the Drakenhof Night has dried, pick out a few grains of sand to highlight. You can do this with a very light drybrush too to speed things up if you like.

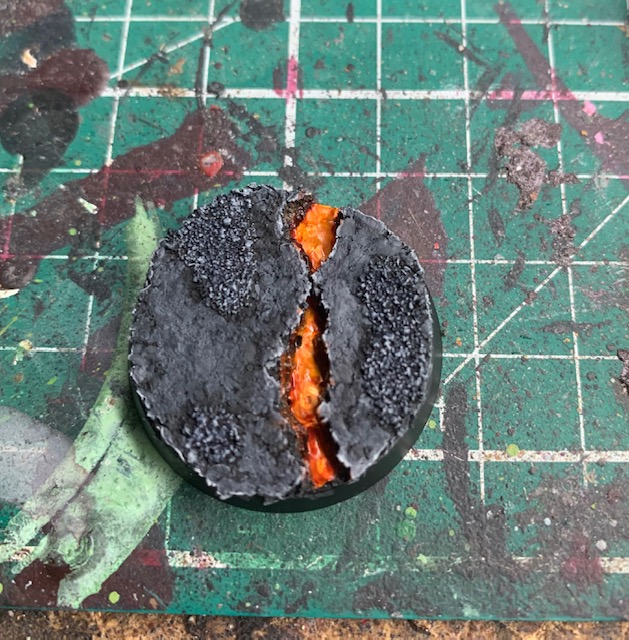
Step 9 – A bit of colour! You want to do a couple of thin coats of Averland Sunset over the plastic putty. Make sure it’s nice and solid before moving on to the next step.

Step 10 – Use some Dorn Yellow (you can go straight from the pot – no need to thin this) and pick out some raised areas in this fresh lava.

Step 11 – Once this is all dry, add a thin-medium layer of Gryph-hound Orange to this flowing laver. And make sure you hit some of the walls too. This is kind of a “poor man’s” OSL but it works really nicely for this.

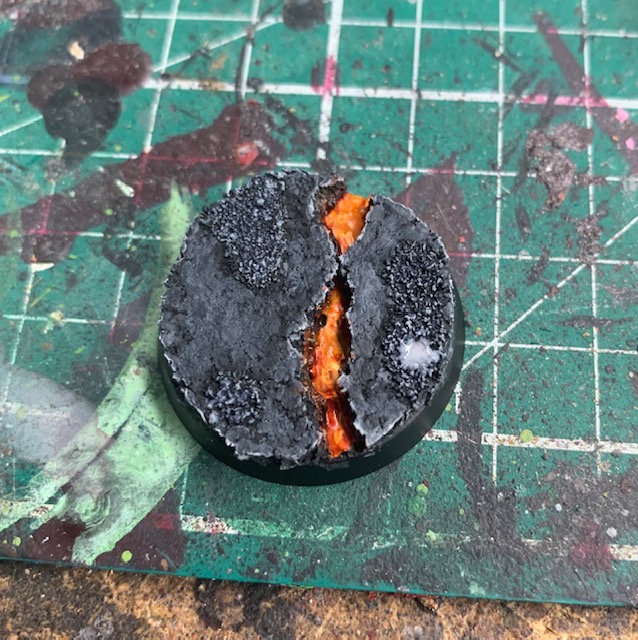
Step 12 – Add some Fleshtearers Red to the edges of the orange. Use very sparingly and wipe away any excess. That’s all the painting done!
Bonus: Adding Static Grass
Static Grass is kind of old fashioned these days, but until they make good looking black tufts, I’ll stick with this. And it’s good to keep the old ways alive too, I guess. So, if you want to add it, it’s this simple:
Step 1: Take some of your static grass and put it onto a clean surface. Preferably one with a lip. This stuff has a habit of getting everywhere, so don’t even breathe on it (or look at it funny). It’s best to have it easily to hand like this too – saves reaching into the bag each time.

Step 2: Place a little PVA glue on a sandy bit of the base.
Step 3: Take a pinch of flock. Roll it in your fingers, even it out, get it all facing in the right direction, and carefully place it onto the PVA. Alternatively, if you have a static grass/flock applicator, that’s even better (but I don’t, hence the instructions). And that’s it! The PVA dries clear so once you’ve left it a little while, it should look like this:

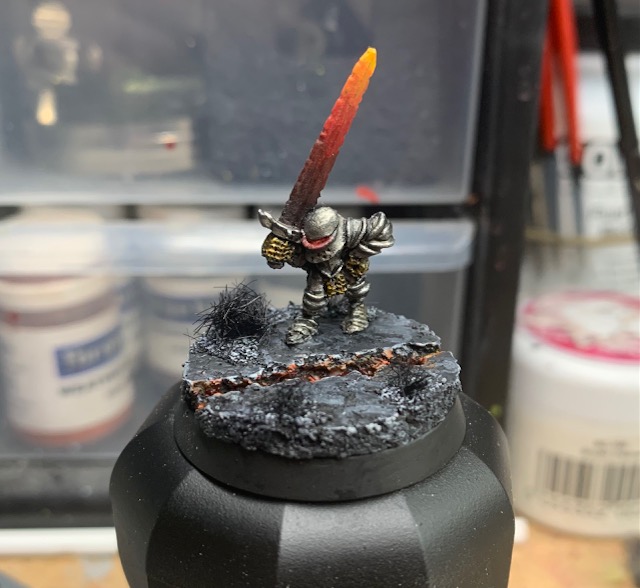
And who’s that little dude at the top of the post? Well, he’s part of a really fun little project I’m working on, but more on that soon (actually, let’s make it tomorrow). In the meantime, I hope this is useful and I hope you have fun with it! If you use it, I’d love to see it, so hit me up on Twitter or leave a comment with a link to your example below. Onwards!

 40kaddict
 4gotowar
 Castigator's Chaos
 convertorum
 darkfuturegaming
 ftgtgaming
 Mind of the Daemon
 taleofpainters
 talkwargaming
 Twisted Brushes
 weemen
Great guide. Thanks for sharing.
Very nice, love how the texture turned out with the cork and sand. My only advice, is that I would paint the lava right after the first coat of black, then do the rest of the black. That way you can cover any mistakes made while painting the lava.
That could work. But I like to paint onto the dark areas with the lava paints to give it the “poor man’s osl” so I need those greys down first. Also, it’s a little easier to touch up those greys and blacks than it is the lava. But worth experimenting though!
Great point! I didn’t do the OSL part when I made my own lava bases, so that’s definitely a consideration.