
I love painting freehand designs on my miniatures and over the years, this has earned me a great many compliments. In fact, between you and me, dear reader, I sometimes repost photos of some of my freehand works to social media just to get the endorphin hit that comes with everyone telling me how wonderful I am. Even my ego needs stroking sometimes.
I often get comments along the lines of “I could never do that!” or “how is that even possible!?” and those too are wonderful stroking hands to my purring ego, but I wanted to write this post because I think anyone can do freehand and I want to help you and everyone else, if I can, to gain the confidence and skills to have a go. You should never feel you can’t do something, but we all need a bit of advice and help, and with that, you can do anything. I promise you, it’s not as tricky as you think it might be. So, as is tradition around these parts, I’ve done a nice list of things to consider and remember should you want to give freehand miniature painting a go yourself. Let’s dive in, starting with a cliche so old, I’m pretty sure it was scrawled under the artwork of mammoths in those caves in France…
Practice makes Perfect
Or at least, practice makes very good, and very good is usually good enough for even the goodest of painters. If you’ve never tried painting freehand on a miniature with acrylic paints before, I’ve got a friendly warning for you; your first attempt is probably going to suck. Mine did. Most people’s first attempts at almost anything in life suck. Sure, there are those freakish naturals (lucky bastards) who can get it right first time but those folk are as rare as a thing that is very rare (like a charismatic Ultramarine). Remember the wisest words Bob Ross ever spoke – “Talent is a pursued interest”.

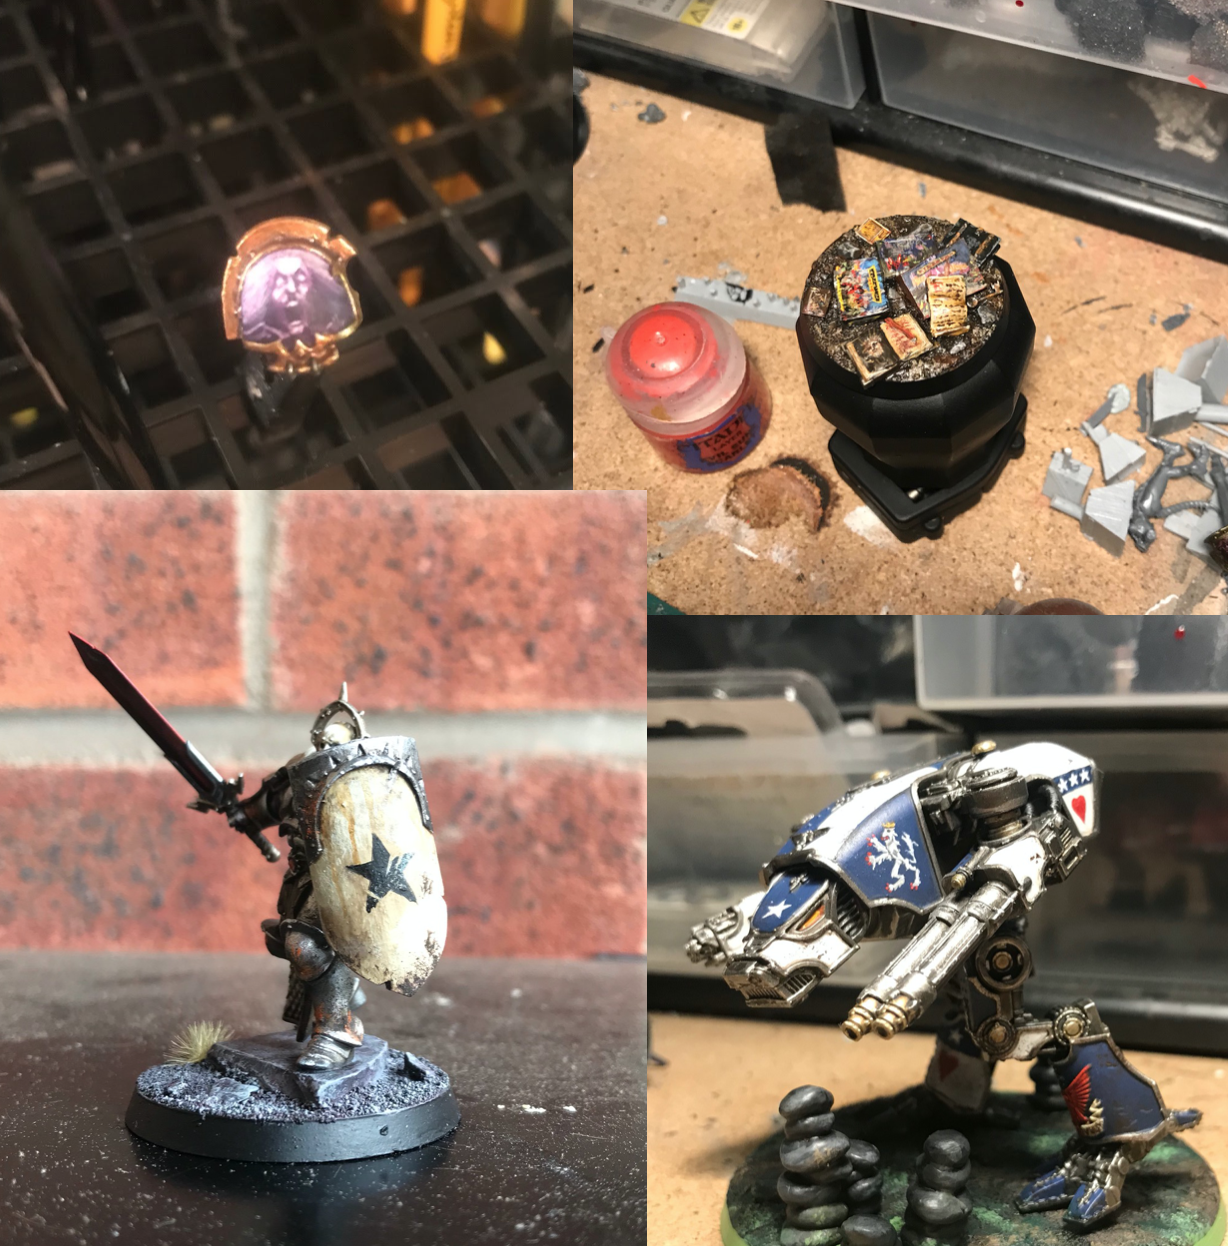
Take my Mortifactors as an example. I painted 100+ skulls for that army because, much to my shock and dismay, the one thing Games Workshop hasn’t made with a skull on it is a Space Marine shoulder pad (no, Silver Skulls ones don’t count). And the difference between the first skull I painted and the last is huge. But I couldn’t have painted that last one, without painting the first one and then the 99+ that followed. You have to put the time in and practice. Just being able to get the feeling for how the brush moves, how the paint sits and builds, and how to bring what you imagine to life is a huge and vitally important part of this aspect of painting, and for the overwhelming majority of us, we need to put in that time. Rome wasn’t painted in a day. But where to start?
Where To Start
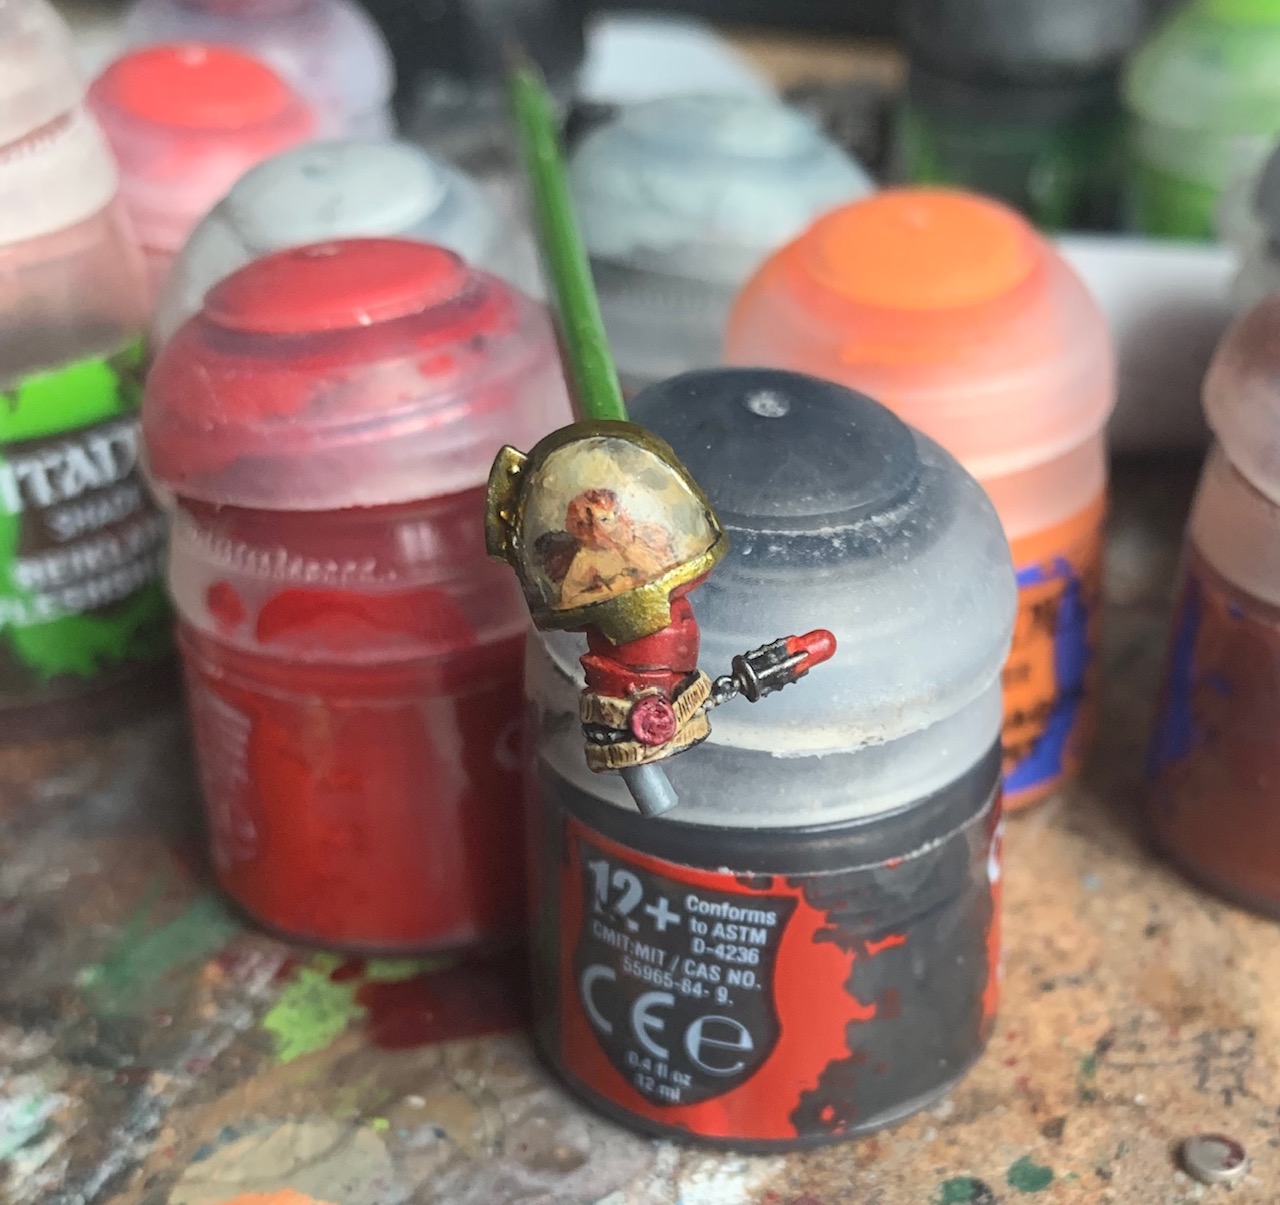
How’s that for foreshadowing? Start with the basics. Yes, you could just paint that chainsword red, but why not try giving it hazard stripes? Sure, that banner pole could just be yellow, but why not do black and white checks? Basic patterns (squares, triangles, lines…) are a great way to learn that brush control, and they can help set miniatures apart. Being able to just paint a straight line with your brush is a serious skill to develop and it’s crucial if you then want to go on to attempt more complex shapes.
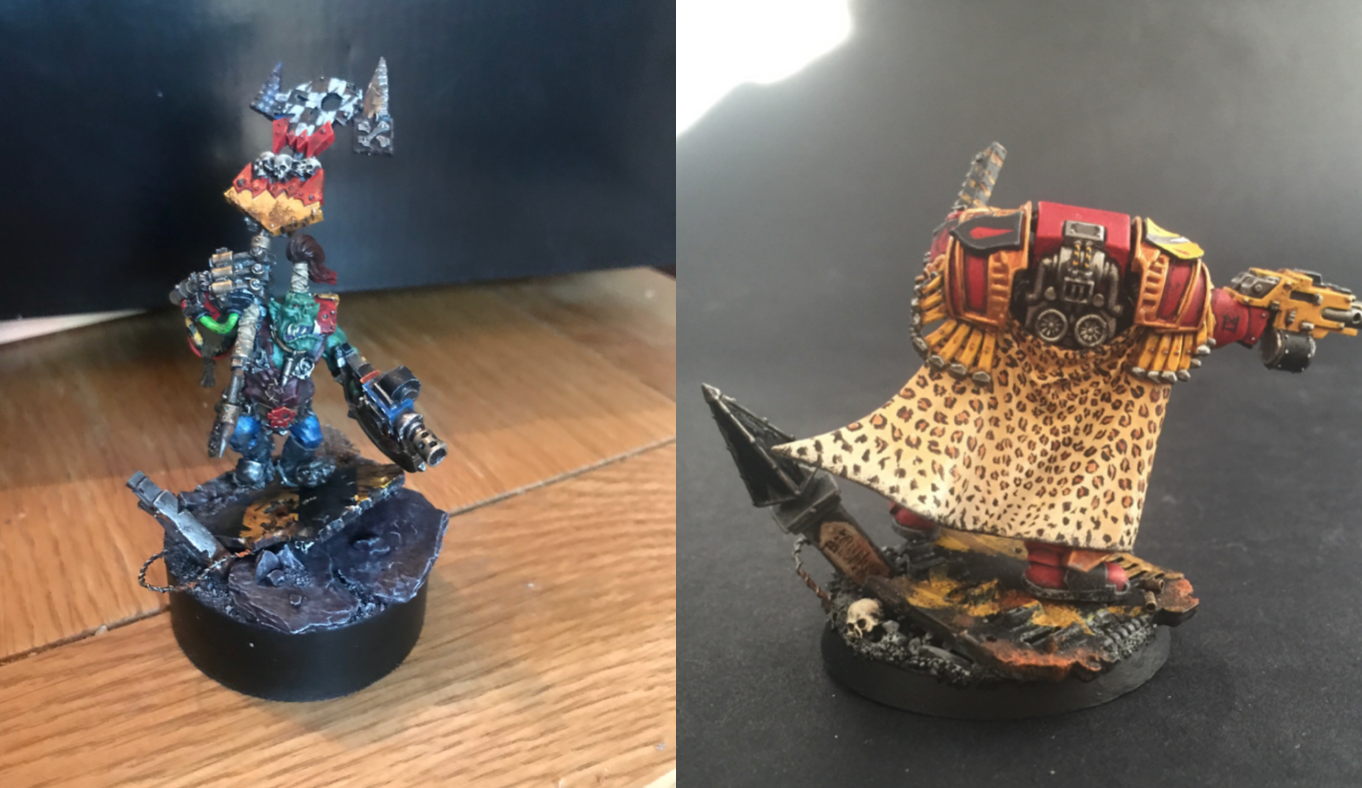
Even leopard-print, which has garnered me much praise over the years, is far simpler than you think. In its basic form, it’s three steps: Paint the light brown fur underneath, then paint the little dark brown sort-of-circles, then put a dot of shade inside those circles and you’re done! But practicing techniques like this help you to gain brush control, and to think of your miniature, or a part of your miniature, as a canvas. And once you’ve got the basics down, you can push on from there. No one’s asking you to jump a hurdle from a standing start – that’s what the run up is for.
Also, I bet your bits box is full of shoulder pads, swords, vehicle doors… all of these are great for practice. If you don’t feel you can risk doing it on the miniature you’re working on yet, get something out and just practice on those and get comfortable. My bits box (well, technically, I have four bits boxes, a bits tub and a bits… crate (I may have a problem)) is full of half painted things that were used to test theories.
Remember Your Friends
We all need things that make our lives easier, and there are thankfully a couple of tricks we can perform when freehand painting that give us a cushion, while forgiving us our occasional painting sins. Weathering is a big one. My hazard stripes aren’t always straight, or evenly spaced. My checks aren’t always square. So scuff them up! Get them as good as you can get them and then add scratches and scuffs, patches of mud, blood, verdigris and rust. Especially when you’re learning, you want to be proud of your efforts and when you do this, yourself and others are less likely to notice the little follies and foibles, and you can be happier with the results too. Then one day you’ll get that really satisfying moment when you don’t want to weather any of it because it looks so pretty – that’s a great day. 🙂
When you’re painting more complex pieces, remember the art of washing and glazing. Every time I attempt something big, I will, at some point, make a transition between two shades that is too harsh. I’ll try and blend it out to correct it, but sometimes, especially when you’re working with minute amounts of paint that dry in seconds, this isn’t always possible. Do your best here, but when the job is finished, remember that you can dull the whole piece down to bring it all together and hide some of those transitions by applying a sympathetic glaze over the top of the artwork. A couple of thinned and evenly spread layers of Seraphim Sepia or Skeleton Horde are great for pieces that are meant to look older, but pick the colours that suit you and what you’re working on.

Tips For Complex Pieces
When it gets to the really complex things, I’m not sure there’s a formula that I can give you. You have to put in the work and work out what works best for you, but I can give you a few tips that worked for me. First off, work from dark to light. I often start most of my miniature painting at or around the mid-tone, but for freehand, I start dark and build to the light. This allows me to more easily frame the lighter areas and bring them up in tone – it’s like drawing all the outlines first and then colouring in. It also helps me to understand what things need to be what shade (“so in the [hypothetical] photo, that hat is darker than that coat so I’ll remember that as I’m building the colours”) and work towards what I know are the lightest tones I have.

Start off with those basic shapes you’re familiar with. Don’t try and paint a space marine. Paint the cylinders and rectangles that make him up first, and then, as you add highlights, keep reducing those shapes so that eventually they will start to look like a space marine. And don’t be discouraged when you look at it half way through and think “well this looks crap”. These things often do at that stage – it’s like seeing a half built house and thinking “well it’s not how the finished project was supposed to look”. Of course it doesn’t! Keep going and only judge it later when it’s very nearly done – this will give you the chance to make any fixes you need to make. And when you do judge it, be kind to yourself; we’re all learning this all the time.
Lastly, it’s worth remembering that patience is a virtue. It can take multiple days to get the image right, so don’t expect to do an hours work and then have a masterpiece on your hands. You need to put a shift in. A long shift. But it will be worth it. And honestly, between the peaceful therapeutic hours of painting, and the joyous payoff at the end, it’s just wonderful.
Be Inspired
Like I said, I love the compliments I get for my work, but there are a lot of miniature painters who do it a lot lot better than I do. Check out the work by Richard Gray which has been blowing my mind for years. or if you want to see a top miniature painter do some amazing freehand in a video, Sam Lenz has some sweet stuff on his channel. If those guys intimidate you (and they shouldn’t because they’re both lovely, helpful people) maybe take a look at some of the more introductory freehand that Pete The Wargamer puts out into some of his excellent tutorials – Pete is great at giving simple advice that helps so many hobbyists (and, by the way, also a lovely human). There’s so much out there to be inspired by in mini painting, but it’s also worth looking at artists and illustrators that work in 2D as well. Maybe you’ll find the piece you want to recreate on that space marine’s cloak out there!
I hope this has been useful. You’re more than welcome to keep telling me I’m amazing – I won’t hold it against you. But I’m kind of hoping that one day I’ll be looking at your elaborate, perfectly executed freehand and telling you that my mind is blown. Of course if you then want to tell me that this article helped in some small way, leave a comment down below, then we both get an ego massage so that’s great all round. If you choose to take on the freehand challenge, I wish you luck, I hope you enjoy yourself, and I look forward to seeing your wonderful creations soon. Oh, and if you have any questions about the subject, find me on twitter or leave a comment below – I’ll do my best to help you out. Onwards!
 40kaddict
 4gotowar
 Castigator's Chaos
 convertorum
 darkfuturegaming
 ftgtgaming
 Mind of the Daemon
 taleofpainters
 talkwargaming
 Twisted Brushes
 weemen
Pingback: My Appearance on The Painting Phase! | Heresy & Heroes