

Hey friends! As GW were kind enough to send me the new Legions Imperialis boxes, and because I’ve been very much enjoying painting up some Blood Angels, I thought I’d put together an article all about how I’ve been painting them. If you’re looking to paint up some extra-tiny IXth Legion, I hope this little walk through will help you out!
I should also point out that this is a basic tutorial – this isn’t going to win you any awards, but it should help you have a lot of fun getting your army done quickly. So let’s get to it…
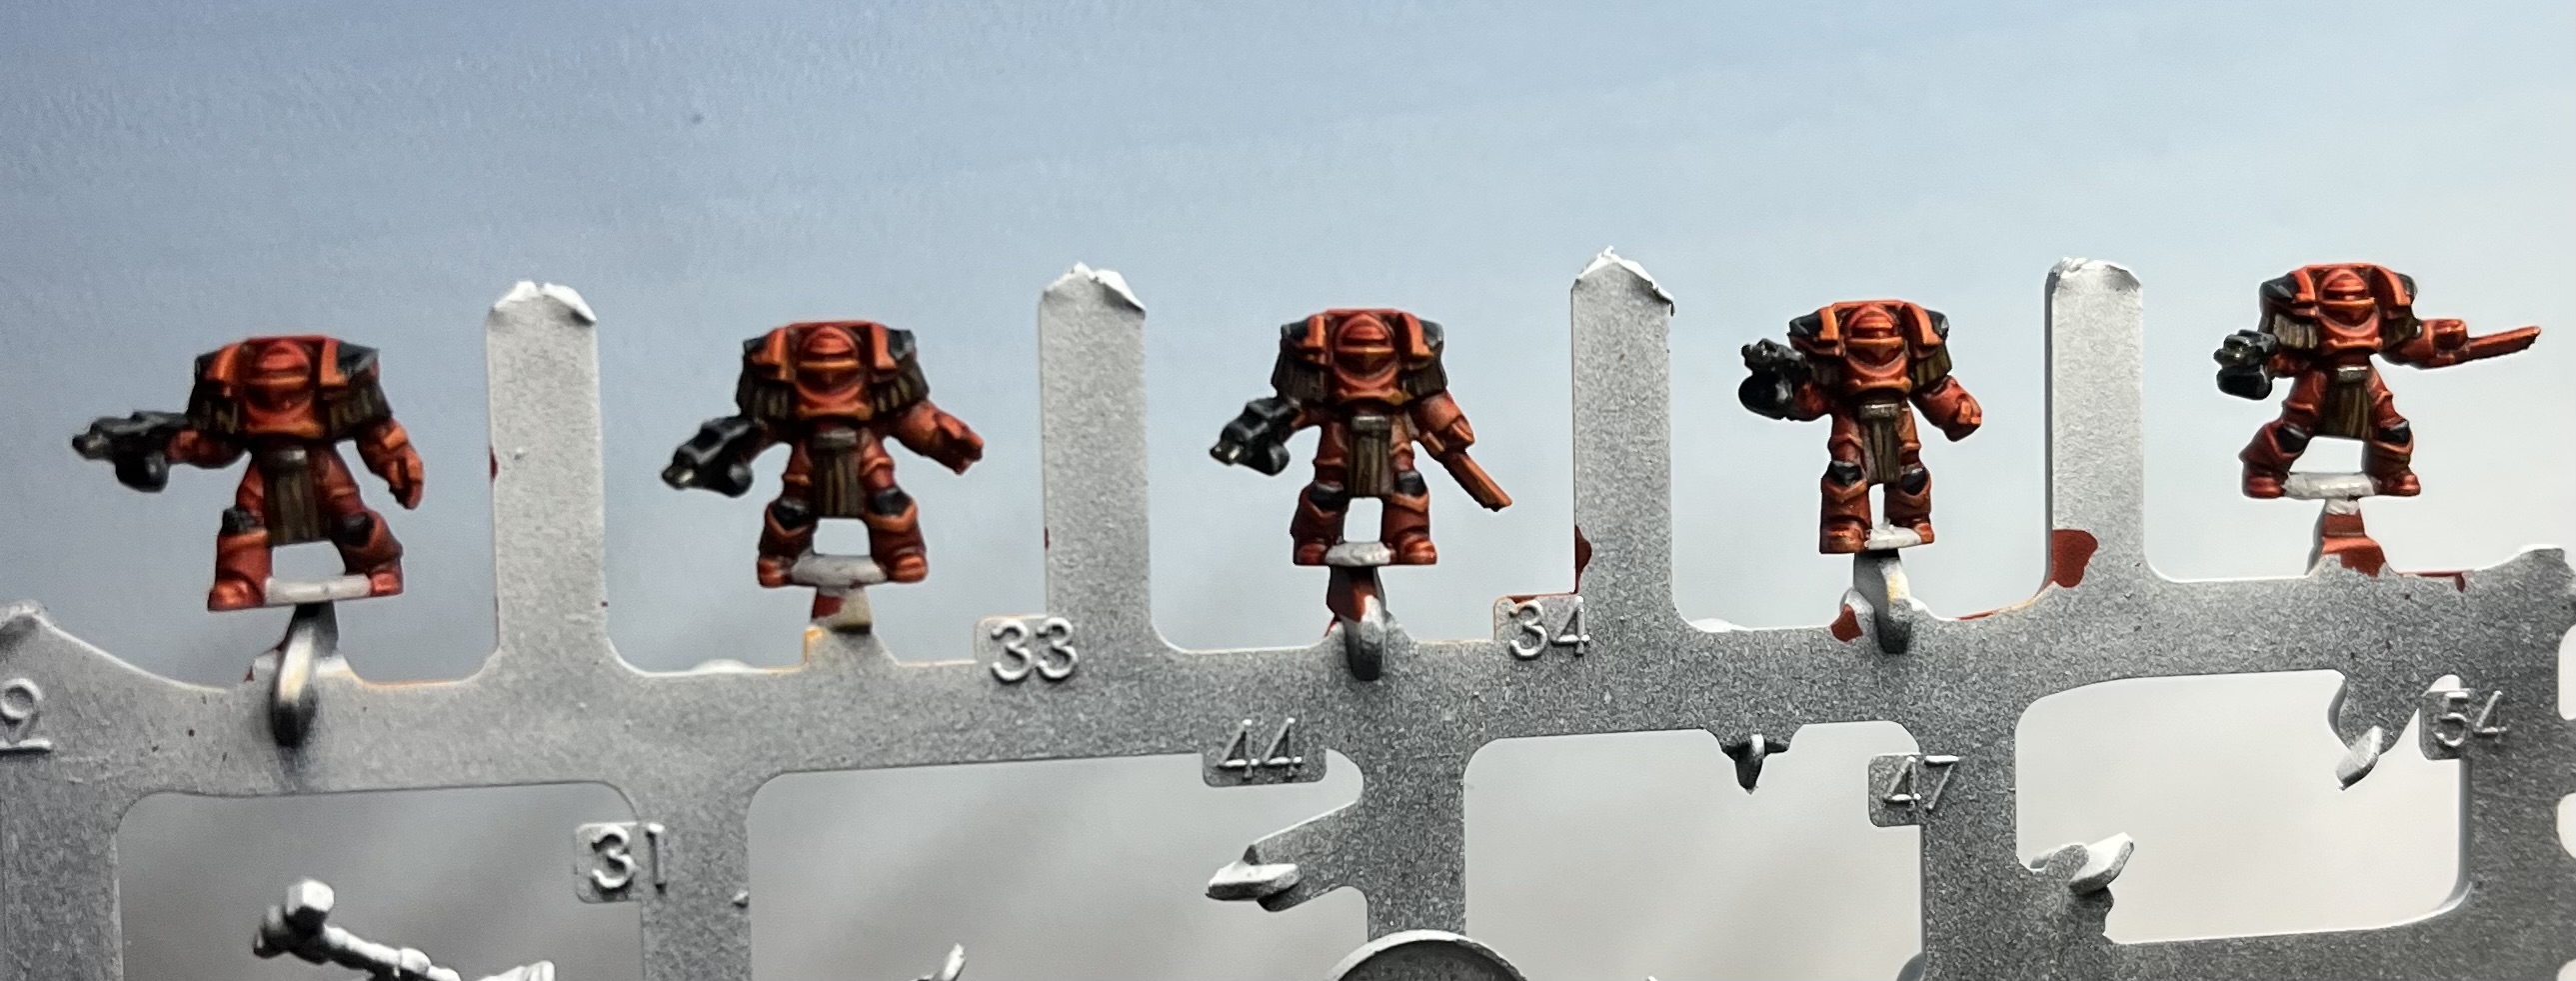
Prep the Sprue

Ok, so painting on the sprue requires some minor prep work. Before starting with the paints, you need to remove the mold lines, if a tiny mini is connected to the sprue anywhere else than the base, you’ll need to snip and clean that, and if any minis come in two parts, it’s worth actually building them on the sprue. For that last one, think of the heavy weapons support squads on the Space Marine sprue – stick the Missile Launcher onto the Devestator before undercoating. Once all of that is done (it really doesn’t take long), you’re ready to start spraying.
Black Then White Spray

I started off with a light spray of Chaos Black, Spraying up the sprue from below. You don’t want a thick coat – you just want to fill in the shadows really. Let the black dry and then hit them from above with a healthy coat of White Scar. You want to cover over 90%(ish) of that black, but keep it in those shadows. Let that dry, and get your brushes ready!
Blood Angels Red

You’re going to want that magical “one thick coat” of this read all over the miniature. Don’t worry about trying to avoid anything – we’ll use thicker paints for later steps and they’ll cover this easily. So get that appropriately named paint all over.
Fire Dragon Bright

And once the red is dry, crack open the Fire Dragon Bright, work some into the bristles of your favourite dry-brushing brush, and give the mini a light dry brush all over. And the red is done!
Block in the Black

I wanted black knees, bolters, and shoulders on these terminators, so I blocked those in here with Abaddon black. Once the black was dry, I added some highlights with Dawnstone on the edges. And we can call that done!

Silver and Leather


For any areas that were going to be metallic, I simply applied a coat of Leadbelcher, and for the leather straps on their arms, I gave these a covering of Rhinox Hide, before putting down some tiny lines of XV88 to highlight these. I then gave the leather areas a thin wash of Seraphim Sepia, and the Leadbelcher was given a thin coat of Nuln Oil.
Stripy Fists

Next up, I went to work on those power/chain fists. I carefully painted on a couple of thin coats of Averland Sunset, and once this was dry, I did a couple of thin lines of Abaddon black. Remember; at this scale, you don’t need to be hyper-accurate to get things looking good.
Clean the Bases
The last little step is to clean up the little bit of base that’s actually on the model – the bit between the feet. My bases start off with Grey Seer, so I just painted these over with a couple of coats of that. And once this is dry, you can stick your minis to their base and get ready to finish them off. But we’ll save the basing for another article…
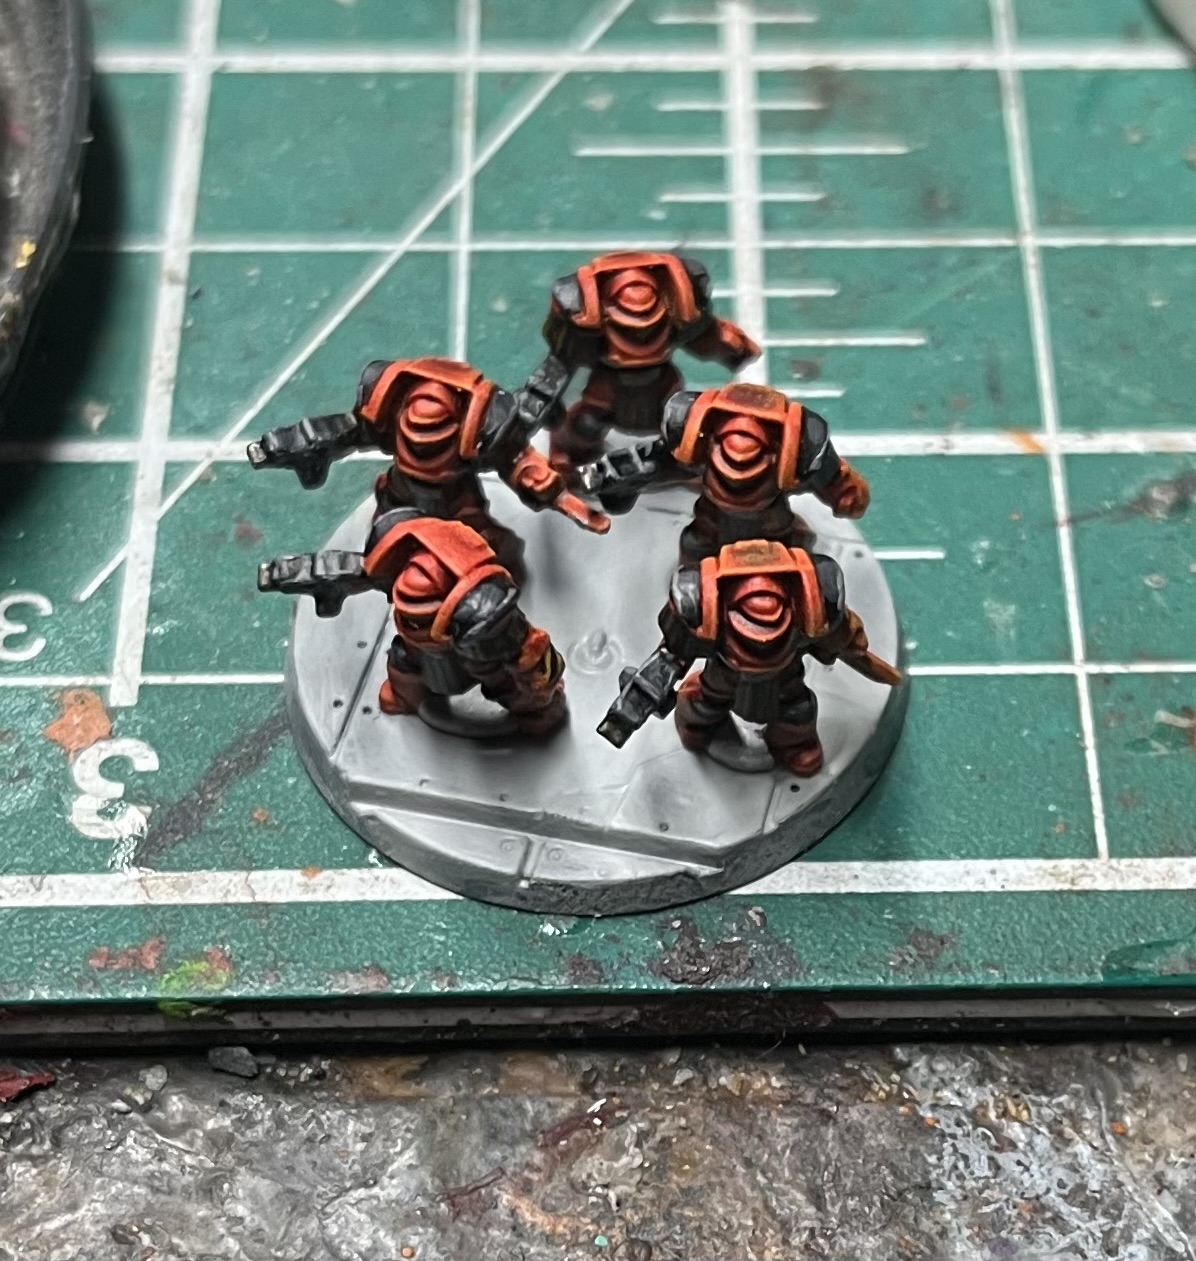
That base was pre-painted with Grey Seer before the terminators were stuck down – that makes things soooooo much easier.
There you have it! I hope this was fun and enjoyable to read through, and that it’s inspired you to tackle your own teeny termies with some added confidence. These models and this scale is very forgiving, so I really suggest just diving straight in. Onwards!
 40kaddict
 4gotowar
 Castigator's Chaos
 convertorum
 darkfuturegaming
 ftgtgaming
 Mind of the Daemon
 taleofpainters
 talkwargaming
 Twisted Brushes
 weemen
Pingback: Legions Imperialis – Painting Tiny Tanks is EPIC! | Heresy & Heroes