
Those familiar with this blog will know that I certainly enjoy basing my miniatures, and I’ve had a couple of people over the last few of months ask me about display bases. Now, I am by no means an expert in making very pretty bases, but I can give you some basic ideas as to how you might want to do it simply, and with materials you may well already have in your hobby supplies stash. If you do want to go more with expert-level, check out the work my Matt Cexwish who always inspires me to be better at basing – he even has a Patreon called The Joy Of Basing that I heartily recommend if you want to up your game. Or look at the work of many Golden Demon winners to get ideas – there’s some amazing things out there.

But I can show you how to do something simple, that looks good. Though mentioning Golden Demon, if you do want to do this because of that prestigious competition, it’s worth remembering that the bases aren’t what’s judged – they’re just a nice way to present your mini. I’ve seen miniatures win with almost entirely unbased bases. Display bases are more something nice to have that you, the creator, likes to look at. It’s an enjoyable finishing touch to help frame a mini you’re proud of painting. So with all that being said, let’s take a look at how to create a simple, yet pleasing display base.

I love a nice, plinth, me. I’m actually reusing this plinth as it’s a nice small one (in terms of base area – it’s 32mm actually which is handy), and it’s quite fancy, so why not? Where does one get plinths? Well, you can use websites like Model Display Products to find pieces that have been specifically created for the job, but really, you can use anything you think will work. Offcuts of wood are a popular choice – as long as it gives a bit of elevation, you’re golden.
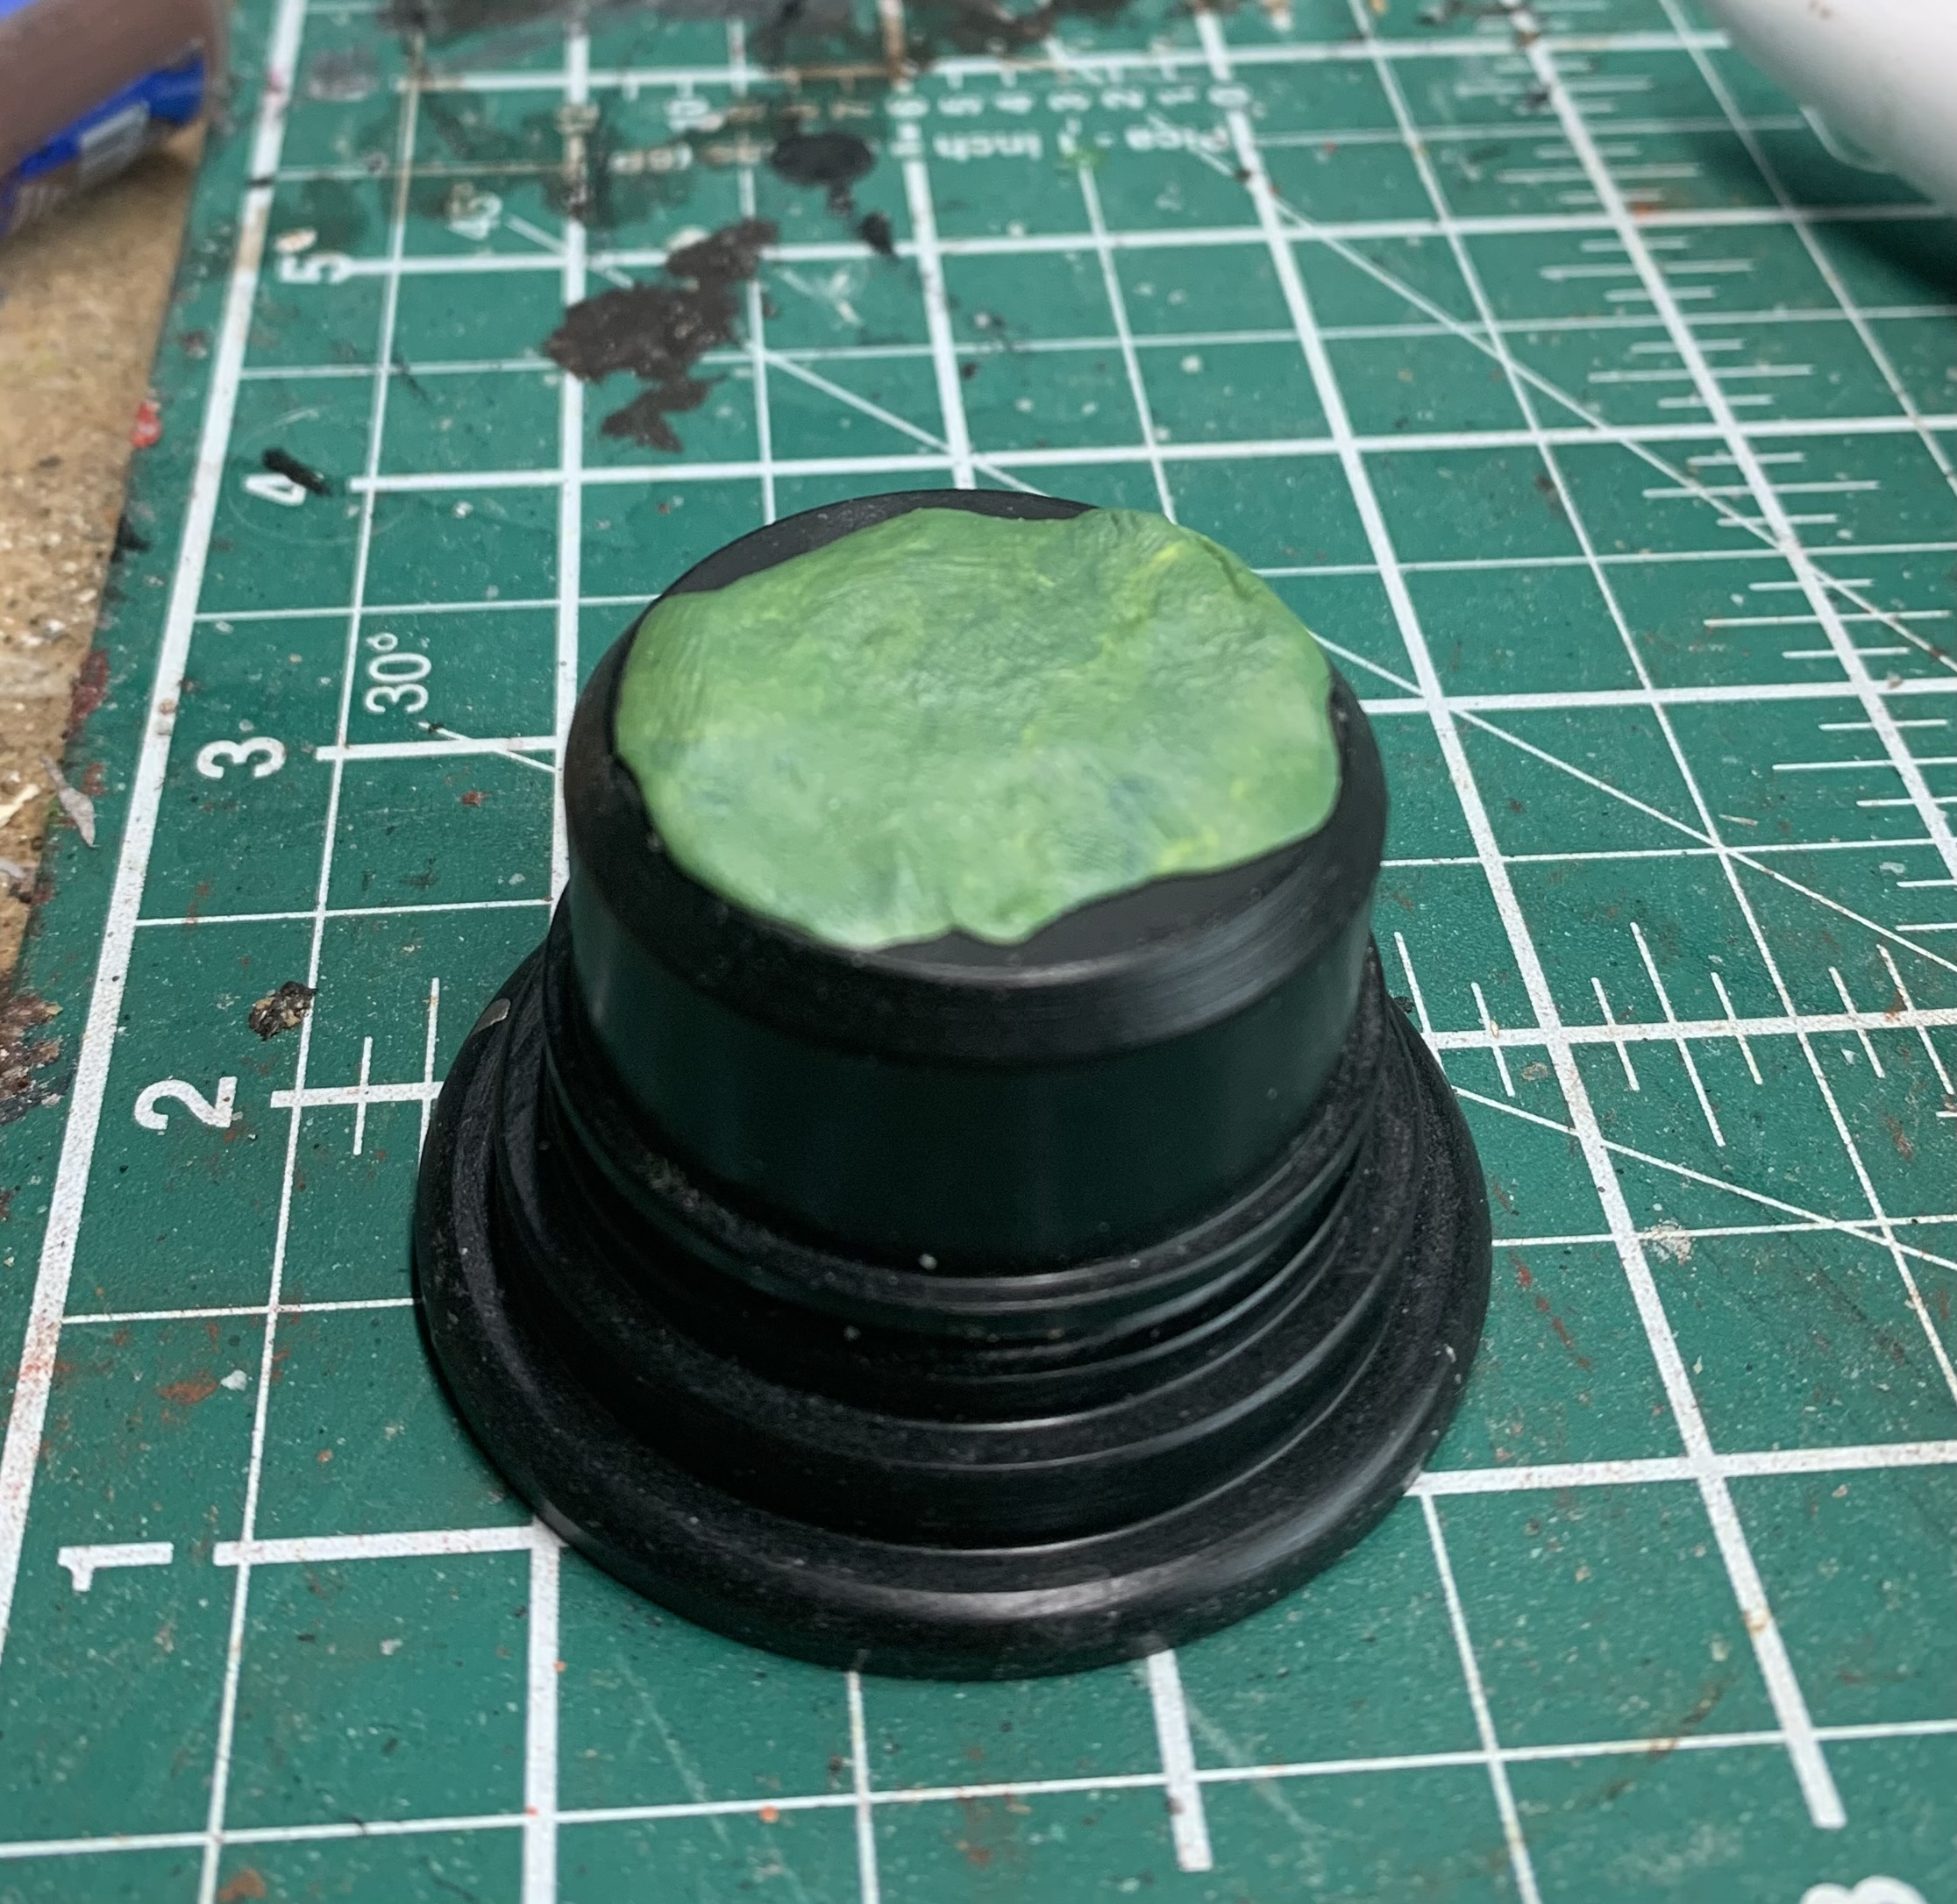
Once you’ve found your plinth, you need to consider the setting you want to create. I’m going with quite a natural setting – I want my mini to be standing on top of a big rock out in the wilds somewhere, so I don’t want a flat floor. To that end, I took some leftover Green Stuff and just pressed it down to give me some variation. Subtle dips and peaks are your friend here – if you go too mad with lumps and bumps, it will be harder to work on, but it all depends on the look you’re trying to create. And you can also use plastic putty, miliput or even clay to do this. Whatever works for you. I also pressed the rock I want to use into this so that it will be easier to glue that down once the Green Stuff has cured.

So, there’s my rock (glued down with plenty of superglue), and notice that it has a nice flat top for the miniature to stand on. It’s definitely worth thinking about how your mini is going to stand on the base you create – nothing worse than a floating foot! And you’ll notice I’ve also put in a trusty skull. Now, if you’re adding a skull onto your base, you need to consider the skull itself. Is it an old skull, or a new one? If it’s old (like I want the one above to be), you want it to be part of the setting, so I want this to sit below the sand I’m going to use, and I’ll be painting it to look old. But maybe your skull was just used in a sacrifice or a ritual – then you’d want it to sit above the sand, and be painted to look newer.
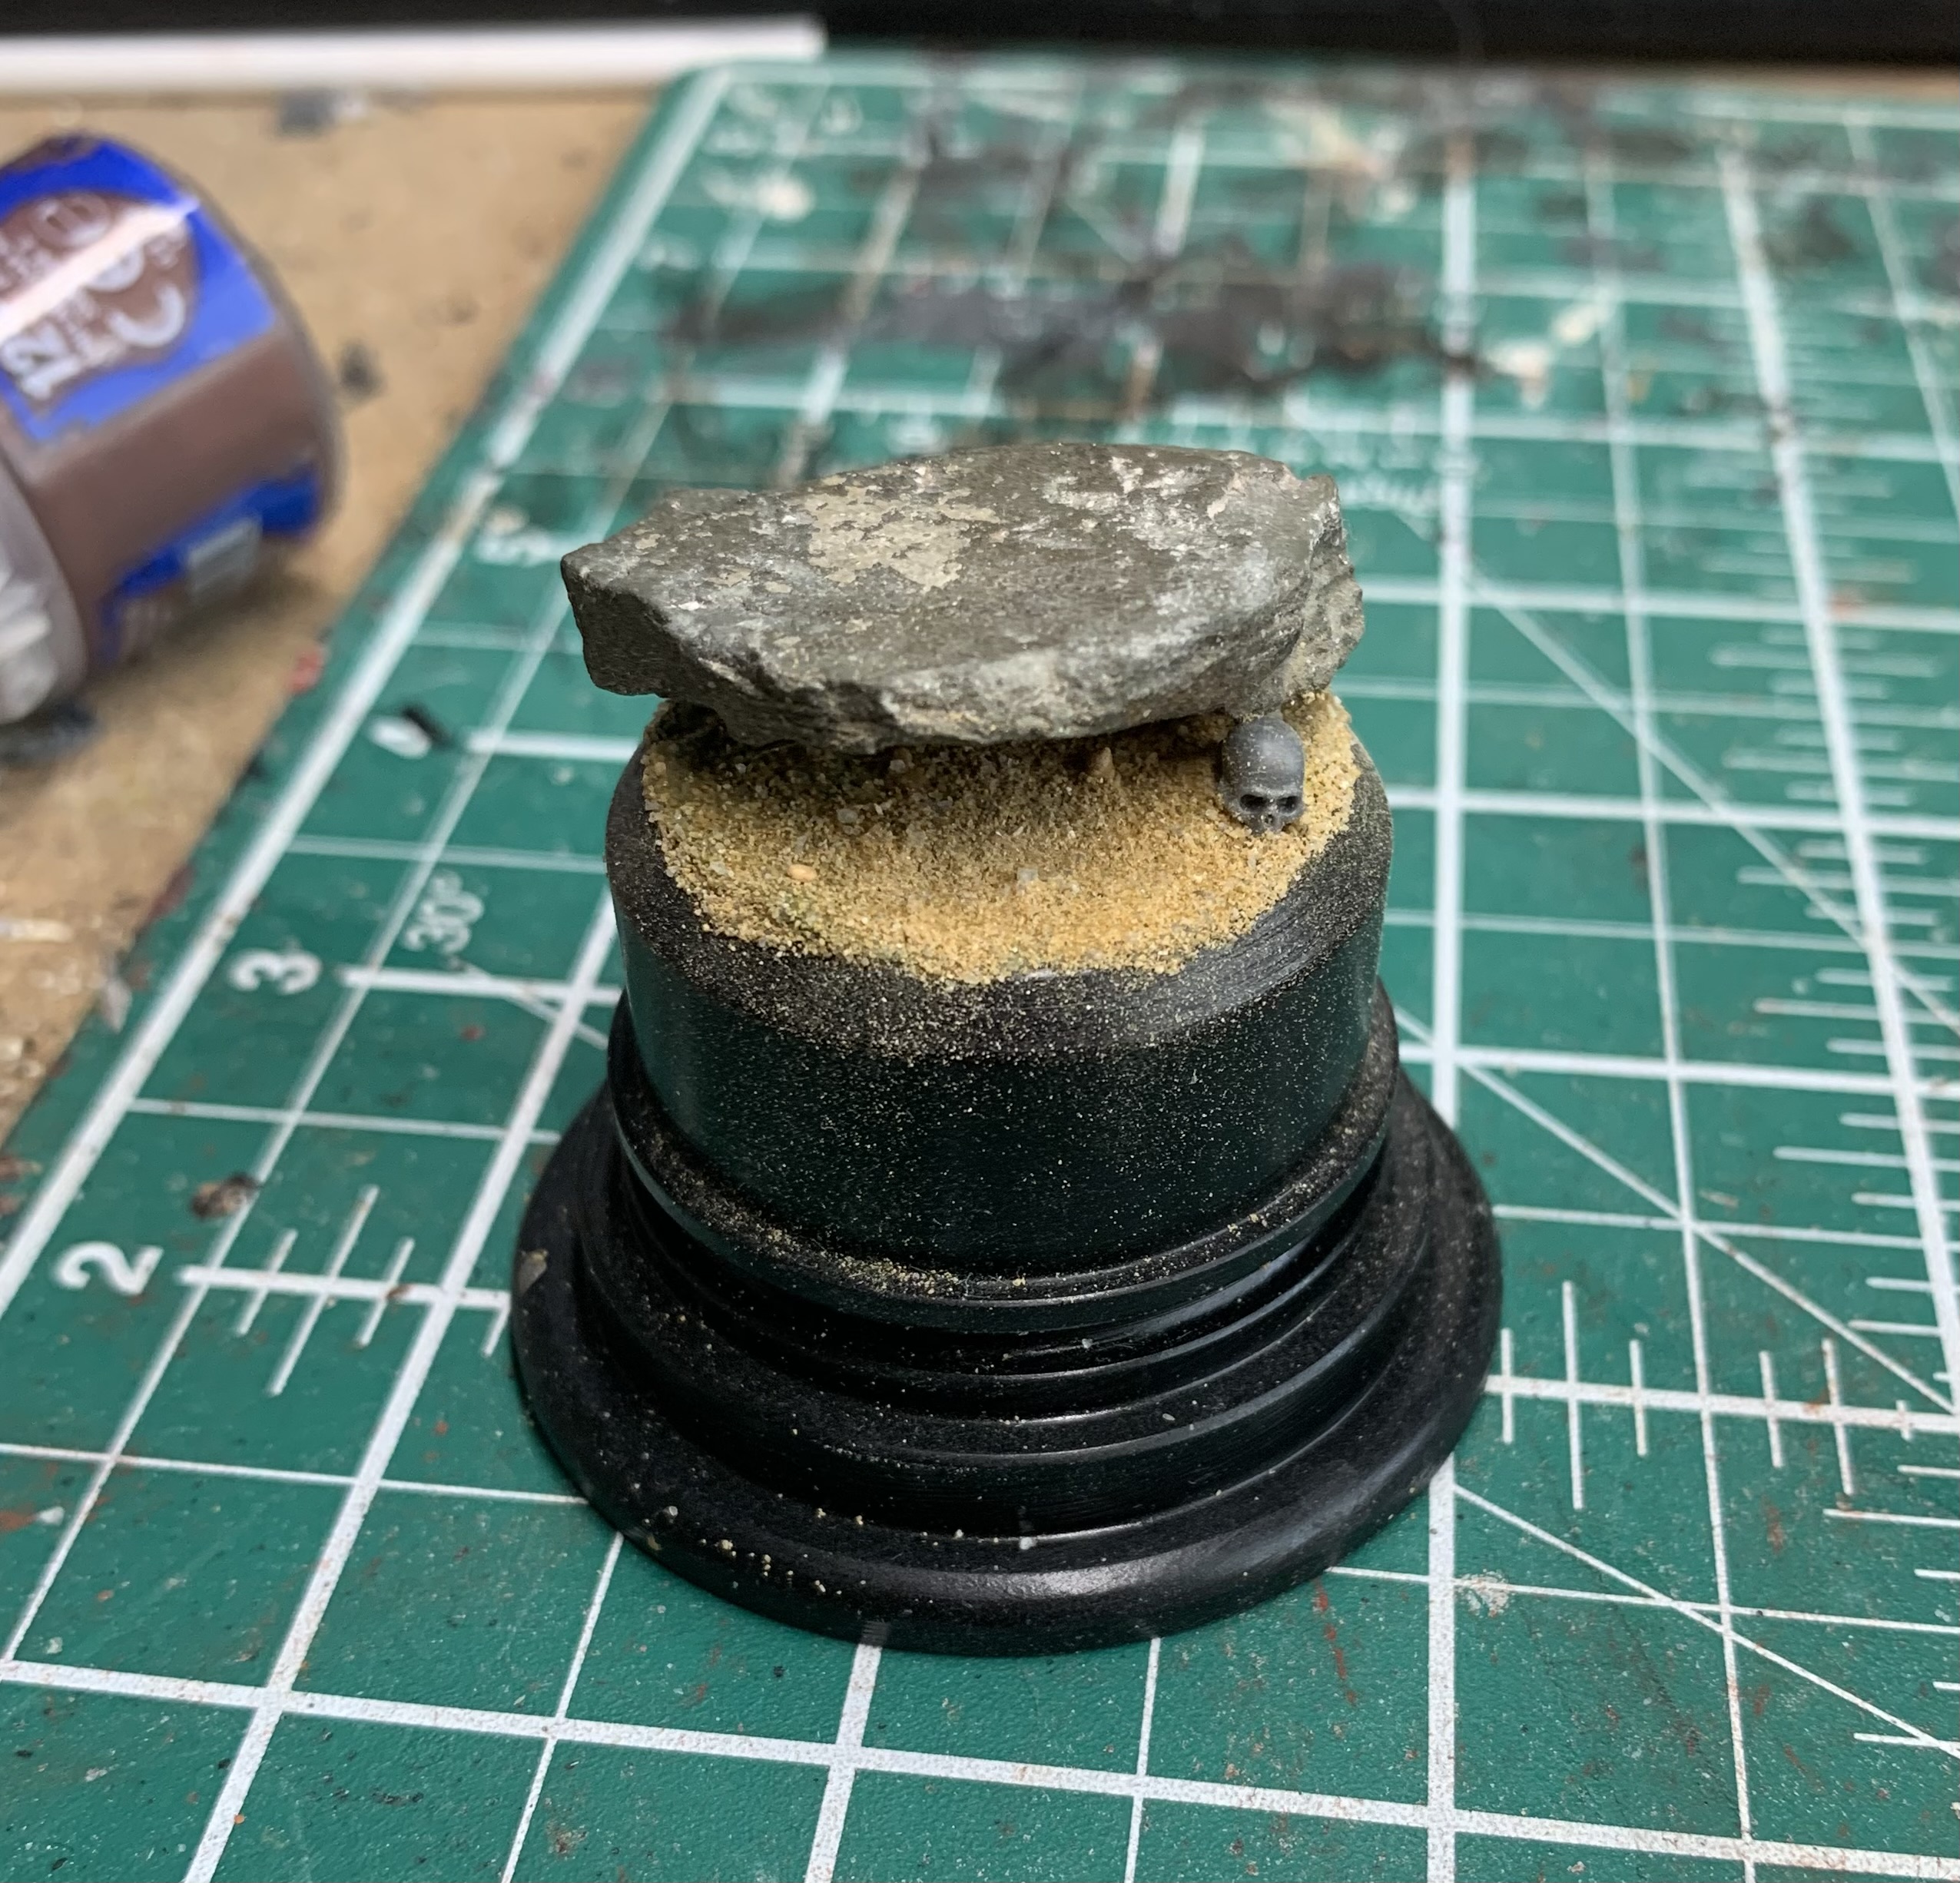
And there’s the sand. I’ve got a big tub of mixed sized grains and this was affixed using some watered down PVA glue. I sprinkled the sand on, and that means, and this is an important bit, we have to clean the sand off the areas where there should be no sand…
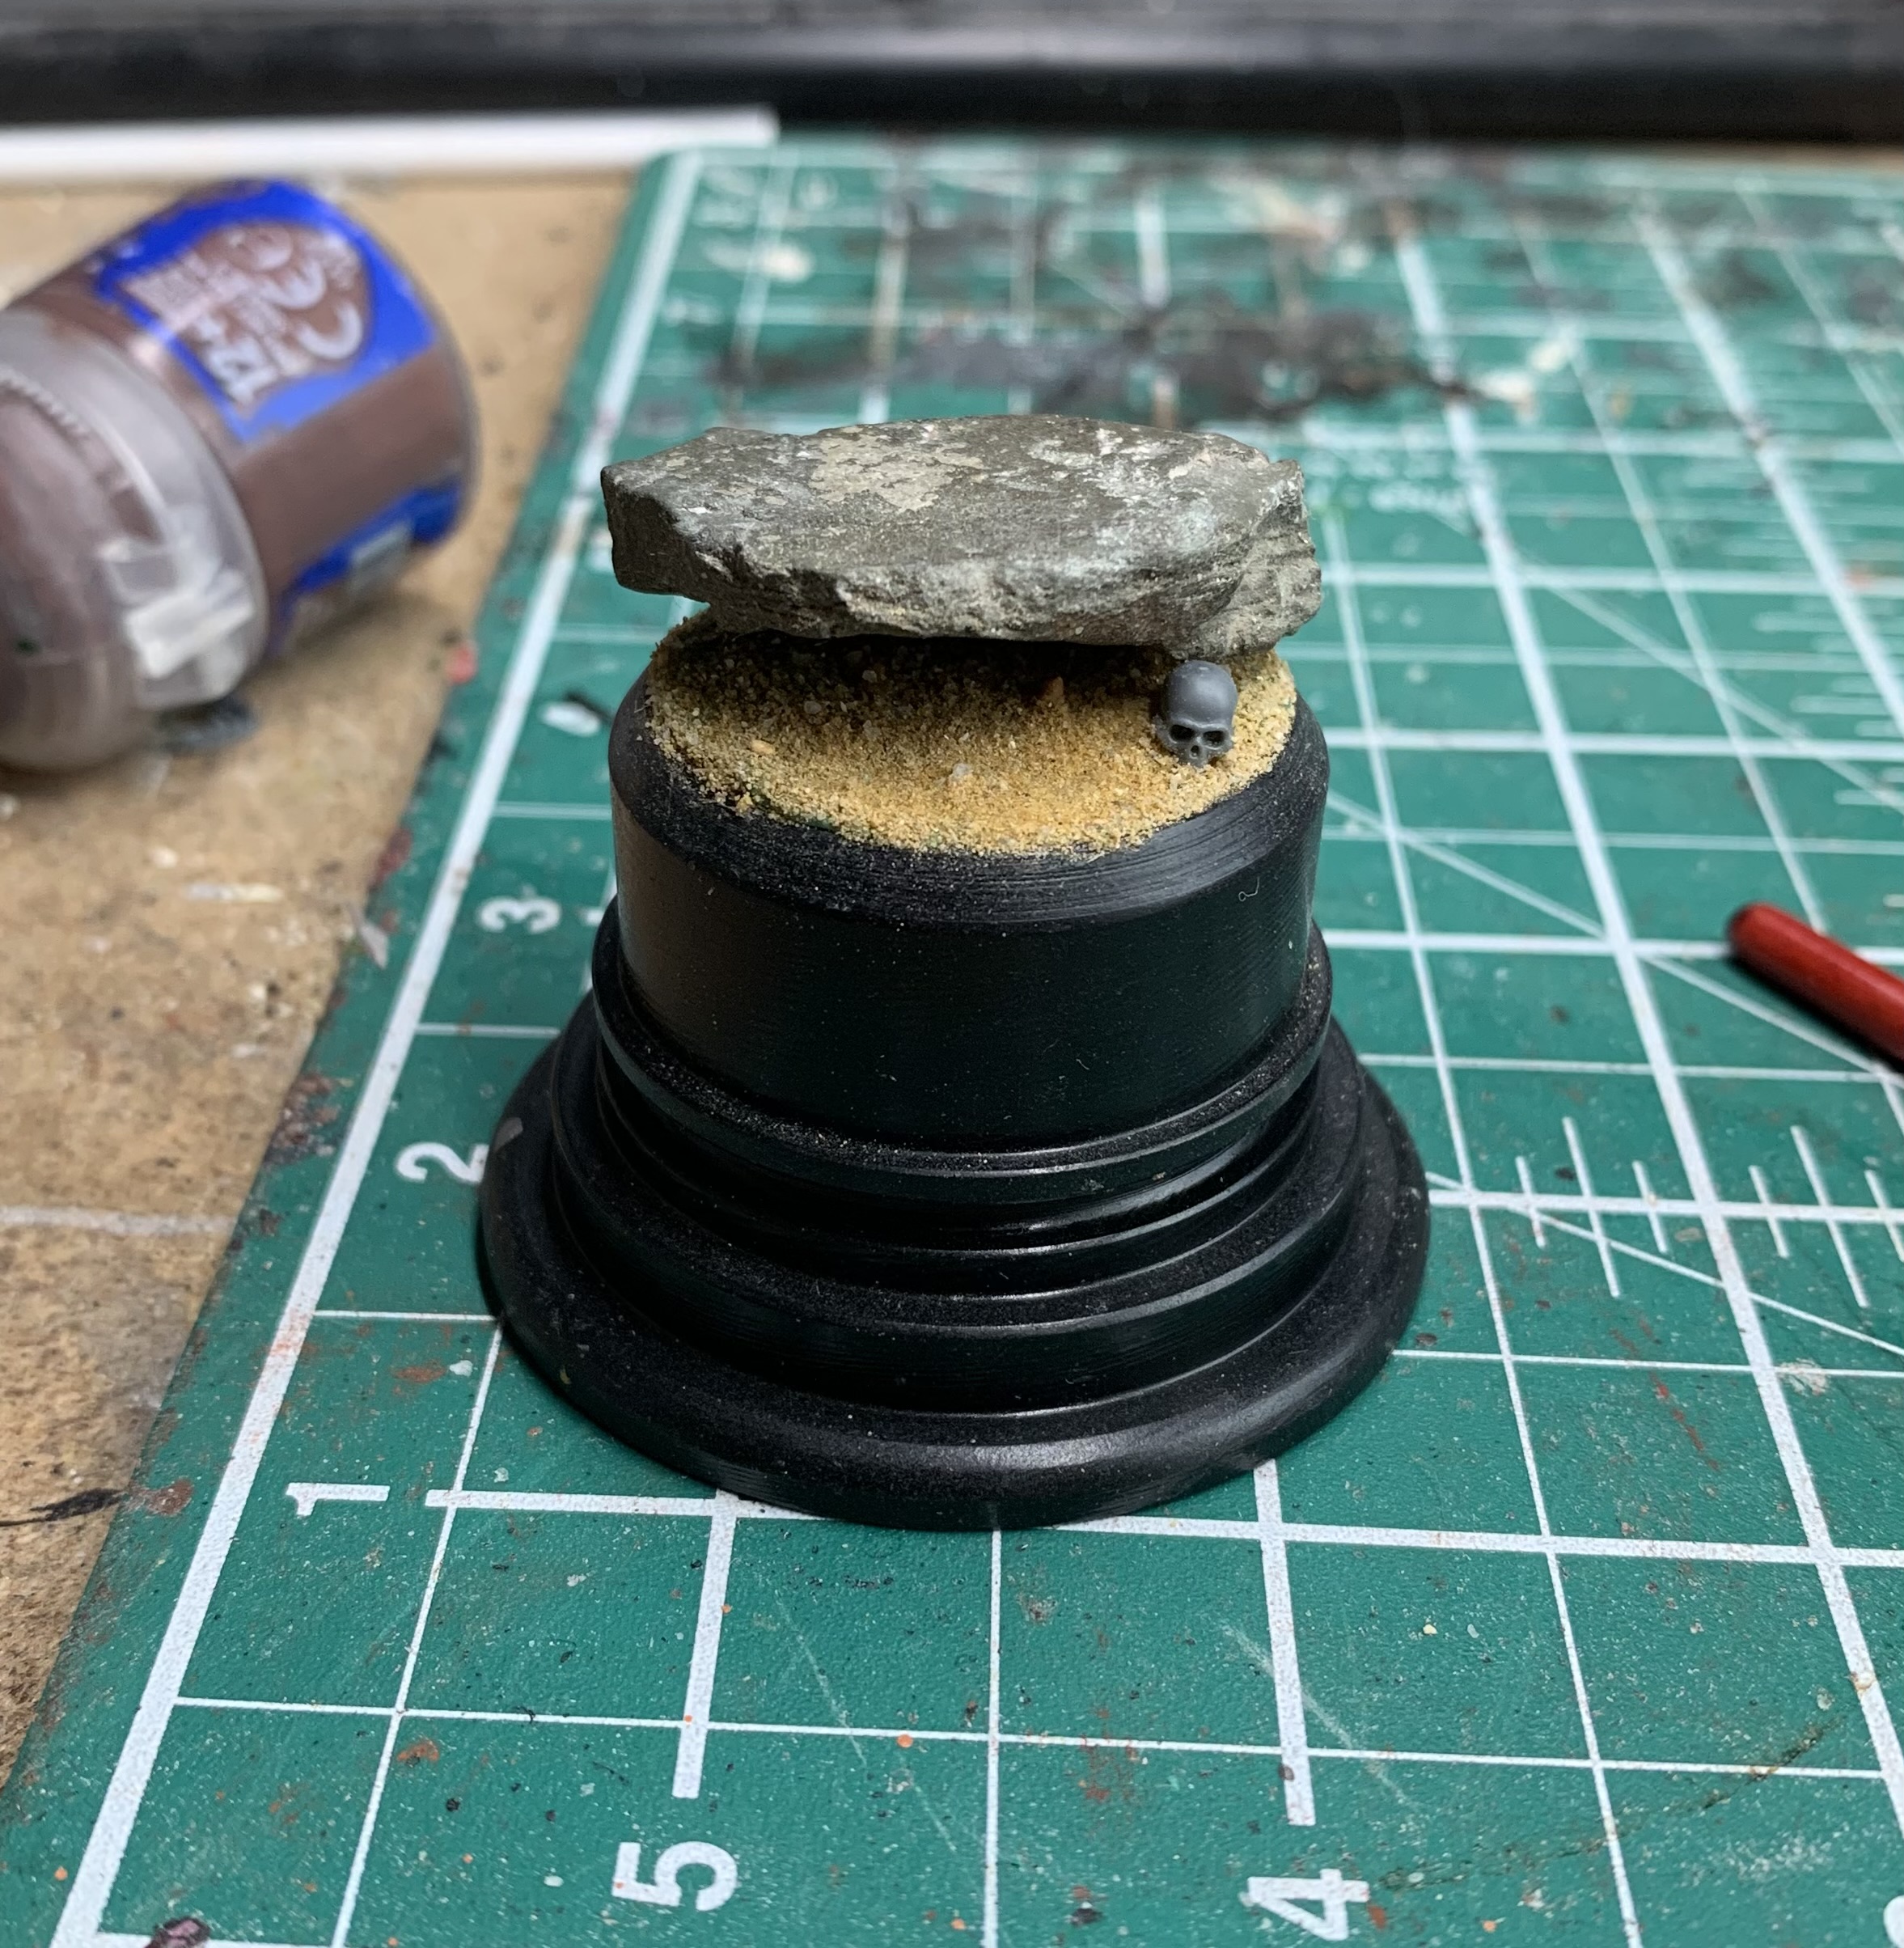
There we go, all cleaned up. Sand gets everywhere though, so be sure to give it a thorough clean. It’s also worth saying, that if you want some more stones on this, you want those to be superglued down before putting the sand on. I don’t because I want this to be really simple, but if you do, it’s rocks first, then sand. You’ll have to clean those too – make up brushes are great for cleaning sand by the way.

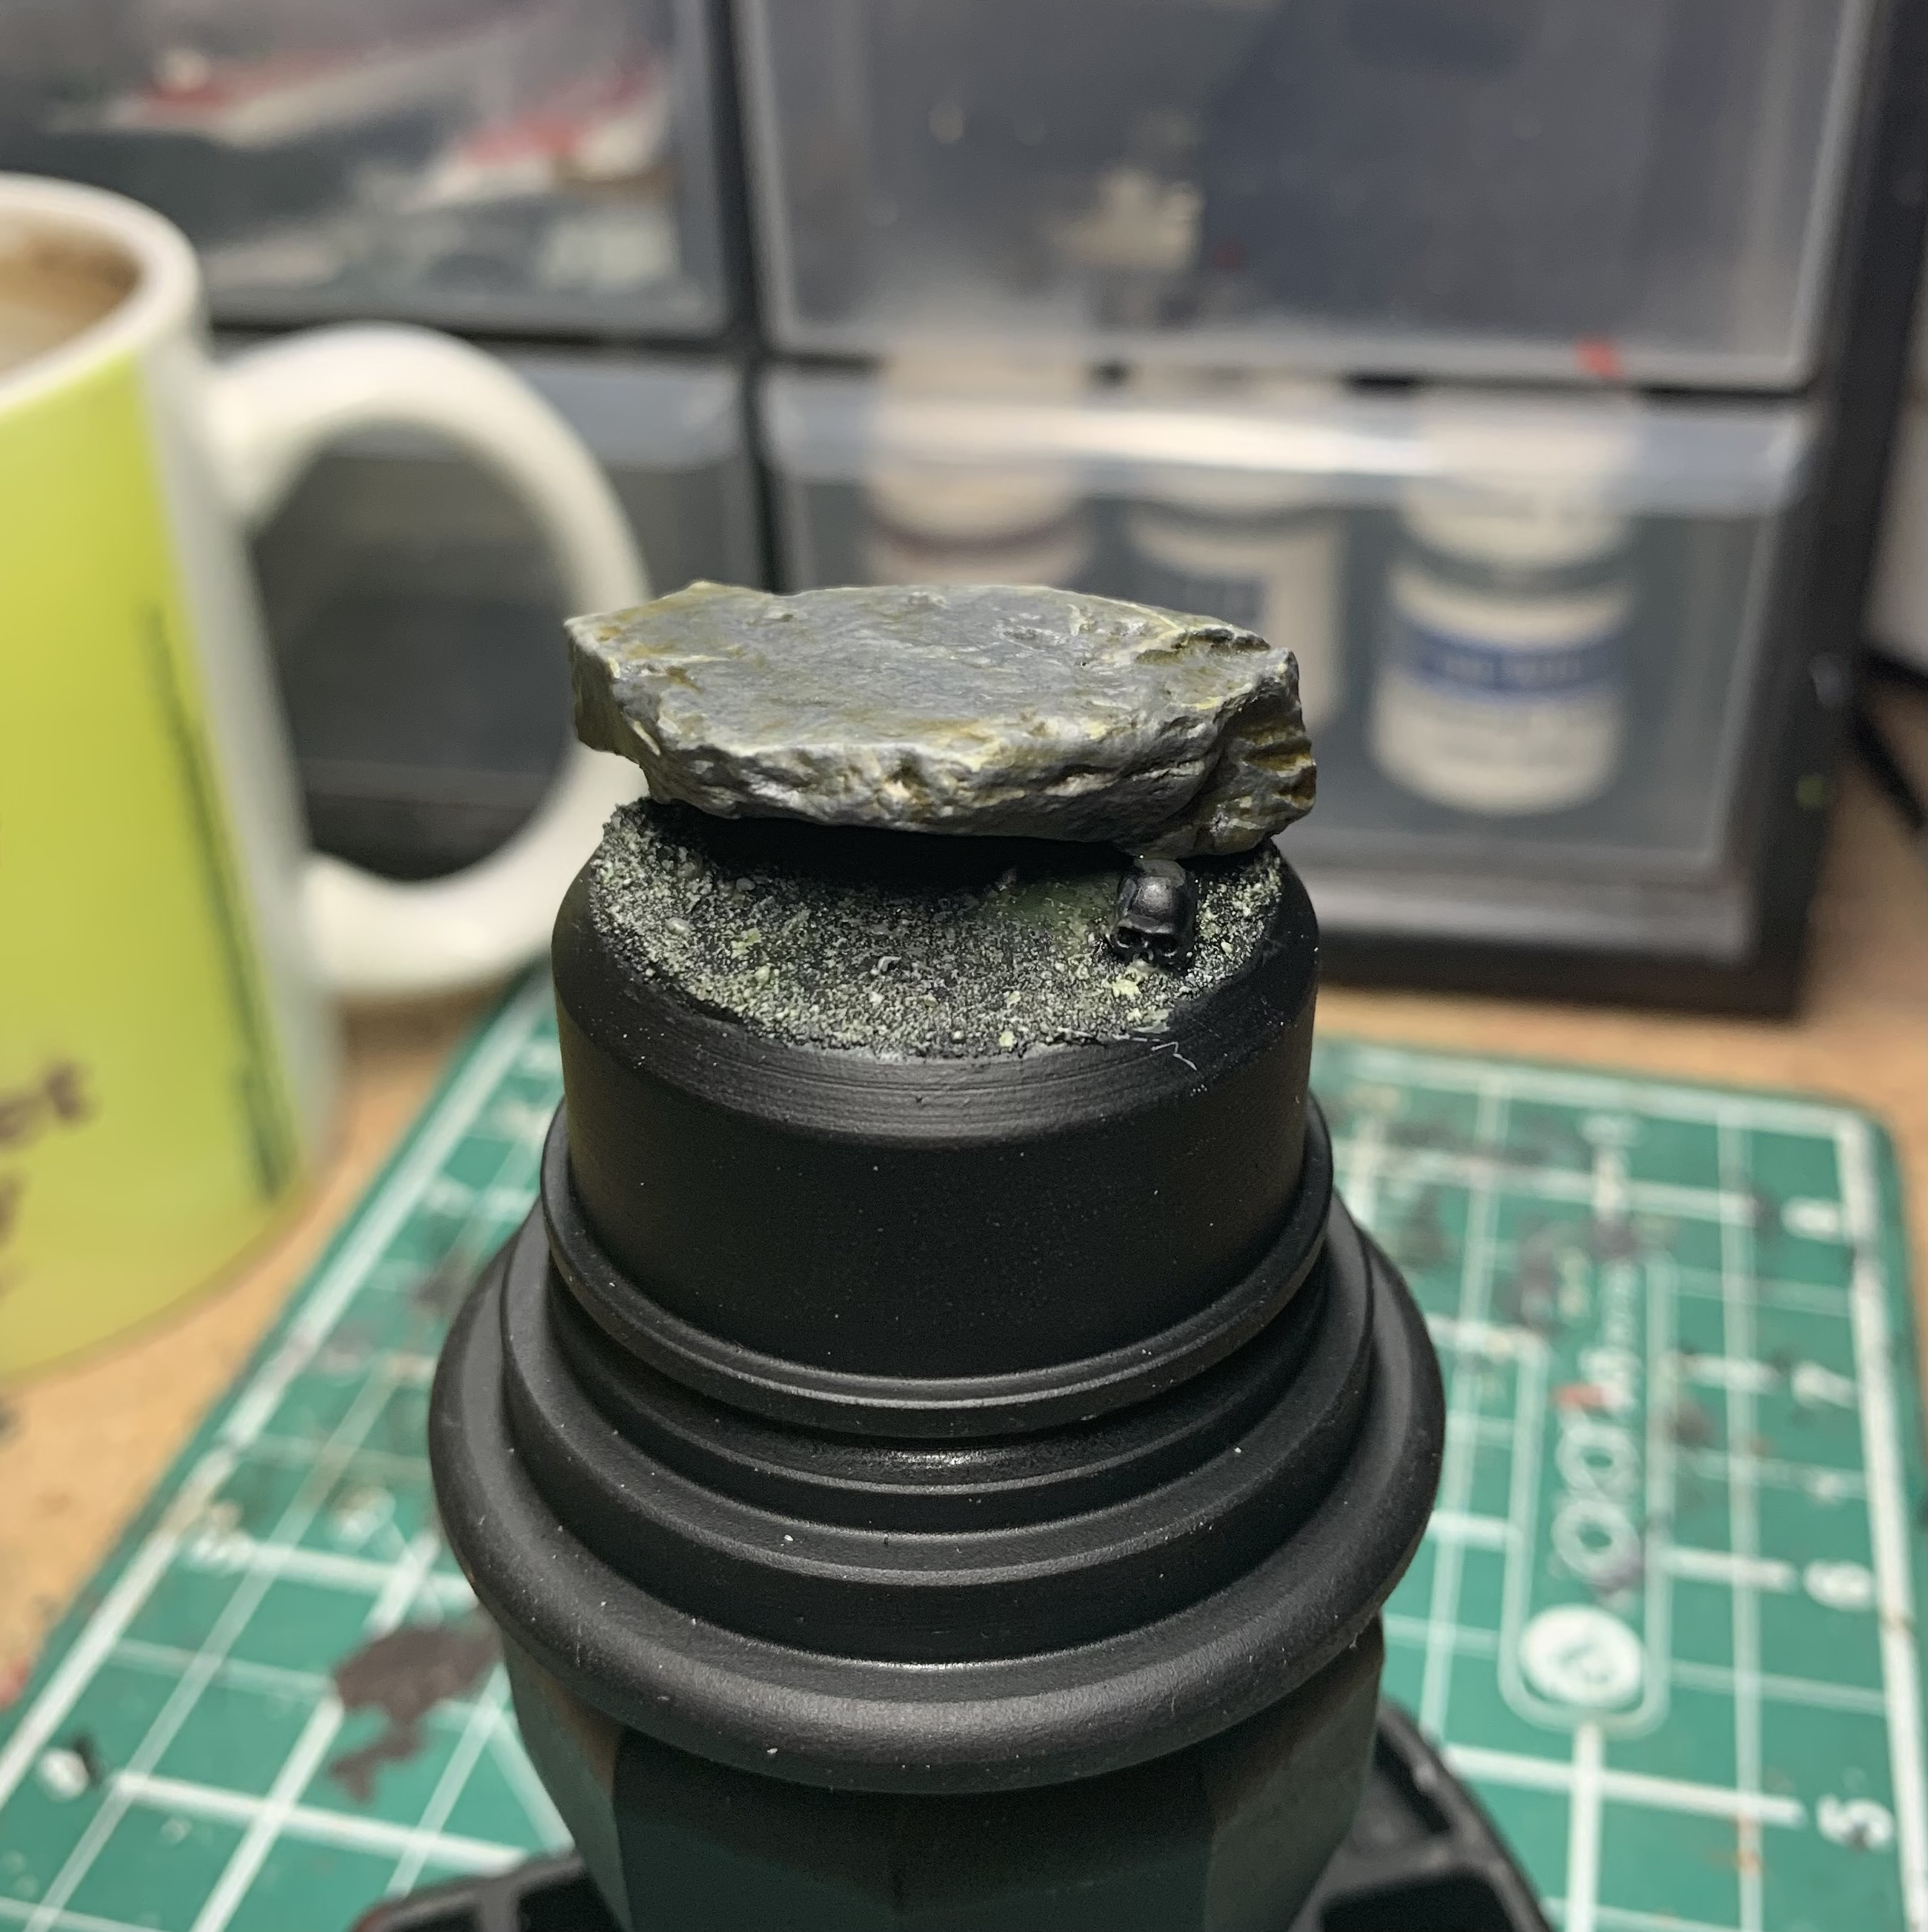
So it’s time to get painting, and I’ve started off with a base of the ever-reliable Chaos Black. You can use whatever colour you want, but I like CB as it does two jobs for me here – bases the model, and paints the plinth for me at the same time. Now, in order to not rub off any of that Chaos Black, I put a few dots of superglue onto the underside of one of the old painting handles from GW and fixed it on there. It snaps off super easy when the glue goes brittle and it means my grubby mits won’t spoil that nice matt finish.

That’s a lot of grey, right! I thought about doing a painting tutorial for these steps but they’re super simple, and the pictures would be bloody boring so I decided to skip that. Grey gives me a nice neutral base to work from so between Eshin Grey, Dawnstone, Administratum Grey, and Celestra Grey (with a little Agrax to help define some shadows), applied delicately, and with plenty of thinning down, I got my rock and floor all sorted out. You should be able to work out how all of that is done, but if you need a hand, let me know in the comments – I’ll be happy to walk you through it.
I bloody love Contrast Paints. I use them as glazes really, and in the above picture, you can see the rock has been covered in a thinned down Aggaros Dunes, and the floor has been covered in a thinned down Militarum Green. In both instances, I used about a 3:1 mix of Contrast Medium to Contrast Paint. It’s starting to look a little more natural now…

And now we have a skull. I do like skulls. To paint old looking skulls like these, I start with a base of Rhinox Hide and work up in diminishing thin layers to Ushabti Bone, and there’s a glaze of Seraphim Sepia over the top for good measure too. We do this now, because we’re going to add some colour, and we want that old skull to be a part of the terrain, so it needs a little bit of that colour too.

Using some thinned Athonian Camoshade, and some thinned Militarum Green, I’ve added some greenery to our base. Maybe this is on a cavern floor and moss, or mould has stained everything green. I also got some of this on the skull, but more significantly, this was used in rough, uneven patches across the floor and the rock.

I felt it needed some foliage, but if this is in a cavern, there won’t be much plant-life. So I soaked a ruined old paint brush down to the ferule in Darkoath Flesh and set that aside to dry. When it was dry, I mixed a little XV-88 into some more Darkoath Flesh, and highlighted the tips, before cutting the bristles off with my craft knife, and using a little PVA glue to fix it behind the skull there. All that’s left, is to clean up the lip of the plinth with some thinned Abaddon Black, and we’re all done!

It feels odd taking a picture of a plinth without a mini on it, but hopefully that shows you a simple way to create a nice looking display plinth for any of the models you’re particularly proud of. And this really is only scratching the surface of what you can do. As I said, there are those out there far better than me, but I hope this has given you a fun place to start, and a few ideas to be getting on with. Now I need to find a mini to put on the top of this! Onwards.
 40kaddict
 4gotowar
 Castigator's Chaos
 convertorum
 darkfuturegaming
 ftgtgaming
 Mind of the Daemon
 taleofpainters
 talkwargaming
 Twisted Brushes
 weemen