


Well, you asked for it, and I have delivered. Here’s my guide to how you paint skulls, complete with potato-quality iphone images, garbled nonsense and lots of images of my thumb. I’ve painted a lot of skulls in my time working on the Mortifactors and over that time I’ve got better and better at it. Time I shared some of that with you. But before I get to the step by step guide, let’s talk about prep work.
Prep Work 1 – Look At Skulls
Sounds morbid, doesn’t it? But don’t worry. You’re not weird (well, you might be) – artists have been studying skulls for centuries. They are amazing things to look at on many levels, from the fact that it used to contain a brain, to the fact that it used to wear a face. But our purposes must start with pure aesthetics of the highest set of bones. There are so many intriguing and interesting shapes in there. From the ridges above the eyes to the bridge of the nose to the cheek bones to the upper jaw… there’s lots to take in. That’s why you have to look at them. A lot of them.
I stole this image from the internet ages ago and having sat above my table for years now, it has become part of my flat. If I ever stop painting skulls, I may just have to frame it. Having something like this right in front of your eyes when you work is incredibly useful as it means you always have your reference right there. So step 1 really is to just look at skulls.
Prep Work 2 – Practice Drawing Skulls
As with most things, the more you practice, the better you get at doing something (look at some of my derpy early skulls). I used to sketch and doodle skulls when I was doing loads of Mortifactors stuff all the time. You get your hands used to the shapes and lines involved. However, though all of that is incredibly useful, painting something on a tiny scale (like a Space Marine shoulder pad) means you have to come up with a technique for constructing the skull with acrylics that differs a lot from drawing. When I start putting the shape down, this is what I do:
I hashed this together at the end of last night’s painting session to give you a rough idea of how I do this. For Step 1, you draw a little blob that looks something like a tooth with splayed roots. Step 2 involves you painting a set of shades. Practice getting the lines and angles right here – I think still the eye sockets are the hardest part but you get better at it over time. In Step 3, you need to create one of those Groucho Marx mask faces, and in Step 4, you need to give him a hat and a bit of warpaint at the top of his cheeks. When I get into the actual painting guide, this is the shape I’ll put down first.
Prep Work 3 – The Tools You’ll Need
In terms of a brush, you’ll want something with a very fine point (obvs) but make sure it’s what you’re comfortable with – not everyone likes tiny heads or thread thin grips. Just make sure it’s got a sharp point and you’re happy with how it feels.
You’ll need five paints (shown above) and if you’re going by the Citadel range, that’ll be Reikland Fleshshade, Abaddon Black, Rhinox Hide, Screaming Skull and White Scar. Remember to add a little water to each of them (except the shade) on your palette to ensure they run smooth (see, I could do Duncan and Emma’s job!). How about we jump in to some actual painting now?
Step 1 – Abaddon Black / Rhinox Hide
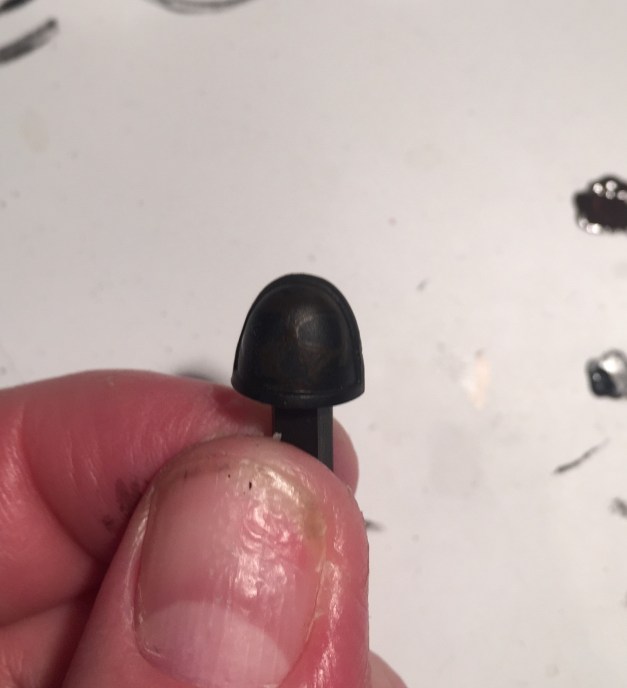
Where is it!? Oh, there it is. Prime your shoulder pad with Abaddon Black before using Rhinox Hide to paint the outline of your skull. You can use the method described in Prep Work 2 above, or just do it however you like. It’s barely visible against the black, so don’t worry if you make any mistakes – this is just your guide.
Step 2 – Mocha / Cappuccino / Au Lait
No, you don’t need to drink all those coffees (though I won’t stop you if you’re in need of a caffeine fix). These are just the names I’ve ended up calling these blends of Rhinox Hide and Screaming Skull. Mocha (4 parts Rhinox Hide, 1 part Screaming Skull), followed by Cappuccino (50/50 mix of Rhinox Hide and Screaming Skull) and finally Au Lait (1 part Rhinox Hide, 4 parts Screaming Skull). It’s fine to add each one before the previous one has dried completely as this can help the transitions. With each layer, you paint less and less, turning the lighter shades increasingly into highlights. There need to be less light areas on the undersides and more on the crown of the skull and upward facing ridges. Hopefully the images below will make more sense than that description!
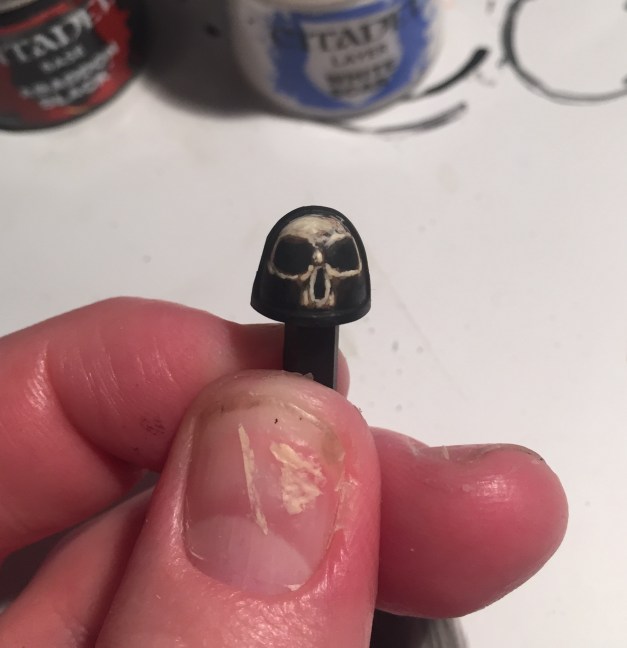
Step 3 – Screaming Skull
Lay down a final highlight at this stage with some Screaming Skull. At this point, take a look at your skull. Are you happy with the shape? If not, use the paints on your palette to touch up/change angles of lines.
Step 4 – Reikland Fleshshade
Now you want to cover the whole pad in Reikland Fleshshade. Don’t swamp it, but don’t be stingy either. This helps to bring all of those coffee colours together and give the outer edges a little softening – as if the skull is coming out of the darkness. Spooky. Leave to dry.
Step 5 – Reikland Fleshshade/Screaming Skull Mix
Now we move into the final stages. Add a little Reikland Fleshshade to some Screaming Skull on your palette until you get a nice little mix that looks like it’s half way between the two. Use this to start highlighting again, just to bring up some of those spots around the raised/upward facing parts.
Step 6 – Screaming Skull and White Scar
Do the same again with Screaming Skull, and then, make a 50/50 blend of Screaming Skull and White Scar. In moderation, use this to add a final layer of highlights to the parts that the light is going to hit.
Step 7 – Fill In The Gaps
Inside the nose and eye sockets, use a blend of Rhinox Hide and Abaddon Black to fill these in. Highlight with Rhinox Hide and finally a 3:1 blend of Rhinox Hide and White Scar to give a it some slight details.
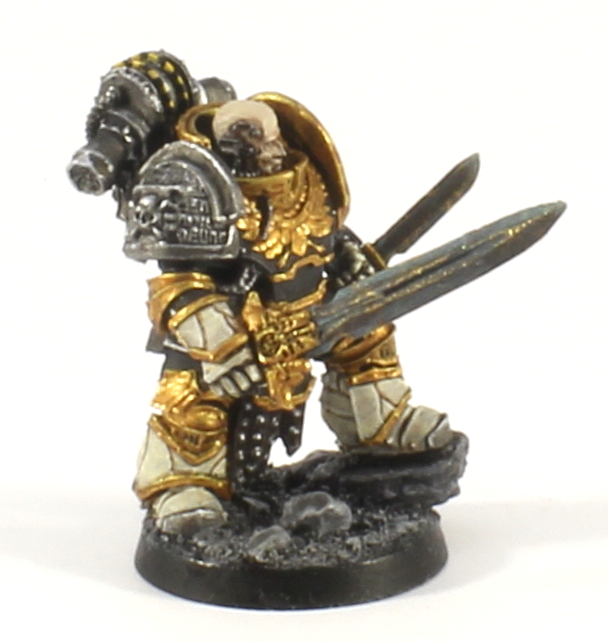
And you’re done!
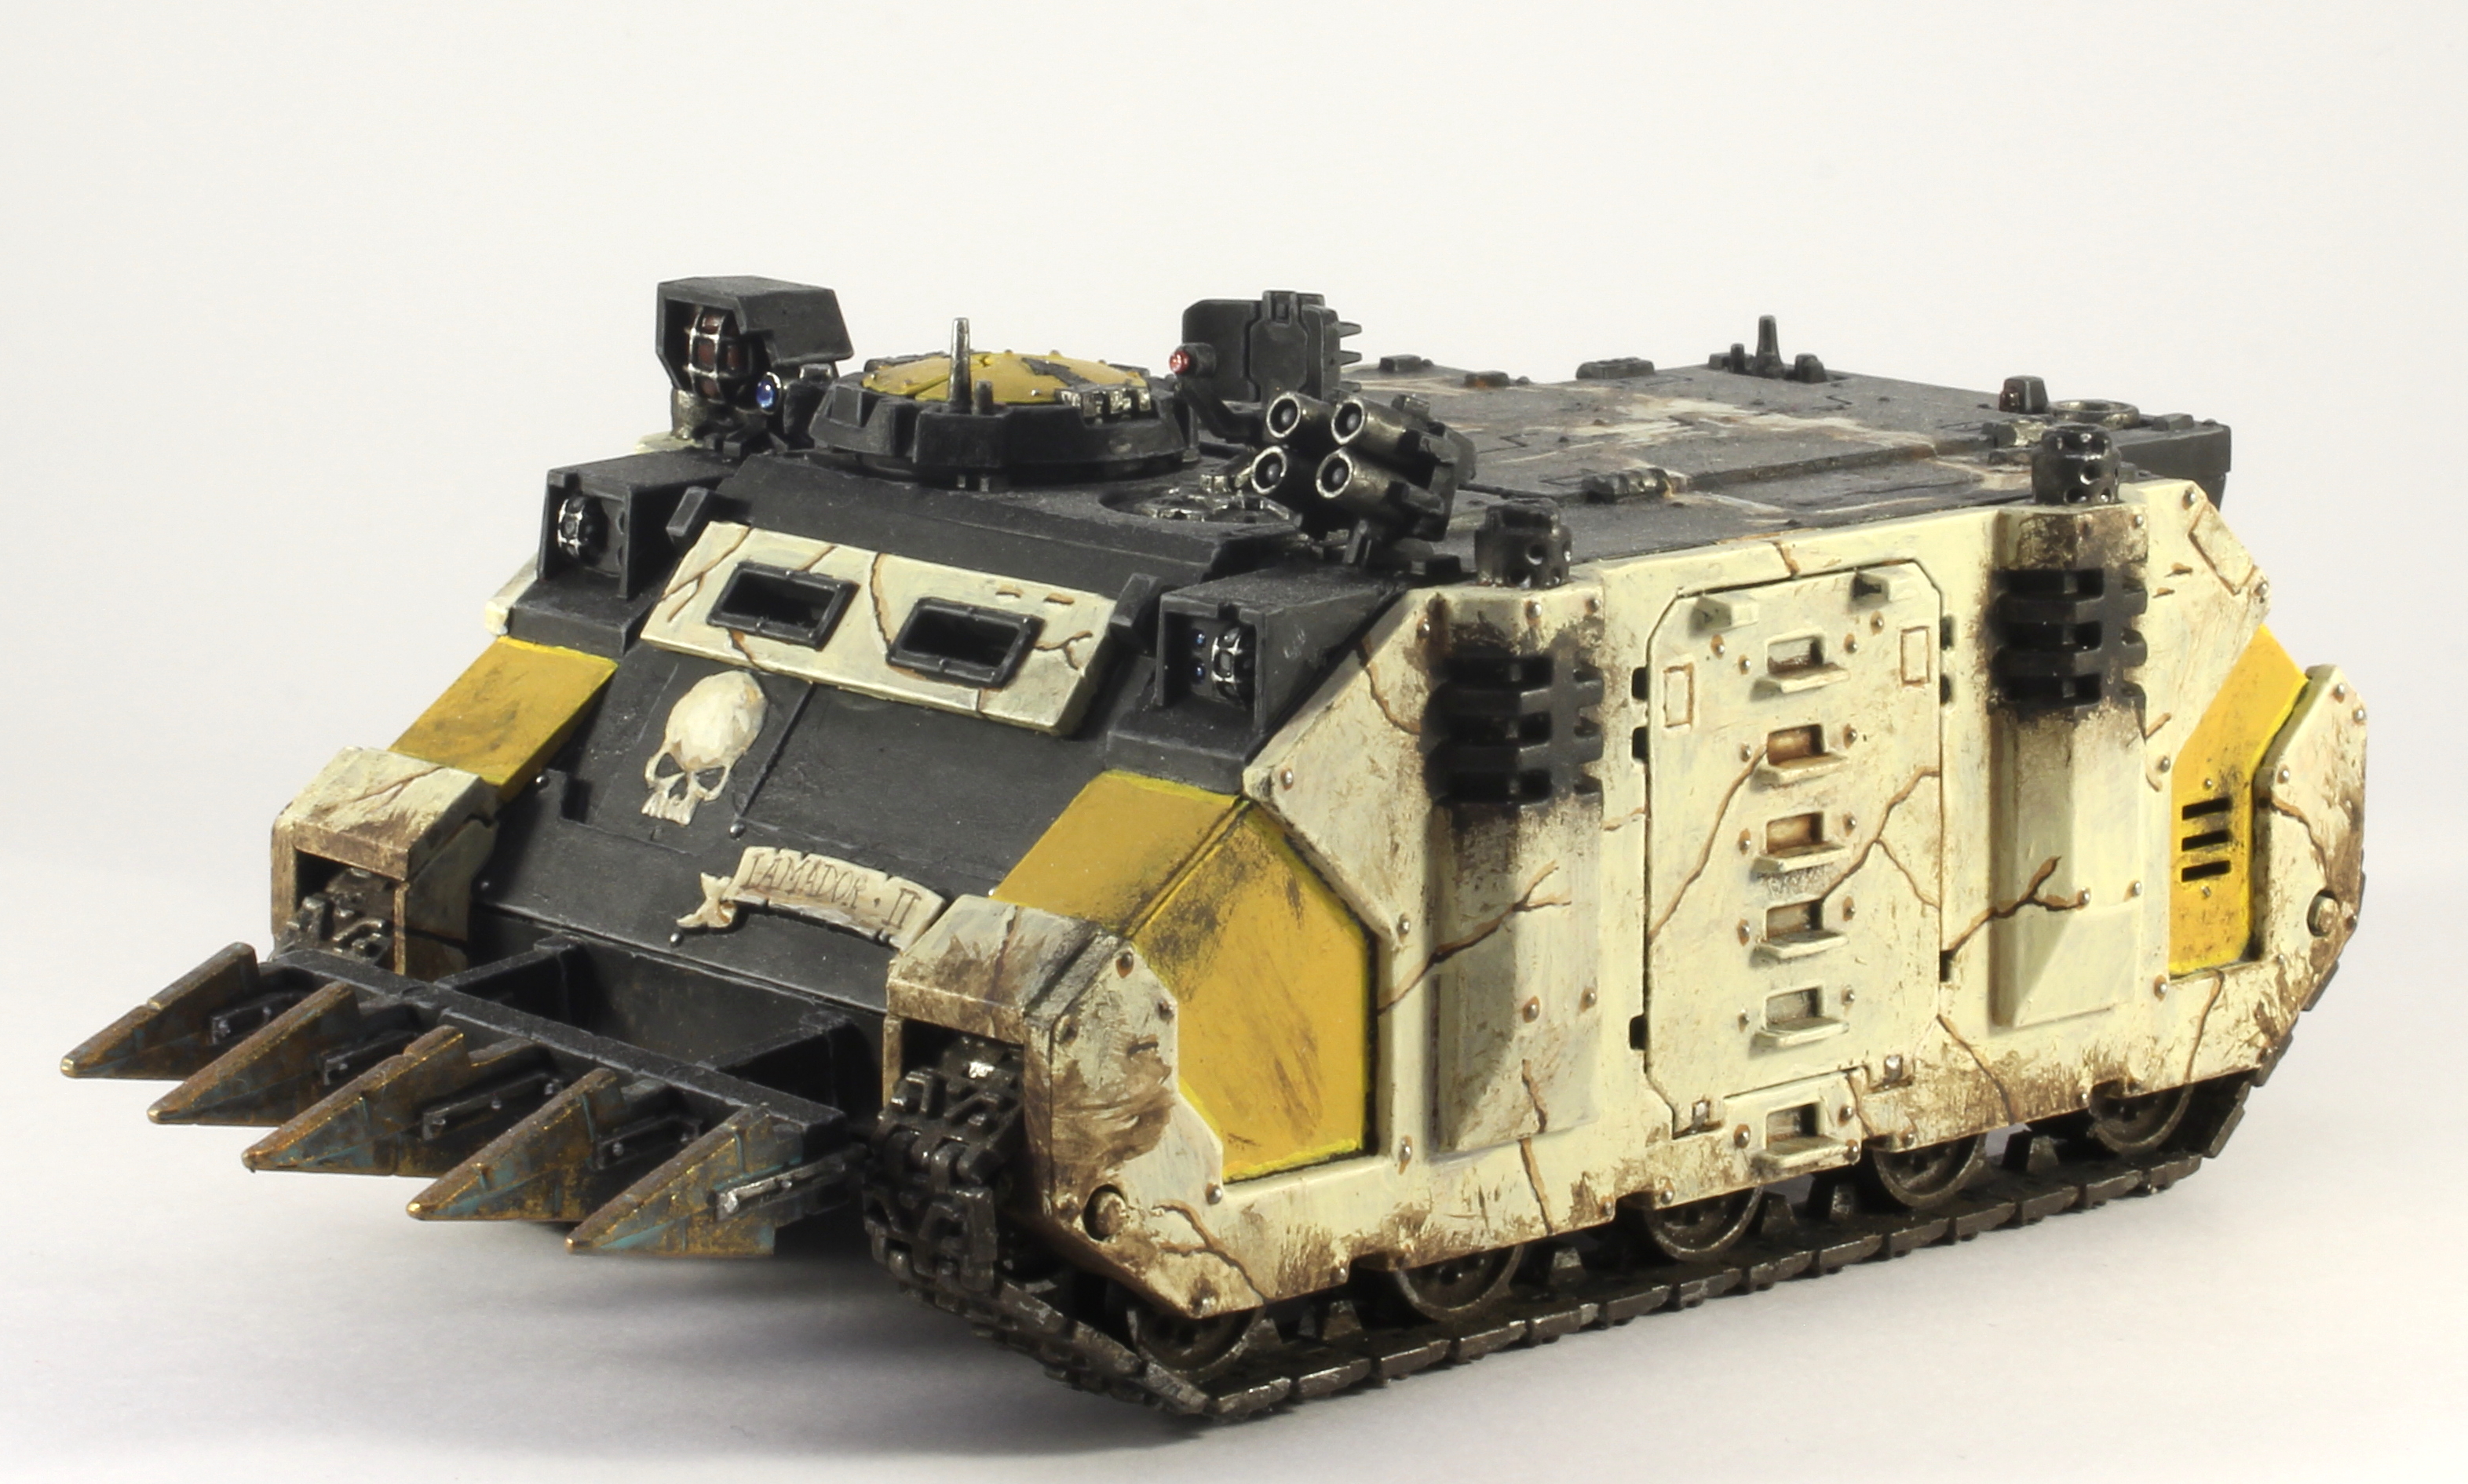
A couple of little things to remember though. If you’re going to use this to paint bigger skulls (like on vehicles for example) you might want to add some more layers/steps to this and spend a little bit more time wet blending on the model as the strokes will be more obvious. If you’re painting shoulder pads like this, do them off the model. I use a bit of sprue and some blue-tack to give me something to hold while painting the shoulder pad – so, so much easier than having to deal with back packs and arms getting in the way. And finally, if you’re doing Teeth as well, use Dawnstone, Ulthuan Grey and highlight with White Scar.
I hope you found that tutorial useful, despite the poor photography. One day I may even get a decent video camera so you can watch me paint it in real time! Who knows. Any questions, just stick them in the comments section below and I’ll do my best to answer them. I felt very rusty doing this as I’ve not painted anything Mortifactory for a while now – need to address that! Onwards.
The summer holiday is over and I’m back on the Mortifactors project and here is my Chapter Champion. I have never put so much metallic paint onto a model this small and so I’ve been calling him the Bling Marine/Mr Shiny throughout this project. In fact, it appears that he’s so shiny, my camera refused to focus properly on him so, yet again I’m hear apologising for my photography. One day, I’ll get it right.
The thing about a chapter champion though, is that he has to be a bit flashy. He’s the duelist, the finest swordsman in the chapter and a member of the Chapter Master’s personal retinue after all. To that end, I wanted to construct a very unique Space Marine. I used the power armour clad Praetor from Forge World as a base and, using a few other bits from other kits, I think I got a pretty unique-looking warrior. He’s got the asymmetrical look of a specialist who has adapted his armour setup to be a better swordsman.
I also made this chap a former member of the Deathwatch. This gave me a chance to use one of the old shoulder guards which still look really cool. This in turn allowed me to break up the gold and black base of the model without having to use bone (which is looking like a rather subtle touch on this chap). The sword comes from the other Praetor and of course I went for bronze to keep him in line with the rest of the army.
The kit was great to work with (just like the other Praetor) and I love the pose of the guy. It really looks like he’s stepping forward to meet an opponent in a battle or arena.
Not the best skull I’ve ever done but it’s still pretty good so it’s nice to learn that I’ve not lost that particular skill. The dagger comes from one of the FW weapon sets (seriously, such a great addition to the bits box) and I went with that over a boltgun because I like the idea of the duelist also being a close combat purist. Also, it gives him an extra attack on the table top too, which is nice.
And so that’s the Chapter Champion done. It’s nice to be back to work on the Mortifactors again, and of course a champion means an honour guard. This will come eventually, but I’ve got a few more things on the shelf that need painting so that might be a longer project (or I’ll cave next week and buy the kits from FW – we’ll see). Hopefully my photography and skull painting will be back on track soon. Onwards!
I don’t get much done these days (hoping to change that btw) but when I do, I like to think afterwards that I’ve given it my all. My Mortifactors Chapter Master is possibly the best thing I’ve ever done for the ol’ black n’ bone brigade, so I’m here to show off some images of my latest creation. And before we dive in, regarding the images themselves, I’m experimenting a little bit to try and bring you images that pick up the true colours of the models and resemble a bit of the ol’ White Dwarf/Visions style. The photography is a bit of a WIP, but the model is most certainly done. So let’s take a look!
As I’m going on my non-Mortifactors summer holiday where I’ll be avoiding the Chapter for three months or so to reignite my love for them, this is a great way to (temporarily) leave the project. This is based on one of Forge World’s Legion Praetors (hence its inclusion into the painting comp at the FW open day), with a head from the CSM tactical squad box, a Grey Knight sword, and a shield from Forge World’s Boarding Assault Upgrade set. And speaking of the shield…
That is possibly the best skull I have ever painted (though there have been quite a few now so I might be forgetting one) and I’m thrilled with how the shield came out. I was initially worried about what I’d be able to fit in there and how I would make it work, but that’s such a lovely blank canvas to work with, with so much space, that it actually just came together really naturally.
I’ve nicknamed this guy ‘Sassy’ after Sasebo Tezuka, and if this isn’t the man himself, then this Chapter Master is wearing his suit of armour. I wanted to call back to the Chapter’s origins as a company within the Ultramarines, and so I included a single blue plate of armour on his right arm with ‘XIII’ on it which refers to the Ultramarines being the 13th Legion Astartes. Happily, XIII is also the number of the Death Card in a Tarot deck, and according to his fluff, Tezuka used the Emperor’s Tarot to guide him to Posul, and the name ‘Mortifactors’ means ‘Agents of Death’. It also appears on the shield too. Can serendipity be unlucky for some?
I won’t bore you too much about the paint scheme. Regular readers will know my methods and not a great deal was done differently here. Lots of bone, lots of black, that moody gold, a bit of bronze… same paints, different shiny space hero in space.
Regarding the pose, I wanted him to look like he was fending off a giant Ork Warmachine or a Greater Daemon perhaps, parrying a blow with the shield before striking forward with that immense sword. I think I captured it well, though occasionally, I’ll have to strike the pose myself just to make sure that it feels relatively natural.
And that’s about it. Happy to answer any questions if you want to stick them in the comments section, and any comments re the photography too. This is a great way to leave it with the Mortifactors for a little while before I go on to try some new things. I’ll be back to work on them in Autumn, but for now, I’m going to leave them under the strong leadership of this guy and go have some fun. I hope you like him too. Onwards!
To round up this week’s new photo shoot, I’ve got brand new snaps of my Mortifactors and a few old favourites as well. What’s more, I’ve had a lot more time to play round with my setup including my camera’s settings, my light box and even a white balance board (it’s freakin’ invaluable). I’m a lot happier with this set than I was with the last set, and I was pretty happy with those. Honestly, it’s to the extent that I’m tempted to reshoot that reshoot (don’t worry, I won’t bother you with it).
This reshoot has done wonders for my want to do some proper painting again and I’m planning to get a good session or two in this weekend. With any luck, I’ll have some new photos of new models next week. But anyways, let’s get on with the show.
Mortifactors
Eldar
Ordo Xenos Inquisition Retinue
Nurgle Blight Drones
Dios Toros
So there you go! Quite a picture dump really, but now that they all have much nicer pictures, I have to start painting some more things so that I can take more pictures. I hope you enjoyed looking at them as much as I enjoyed shooting them. Onwards!
As mentioned in my previous post, I’ve been toying around with some custom rules ideas for my new First Captain, he of the skull helm and big nasty axe, Aikos Valedrix. I’ve also fleshed out his background a bit too with a little history and personality. Anyway, it would be great to get your take on what’s below. I’m not claiming to be an expert on writing rules, but I think I’ve done ok. Here goes…
Aikos Valedrix, 1st Captain of the Mortifactors (220pts)
WS BS S T W I A Ld Sv
6 5 4 4 3 5 3 10 2+/4++
• Infantry (Character)
• Terminator Armour
• Iron Halo
• Tezuka’s Axe
• The Dragon of Calth
Aikos Valedrix counts as an HQ Choice in a Mortifactors Army list.
Background
Valedrix’s rise to the position of 1st Captain was meteoric, but he has proven himself in the centuries since his appointment as a terrifying warrior, always determined to prove his worth and zealously transfixed on raising the standing of his chapter.
Placed in the 2nd Company as a tactical marine within Squad Vax, he was part of the force became known as The Heroes of Drannar IV. Out of eighty Space Marines deployed to the Ork infested warzone of the Drannar system, only fifteen returned to the Basilica Mortis having held the citadel on the fourth planet for over three months before a huge Imperial force arrived to relieve them. As the 2nd Company was rebuilt, his valorous actions prompted his promotion to Sergeant despite having only fought in a handful of campaigns.
He soon proved himself in the furnace of war, and time and again he was to be found at the vanguard of most assaults. His original tactics and defiant attitude pushed him from campaign to campaign, often without stopping to replenish troops and supplies. On the Moon, Franeth, he took just 24 Space Marines into battle to support a beleaguered Astra Militarum force facing down a Necron awakening and inspired all the Imperial troops to a rousing victory as he himself destroyed the tomb core.
Inducted into the 1st Company after Franeth, he became a master of combat in Tactical Dreadnought Armour and was soon commanding his own squad as ferociously as he had done in the 2nd Company. He was elected Captain after the death of his predecessor, Garon Manix, who fell during the cleansing of the Space Hulk, Blessed Horror.
Since then, he has raised his company to mirror his own actions in war, pursuing the Imperium’s foes without hesitation or the thought of self preservation. He now wields Tezuka’s Axe, a monstrous weapon and the first to be forged from Posul bronze, along with the ancient combi-weapon, The Dragon of Calth. He strides into battle as a terrifying spectre, an incarnate of death and a single-minded warrior intent on destroying the Imperium’s enemies.
Character Special Rules
• Fearless
• Hatred (Xenos)
• Fear
• The Will of Posul
• Chapter Tactics
Tezuka’s Axe
Range S AP Type
N/A +3 2 Melee, Unwieldy, Concussive, Master Crafted
When the young Chapter first arrived at Posul, they saw nothing but a world shrouded in darkness. Many among the chapter counselled that they ought to move on and find a different world in the sector to make their home, but unbeknown to them, Sasebo Tezuka had had a vision of the world below and knew that it had worth. He took a Stormraven down to the planet’s surface alone, and after thirteen days he returned with this mighty weapon in hand. It was forged in Posul bronze and he spoke of the tribes below and how they had found him and instantly recognised him as a great and noble warrior, and they had taught him to cast and work the metal. He handed the axe to his First Captain, Alino Darador, and it has been passed down to every First Captain in the chapter ever since.
The Dragon of Calth
This weapon confers one extra melee attack, already included in the profile above using the ‘Dragon Tooth Blade’ profile below.
Range S AP Type (Flamer)
Template 5 4 Soulblaze (one use)
Range S AP Type (Bolter)
24” 5 4 Assault 2
Range S AP Type (Dragon Tooth Blade)
N/A User 3 Melee
10,000 years ago, as the Word Bearers and Ultramarines battled through the caverns of Calth after the great betrayal on the surface, one weapon earned a fearsome reputation among the traitors and became a grim harbinger of hope for the loyalists. No one is sure of its origins, but some have claimed it was on route to be presented to Lord Guilliman himself by the Mechanicum who had crafted a unique weapon only fit for a primarch. In the tunnels below the surface, its firy breath belched corrosive flames that enveloped the enemies of the Ultramarines. It earned its name, The Dragon of Calth, from both sides of the conflict, and became a terrifying whisper in the eternal night of that subterranean world. None remember how it came into the possession of the Mortifactors, but it has been a fixture of their armoury since the chapter’s birth.
The Will of Posul (Special Rule)
All Mortifactors Models within 6” of Aikos Valedrix lose ATSKNF and gain Fearless.
Every 1st Company needs its own Terminator Captain, and I’ve happily found mine – Aikos Valedrix. The keen-eyed among you might be thinking ‘hang on, that’s just the Terminator chaplain’ and save a few bits and pieces changing round, you’d be right. It’s the good thing about the Mortifactors really; if it’s got a skull on it, it automatically fits in. In this case, the skull helm looked perfect and I needed a 1st Captain. Done.
I’m really pleased with the overall paint job here, and the minor conversions that went into it. You might notice the removal of an Imperial cross, and a sensor swapped with a skull and really, excluding the arms (we’ll get to those shortly), that’s it. There are plenty of skulls and that’s all you need for the Mortifactors. In terms of the painting, I like the small skull plate over his waist, and I’m also quite proud of his gauntlets too. I spent a long time making sure I got everything right with this guy and while the techniques are all pretty standard, the effort’s there so they can still make the mini pop. Also, I like his glowing blue eyes – very moody.
The axe means he’s going to need his own rules – Terminator Captains apparently can’t carry these (which is just silly), so I’m looking forward to getting those written as they also give me the opportunity to give it a bit of flavour and fluff. So I’m calling that Tezuka’s Axe – the first bit of Posul bronze used in weapon-craft by the chapter’s founder himself as he proved to all his men that the twilight world had something of great value for them. Anyway, the rules are to follow soon. I have to say, the one bit of the model that I don’t like, is the handle on the axe. I need to practice these a bit more as they can be a source of great detail. This one had to be rescued a coupled of times but hopefully it looks ok now.
The other part of the model that needs some rules written for it is the combi-flamer which I’m calling The Dragon of Calth. I’m not thrilled about the blade on this and it might get redone, but I love the overall look of this monstrous weapon. Also, i’m quietly pleased with that skull on the shoulder there – quite a nice one from my ever-growing collection.
I’m quite proud of all the detail I got on the top of this model too – lots of little lines on that parchment. I should also say that the base is made from a bit of roof slate. It’s a great material that takes paint really nicely and usually provides a nice flat base while still being interesting. This one needed a little putty added as this guy was at one point on tip toes due to a slight slope and that is not a good look for anyone in TDA.
And now, as a small treat shot, here’s a snap of my 1st Company so far. They’re not going to be the biggest part of my force, but they certainly have been a lot of fun to do, and they definitely stand out…
Anyway, this has been a really fun break away from more boring unspectacular projects but it’s time to get back to the utility stuff. I’ll look back with a lot of fondness at my time painting this guy up – it has been a blast. Onwards!
It’s only taken three weeks to do these two (I told you I was going slowly at the moment) but I’m pretty pleased with these guys – the first of my Mortifactors Devestators.
I’d like to start by saying that the phrase ‘Mortifactors Devestators’ is something i find very enjoyable. It rolls off the tongue in a delightfully death-filled sort of way, and I appreciate that. Eventually they will be a squad of 10 (some time around August if my current slow work rate continues), but the first two are done and these are the guys I’m pointing out today.
With regards to the Devestator kit, as previously mentioned, it is showing its age. It is full of seams and very static, but it’s still pretty fun to play around with. Of course, you only get one missile launcher with the kit, so the second one was a spare from one of the tactical squads I’v worked on. Mixing up the kits like this has its benefits – Space Marines have to do a lot of ‘make do and mend’ within their chapters and the likelihood of them having 10 or even two identical weapons drops due to myriad reasons. The weapons do look slightly different and the changes are subtle enough that you only spot them if you’re looking.
For the Mortifactors Devestator squad marking, I’ve gone for a vertical line in bone on a black background on the right shoulder. Yes, that is very simple, but their other shoulders will all be skulls and flames (in my previous notes on their heraldry, I noted that heavy weapons training earns them the right to add a fiery design to their skull) so there’s enough to mark them out.
I’ve always been a big fan of missile launchers as heavy weapons, and though I haven’t included any in the tactical squads I’ve done so far, I’m glad I included them here. This Devestator Squad may be called on to offer some AA support in the future and having the option to add some flakk missiles is a nice thing to have, even if I don’t use it. When not called upon for that role, there’s still the armour-cracking strength of krak, and if any angry mobs start heading in your direction, you can frag them too. It’s versatile, but uncompromising, and that’s why it’s in here.
I may plough on with the rest of this squad, or I may mix things up a bit next, before working on the next two heavy weapons. Not sure yet, but keep an eye on this blog to find out what’s next!
…But wait! There’s more!
My good friend, Henry South (of 4gotowar.blogspot.co.uk), is offering you a great chance to support a noble cause and get your hands on some amazing things too. Henry and I were both very much inspired by Terry Pratchett when we were young and to this day we are both avid readers and quoters (I can still make him giggle with my Nanny Ogg impression) of this extraordinary man’s work. Well, Henry put up a couple of his models (which have appeared in Blanchitsu in Visions! – shown above) to be won and all you have to do to enter this raffle is make a donation via this just giving page. The money goes to the Alzheimer’s Society who provide care for those who suffer from what Sir Terry called the ’embuggerance’ of Alzhaimer’s disease, and also goes towards research to help fight it. And just to sway you even more to give, John Blanche has also contributed the original illustration below to Henry’s efforts.
Many other fine painters have put their work in too, so you could end up with several amazing models, and/or a John Blanche original and all you have to do is give to charity. Not bad, eh? There will be three winners and the draw will take place on April 28th. Please give what you can and use the link above.
I’ve got a bit of a bee in my bonnet at the moment about how long it seems to be taking me to get stuff done and the lack of my own original work coming up on this blog. When I had hours and hours to paint, I seemed to be getting something new up every week but that has not been the case of late, and in an effort to prove (as much to myself as to you) that I am still in the game, I thought I’d show you some of the stuff that I’m working on. Starting with, happily, something that’s completed! Yay!
Relic – Battle Sister
This is the first member of the Adepta Sororitas that I’ve worked on in decades (has it really been that long!?), and it’s also a return to a project I kicked off months ago too. Firstly, apologies for the rubbish shots – didn’t have much time to fire these photos off so resorted to the iPhone and was instantly reminded about why I splashed for a DSLR at the end of last year. When painting this over the last couple of days, I was also reminded about how much I hate painting this weird rubber stuff that FFG use for these busts and its own general hatred of paint and being painted.
However, in the flesh, this looks a lot better and I’m very happy with it. It’s the 5th piece I’ve done for the game and that means I’m half way through this project. One day, I’ll actually get a game in, which will be nice. Also, when they’re all done, I’ll fire off some shots that do them justice.
The Golden Hour – Finding Time to Paint my Devestators
If you can’t find time, make time. Not a bad adage to live by during the times when you can’t seem to find a second to get any painting done. And because of that, I am now waking up one hour earlier every day, and using that time to paint. I’m calling it the Golden Hour because not only is it lighter in the morning now, it’s ensuring that I start the day with a creative burst and a smile on my face. If you can do it, I recommend it because it really is quite energising.
It’s already paying dividends and, as you can see from the snap above, one Devestator is done and the second one is under way. In fact, that second one is coming along really nicely now and this approach is really starting to move things along at a far more acceptable pace. I’ll do a bit more of a write-up on these guys next week when (hopefully) I have another one finished.
One thing that I’m already appreciating is how far Space Marine kits have come since these Devs were first brought out. Having worked on the new tactical squads and the Vanguard Vets recently, I took my eye off the ball a bit when it came to looking for casting faults, because those new kits have none. These older kits though, well, there are seams and joins everywhere, and some bits really don’t sit flush against other bits… basically, there’s a fair bit of rescuing happening as I go along which could have been avoided had I been more vigilant. Lesson learned for next time.
Future Plans – A Quick Sneak Peek
This one’s coming up soon – my Mortifactors First Captain. I thought I’d share with you a quick sketch and some of the inspiration for him. Yes, it’s technically based on the Terminator Chaplain, but when you’re delaing with Mortifactors, everything has skulls, not just Chaplains. A couple of minor adjustments/conversions and he should be ready for painting relatively soon too. Here he is ready to get worked on:
There. I am doing stuff. Get off my back. Not that you were on it anyway. But whatever. Onwards!
Stomping his way onto tabletops in the near future is this brutal creation, my second Mortifactors Contemptor Dreadnought who has been given the title of ‘Nameless Death’. Armed with two power claws carved from Posul bronze and a skull helm, this guy is as much about intimidation as he is about brutal close-quarters killing power.
The keen-eyed and geeky amongst you (so that’s all of you then) and those who keep up with this little blog of mine will have recognised that this miniature used to be the Night Lords Contemptor chassis, but simply by removing a pair of bat wings (and by making a couple of other minor tweaks), I have been able to turn him into a pretty perfect Mortifactors Mini. I also left out the rotting heads that come with the dread, even though some of those were skulls, they were a bit more NL than M – more about fear than ritual.
The pose is a little static, but I was trying to go for a stationery pose that had a ‘come at me bro’ kind of feel and I think I’ve just about managed that. It could have gone worse, and the end result has a definite menace to it . The base is simple (though annoyingly, I appear to have been a bit stingy on the stand so from some angles he looks like he’s light enough not to make a mark in it, but this can be fixed if needs be) and I even experimented with a RMM technique for copper on that broken column/pipe thing.
On the fluff side of things, I decided to call him ‘Nameless Death’ because I couldn’t think of a name, and because I already wrote ‘Mortis’ on the middle part of his chest banner. That aside though, I like to think of him as an ancient machine, still showing the scars of battles that Sasebo Tezuka led the Mortifactors into himself. Over the centuries, between lost records and the creeping insanity that comes with being entombed alive within a dreadnought, the name of this warrior has long since been lost. All that remains is his martial prowess and his desire to crush the enemies of the Emperor.
There ain’t much new on the painting front here. Really happy with the claws as they are looking thoroughly nasty and once again prove that my much tried and tested bronze technique still holds its own. What’s more, it had been a while since I’d done anything with the Mortifactors so it was good to find out that I can return to it and no bodge it up too badly.
You might also notice a slight improvement with the pictures this time round. The new fancy-pants camera is doing very nicely thank you, though there are still areas where I need to learn things and still a few small toys to buy to help out. It’s coming along though and I’m sure you’ll agree that these snaps are plenty better than the old potato-quality shots I used to stick up here. I even managed to get this murky shot…
Well, I hope you enjoyed the pretty pictures almost as much as I enjoyed painting him up. It was fun, but it took me a good while to do, so maybe something smaller and faster next. Onwards!