
If you’d forgotten that I was working on my first ever titan, a Warhound no less, then rest assured that I haven’t forgotten. How could I forget? My entire work bench is taken up with the damn project, but after a couple of weeks, I can finally show you my legs (saucy), so here they are!

Although these spindly, bird-like legs don’t look like much at the moment, it should be known that most parts of the kit are in these legs. This has not been easy by any stretch of the imagination and on more than a couple of occasions, I was convinced that I had bitten off more than I could chew with this project. I was actually scared of going further a couple of times for fear that I’d botch it. Combine that with a very busy schedule of late, and this has already taken longer than I would have liked. However, I have learned a couple of really big, important lessons that I would like to pass on to anyone else thinking of trying to build one of these. Firstly…
They’re Very Posable, But Not That Posable
Remember the old adage ‘measure twice, cut once’? This has been recanted by craftsmen for centuries to ensure that dramas are limited and quality is assured. I myself try to make sure of this and when I initially set up the legs, I followed this rule. Despite this, I found out the hard way (post JB Weld stage) that even though I worked out the angles for my legs perfectly, I didn’t think of the pistons. In its first incarnation, its stance was much more that of a stalking hunter. It was, in fact, modelled after these guys…

Stalking lions look so menacing and sneaky when they’re prowling towards their prey, and I imagined my Warhound, skulking behind smoke and buildings, waiting to pounce on its quarry. Those long, outstretched forelimbs leading forward just look so cool in a predatory sort of way. Alas, the peripherals of the legs simply wouldn’t allow this and so, despite my best efforts, I had to break one leg apart and start again. That was particularly stressful. The lesson here is to remember those pistons and extras when setting up your original pose.
Speaking Of Pistons…
Don’t talk to me about pistons. I hate pistons. I never want to have to assemble another Warhound titan piston ever again. How many are there, you ask? Well, each foot has nine (three in each front facing toe), then each ankle has five each. There’s a double one in the knee, one in each thigh and three at each hip, leading us to a grand total of 40 (well, 38 really as the knee is a double piston rather than two separate ones, but still!). And each one comes in two separate pieces and you can’t just put them together and glue them in. Oh no. You have to cut them down to size. 40 pieces cut to size to fit into 40 other pieces. That is not fun. Actually sticking them to the lower limbs is a whole other nightmare.
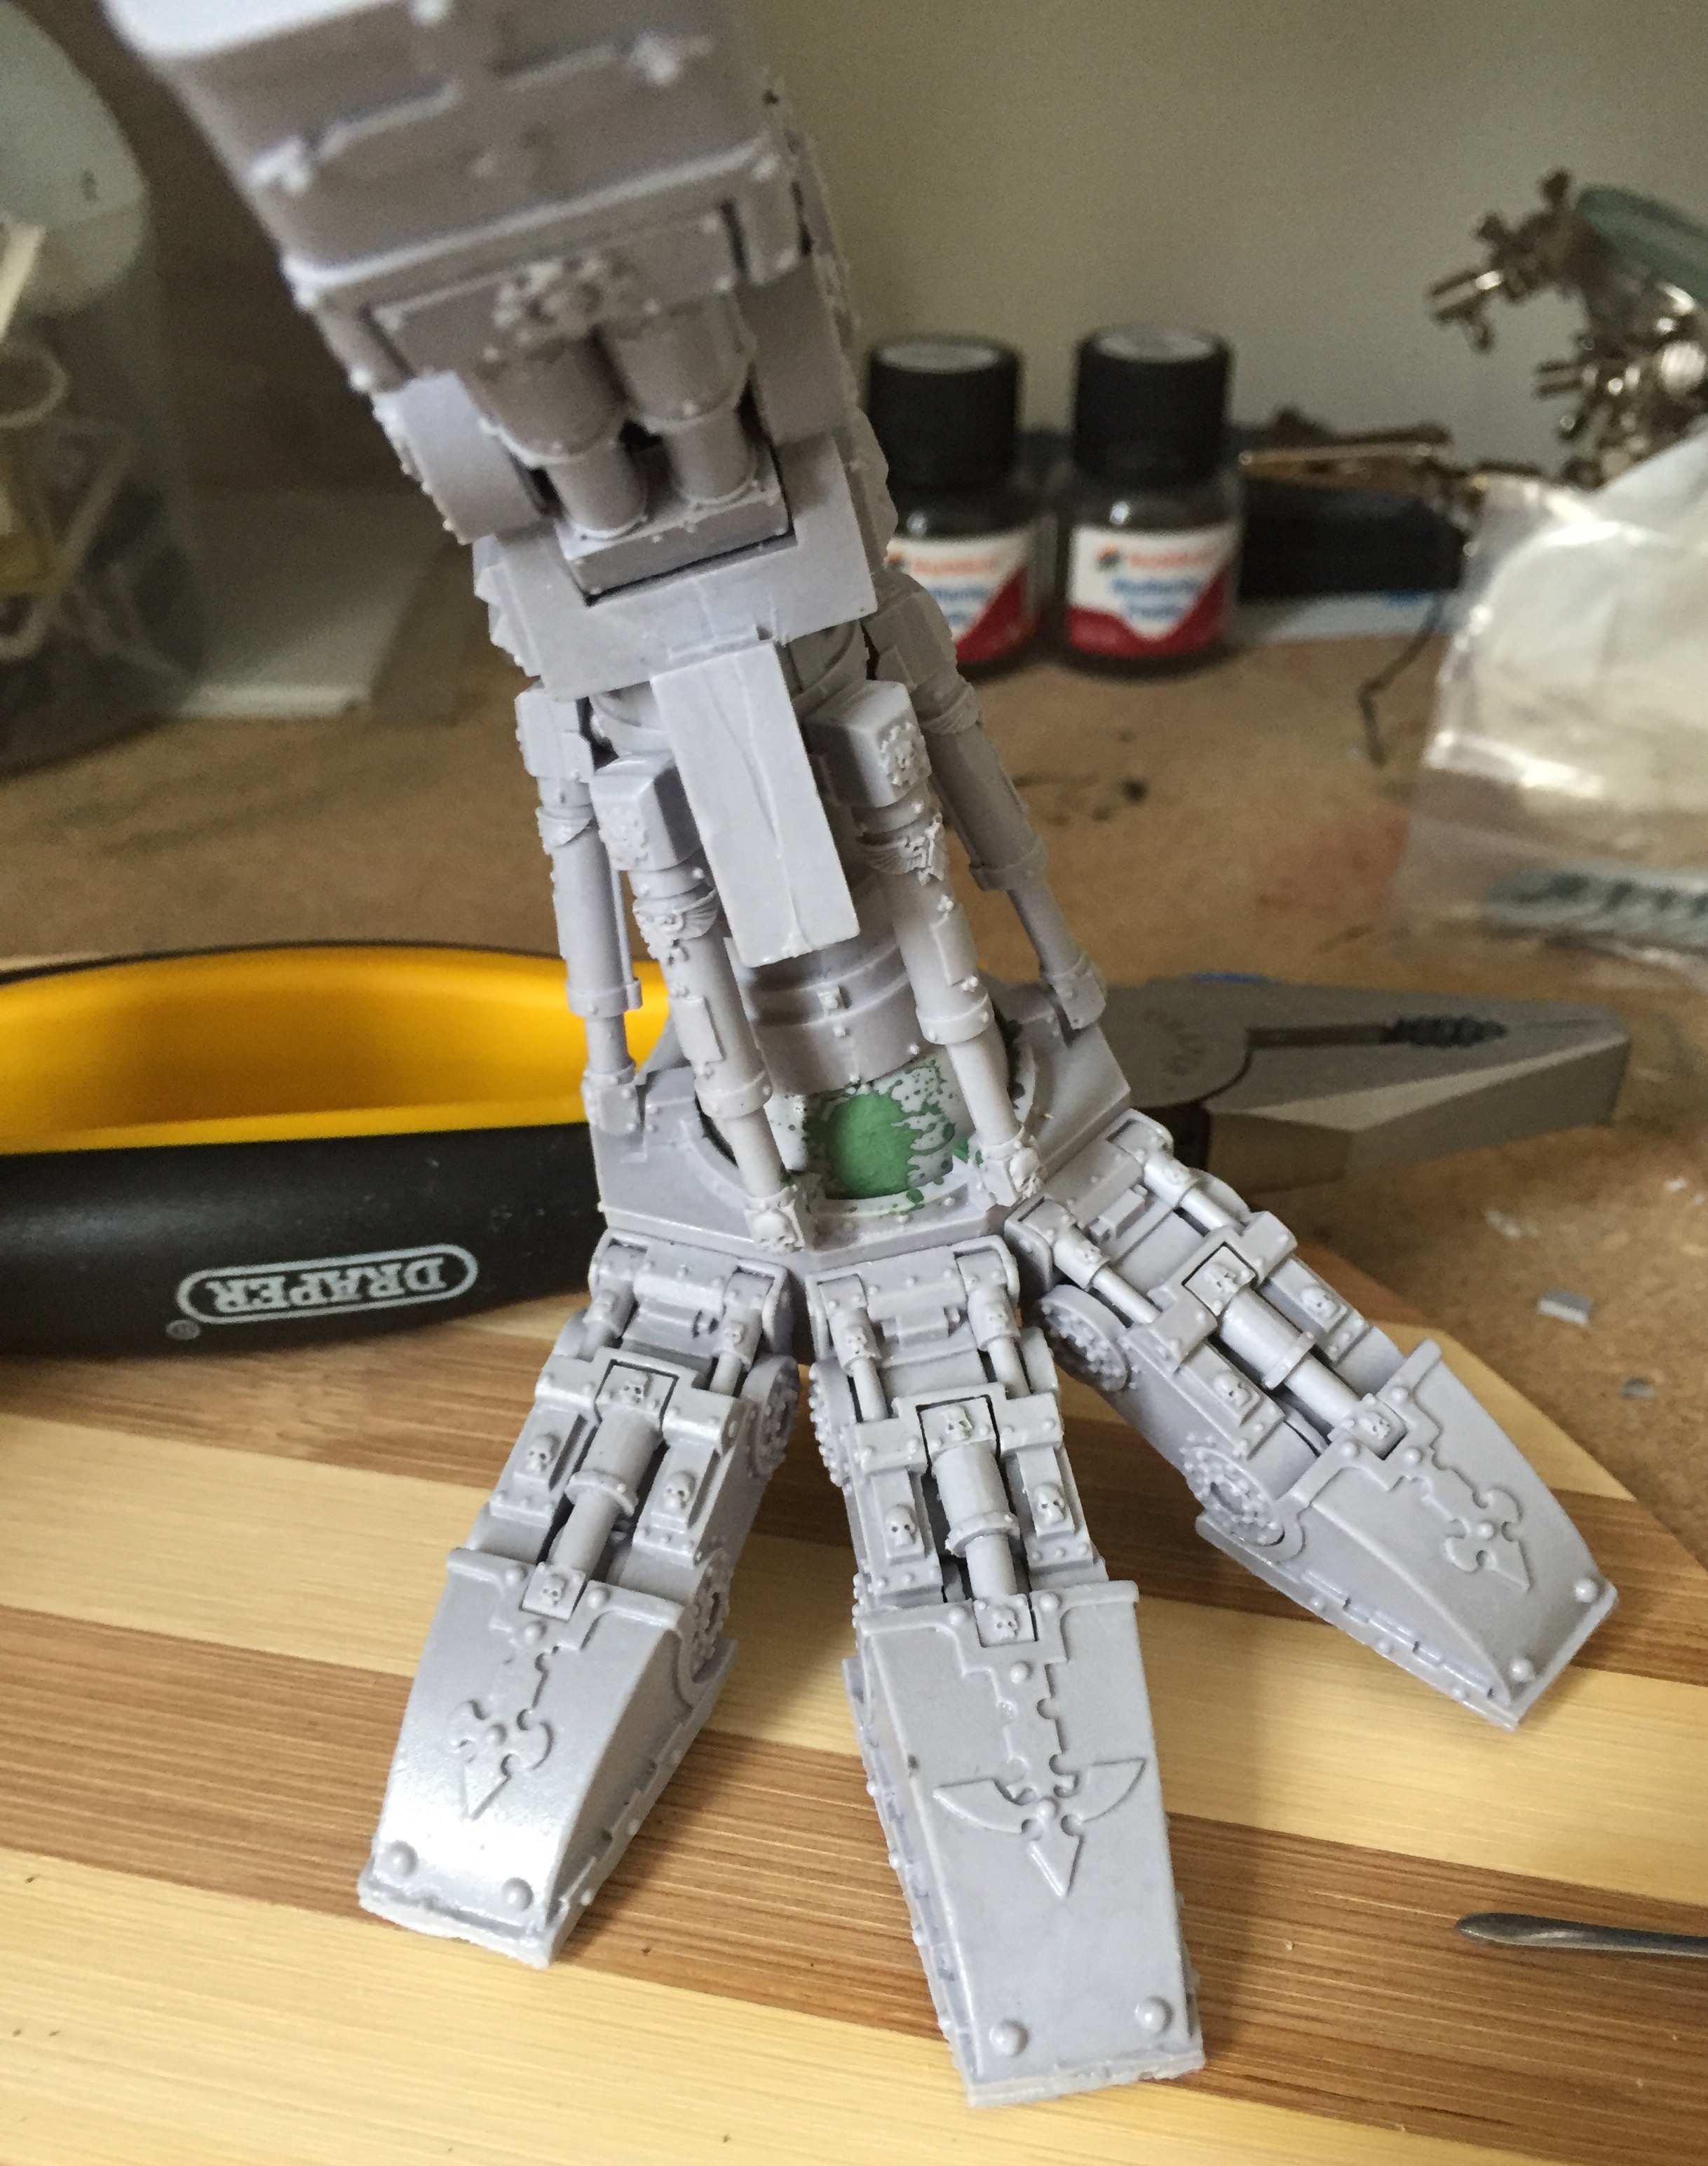
Thankfully, Forge World do provide you with a few spares which was is awesome, but even then, the stress of getting it wrong and cutting too short is a real fear. Oh, and typically, there are mould lines on each one that need to be removed, and, even though you look at them for ages to ensure they aren’t in any way bowed, one or two will get through your net and you won’t notice until everything is glued into place that there’s just something slightly off about one or two of them. It drives you nuts.
Get All The Tools You Need before You Start
Want to see how you cut the flash from the groin-piece of a Warhound titan? This is how:

That is a coping saw. I didn’t own a coping saw when I started this (well, I thought I did but I couldn’t find it…) so I had to buy one such saw because this chunk of resin is attached to its flash by something about the thickness of a banana. You will need all the materials for pinning big bits too. The legs have six, large pins in them just to support the stupidly strong JB Weld epoxy. This is the outlay I was talking about in the last post, but I thought I’d show you it in action.
Those are the key lessons from this part of the project that you need to know about. If I save one of you even a bit of stress when building one of these things, my job here will be well done.
But Wait, There’s More!
That’s not all I’ve been doing! Lots more has been going on besides just putting the legs together. For a start, I’ve also been having some fun with magnets. I picked up some neodymium magnets which are loads of fun as they tend to fly around and stick firmly to almost everything metallic (which is even funnier when your bench is made of metal). I got some 2x19mm magnets, (and some 3x5mm) and they will be used to hold key bits together to allow for better transport options and posing.

So far, I’ve used one big one on the groin/torso attachment part, and there’s also a big one and a small one on the foreward foot to help it stay steady on the base. I’ve also drilled holes for six pins that will also fix it to the base (which you can see above – a donation gratefully received from Henry South who thought it would be big enough for his Warlord Titan (the mad fool)) and I’m hoping that will be enough.

This will also be a key part of the base – the promethium relay pipes kit from GW. It looks really cool, however I have to say, like other China-produced GW kits, it’s not quite as crisp as what comes out of Nottingham. The details are a little dull, but once painted, you can see from the box that this is barely noticeable. And my Titan is going to be stomping right through it.
Lastly, it should be known that my paintbrush has not been sitting idly by. Far from it in fact. I’ve started testing out the freehand style that I want to employ on the Warhound and these are the initial results:

While I’m very happy with the style and the techniques used/effects realised, the illustration itself needs work. Thankfully, you get four shin guards in the box (more spares from FW!) so I’ll keep this one for reference and have another go using one of those. For those interested, this scene was taken from Bruegel the Elder’s The Triumph of Death, painted in the 16th Century. You can find out more about the artist and the painting here.
Right. That’s enough for this update. It’s getting late and there’s a lot more to do. Basing, painting, building the body… this is going to keep me going for a long time. Stay tuned for further updates. Onwards!
 40kaddict
 4gotowar
 Castigator's Chaos
 convertorum
 darkfuturegaming
 ftgtgaming
 Mind of the Daemon
 taleofpainters
 talkwargaming
 Twisted Brushes
 weemen
Holy CRAP dude. I wasn’t sure if it was Breugel or Bosch. That leg piece is amazing amazing. Seriously. If you don’t use it I would honestly consider buying it from you.
I have one of these coming and I feel exactly like you. Excited but guilty and a little freaked out. But the excitement outweighs the other stuff.
Keep us posted! I’m really eager to see more. I think the illustration is freaking amazing, did I say that?
Thanks! Yeah, I’m feeling even more guilty about the titan because at the moment, I just don’t have the time to work on it. It’s a huge amount of work and one thing I’ve learned working on it so far is that you need to be in the mood for working on it. At the moment, I’d rather work on single space marines than God machines so it’s waiting patiently in the queue. I’ll get there.
And I think now I’m going to use that pad. It took a day to do that one half so I think it’s earned a place on the finished model. Now I just have to do every other plate in the same style. 😐
Hahaha! Well if you are looking for ideas, the Garden of Earthly Delights by Hieronymous Bosch (might have the spelling wrong) is in the same style the Triumph of Death. I would love to see a Titan covered head to toe in this kind of artwork. I also understand about doing other models – I will probably need a break from time to time. At any rate keep it up and keep sharing! I’ll be checking back as I do my own!
Wow! That is a beautiful freehand painting! I’m impressed! I presume you’ve been studying classical arts and been trained to paint that way! You probably need a couple of whiskies in your bloodstream before you start weathering that shin guard!