

Space Marine Scout with Urban Camo Cloak
My Space Marine scouts are coming along slowly, but surely. Number two (giggles) is now in the bag and I decided to take this opportunity to walk you through how I did (and am doing) the cloaks. My board typically represents a desolate outpost, ravaged by orbital strikes and comprises of several ruined buildings. And as some readers may have noted, I’m a fan of the Cities of Death expansion too, so urban is my thing. I wanted urban camo cloaks for my Mortifactors scouts and that meant lots of shades of grey and a busy pattern. Rather than just slap it all on, I did develop a little technique which, while a bit time consuming, does produce results that I am at least happy with. Here’s how I got it just so…
Step 1: Eshin Grey

After undercoating black, Eshin Grey was used all over the cloak in as even strokes as possible. The undercoating black is actually a little important because, as you handle this throughout the process, tiny flecks of grey will come off on your fingers and the black underneath will shot in little dots. This is great for giving it a little more texture and character (and yes, it was discovered by accident, but it still works!)
Step 2: Administratum Grey

Create a thick web of this lighter grey, keeping the pattern random. In camouflage, repeating patterns are easier to discern than random patterns and so you don’t want it to look like squares or a spider’s web. Keep it random and keep the lines relatively thick. And note a few areas where the paint looks a little thinner – this is to help add depth through wear and tear. Don’t overdo this aspect of it though or it’ll just look like a rushed job.
Step 3: Ulthuan Grey
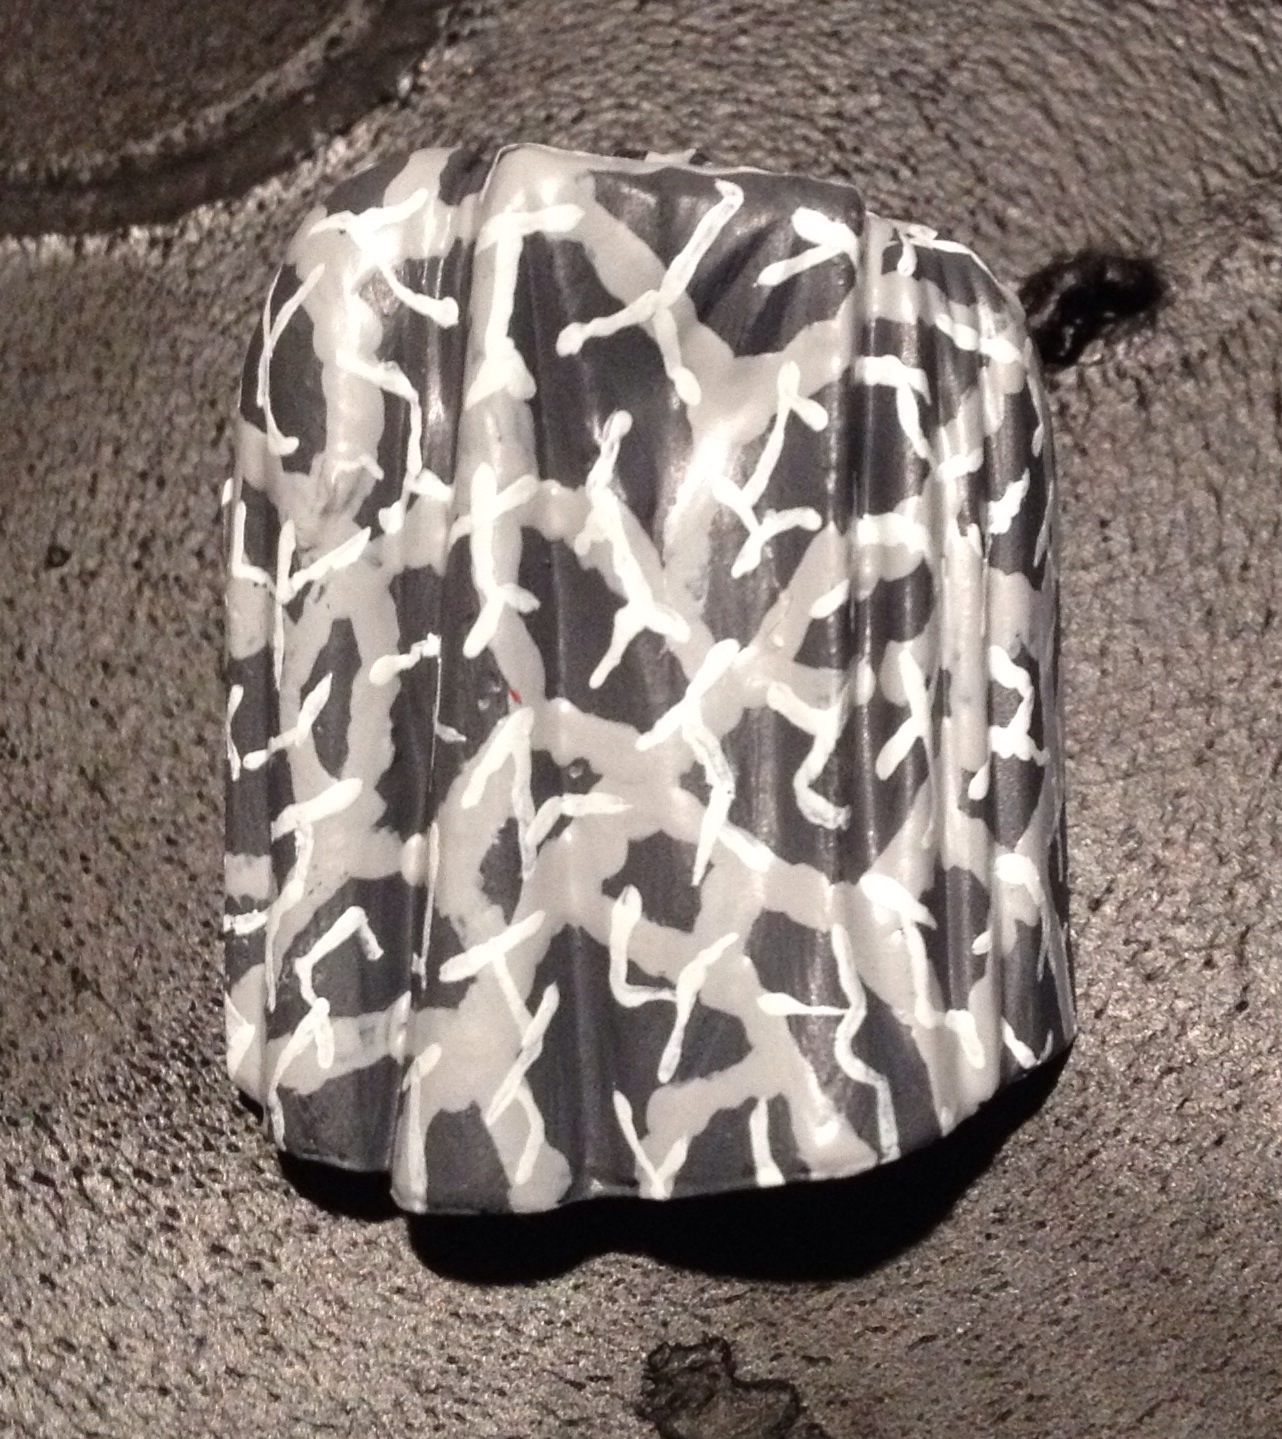
This is almost white and, now you’ve got the big patterns down, it’s time to switch to a thinner brush. Making sure they’re evenly spaced, create patterns like letters across the cloak. I just riffed on ‘J’, ‘f’, ‘x’, ‘G’ and ‘y’. Just remember to keep the lines thin.
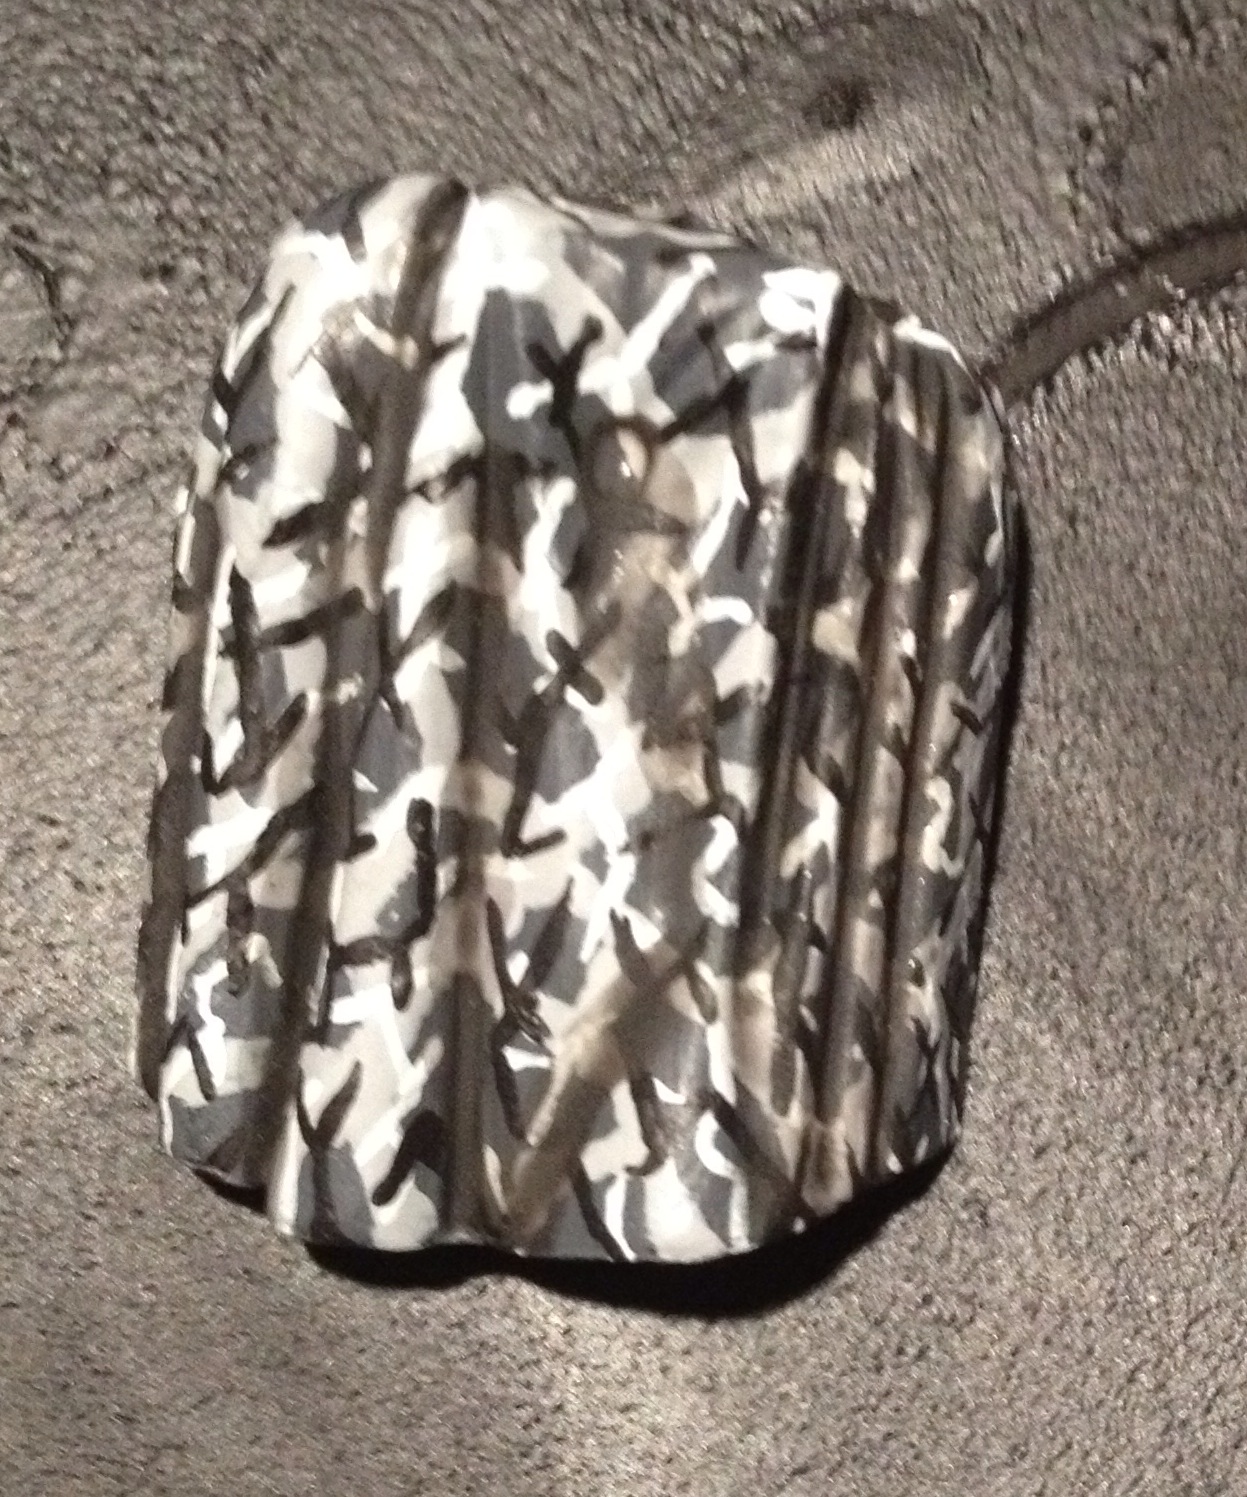
Step 4: Abaddon Black

Same as with Ulthuan Grey, you want thin shapes, evenly spaced, kind of like alien letters. The only difference with these in terms of how I applied them, was less random placement – they’re actually in lines (which kind of goes against the whole ‘random pattern’ thing from earlier but they’re random shapes so whatevs).
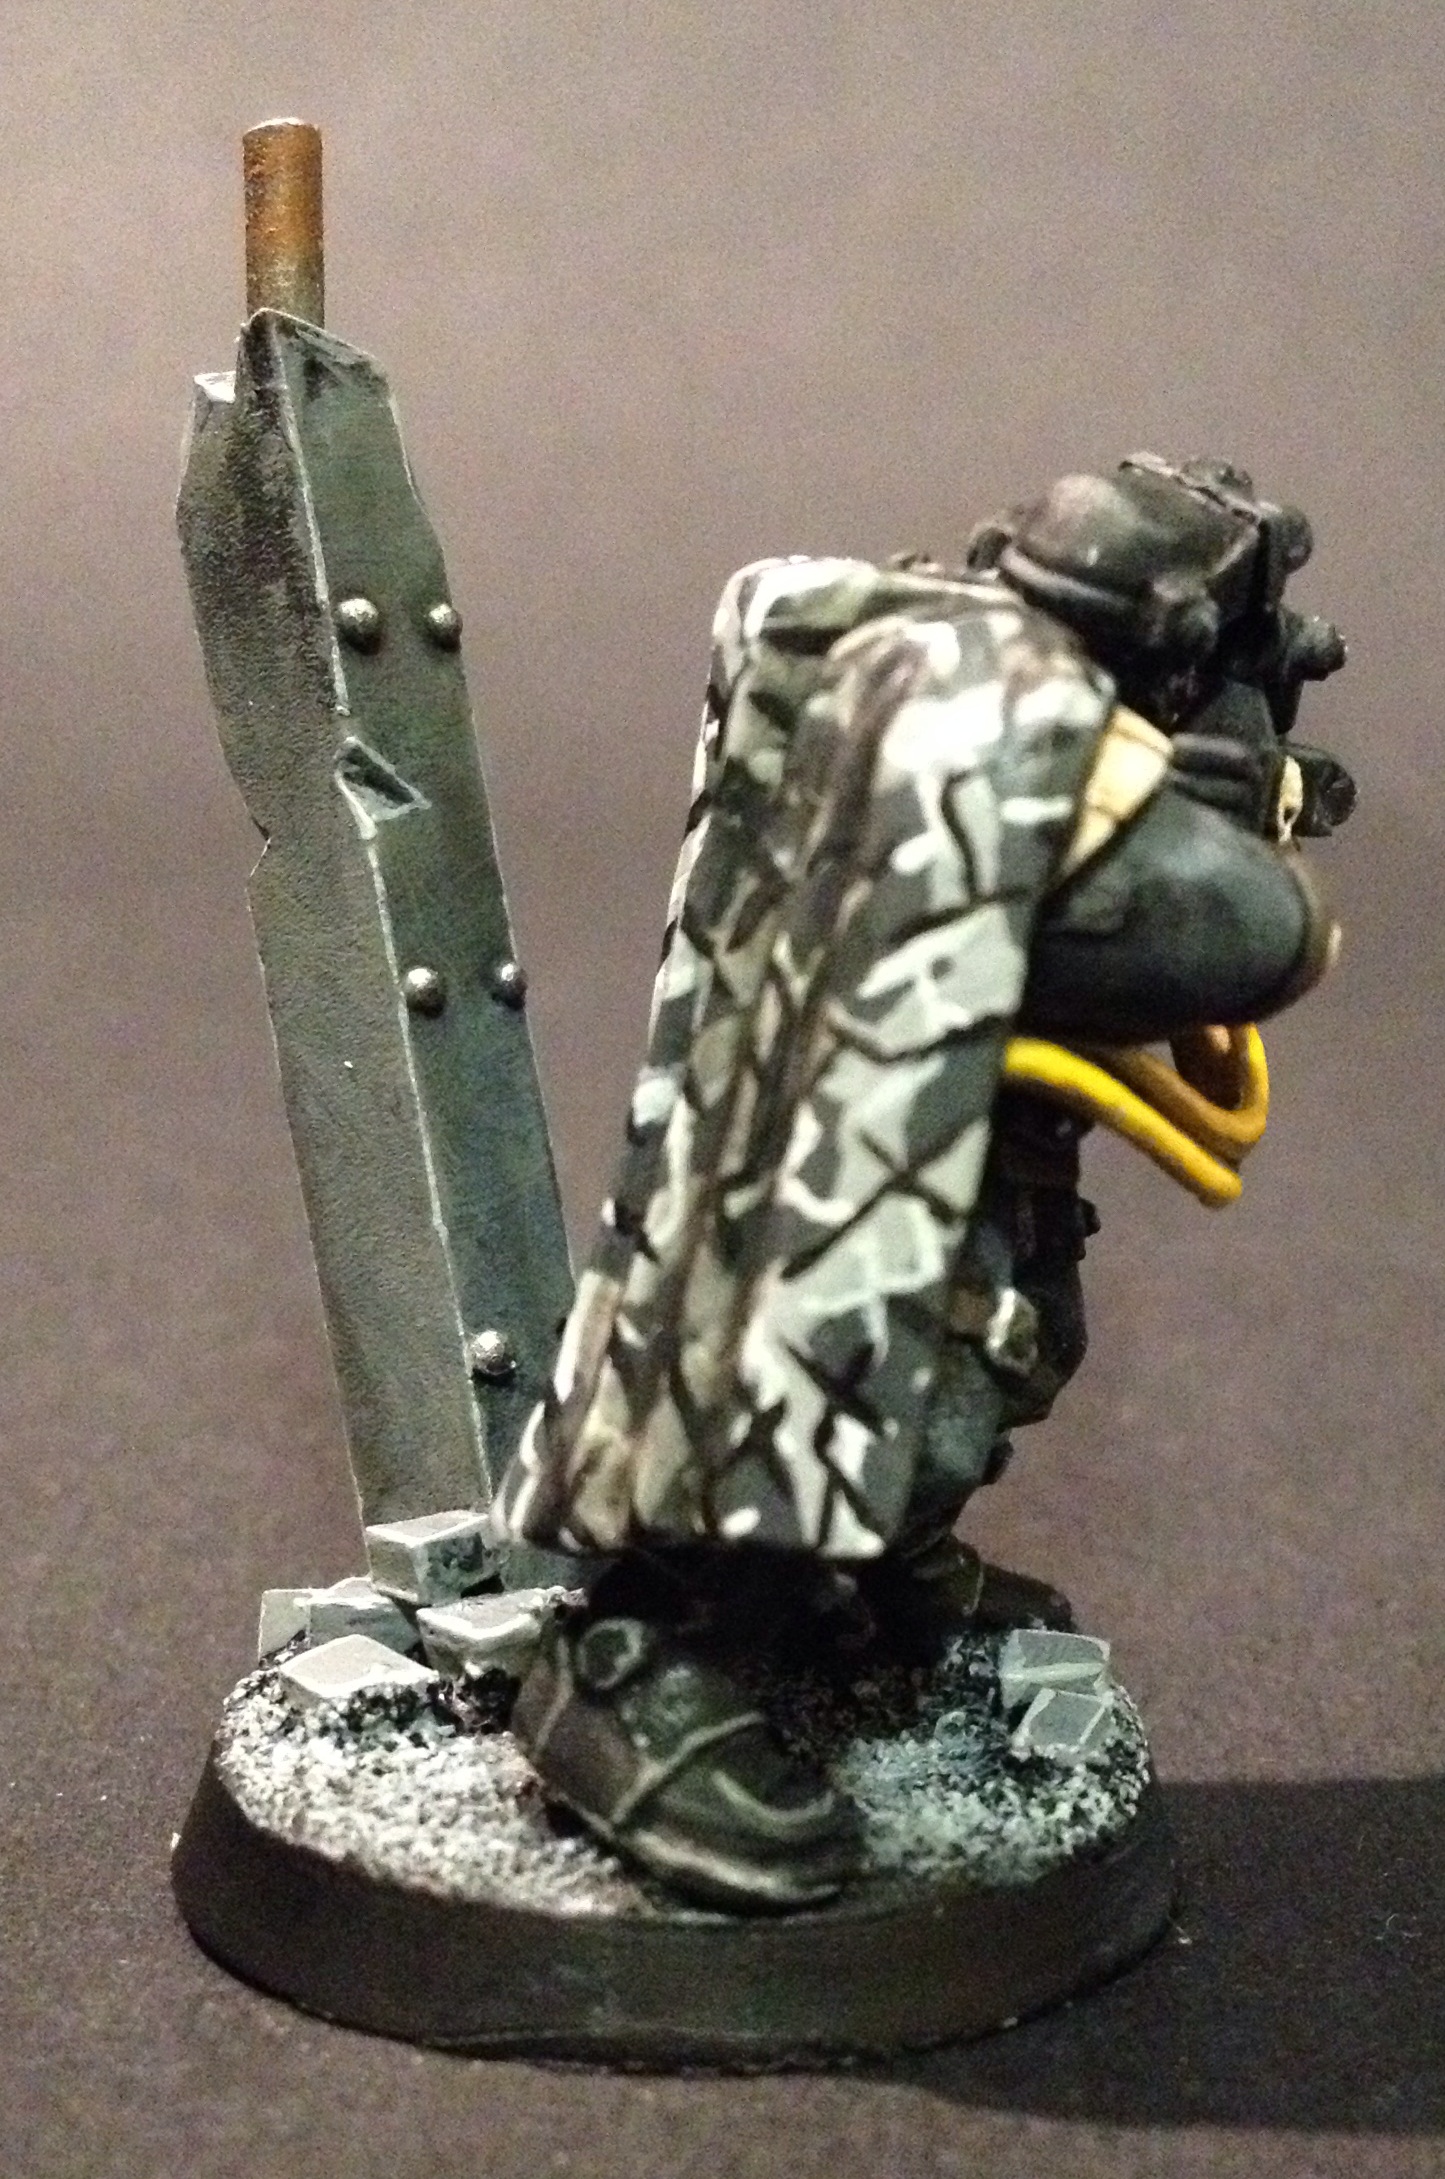
Step 5: Add shade
Quick couple of things to bring out the shadows on the cloak. A bit of Nuln Oil in the valleys of the cloak to infer shade. Don’t go mad – a thin coat’ll do, with maybe a little more in the deep wells. And then just a a touch of Skull White on the top peaks where the cloak goes over the backpack.
And that’s done. As a congratulations for going through all of that, here are a few pictures of the most recently completed scout. Onwards!

Questions? Comments? Random thoughts about penguins wearing overcoats? Stick ’em below then!
 40kaddict
 4gotowar
 Castigator's Chaos
 convertorum
 darkfuturegaming
 ftgtgaming
 Mind of the Daemon
 taleofpainters
 talkwargaming
 Twisted Brushes
 weemen
Blimey that’s some serious quality detail on those cloaks. Good job.
Thanks! Always nice to hear that. 🙂
Thanks for this tutorial, I used it to do my Raven Guard Sniper Scouts.
https://automatonmodeling.wordpress.com/sniper-scouts/
Pingback: Happy 1st Birthday To Me! Heresy & Heroes Turns One. | heresy and heroes